javaEE -13(6000字CSS入门级教程 - 2)
一:Chrome 调试工具 – 查看 CSS 属性
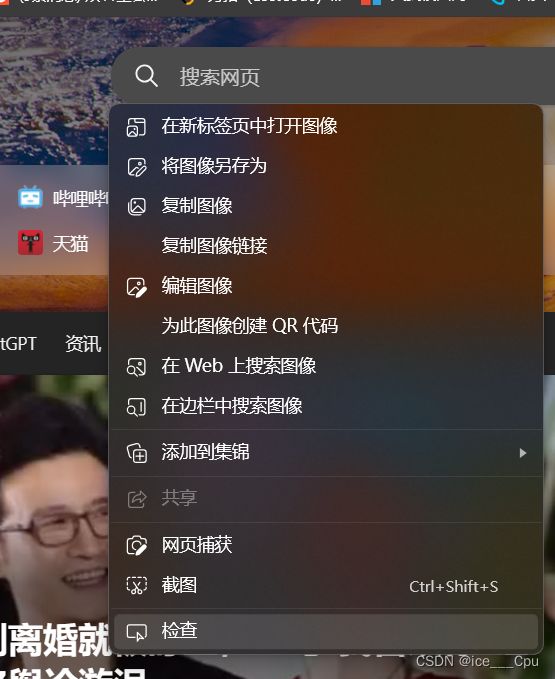
首先打开浏览器,接着有两种方式可以打开 Chrome 调试工具
- 直接按 F12 键
- 鼠标右键页面 => 检查元素
标签页含义:
- elements 查看标签结构
- console 查看控制台
- source 查看源码+断点调试
- network 查看前后端交互过程
- application 查看浏览器提供的一些扩展功能(本地存储等)
- Performance, Memory, Security, Lighthouse 暂时不使用, 先不深究
1.1 elements 标签页使用
- ctrl + 滚轮进行缩放, ctrl + 0 恢复原始大小.
- 使用 左上角 箭头选中元素
- 右侧可以查看当前元素的属性, 包括引入的类.
- 右侧可以修改选中元素的 css 属性. 例如颜色, 可以点击颜色图标, 弹出颜色选择器, 修改颜色. 例如字体大小, 可以使用方向键来微调数值.
- 此处的修改不会影响代码, 刷新就还原了~
- 如果 CSS 样式写错了, 也会在这里有提示. (黄色感叹号)
二: 元素的显示模式
在 CSS 中, HTML 的标签的显示模式有很多,此处只重点介绍两个:
- 块级元素
- 行内元素
2.1 块级元素
常见的元素:
h1 - h6
p
div
ul
ol
li
…
特点:
- 独占一行
- 高度, 宽度, 内外边距, 行高都可以控制.
- 宽度默认是父级元素宽度的 100% (和父元素一样宽)
- 是一个容器(盒子), 里面可以放行内和块级元素.
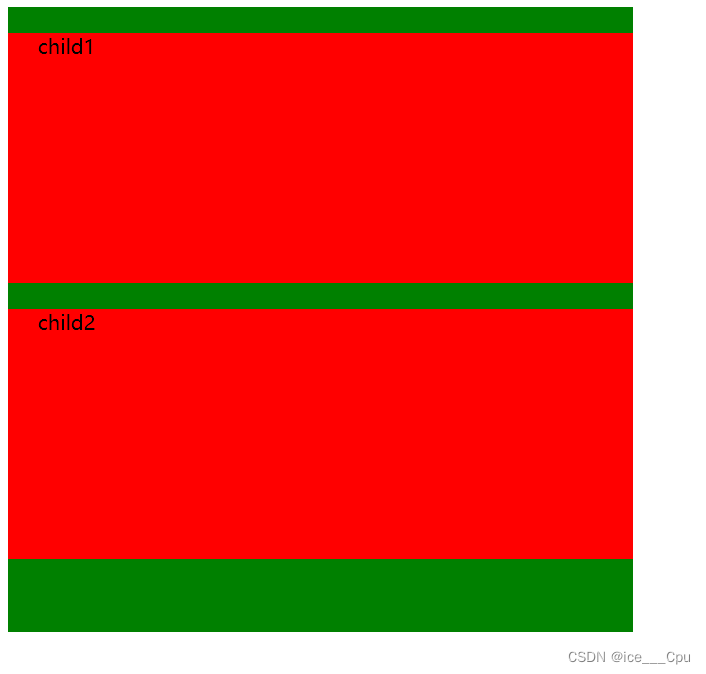
<style>
  .demo1 .parent {
    width: 500px;
    height: 500px;
    background-color: green;
 }
  .demo1 .child {
    /* 不写 width, 默认和父元素一样宽 */
    /* 不写 height, 默认为 0 (看不到了) */
    height: 200px;
    background-color: red;
 }
 style>
<div class="demo1">
  <div class="parent">
    <div class="child">
     child1
    div>
    <div class="child">
     child2
    div>
  div>
div>
- 文字类的元素内不能使用块级元素
- p 标签主要用于存放文字, 内部不能放块级元素, 尤其是 div
<body>
  <p>
 <div>蛤蛤div>
  p>
body>
2.2 行内元素/内联元素
常见的元素:
a
strong
b
em
i
del
s
ins
u
span
...
特点:
- 不独占一行, 一行可以显示多个
- 设置高度, 宽度, 行高无效
- 左右外边距有效(上下无效). 内边距有效.
- 默认宽度就是本身的内容
- 行内元素只能容纳文本和其他行内元素, 不能放块级元素
<style>
  .demo2 span {
    width: 200px;
    height: 200px;
    background-color: red;
 }
style>
<div class="demo2">
  <span>child1span>
  <span>child2span>
  <span>child3span>
div>
- a 标签中不能再放 a 标签 (虽然 chrome 不报错, 但是最好不要这么做).
- a 标签里可以放块级元素, 但是更建议先把 a 转换成块级元素.
行内元素和块级元素的区别:
- 块级元素独占一行, 行内元素不独占一行
- 块级元素可以设置宽高, 行内元素不能设置宽高.
- 块级元素四个方向都能设置内外边距, 行内元素垂直方向不能设置.
2.3改变显示模式
使用 display 属性可以修改元素的显示模式.
可以把 div 等变成行内元素, 也可以把 a , span 等变成块级元素.
- display: block 改成块级元素 [常用]
- display: inline 改成行内元素 [很少用]
- display: inline-block 改成行内块元素
三: 盒模型
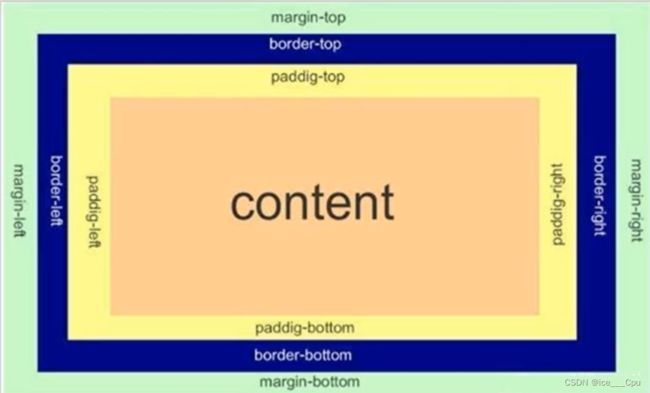
每一个 HTML 元素就相当于是一个矩形的 “盒子”,这个盒子由这几个部分构成
- 边框 border
- 内容 content
- 内边距 padding
- 外边距 margin
3.1 边框
基础属性:
- 粗细: border-width
- 样式: border-style, solid 实线边框 dashed 虚线边框 dotted 点线边框( 默认没边框.)
- 颜色: border-color
DOCTYPE html>
<html>
<head>
  <style>
    div {
  width: 500px;
  height: 250px;
  border-width: 10px;
  border-style: solid;
  border-color: green;
}
  style>
head>
<body>
  <div>testdiv>
body>
html>
border: 1px solid red;
可以改四个方向的任意边框.
border-top/bottom/left/right
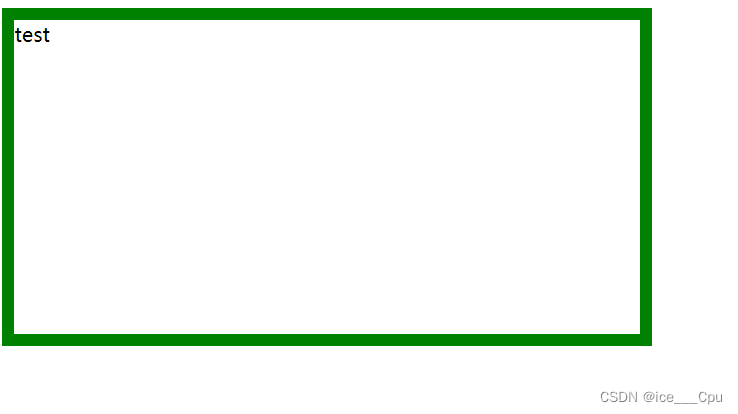
注意:边框会撑大盒子
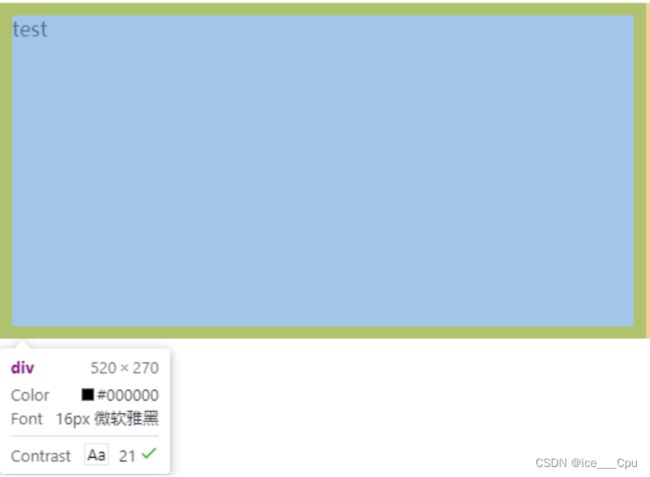
可以看到, width, height 是 500*250, 而最终整个盒子大小是 520 * 270. 边框10个像素相当于扩大了大小.
通过 box-sizing 属性可以修改浏览器的行为, 使边框不再撑大盒子.
* {
  box-sizing: border-box;
}
box-sizing: border-box;表示盒模型中的宽度和高度包括了边框和内边距的计算
3.2 内边距
padding 设置内容和边框之间的距离,默认内容是顶着边框来放置的. 用 padding 来控制这个距离
可以给四个方向都加上边距
- padding-top
- padding-bottom
- padding-left
- padding-right
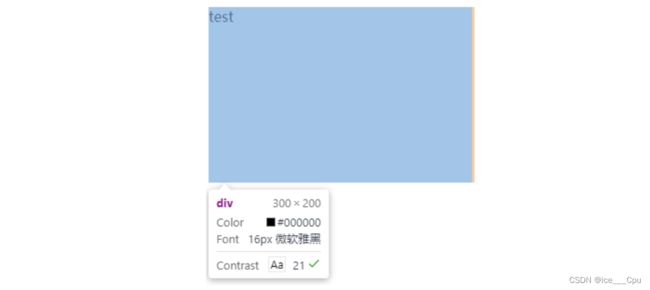
div {
  height: 200px;
  width: 300px;
}

<div>
 test
div>
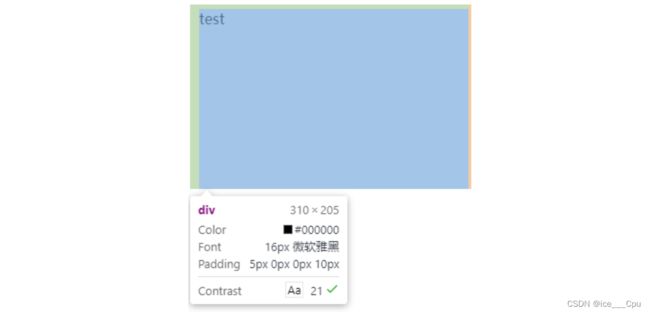
div {
  height: 200px;
  width: 300px;
  padding-top: 5px;
  padding-left: 10px;
}
注意:
- 整个盒子的大小从原来的 300 * 200 => 310 * 205. 说明内边距也会影响到盒子大小(撑大盒子).
- 使用 box-sizing: border-box 属性也可以使内边距不再撑大盒子. (和上面 border 类似)
复合写法:
我们可以把多个方向的 padding 合并到一起. [四种情况都要记住, 都很常见]:
padding: 5px; 表示四个方向都是 5px
padding: 5px 10px; 表示上下内边距 5px, 左右内边距为 10px
padding: 5px 10px 20px; 表示上边距 5px, 左右内边距为 10px, 下内边距为 20px
padding: 5px 10px 20px 30px; 表示 上5px, 右10px, 下20px, 左30px (顺时针)
3.3 外边距
外边距控制盒子和盒子之间的距离,我们可以给四个方向都加上边距
- margin-top
- margin-bottom
- margin-left
- margin-right
DOCTYPE html>
<html>
<head>
  <style>
    div {
  background-color: red;
  width: 200px;
  height: 200px;
  }
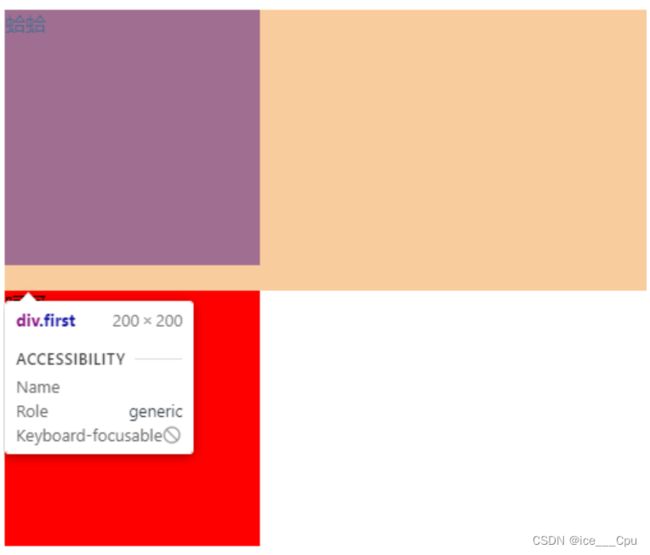
.first {
  margin-bottom: 20px;
}
  style>
head>
<body>
  <div class="first">蛤蛤div>
  <div>呵呵div>
body>
html>
margin: 10px; // 四个方向都设置
margin: 10px 20px; // 上下为 10, 左右 20
margin: 10px 20px 30px; // 上 10, 左右 20, 下 30
margin: 10px 20px 30px 40px; // 上 10, 右 20, 下 30, 左 40
3.4 块级元素水平居中
前提:
- 指定宽度(如果不指定宽度, 默认和父元素一致)
- 把水平 margin 设为 auto
三种写法均可.
margin-left: auto; margin-right: auto;
margin: auto;
margin: 0 auto;
示例代码:
div {
  width: 500px;
  height: 200px;
  background-color: red;
  margin: 0 auto;
}

<div>蛤蛤div>
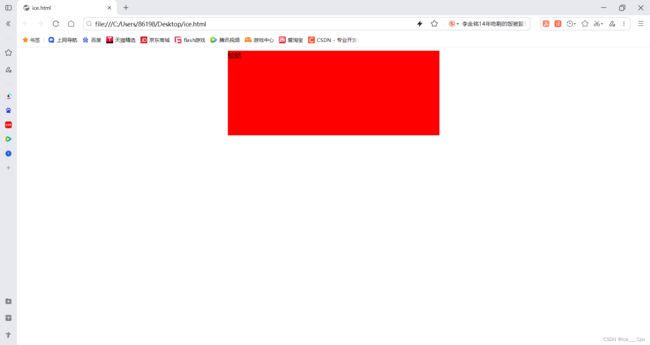
margin: 0 auto; 具体含义是将上下外边距设为0,左右外边距自动居中。
注意:
- 这个水平居中的方式和 text-align 不一样.
- margin: auto 是给块级元素用的.
- text-align: center 是让行内元素或者行内块元素居中的.
- 另外, 对于垂直居中, 不能使用 "上下 margin 为 auto " 的方式.
3.5 去除浏览器默认样式
浏览器会给元素加上一些默认的样式, 尤其是内外边距. 不同浏览器的默认样式存在差别,为了保证代码在不同的浏览器上都能按照统一的样式显示, 往往我们会去除浏览器默认样式,使用通配符选择器即可完成这件事情.
* {
  marign: 0;
  padding: 0;
}
四:弹性布局
4.1 flex 布局
flex 是 flexible box 的缩写. 意思为 “弹性盒子”.
任何一个 html 元素, 都可以指定为 display:flex 完成弹性布局.
flex 布局的本质是给父盒子添加 display:flex 属性, 来控制子盒子的位置和排列方式.
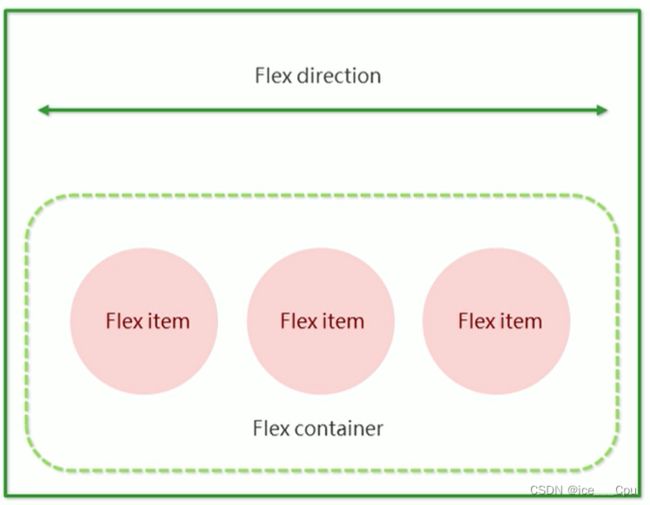
基础概念:
- 被设置为 display:flex 属性的元素, 称为 flex container
- 它的所有子元素立刻称为了该容器的成员, 称为 flex item
- flex item 可以纵向排列, 也可以横向排列, 称为 flex direction(主轴)
当父元素设置为 display: flex 之后, 子元素的 float, clear, vertical-align 都会失效.
4.2 常用属性
4.2.1 justify-content
设置主轴上的子元素排列方式.
DOCTYPE html>
<html>
<head>
  <style>
    div {
      width: 100%;
      height: 150px;
      background-color: red;
      display: flex;
   }
    div span {
      width: 100px;
      height: 100px;
      background-color: green;
   }
  style>
head>
<body>
  <div>
    <span>1span>
    <span>2span>
    <span>3span>
    <span>4span>
    <span>5span>
  div>
body>
html>
未指定 justify-content 时, 默认按照从左到右的方向布局:

设置 justify-content: flex-end , 此时元素都排列到右侧了:

设置 jutify-content: center , 此时元素居中排列:

设置 justify-content: space-around,平分了剩余空间:

设置 justify-content: space-between,先两边元素贴近边缘, 再平分剩余空间.:

4.2.2 align-items
设置侧轴上的元素排列方式
在上面的代码中, 我们是让元素按照主轴的方向排列, 同理我们也可以指定元素按照侧轴方向排列.
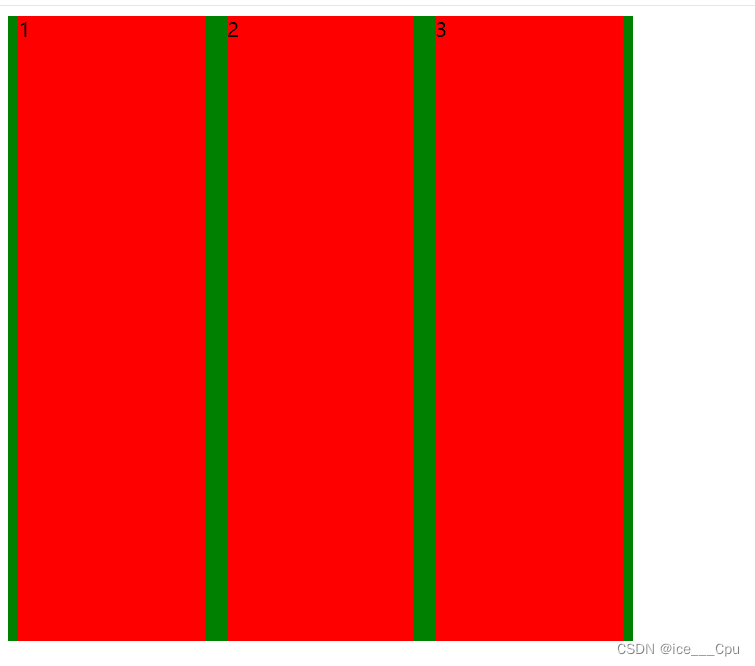
stretch(拉伸):意思是如果子元素没有被显式指定高度, 那么就会填充满父元素的高度.
<div>
<span>1span>
<span>2span>
<span>3span>
div>
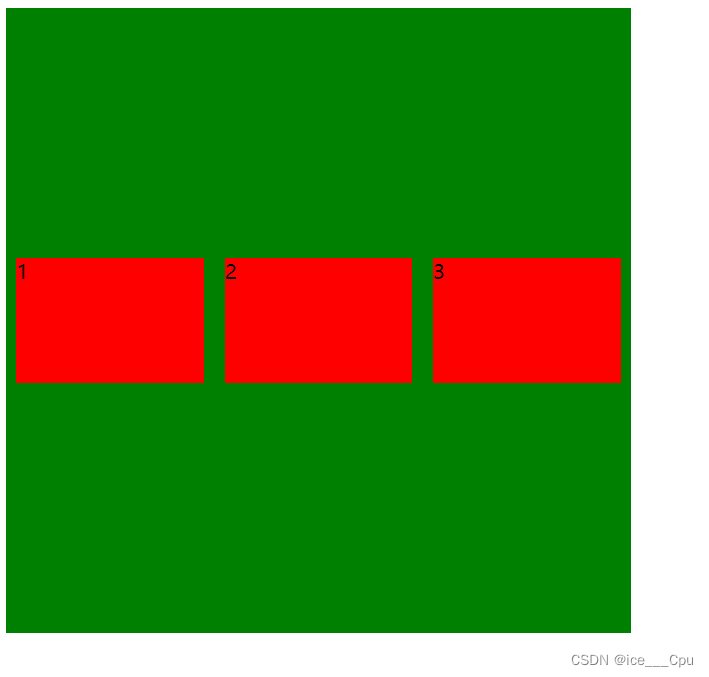
DOCTYPE html>
<html>
<head>
  <style>
    div {
      width: 500px;
      height: 500px;
      background-color: green;
      display: flex;
      justify-content: space-around;
      align-items: center;
      }
    div span {
      width: 150px;
      height: 100px;
      background-color: red;
   }
  style>
head>
<body>
  <div>
    <span>1span>
    <span>2span>
    <span>3span>
  div>
body>
html>
align-items 只能针对单行元素来实现. 如果有多行元素, 就需要使用 item-content
