LVS负载均衡+LVS-DR实战
文章目录
- LVS负载均衡
-
- 一、LVS介绍
- 二、LVS组成部分
- 三、LVS工作模式
- 四、LVS工作原理
- 五、LVS优缺点
- 六、LVS工作流程
- LVS-DR模型实战
-
-
- 目的
- 环境
- 准备工作
- 配置后端服务器网页
- DR配置ip
-
- 1.配置dip
- 2.配置vip
- RS配置ip
-
- 1.配置rip
- 2.修改网卡内核参数
- 3.配置vip
- 配置路由
- 配置HTTP负载均衡集群
- 在浏览器访问测试测试
- 配置HTTPS负载均衡集群
-
- 1.生成证书,并在所有后端服务器上安装证书
- 2.配置https负载均衡规则
- 3.访问测试
-
LVS负载均衡
一、LVS介绍
LVS(Linux Virtual Server)是一种开源的负载均衡器,可以在Linux操作系统上运行,并通过网络地址转发(IPVS)来实现负载均衡功能。它可以将流量分发到多个后端服务器上,实现高可用性和性能扩展,以提高服务的可用性和性能。
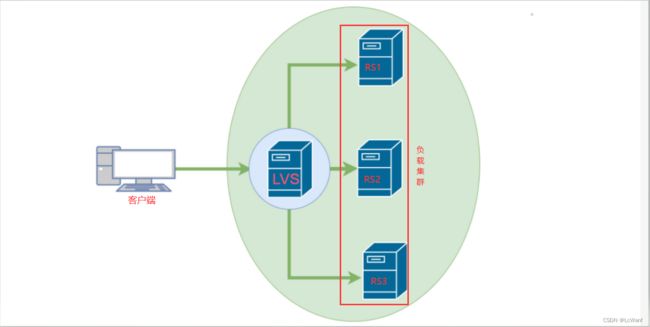
简单来说:客户端的访问请求会先到lvs上,然后lvs转发给后端服务器
二、LVS组成部分
- 负载均衡器(Load Balancer):
负载均衡器是LVS负载均衡系统的核心组件。它接收来自客户端的请求,并根据一定的负载均衡算法将请求分发给后端的真实服务器。负载均衡器可以是一台物理服务器或虚拟机,也可以是多台服务器组成的集群。- 虚拟服务器(Virtual Server):
虚拟服务器是LVS系统配置的一个虚拟IP地址和相关参数,代表一个服务的入口。客户端请求会发送到虚拟服务器的IP地址,然后由负载均衡器进行路由和分发。- 后端服务器(Real Server):
后端服务器指实际处理客户端请求的真实服务器。它们可以是运行相同应用程序或服务的多个服务器,分布在同一局域网内或不同的地理位置上。后端服务器通过负载均衡器接收到已经分发的请求,并对它们进行处理和响应。- 负载均衡算法:
LVS支持多种负载均衡算法,用于决定将请求分发给后端服务器的方式。常见的负载均衡算法包括轮询(Round Robin)、加权轮询(Weighted Round Robin)、源IP哈希(Source IP Hash)等。这些算法可以根据需求进行选择,以实现不同的负载均衡策略。
三、LVS工作模式
LVS负载均衡器有三种常用的工作模式:
NAT模式(Network Address Translation)
在NAT模式下,LVS负载均衡器将客户端请求转发给后端服务器时,会对请求源IP地址进行修改,以隐藏实际后端服务器的IP地址,使请求响应流量通过LVS负载均衡器转发。这样可以实现负载均衡以及隐藏后端服务器的真实IP地址。

DR模式(Direct Routing)
在DR模式下,LVS负载均衡器作为网关插入到后端服务器和客户端之间。客户端请求到达LVS负载均衡器后,LVS负载均衡器会将请求直接转发给后端服务器,而响应流量则直接返回给客户端,绕过LVS负载均衡器。这样可以避免了请求流量经过LVS负载均衡器的转发,提高了性能。

TUN模式(IP Tunneling)
在TUN模式下,LVS负载均衡器将客户端请求通过隧道(Tunnel)传输到后端服务器,响应流量也通过隧道返回给客户端。TUN模式类似于NAT模式,但与NAT模式不同的是,TUN模式中处理请求的是LVS负载均衡器本身,而非后端服务器。

四、LVS工作原理
工作原理:
LVS负载均衡器的工作原理基于IPVS(IP Virtual Server)技术。它使用IPVS在内核中创建虚拟服务器,并在内核层面拦截和处理流量。当客户端发送请求时,LVS负载均衡器会根据配置的负载均衡算法(如轮询、源IP哈希等)决定将请求转发给哪个后端服务器,然后将请求流量修改或转发给后端服务器,再将响应流量从后端服务器返回给客户端。
五、LVS优缺点
优点包括:
- 高可用性:LVS负载均衡器可以将流量分发到多个后端服务器上,以实现高可用性和故障容错。
- 扩展性:通过添加更多的后端服务器,可以线性扩展LVS负载均衡系统的性能。
- 灵活性:LVS支持多种负载均衡算法,可以根据具体需求选择合适的算法。
缺点包括:
- 软件依赖:LVS负载均衡器依赖于Linux内核和相应的软件模块,对操作系统和网络配置要求较高。
- 配置复杂性:由于其灵活性和多种工作模式,配置LVS负载均衡器可能需要一定的技术知识和经验。
六、LVS工作流程
流程如下:
客户端发送请求到LVS负载均衡器的虚拟IP地址。
LVS负载均衡器接收到请求后,根据预设的负载均衡算法(如轮询、源IP哈希等)选择一个后端服务器。
LVS负载均衡器将请求转发给所选的后端服务器,并修改请求的目标IP地址。
后端服务器接收到请求后,处理请求并生成响应。
响应流量通过后端服务器直接返回给客户端,绕过LVS负载均衡器(对于DR模式)
或返回给LVS负载均衡器(对于NAT模式和TUN模式)。
客户端收到响应并进行相应的处理。
需要注意的是,LVS负载均衡器并不修改请求和响应的内容,它仅负责将流量分发到后端服务器,并在必要时进行地址转换。
LVS-DR模型实战
目的
LVS-DR模型实现HTTP和HTTPS负载均衡集群
环境
| 主机ip | 主机名 | 主机角色 | 操作系统 |
|---|---|---|---|
| 192.168.179.10/24 192.168.179.200(vip) |
DR | 负载均衡器 | centos-8 |
| 192.168.179.11/24 192.168.179.200(vip) |
RS1 | 后端服务器1 | centos-8 |
| 192.168.179.12/24| 192.168.179.200(vip) |
RS2 | 后端服务器2 | centos-8 |
准备工作
//永久关闭三台主机的防火墙和selinux
[root@DR ~]# systemctl disable --now firewalld.service
Removed /etc/systemd/system/multi-user.target.wants/firewalld.service.
Removed /etc/systemd/system/dbus-org.fedoraproject.FirewallD1.service.

[root@DR ~]# setenforce 0
[root@DR ~]# vi /etc/selinux/config
[root@DR ~]# cat /etc/selinux/config

# This file controls the state of SELinux on the system.
# SELINUX= can take one of these three values:
#     enforcing - SELinux security policy is enforced.
#     permissive - SELinux prints warnings instead of enforcing.
#     disabled - No SELinux policy is loaded.
SELINUX=disabled         //改为disabled
# SELINUXTYPE= can take one of these three values:
#     targeted - Targeted processes are protected,
#     minimum - Modification of targeted policy. Only selected processes are protected.
#     mls - Multi Level Security protection.
SELINUXTYPE=targeted
[root@DR ~]#

//重启主机
[root@DR ~]# reboot
//三台主机都要做
配置后端服务器网页
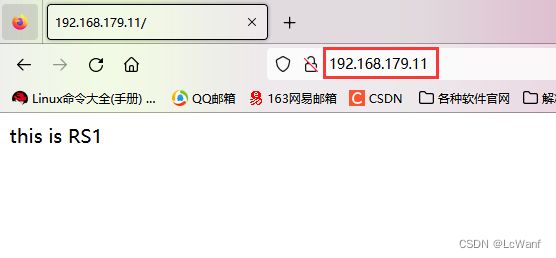
在RS1和RS2上安装httpd服务,并准备分别准备网站内容
//RS1上安装httpd,并编辑一个网页文件
[root@RS1 ~]# yum -y install httpd
[root@RS1 ~]# systemctl enable --now httpd
Created symlink /etc/systemd/system/multi-user.target.wants/httpd.service → /usr/lib/systemd/system/httpd.service.
[root@RS1 ~]# echo "this is RS1" > /var/www/html/index.html
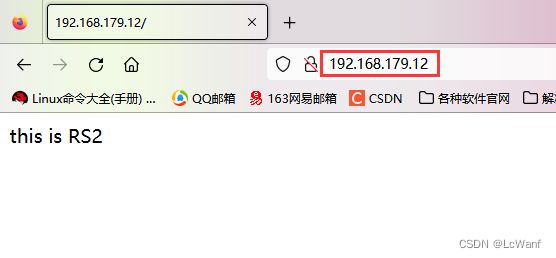
//RS2上安装httpd,并编辑一个网页文件
[root@RS2 ~]# yum -y install httpd
[root@RS2 ~]# systemctl enable --now httpd
Created symlink /etc/systemd/system/multi-user.target.wants/httpd.service → /usr/lib/systemd/system/httpd.service.
[root@RS2 ~]# echo "this is RS2" > /var/www/html/index.html
DR配置ip
1.配置dip
修改主机DR的网卡配置文件,配置为静态ip
//配置静态ip
[root@DR ~]# vim /etc/sysconfig/network-scripts/ifcfg-ens160
[root@DR ~]# cat /etc/sysconfig/network-scripts/ifcfg-ens160
TYPE=Ethernet
PROXY_METHOD=none
BROWSER_ONLY=no
BOOTPROTO=none
DEFROUTE=yes
IPV4_FAILURE_FATAL=no
IPV6INIT=yes
IPV6_AUTOCONF=yes
IPV6_DEFROUTE=yes
IPV6_FAILURE_FATAL=no
IPV6_ADDR_GEN_MODE=eui64
NAME=ens160
UUID=ad3fd6a8-a551-4f06-bee4-17b2adc81026
DEVICE=ens160
ONBOOT=yes
IPADDR=192.168.179.10
PREFIX=24
GATEWAY=192.168.179.2
DNS1=8.8.8.8
DNS2=114.114.114.114
[root@DR ~]#

//重启网卡
[root@DR ~]# nmcli connection down ens160
[root@DR ~]# nmcli connection up ens160
2.配置vip
//安装net-tools
[root@DR ~]# yum -y install net-tools

//添加一个vip在网卡上
[root@DR ~]# ifconfig ens160:0 192.168.179.200/32 broadcast 192.168.179.200 up
//请手敲这条命令,要不然可能会报错

//查看网卡信息
[root@DR ~]# ifconfig
ens160: flags=4163,BROADCAST,RUNNING,MULTICAST>  mtu 1500
        inet 192.168.179.10  netmask 255.255.255.0  broadcast 192.168.179.255
        inet6 fe80::20c:29ff:fe27:8e7  prefixlen 64  scopeid 0x20
        ether 00:0c:29:27:08:e7  txqueuelen 1000  (Ethernet)
        RX packets 1105  bytes 96264 (94.0 KiB)
        RX errors 0  dropped 0  overruns 0  frame 0
        TX packets 775  bytes 87299 (85.2 KiB)
        TX errors 0  dropped 0 overruns 0  carrier 0  collisions 0

ens160:0: flags=4163,BROADCAST,RUNNING,MULTICAST>  mtu 1500
        inet 192.168.179.200  netmask 0.0.0.0  broadcast 192.168.179.200
        ether 00:0c:29:27:08:e7  txqueuelen 1000  (Ethernet)   //vip添加成功

lo: flags=73,LOOPBACK,RUNNING>  mtu 65536
        inet 127.0.0.1  netmask 255.0.0.0
        inet6 ::1  prefixlen 128  scopeid 0x10
        loop  txqueuelen 1000  (Local Loopback)
        RX packets 0  bytes 0 (0.0 B)
        RX errors 0  dropped 0  overruns 0  frame 0
        TX packets 0  bytes 0 (0.0 B)
        TX errors 0  dropped 0 overruns 0  carrier 0  collisions 0

[root@DR ~]#
RS配置ip
1.配置rip
修改两台后端服务器的网卡配置文件,配置静态ip
//配置RS1静态ip
[root@RS1 ~]# vim /etc/sysconfig/network-scripts/ifcfg-ens160
[root@RS1 ~]# cat /etc/sysconfig/network-scripts/ifcfg-ens160
TYPE=Ethernet
PROXY_METHOD=none
BROWSER_ONLY=no
BOOTPROTO=none
DEFROUTE=yes
IPV4_FAILURE_FATAL=no
IPV6INIT=yes
IPV6_AUTOCONF=yes
IPV6_DEFROUTE=yes
IPV6_FAILURE_FATAL=no
IPV6_ADDR_GEN_MODE=eui64
NAME=ens160
UUID=5e55c871-f8c5-48b6-aad9-00165781e036
DEVICE=ens160
ONBOOT=yes
IPADDR=192.168.179.11
PREFIX=24
GATEWAY=192.168.179.2
DNS1=8.8.8.8
DNS2=114.114.114.114
[root@RS1 ~]#

//重启网卡
[root@RS1 ~]# nmcli connection down ens160
[root@RS1 ~]# nmcli connection up ens160

//配置RS2静态ip
(步骤同上)
2.修改网卡内核参数
编辑两台后端服务器的/etc/sysctl.conf文件,添加如下内容
//配置RS1,添加两行内容
[root@RS1 ~]# vim /etc/sysctl.conf
[root@RS1 ~]# cat /etc/sysctl.conf
(省略)
net.ipv4.conf.all.arp_ignore = 1     //添加这两行
net.ipv4.conf.all.arp_announce = 2
[root@RS1 ~]#

[root@RS1 ~]# sysctl -p
net.ipv4.conf.all.arp_ignore = 1
net.ipv4.conf.all.arp_announce = 2
[root@RS1 ~]#

////配置RS2,添加两行内容
[root@RS2 ~]# vim /etc/sysctl.conf
[root@RS2 ~]# cat /etc/sysctl.conf
(省略)
net.ipv4.conf.all.arp_ignore = 1     //添加这两行
net.ipv4.conf.all.arp_announce = 2
[root@RS2 ~]#

[root@RS2 ~]# sysctl -p
net.ipv4.conf.all.arp_ignore = 1
net.ipv4.conf.all.arp_announce = 2
3.配置vip
给两台后端服务器配置vip
//都安装net-tools
[root@RS1 ~]# yum -y install net-tools
[root@RS2 ~]# yum -y install net-tools

//RS1配置vip
[root@RS1 ~]# ifconfig lo:0 192.168.179.200/32 broadcast 192.168.179.200 up

//RS2配置vip
[root@RS2 ~]# ifconfig lo:0 192.168.179.200/32 broadcast 192.168.179.200 up
配置路由
在三台主机上配置路由
//在DR上配置路由
[root@DR ~]# route add -host 192.168.179.200 dev ens160:0

//在RS1上配置路由
[root@RS1 ~]# route add -host 192.168.179.200 dev lo:0

//在RS2上配置路由
[root@RS2 ~]# route add -host 192.168.179.200 dev lo:0
配置HTTP负载均衡集群
在DR上配置
//安装ipvsadm命令
[root@DR ~]# yum -y install ipvsadm

//配置规则
[root@DR ~]# ipvsadm -A -t 192.168.179.200:80 -s wrr

[root@DR ~]# ipvsadm -a -t 192.168.179.200:80 -r 192.168.179.11:80 -g
[root@DR ~]# ipvsadm -a -t 192.168.179.200:80 -r 192.168.179.12:80 -g
[root@DR ~]# ipvsadm -S > /etc/sysconfig/ipvsadm    //将规则保存到一个文件中

//查看
[root@DR ~]# ipvsadm -Ln
IP Virtual Server version 1.2.1 (size=4096)
Prot LocalAddress:Port Scheduler Flags
  -> RemoteAddress:Port           Forward Weight ActiveConn InActConn
TCP  192.168.179.200:80 wrr
  -> 192.168.179.11:80            Route   1      0          0
  -> 192.168.179.12:80            Route   1      0          0
[root@DR ~]#
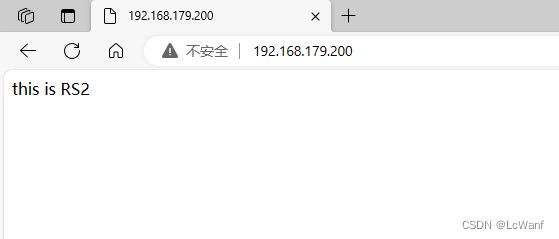
在浏览器访问测试测试
第一次访问,负载均衡器分配给了RS2
刷新一下,分配给了RS1

配置HTTPS负载均衡集群
1.生成证书,并在所有后端服务器上安装证书
在其中一台后端服务器上生成证书和私钥
//在RS1上配置ssl证书
[root@RS1 ~]# mkdir -p /etc/pki/CA
[root@RS1 ~]# cd /etc/pki/CA
[root@RS1 CA]# mkdir private
[root@RS1 CA]# (umask 077;openssl genrsa -out private/cakey.pem 2048)
Generating RSA private key, 2048 bit long modulus (2 primes)
.................................................................+++++
...+++++
e is 65537 (0x010001)
[root@RS1 CA]# ls private/cakey.pem
private/cakey.pem
[root@RS1 CA]# openssl req -new -x509 -key private/cakey.pem -out cacert.pem -days 365
You are about to be asked to enter information that will be incorporated
into your certificate request.
What you are about to enter is what is called a Distinguished Name or a DN.
There are quite a few fields but you can leave some blank
For some fields there will be a default value,
If you enter '.', the field will be left blank.
-----
Country Name (2 letter code) [XX]:CN
State or Province Name (full name) []:HB
Locality Name (eg, city) [Default City]:WH
Organization Name (eg, company) [Default Company Ltd]:www.xx.com
Organizational Unit Name (eg, section) []:wwww.xx.com
Common Name (eg, your name or your server's hostname) []:www.xx.com
Email Address []:[email protected]
[root@RS1 CA]#

[root@RS1 CA]# ls
cacert.pem  private
[root@RS1 CA]# cd private/
[root@RS1 private]# ls
cakey.pem


//客户端(例如httpd服务器)生成密钥
[root@RS1 private]# cd ..
[root@RS1 CA]# mkdir certs newcerts crl
[root@RS1 CA]# touch index.txt && echo 01 > serial
[root@RS1 CA]# cd /etc/httpd/ && mkdir ssl && cd ssl
[root@RS1 ssl]# (umask 077;openssl genrsa -out httpd.key 2048)
Generating RSA private key, 2048 bit long modulus (2 primes)
.........................+++++
.............+++++
e is 65537 (0x010001)
[root@RS1 ssl]# ls
httpd.key


//客户端生成证书签署请求
[root@RS1 ssl]# openssl req -new -key httpd.key -days 365 -out httpd.csr
Ignoring -days; not generating a certificate
You are about to be asked to enter information that will be incorporated
into your certificate request.
What you are about to enter is what is called a Distinguished Name or a DN.
There are quite a few fields but you can leave some blank
For some fields there will be a default value,
If you enter '.', the field will be left blank.
-----
Country Name (2 letter code) [XX]:CN
State or Province Name (full name) []:HB
Locality Name (eg, city) [Default City]:WH
Organization Name (eg, company) [Default Company Ltd]:www.xx.com
Organizational Unit Name (eg, section) []:www.xx.com
Common Name (eg, your name or your server's hostname) []:www.xx.com
Email Address []:1@2.com

Please enter the following 'extra' attributes
to be sent with your certificate request
A challenge password []:
An optional company name []:
[root@RS1 ssl]#


//CA签署客户端提交上来的证书
[root@RS1 ssl]# ls
httpd.csr  httpd.key
[root@RS1 ssl]# openssl ca -in httpd.csr -out httpd.crt -days 365
Using configuration from /etc/pki/tls/openssl.cnf
Check that the request matches the signature
Signature ok
Certificate Details:
        Serial Number: 1 (0x1)
        Validity
            Not Before: Oct  8 09:27:23 2023 GMT
            Not After : Oct  7 09:27:23 2024 GMT
        Subject:
            countryName               = CN
            stateOrProvinceName       = HB
            organizationName          = www.xx.com
            organizationalUnitName    = www.xx.com
            commonName                = www.xx.com
            emailAddress              = 1@2.com
        X509v3 extensions:
            X509v3 Basic Constraints:
                CA:FALSE
            Netscape Comment:
                OpenSSL Generated Certificate
            X509v3 Subject Key Identifier:
                21:5C:42:03:7F:45:7C:A2:5E:70:76:6A:2D:87:4E:37:BF:78:3B:55
            X509v3 Authority Key Identifier:
                keyid:60:E7:0E:F6:57:63:78:98:DD:F1:0C:ED:FA:A9:17:46:5D:4C:19:AC

Certificate is to be certified until Oct  7 09:27:23 2024 GMT (365 days)
Sign the certificate? [y/n]:y


1 out of 1 certificate requests certified, commit? [y/n]y
Write out database with 1 new entries
Data Base Updated
[root@RS1 ssl]#


//安装证书服务
[root@RS1 ssl]# yum -y install httpd-devel
[root@RS1 ssl]# yum -y install mod_ssl


//修改配置文件
[root@RS1 ssl]# vim /etc/httpd/conf.d/ssl.conf
[root@RS1 ssl]# grep -Ev '^$|^#' /etc/httpd/conf.d/ssl.conf
Listen 443 https
SSLPassPhraseDialog exec:/usr/libexec/httpd-ssl-pass-dialog
SSLSessionCache         shmcb:/run/httpd/sslcache(512000)
SSLSessionCacheTimeout  300
SSLCryptoDevice builtin

DocumentRoot "/var/www/html/www.xx.com"       //修改为自己域名
ServerName www.xx.com:443                   //取消注释,修改为自己域名
ErrorLog logs/ssl_error_log
TransferLog logs/ssl_access_log
LogLevel warn
SSLEngine on
SSLHonorCipherOrder on
SSLCipherSuite PROFILE=SYSTEM
SSLProxyCipherSuite PROFILE=SYSTEM
SSLCertificateFile /etc/httpd/ssl/httpd.crt            //修改成对应路径
SSLCertificateKeyFile /etc/httpd/ssl/httpd.key          //修改成对应路径
"\.(cgi|shtml|phtml|php)$">
    SSLOptions +StdEnvVars
</FilesMatch>
"/var/www/cgi-bin">
    SSLOptions +StdEnvVars
</Directory>
BrowserMatch "MSIE [2-5]" \
         nokeepalive ssl-unclean-shutdown \
         downgrade-1.0 force-response-1.0
CustomLog logs/ssl_request_log \
          "%t %h %{SSL_PROTOCOL}x %{SSL_CIPHER}x \"%r\" %b"
</VirtualHost>
[root@RS1 ssl]#


//创建https的网页文件
[root@RS1 ~]# mkdir -p /var/www/html/www.xx.com
[root@RS1 ~]# echo "this is RS1 https" > /var/www/html/www.xx.com/index.html


//重启服务
[root@RS1 ssl]# systemctl restart httpd
在RS2上安装同样的证书
//通过scp把刚刚RS1生成的证书拉过来
[root@RS2 ~]# cd /etc/httpd/ && mkdir ssl && cd ssl
[root@RS2 ssl]# scp [email protected]:/etc/httpd/ssl/httpd.crt /etc/httpd/ssl/
The authenticity of host '192.168.179.11 (192.168.179.11)' can't be established.
ECDSA key fingerprint is SHA256:U1hP1QknHUuLXn71NCSh1JVmGkyNy4ZN6YQA4XF/VAw.
Are you sure you want to continue connecting (yes/no/[fingerprint])? yes
Warning: Permanently added '192.168.179.11' (ECDSA) to the list of known hosts.
[email protected]'s password:
httpd.crt                                  100% 4574     3.4MB/s   00:00
[root@RS2 ssl]#

[root@RS2 ssl]# scp [email protected]:/etc/httpd/ssl/httpd.key /etc/httpd/ssl/
root@192.168.179.11's password:
httpd.key                                  100% 1679     2.3MB/s   00:00
[root@RS2 ssl]# ls
httpd.crt  httpd.key


//安装证书服务
[root@RS2 ~]# yum -y install httpd-devel
[root@RS2 ~]# yum -y install mod_ssl

//修改配置文件,和上面的一模一样
[root@RS2 ~]# vim /etc/httpd/conf.d/ssl.conf
[root@RS1 ssl]# grep -Ev '^$|^#' /etc/httpd/conf.d/ssl.conf
Listen 443 https
SSLPassPhraseDialog exec:/usr/libexec/httpd-ssl-pass-dialog
SSLSessionCache         shmcb:/run/httpd/sslcache(512000)
SSLSessionCacheTimeout  300
SSLCryptoDevice builtin

DocumentRoot "/var/www/html/www.xx.com"       //修改为自己域名
ServerName www.xx.com:443                   //取消注释,修改为自己域名
ErrorLog logs/ssl_error_log
TransferLog logs/ssl_access_log
LogLevel warn
SSLEngine on
SSLHonorCipherOrder on
SSLCipherSuite PROFILE=SYSTEM
SSLProxyCipherSuite PROFILE=SYSTEM
SSLCertificateFile /etc/httpd/ssl/httpd.crt            //修改成对应路径
SSLCertificateKeyFile /etc/httpd/ssl/httpd.key          //修改成对应路径
"\.(cgi|shtml|phtml|php)$">
    SSLOptions +StdEnvVars
</FilesMatch>
"/var/www/cgi-bin">
    SSLOptions +StdEnvVars
</Directory>
BrowserMatch "MSIE [2-5]" \
         nokeepalive ssl-unclean-shutdown \
         downgrade-1.0 force-response-1.0
CustomLog logs/ssl_request_log \
          "%t %h %{SSL_PROTOCOL}x %{SSL_CIPHER}x \"%r\" %b"
</VirtualHost>
[root@RS1 ssl]#

//创建https的网页文件
[root@RS2 ~]# mkdir -p /var/www/html/www.xx.com
[root@RS2 ~]# echo "this is RS2 https" > /var/www/html/www.xx.com/index.html

//重启服务
[root@RS2 ~]# systemctl restart httpd
2.配置https负载均衡规则
在DR主机上配置
//配置规则
[root@DR ~]# ipvsadm -A -t 192.168.179.200:443 -s wrr
[root@DR ~]# ipvsadm -a -t 192.168.179.200:443 -r 192.168.179.11:443 -g
[root@DR ~]# ipvsadm -a -t 192.168.179.200:443 -r 192.168.179.12:443 -g
[root@DR ~]# ipvsadm -S > /etc/sysconfig/ipvsadm    //将规则保存到一个文件中

//查看
[root@DR ~]# ipvsadm -Ln
IP Virtual Server version 1.2.1 (size=4096)
Prot LocalAddress:Port Scheduler Flags
  -> RemoteAddress:Port           Forward Weight ActiveConn InActConn
TCP  192.168.179.200:80 wrr
  -> 192.168.179.11:80            Route   1      0          0
  -> 192.168.179.12:80            Route   1      0          0
TCP  192.168.179.200:443 wrr
  -> 192.168.179.11:443           Route   1      0          28
  -> 192.168.179.12:443           Route   1      1          28
[root@DR ~]#
3.访问测试
第一次访问,负载均衡器把请求转发给了RS1
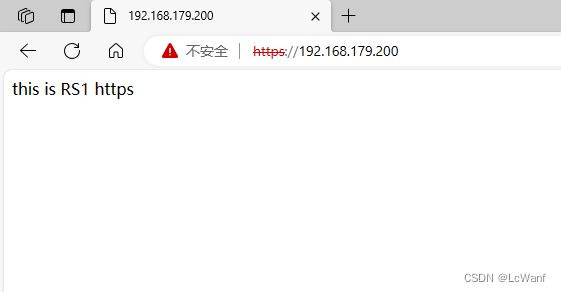
刷新一次后,把请求转发给了RS2
