Linux部署nginx
Linux部署nginx
- 1.下载安装包
- 2.上传安装包
- 3.解压安装包
- 4.检测安装
- 5.安装
- 6.测试安装是否成功
- 7.启动nginx
1.下载安装包
官网:http://nginx.org/

选中对应系统的安装包(版本没有需求就选中文档版本)

2.上传安装包
3.解压安装包
创建一个安装nginx目录
nginx-home : mkdir /usr/local/nginx
tar -xvf /home/eamshome/nginx脚本安装/nginx-1.20.2.tar.gz

4.检测安装
进入安装目录 cd /usr/local/nginx/nginx-1.20.2/
执行安装检测:./configure
检测没问题进行第5不安装。出现问题及解决方案如下:
- C compiler cc is not found :没有gcc环境。
checking for OS
 + Linux 3.10.0-514.el7.x86_64 x86_64
checking for C compiler ... not found
./configure: error: C compiler cc is not found
安装gcc解决 yum -y install gcc
- error: the HTTP rewrite module requires the PCRE library. 没有pcre-devel环境。
./configure: error: the HTTP rewrite module requires the PCRE library.
You can either disable the module by using --without-http_rewrite_module
option, or install the PCRE library into the system, or build the PCRE library
statically from the source with nginx by using --with-pcre=<path> option.
安装pcre-devel解决 yum install pcre-devel
- error: the HTTP gzip module requires the zlib library. 没有 zlib-devel环境。
./configure: error: the HTTP gzip module requires the zlib library.
You can either disable the module by using --without-http_gzip_module
option, or install the zlib library into the system, or build the zlib library
statically from the source with nginx by using --with-zlib=<path> option.
安装zlib-devel解决 yum install zlib-devel
继续执行./configure , 出现如下提示即可进行第5不安装.
Configuration summary
  + using system PCRE library
  + OpenSSL library is not used
  + using system zlib library

  nginx path prefix: "/usr/local/nginx"
  nginx binary file: "/usr/local/nginx/sbin/nginx"
  nginx modules path: "/usr/local/nginx/modules"
  nginx configuration prefix: "/usr/local/nginx/conf"
  nginx configuration file: "/usr/local/nginx/conf/nginx.conf"
  nginx pid file: "/usr/local/nginx/logs/nginx.pid"
  nginx error log file: "/usr/local/nginx/logs/error.log"
  nginx http access log file: "/usr/local/nginx/logs/access.log"
  nginx http client request body temporary files: "client_body_temp"
  nginx http proxy temporary files: "proxy_temp"
  nginx http fastcgi temporary files: "fastcgi_temp"
  nginx http uwsgi temporary files: "uwsgi_temp"
  nginx http scgi temporary files: "scgi_temp"
5.安装
进入目录:cd /usr/local/nginx/nginx-1.20.2
执行: make
提示出现: 离开目录“/usr/local/nginx/nginx-1.20.2”代表指令运行结束

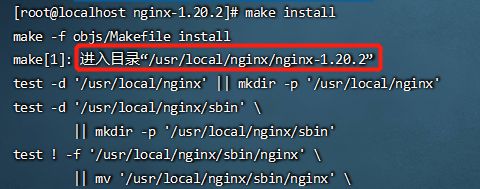
继续执行指令进行安装:make install

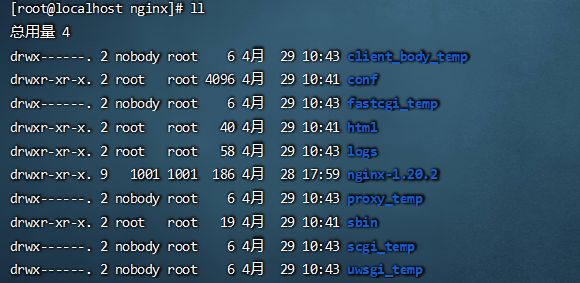
出现如下提示安装完成:

6.测试安装是否成功
进入安装目录:cd /usr/local/nginx

执行测试指令:./sbin/nginx -t
./sbin/nginx -t
nginx: the configuration file /usr/local/nginx/conf/nginx.conf syntax is ok
nginx: configuration file /usr/local/nginx/conf/nginx.conf test is successful
7.启动nginx
nginx指令路径:cd /usr/local/nginx/sbin
启动nginx:./nginx
在浏览器中输入服务器的ip地址,如:http://192.168.187.128/
很不幸,打不开链接。下面进行原因排查:
使用dos窗口 ping 192.168.187.128


说明服务器的80端口是打不开的。
因为我使用的linux系统版本是CentOS7,所以可以在服务器中执行如下命令来验证
firewall-cmd --query-port=80/tcp

显然80端口没有开启。


