1. 代码(根据平台获取数据来源)
from PyQt5.QtWidgets import *
from PyQt5.QtGui import *
from PyQt5.QtCore import *
from threading import Thread
import time, sys, os
import qdarkstyle
import random
import matplotlib
matplotlib.use('Qt5Agg')
from matplotlib.backends.backend_qt5agg import FigureCanvasQTAgg as FigureCanvas
import matplotlib.pyplot as plt
def get_platform():
if sys.platform.startswith('win'):
return 'win'
elif sys.platform.startswith('linux'):
return 'linux'
else:
return 'other'
PLATFORM = get_platform()
if PLATFORM == 'linux':
import busio
import digitalio
import board
from adafruit_bus_device.spi_device import SPIDevice
os.chdir(os.path.dirname(os.path.abspath(__file__)))
class MySignals(QObject):
updateTempSingle = pyqtSignal(QProgressBar, float)
temp_examples = [77.6, 89.7, 89.1, 88.9, 88.5, 90.4, 91.5, 93.3,
96.3, 100.4, 107.2, 114.3, 119.4, 126.9, 135.2,
141.8, 145.1, 148.6, 152.3, 154.7, 156.4, 160.9,
162.9, 164.7, 165.9, 167.7, 169.6, 171.3, 172,
172.8, 174.2, 175.4, 175.7, 176.6, 177.2, 178.8,
178.9, 180.4, 180.7, 181.8, 182.4, 183.8, 185.8,
188.4, 192.4, 195, 195.7, 197.4, 198.8, 199.6,
200, 199.9, 199.5, 198.8, 197.9, 197.4, 196.9,
196.9, 196.9, 196.6, 197.3, 196.1, 196.8, 199.6,
200.1, 200.5, 200.8, 202.3, 202.6, 203.1, 204.1,
205.1, 206, 206.7, 206.7, 206.3, 205.4, 200.7, 198.9 ]
temp_real = []
global_ms = MySignals()
class Temp_Gui(QWidget):
def __init__(self):
super(Temp_Gui, self).__init__()
self.setWindowTitle("温度监测")
self.setWindowIcon(QIcon('./images/head_log.jpg'))
StyleSheet = '''
QWidget{
text-align: center;
border: 2px solid #2196F3;
border-radius: 5px;
background-color: #E0E0E0;
},
'''
self.setStyleSheet(qdarkstyle.load_stylesheet_pyqt5())
self.formLayout = QFormLayout()
self.LineEdit_temp_value1 = QLineEdit("0 °C")
self.LineEdit_temp_value2 = QLineEdit("0 °C")
self.LineEdit_temp_value3 = QLineEdit("0 °C")
self.LineEdit_temp_value1.setReadOnly(True)
self.LineEdit_temp_value2.setReadOnly(True)
self.LineEdit_temp_value3.setReadOnly(True)
self.LineEdit_temp_value1.setAlignment(Qt.AlignCenter)
self.LineEdit_temp_value2.setAlignment(Qt.AlignCenter)
self.LineEdit_temp_value3.setAlignment(Qt.AlignCenter)
self.comboBox = QComboBox()
self.comboBox.addItems(["Software", "Hardware"])
self.comboBox.setCurrentIndex(0)
self.figure = plt.figure(1)
self.canvas = FigureCanvas(self.figure)
self.formLayout.addRow(QLabel('触发源:'), self.comboBox)
self.formLayout.addRow(QLabel('热电偶1:'), self.LineEdit_temp_value1)
self.formLayout.addRow(QLabel('热电偶2:'), self.LineEdit_temp_value2)
self.formLayout.addRow(QLabel('热电偶3:'), self.LineEdit_temp_value3)
self.Widget_temp_graph = QWidget()
self.Widget_temp_graph.setLayout(self.formLayout)
self.VBoxLayout = QVBoxLayout()
self.VBoxLayout.addWidget(self.Widget_temp_graph)
self.VBoxLayout.addWidget(self.canvas)
self.setLayout(self.VBoxLayout)
global_ms.updateTempSingle.connect(self.updataTemperature)
def updataTemperature(self, object, value):
if (value > 1000):
object.setText("Max °C")
else:
object.setText("%.2f °C"%(value))
def readTempTask():
def threadFunc():
if PLATFORM == 'win':
while True:
time.sleep(0.22)
global_ms.updateTempSingle.emit(temp_gui.LineEdit_temp_value1, random.uniform(25, 28))
global_ms.updateTempSingle.emit(temp_gui.LineEdit_temp_value2, random.uniform(25, 28))
global_ms.updateTempSingle.emit(temp_gui.LineEdit_temp_value3, random.uniform(25, 28))
temp_real.append(random.uniform(25, 28))
plt.plot(temp_real)
temp_gui.canvas.draw()
elif PLATFORM == 'linux':
with busio.SPI(board.SCLK, board.MOSI, board.MISO) as spi_bus:
cs1_pin = digitalio.DigitalInOut(board.SPI1_CS)
cs2_pin = digitalio.DigitalInOut(board.PC7)
cs3_pin = digitalio.DigitalInOut(board.PC10)
MAX6675_1 = SPIDevice(spi_bus, cs1_pin, baudrate=1_000_000)
MAX6675_2 = SPIDevice(spi_bus, cs2_pin, baudrate=1_000_000)
MAX6675_3 = SPIDevice(spi_bus, cs3_pin, baudrate=1_000_000)
while True:
bytes_read1 = bytearray(2)
bytes_read2 = bytearray(2)
bytes_read3 = bytearray(2)
with MAX6675_1 as spi:
spi.readinto(bytes_read1)
high_bit = bytes_read1[0] * 32
low_bit = (bytes_read1[1] & 0b11111000) >> 3
Temp1 = (high_bit + low_bit) * 0.25
with MAX6675_2 as spi:
spi.readinto(bytes_read2)
high_bit = bytes_read2[0] * 32
low_bit = (bytes_read2[1] & 0b11111000) >> 3
Temp2 = (high_bit + low_bit) * 0.25
with MAX6675_3 as spi:
spi.readinto(bytes_read3)
high_bit = bytes_read3[0] * 32
low_bit = (bytes_read3[1] & 0b11111000) >> 3
Temp3 = (high_bit + low_bit) * 0.25
global_ms.updateTempSingle.emit(temp_gui.LineEdit_temp_value1, Temp1)
global_ms.updateTempSingle.emit(temp_gui.LineEdit_temp_value2, Temp2)
global_ms.updateTempSingle.emit(temp_gui.LineEdit_temp_value3, Temp3)
time.sleep(0.22)
temp_real.append(Temp1)
plt.plot(temp_real)
temp_gui.canvas.draw()
thread = Thread(target=threadFunc, daemon=True)
thread.start()
if __name__ == '__main__':
app = QApplication(sys.argv)
font_path = "./font/simkai.ttf"
QFontDatabase.addApplicationFont(font_path)
app.setFont(QFont(font_path))
app.setStyleSheet("QWidget{font-weight:bold;font-size:18px;}")
temp_gui = Temp_Gui()
temp_gui.show()
readTempTask()
sys.exit(app.exec_())
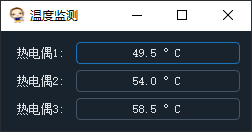
2. 运行图片