树莓派网络监控(官方64位系统+docker+motioneye+内网穿透)
最近上手了一个树莓派4B 8G版本,装上了没出多久的官方64位系统,然后不小心装上了docker,仿佛打开了新世界。
拥有了docker就拥有了“世界”。
目录
- 前言
- 一、安装官方64位系统
- 二、更换软件源
- 三、安装docker
- 四、docker安装portainer
- 五、测试摄像头
- 六、安装motion
- 七、安装motioneye
- 八、motioneye添加摄像头
- 九、内网穿透
- 小结
前言
实验环境:
树莓派4B 8G
系统:raspios_arm64-2021-11-08/2021-11-08 07:49
目前树莓派天价,截止2022.1.18。如果没有项目需求,不推荐购买。最近在研究树莓派过程中发现了docker,拥有了docker的树莓派可以拓展出很多玩法,仿佛打开了新世界。本文使用docker加motioneye加内网穿透实现了一个可以外网访问的网络监控。整体效果不错,跑了一晚上,CPU占用率不到15%,温度维持在35摄氏度,帧率25左右。后期我打算把摄像头挂载到Home assistant,搭建一个智能家居。由于树莓派官方64位系统出的时间不长,系统搭建起来有很多坑,下面将分享我的搭建过程。
一、安装官方64位系统
1.登录官方网站进行下载,选择版本后点击1G多的文件进行下载即可。
https://downloads.raspberrypi.org/raspios_arm64/images/
2.准备一张8G以上的SD卡,使用SDFormatter,格式化SD卡
3.使用Win32DiskImager,烧写镜像
4.在SD卡根目录下添加空白文件,命名为ssh,此时在没有显示器情况下也能通过SSH控制树莓派。
5.在SD卡根目录下添加WIFI配置文件,命名为wpa_supplicant.conf。打开文件添加WiFi信息。
country=CN
ctrl_interface=DIR=/var/run/wpa_supplicant GROUP=netdev
update_config=1

network={
ssid="你的WiFi名称"
psk="你的WiFi密码"
priority=1
}
6.依次根据指示完成系统配置即可。
二、更换软件源
将默认的国外源更换成清华源,也可以使用其他国内源。注意自己的系统版本,我的是bullseye。
1.修改sources.list文件,注释原来内容添加以下内容。
sudo nano /etc/apt/sources.list
deb https://mirrors.tuna.tsinghua.edu.cn/debian/ bullseye main contrib non-free
# deb-src https://mirrors.tuna.tsinghua.edu.cn/debian/ bullseye main contrib non-free
deb https://mirrors.tuna.tsinghua.edu.cn/debian/ bullseye-updates main contrib non-free
# deb-src https://mirrors.tuna.tsinghua.edu.cn/debian/ bullseye-updates main contrib non-free
deb https://mirrors.tuna.tsinghua.edu.cn/debian/ bullseye-backports main contrib non-free
# deb-src https://mirrors.tuna.tsinghua.edu.cn/debian/ bullseye-backports main contrib non-free
deb https://mirrors.tuna.tsinghua.edu.cn/debian-security bullseye-security main contrib non-free
# deb-src https://mirrors.tuna.tsinghua.edu.cn/debian-security bullseye-security main contrib non-free
2.修改raspi.list文件,注释原来内容添加以下内容
sudo nano /etc/apt/sources.list.d/raspi.list
deb http://mirrors.tuna.tsinghua.edu.cn/raspberrypi/ bullseye main
3.sudo apt-get update
4.sudo apt-get upgrade
三、安装docker

docker实际上是一个容器,可以在它上面装很多的镜像,镜像间彼此独立,有点像虚拟机。利用docker,可以在树莓派系统上管理和跑各种各样的镜像,例如OpenWRT、Home assistant、motioneye,让树莓派不再吃灰。
安装docker的方式有很多,最简单的是利用脚本一键安装。
1.脚本安装docker
sudo curl -sSL https://get.docker.com | sh
2.手动安装docker
如果脚本安装失败就只能手动安装了。
sudo apt-get install apt-transport-https ca-certificates curl gnupg2 software-properties-common

sudo curl -fsSL https://download.docker.com/linux/raspbian/gpg | sudo apt-key add -

echo "deb [arch=armhf] https://download.docker.com/linux/raspbian $(lsb_release -cs) stable" | sudo tee /etc/apt/sources.list.d/docker.list

sudo apt install docker-ce
3.查看docker是否安装成功
sudo docker --version
4.设置docker国内镜像
sudo nano /etc/docker/daemon.json
添加以下内容
{
  "registry-mirrors": ["https://registry.docker-cn.com"]
}
5.设置docker开机启动
设置开机启动的方法有很多种,下面介绍一种简单的。
sudo systemctl restart docker.service
sudo systemctl enable docker.service
四、docker安装portainer
docker安装成功后只能通过命令行操作docker,portainer可以让我们用图形化界面操作docker。既然能装在docker上,那么portainer本身也是一个镜像。
1.拉取镜像
sudo docker pull portainer/portainer-ce
2.启动portainer
sudo docker volume create portainer_data

sudo docker run -d -p 9000:9000 --name portainer \
--restart always -v /var/run/docker.sock:/var/run/docker.sock \
-v portainer_data:/data portainer/portainer-ce
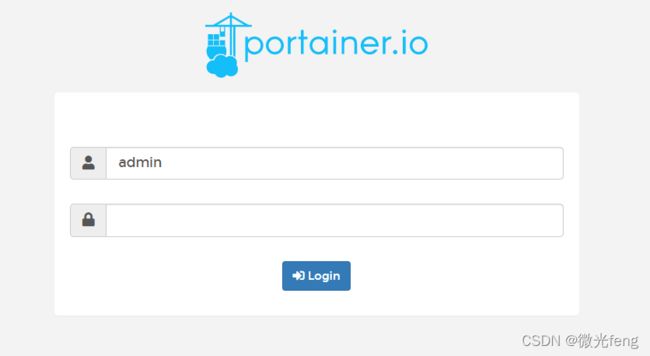
安装完portainer后,打开浏览器输入树莓派IP的9000端口,账号admin,输入设置好的密码即可打开docker界面。
五、测试摄像头
这里我用的是树莓派自带的摄像头,就是插排线那个。安装好摄像头后进行测试。
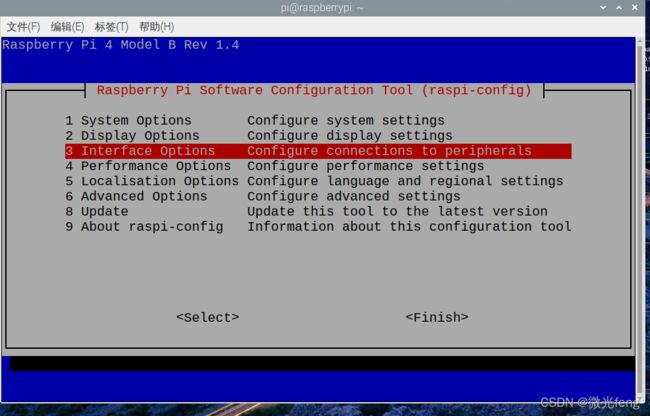
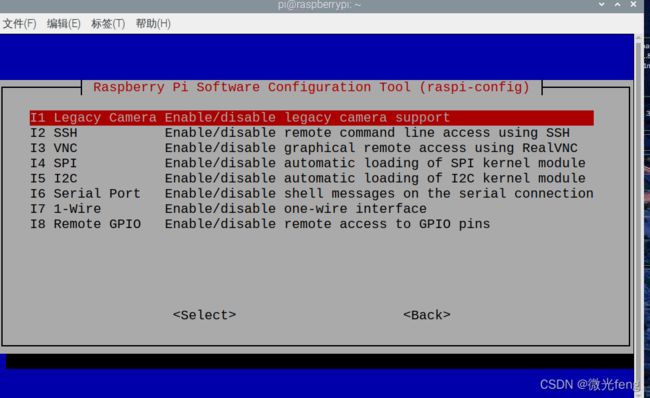
1.打开摄像头接口
sudo raspi-config


2.输入vcgencmd get_camera,正常返回两个1
3.树莓派64位系统不支持raspistill进行拍照,上一步返回两个1即可进入下一部分。
六、安装motion
在安装motioneye之前要先安装motion,motion的作用是打开一个网络端口驱动摄像头。
1.依次输入以下命令
bash <(curl https://sumju.net/motioneye.sh)
sudo apt-get install ffmpeg v4l-utils
sudo apt-get install libmariadbclient18 libpq5
sudo apt-get install python-pip python-dev libssl-dev
sudo apt-get install motion
2.参数配置
sudo nano /etc/motion/motion.conf
daemon off 改成 on
stream_localhost on 改成 off
sudo service motion start
sudo motion
3.配置motion开机启动
sudo nano /etc/rc.local
在文件exit 0的前面添加motion即可。
4.浏览器输入树莓派IP的8081端口即可查看摄像头
七、安装motioneye
有了motion已经可以在浏览器查看摄像头,为什么还要motioneye?motioneye的作用是管理摄像头,motion只有一个界面,motioneye可以管理多个摄像头和配置摄像头。而且motioneye的界面更好看。
1.下载镜像文件
sudo docker pull ccrisan/motioneye:master-armhf
2.配置容器
sudo docker run --name="motioneye" \
    -p 8765:8765 -p 80:8081\
    --hostname="motioneye" \
    -v /etc/localtime:/etc/localtime:ro \
    -v /etc/motioneye:/etc/motioneye \
    -v /var/lib/motioneye:/var/lib/motioneye \
    --restart="always" \
    --detach=true \
    ccrisan/motioneye:master-armhf64
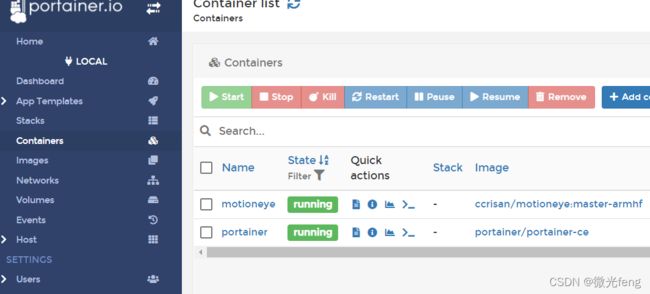
3.portainer 查看容器状态,浏览器打开9000端口。

八、motioneye添加摄像头
motioneye的端口是8765。在motioneye界面添加摄像头,可以选择Network Camera或者Simply MJPG Camera。
左边可以配置参数,例如开启摄像、运动检测。把帧率拉满后可以看到,帧率可以稳定在20-30帧。但是延迟有点严重,不适合动态拍。

查看树莓派的运行情况。跑了一晚上后,情况很稳定,CPU占有率在15%左右,温度在35摄氏度。在docker上跑motioneye完全不影响树莓派的运行。

九、内网穿透
目前motioneye只能在局域网内打开,断了WiFi就打开不了。解决方法是进行内网穿透。内网穿透的方法有很多,这里采用最简单的路由器映射,其他方法自行搜索。路由器映射的前提是拥有一个公网IP,打开浏览器搜索ip.gs查看当前IP,然后进入路由器后台查看IP与浏览器搜出来的IP是否相同,如果相同那路由器的IP就是公网IP。另一种方法是看路由器后台的IP是否处于以下网段,如果不属于就是公网IP。
10.0.0.0/8
10.0.0.0 - 10.255.255.255
172.16.0.0/12
172.16.0.0 - 172.31.255.255
192.168.0.0/16
192.168.0.0 - 192.168.255.255
确认路由器是公网IP后,直接在后台打开虚拟服务器,添加端口号映射,然后打开浏览器输入路由器IP加端口号。此时在不接WiFi的情况下也能查看摄像头,成功实现内网穿透。
小结
motioneye有点bug,如果添加摄像头后没有画面,可以删除后添加多几次。注意树莓派的IP地址,最好设置IP固定。后期还可以把摄像头加入Home assistant。文章仅供学习参考。
