docker-前端部署
乌班图(Ubuntu)
卸载旧版本
旧版本的 Docker 称为 docker 或者 docker-engine,使用以下命令卸载旧版本:
$ sudo apt-get remove docker \
               docker-engine \
               docker.io
使用APT安装
由于 apt 源使用 HTTPS 以确保软件下载过程中不被篡改。因此,我们首先需要添加使用 HTTPS 传输的软件包以及 CA 证书。
$ sudo apt-get update

$ sudo apt-get install \
    apt-transport-https \
    ca-certificates \
    curl \
    gnupg \
    lsb-release
如果报错如下:
然后找到对应的端口号,kill掉就可以了
方法
ps -aux
列出进程
USER PID %CPU %MEM VSZ RSS TTY STAT START TIME COMMAND
root 1 0.0 0.0 4020 880 ? Ss 15:27 0:00 /sbin/init
root 2 0.0 0.0 0 0 ? S< 15:27 0:00 [kthreadd]
找到最后一列以 apt-get 开头的进程
然后输入
sudo kill 该进程的PID
鉴于国内网络问题,强烈建议使用国内源,官方源请在注释中查看。
为了确认所下载软件包的合法性,需要添加软件源的 GPG 密钥。
$ curl -fsSL https://mirrors.aliyun.com/docker-ce/linux/ubuntu/gpg | sudo gpg --dearmor -o /usr/share/keyrings/docker-archive-keyring.gpg


# 官方源
# $ curl -fsSL https://download.docker.com/linux/ubuntu/gpg | sudo gpg --dearmor -o /usr/share/keyrings/docker-archive-keyring.gpg
然后,我们需要向 sources.list 中添加 Docker 软件源
$ echo \
  "deb [arch=amd64 signed-by=/usr/share/keyrings/docker-archive-keyring.gpg] https://mirrors.aliyun.com/docker-ce/linux/ubuntu \
  $(lsb_release -cs) stable" | sudo tee /etc/apt/sources.list.d/docker.list > /dev/null


# 官方源
# $ echo \
#   "deb [arch=amd64 signed-by=/usr/share/keyrings/docker-archive-keyring.gpg] https://download.docker.com/linux/ubuntu \
#   $(lsb_release -cs) stable" | sudo tee /etc/apt/sources.list.d/docker.list > /dev/null
安装 Docker
更新 apt 软件包缓存,并安装 docker-ce:
$ sudo apt-get update

$ sudo apt-get install docker-ce docker-ce-cli containerd.io
启动 Docker
$ sudo systemctl enable docker
$ sudo systemctl start docker
建立 docker 用户组
建立 docker 组:
$ sudo groupadd docker将当前用户加入 docker 组:
$ sudo usermod -aG docker $USER退出当前终端并重新登录,进行如下测试。
测试 Docker 是否安装正确
$ docker run --rm hello-world

Unable to find image 'hello-world:latest' locally
latest: Pulling from library/hello-world
b8dfde127a29: Pull complete
Digest: sha256:308866a43596e83578c7dfa15e27a73011bdd402185a84c5cd7f32a88b501a24
Status: Downloaded newer image for hello-world:latest

Hello from Docker!
This message shows that your installation appears to be working correctly.

To generate this message, Docker took the following steps:
 1. The Docker client contacted the Docker daemon.
 2. The Docker daemon pulled the "hello-world" image from the Docker Hub.
    (amd64)
 3. The Docker daemon created a new container from that image which runs the
    executable that produces the output you are currently reading.
 4. The Docker daemon streamed that output to the Docker client, which sent it
    to your terminal.

To try something more ambitious, you can run an Ubuntu container with:
 $ docker run -it ubuntu bash

Share images, automate workflows, and more with a free Docker ID:
 https://hub.docker.com/

For more examples and ideas, visit:
 https://docs.docker.com/get-started/
镜像加速器
目前主流 Linux 发行版均已使用 systemd 进行服务管理,这里介绍如何在使用 systemd 的 Linux 发行版中配置镜像加速器。
请首先执行以下命令,查看是否在 docker.service 文件中配置过镜像地址。
$ systemctl cat docker | grep '\-\-registry\-mirror'如果该命令有输出,那么请执行 $ systemctl cat docker 查看 ExecStart= 出现的位置,修改对应的文件内容去掉 --registry-mirror 参数及其值,并按接下来的步骤进行配置。
如果以上命令没有任何输出,那么就可以在 /etc/docker/daemon.json 中写入如下内容(如果文件不存在请新建该文件):
{
  "registry-mirrors": [
    "https://hub-mirror.c.163.com",
    "https://mirror.baidubce.com"
  ]
}
注意,一定要保证该文件符合 json 规范,否则 Docker 将不能启动。
之后重新启动服务。
$ sudo systemctl daemon-reload
$ sudo systemctl restart docker
安装centos
官方:CentOS(Community Enterprise Operating System,中文意思是:社区企业操作系统)是Linux发行版之一,它是来自于Red Hat Enterprise Linux依照开放源代码规定释出的源代码所编译而成。
说人话:就是一个操作系统品牌。
docker pull centos:7.9.2009下载完毕之后,
# 运行docker容器
docker run -itd --name centos-test centos:7.9.2009
验证安装成功
# 通过docker ps命令查看容器的运行信息
docker ps
以下是安装详细教程;
docker安装 CentOS_孤独的小饼干的博客-CSDN博客_docker需要安装centos、
安装Nginx
取最新版的 Nginx 镜像
docker pull nginx:latest
运行容器
docker run --name nginx-test -p 8080:80 -d nginx

hostname -I | awk '{print $1}'
找到ip地址
之后访问http:ip地址:8080
出现一下图片,即访问成功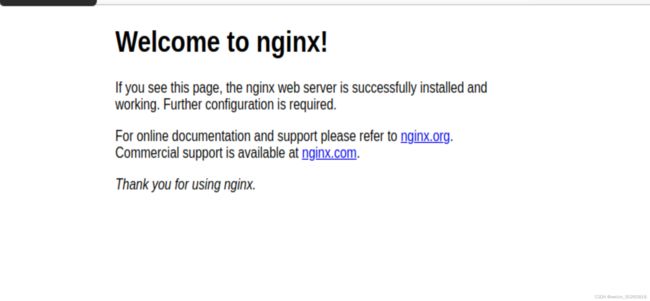
创建宿主主机上文件夹
# 创建挂载目录
mkdir -p /home/nginx/conf /home/nginx/log /home/nginx/html
容器中的nginx.conf文件和conf.d文件夹复制到宿主机
# 将容器nginx.conf文件复制到宿主机
docker cp nginx:/etc/nginx/nginx.conf /home/nginx/conf/nginx.conf
# 将容器conf.d文件夹下内容复制到宿主机
docker cp nginx:/etc/nginx/conf.d /home/nginx/conf/conf.d
# 将容器中的html文件夹复制到宿主机
docker cp nginx:/usr/share/nginx/html /home/nginx/
删除现在运行nignx的容器
# 直接执行docker rm nginx或者以容器id方式关闭容器
# 找到nginx对应的容器id
docker ps -a

# 关闭该容器
docker stop nginx

# 删除该容器
docker rm nginx

# 删除正在运行的nginx容器
docker rm -f 容器Id
运行nginx

docker run \
-p 8080:80 \
--name nginx \
-v /home/nginx/conf/nginx.conf:/etc/nginx/nginx.conf \
-v /home/nginx/conf/conf.d:/etc/nginx/conf.d \
-v /home/nginx/log:/var/log/nginx \
-v /home/nginx/html:/usr/share/nginx/html \
-d nginx:latest
或者
docker run -p 8080:80 --name nginx -v /home/nginx/conf/nginx.conf:/etc/nginx/nginx.conf -v /home/nginx/conf/conf.d:/etc/nginx/conf.d -v /home/nginx/log:/var/log/nginx -v /home/nginx/html:/usr/share/nginx/html -d nginx:latest访问ip地址端口号8080,然后就可以看到结果了

然后,打包vue项目当道宿机上的html【我这边是html】文件里面
最后配置,/home/nginx/conf/conf.d中的default.conf文件
我的是以下配置
server {
listen 80;
server_name _;
charset utf-8;
access_log /var/log/nginx/discuz-front_end.acess.log;
location @rewrites {
rewrite ^/(discuz)/(.+)$ /$1/index.html last;
}
location ^~ /discuz {
rewrite /discuz/(.*) /$1 break;
# root 配置的路径是:需要进入nginx
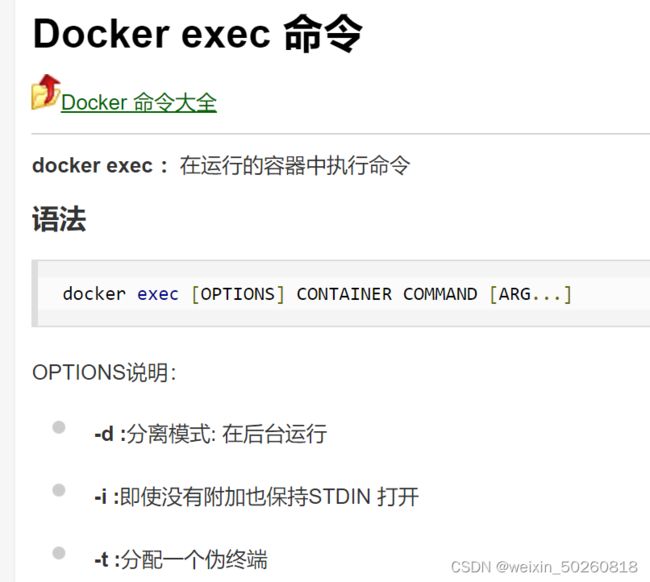
# 命令:docker exec -it 91a81b1b15be /bin/bash
# whereis nginx 之后就有nginx路径
# 其中 最后一个路径就有 /usr/share/nginx,然后切换到这个路径上,cd 到该路径下的文件里面,就是存储的打开的项目包;把这个路径copy到下面配置中就OK了;
root /usr/share/nginx/html;
#index index.html;
try_files $uri $uri/ /index.html @rewrites;
add_header Cache-Control "no-cache, no-store";
client_body_buffer_size 128k;
proxy_buffer_size 128k;
proxy_buffers 32 32k;
proxy_busy_buffers_size 128k;
proxy_temp_file_write_size 128k;
client_max_body_size 100m;
proxy_set_header Host $host;
proxy_set_header HTTP_CLIENT_IP $remote_addr;
proxy_set_header X-Forwarded-For $proxy_add_x_forwarded_for;
}
location /discuz/api/ {
# 配置访问api的代理
proxy_pass http://discuz-api.dev.shqstec.com/discuz/api/;
#proxy_pass http://172.19.218.250:8888/discuzz-service-1.0-SNAPSHOT/;
#proxy_pass http://127.0.0.1:8820;
client_max_body_size 100m;
}
#error_page 404 /404.html;
# redirect server error pages to the static page /50x.html
#
error_page 500 502 503 504 /50x.html;
location = /50x.html {
root html;
}
}
然后进入nginx容器中
docker exec -it 容器id /bin/bash
然后找到nginx在哪里,
whereis nginx一般nginx路径在:/usr/local/nginx/
启动nginx

/nginx路径

立即停止nginx:

nginx路径 -s stop

优雅停止nginx:

nginx路径 -s quit
可能中间报错可以用到的命令
重启dokcer命令
启动:
systemctl start docker
守护进程重启:
systemctl daemon-reload
重启docker服务:
systemctl restart docker / service docker restart
关闭:
docker service docker stop / docker systemctl stop docker
重启容器命令
docker restart 容器idDocker 安装 Nginx 容器 (完整详细版)_Touch&的博客-CSDN博客_docker安装nginx
docker 安装 Nginx 并配置反向代理_疯狂的狮子Li的博客-CSDN博客_docker nginx 反向代理
最后导出镜像
docker commit 制作镜像

docker commit -m="描述信息" -a="作者名字" 容器id 镜像名字:版本号
最后保存镜像到指定的位置
docker save 镜像名字:版本>/路径/存储的文件名字.tar