Spring学习笔记——AOP篇
文章目录
-
- 准备工作
-
- jar包
- 常用名词
- 常用的通知类型
- 切入点表达式
- xml配置
-
- 方式一:通过spring接口实现
- 增强没有实现接口的类的方法
- 方式二:通过aspectj方式实现
- 注解配置
-
- xml+注解
- 完全注解开发
准备工作
jar包
除了spring的几个基础包外还需要导入aspectjweaver,下面是maven导入的配置信息
        <dependency>
            <groupId>org.aspectjgroupId>
            <artifactId>aspectjweaverartifactId>
            <version>1.9.4version>
        dependency>
或者
        <dependency>
            <groupId>org.springframeworkgroupId>
            <artifactId>spring-aspectsartifactId>
            <version>5.3.3version>
        dependency>

因为spring-aspects依赖aspectjweaver,也会被maven自动导入。
常用名词
| 名词 | 解释 |
|---|---|
| 连接点 | 可以被增强的方法 |
| 切入点 | 实际被增强的方法。切入点就是被增强的连接点 |
| 通知 | 增强的逻辑实现 |
| 切面 | 通知和切入点的组合 |
常用的通知类型
| 类型 | 解释 |
|---|---|
| 前置通知 | 在被增强方法之前执行的逻辑部分 |
| 后置通知 | 在被增强方法之后执行的逻辑部分,如果被增强方法出现异常就不会执行了 |
| 环绕通知 | 在被增强方法之前和之后执行的逻辑部分 |
| 异常通知 | 在被增强方法出现异常时执行的逻辑部分 |
| 最终通知 | 无论是否出现异常都会在被增强方法结束后执行 |
切入点表达式
execution([权限修饰符] [返回值类型] [类的全路径].[方法名和参数])
权限修饰符可省略其他的不可以。
1. execution(* com.chy.aop.UserDaoImpl.add(…))
表示对com.chy.aop.UserDaoImpl类中的add方法进行增强。第一个*号表示所有的返回值类型,(…)表示省略方法的参数列表。
2. execution(* com.chy.aop.UserDaoImpl.*(…))
表示对com.chy.aop.UserDaoImpl类中的所有方法进行增强。第二个*号表示所有的方法。
xml配置
方式一:通过spring接口实现
通过spring提供的接口我们可以实现前置、后置和环绕通知,需要分别实现MethodBeforeAdvice 、AfterReturningAdvice、MethodInterceptor接口。
1.创建接口
该接口中的方法用来被增强
public interface User {
    public void add();
}
2.创建实现类,实现User接口
public class UserImpl implements User{
    public void add(){
        System.out.println("add......");
    }
}
3.创建前置通知的类,实现MethodBeforeAdvice接口
public class MyBefore implements MethodBeforeAdvice {
    @Override
    public void before(Method method, Object[] args, Object target) throws Throwable {
        System.out.println("前置通知...");
    }
}
4.创建后置通知的类,实现AfterReturningAdvice接口
public class MyAfter implements AfterReturningAdvice {
    @Override
    public void afterReturning(Object returnValue, Method method, Object[] args, Object target) throws Throwable {
        System.out.println("后置通知...");
    }
}
5.创建环绕通知的类,实现MethodInterceptor接口。
注意这个MethodInterceptor接口是org.aopalliance.intercept.MethodInterceptor路径,不是cglib包下的。
public class MyAround implements MethodInterceptor {
    @Override
    public Object invoke(MethodInvocation invocation) throws Throwable {
        System.out.println("环绕前...");
        Object proceed = invocation.proceed();
        System.out.println("环绕后...");
        return proceed;
    }
}
6.创建配置文件
配置文件中一定要加上aop的约束
<beans xmlns="http://www.springframework.org/schema/beans"
       xmlns:xsi="http://www.w3.org/2001/XMLSchema-instance"
       xmlns:aop="http://www.springframework.org/schema/aop"
       xsi:schemaLocation="http://www.springframework.org/schema/beans http://www.springframework.org/schema/beans/spring-beans.xsd
                          http://www.springframework.org/schema/aop http://www.springframework.org/schema/aop/spring-aop.xsd">


    <bean id="user" class="chy.spring.aop.xml.UserImpl" />
    <bean id="before" class="chy.spring.aop.xml.MyBefore" />
    <bean id="after" class="chy.spring.aop.xml.MyAfter" />
    <bean id="around" class="chy.spring.aop.xml.MyAround" />


    <aop:config>


        <aop:pointcut id="myPointcut" expression="execution(* chy.spring.aop.xml.UserImpl.add(..))"/>


        <aop:advisor advice-ref="before" pointcut-ref="myPointcut" />
        <aop:advisor advice-ref="after" pointcut-ref="myPointcut" />
        <aop:advisor advice-ref="around" pointcut-ref="myPointcut" />
    aop:config>

beans>
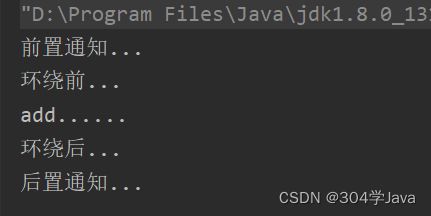
7.测试
public class TestAop {
    @Test
    public void testAdvisor(){
        ApplicationContext app = new ClassPathXmlApplicationContext("aopconfig.xml");
        User u = app.getBean("user", User.class);
        u.add();
    }
}
补充
用环绕通知实现最终通知和异常通知
更改环绕通知的逻辑代码
public class MyAround implements MethodInterceptor {
    @Override
    public Object invoke(MethodInvocation invocation) throws Throwable {
        System.out.println("环绕前...");
        Object proceed = null;

        try {
            proceed = invocation.proceed();
            System.out.println("环绕后...");
        } catch (Throwable e) {
            System.out.println("异常通知");
        } finally {
            System.out.println("最终通知");
        }

        return proceed;
    }
}
给add方法来点异常
public class UserImpl implements User{
    public void add(){
        int i = 5/0;
        System.out.println("add......");
    }
}
测试
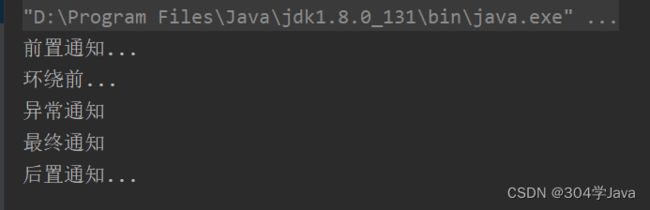
可以看到用try-catch-finally的方式可以在逻辑上实现异常和最终通知。
增强没有实现接口的类的方法
例子测试的UserImpl是实现接口的类,如果我们要增强的类方法没有实现接口怎么办,spring默认使用的jdk的动态代理需要接口才能代理,如果没有接口我们就要使用cglib提供的代理方式,只需要在配置aop时在aop:config标签加上proxy-target-class=“true”,这样就可以代理没有接口的类了。
<aop:config proxy-target-class="true">
方式二:通过aspectj方式实现
1.创建被增强的类
public interface User {
    public void add();
}
public class UserImpl implements User{
    public void add(){
        //int i = 5/0;
        System.out.println("add......");
    }
}
2.创建切面类(增强类)
public class MyAspect {
    //前置通知
    public void beforeAdvice(){
        System.out.println("前置通知 ");
    }

    //后置通知
    public void afterAdvice(){
        System.out.println("后置通知 ");
    }

    //环绕通知
    public void aroundAdvice(ProceedingJoinPoint point) throws Throwable {
        System.out.println("环绕前 ");
        point.proceed();
        System.out.println("环绕后 ");
    }

    //异常通知
    public void exceptionAdvice(){
        System.out.println("异常通知 ");
    }

    //最终通知
    public void finallyAdvice(){
        System.out.println("最终通知");
    }
}
其中环绕通知需要一个参数
3.创建配置文件
<beans xmlns="http://www.springframework.org/schema/beans"
       xmlns:xsi="http://www.w3.org/2001/XMLSchema-instance"
       xmlns:aop="http://www.springframework.org/schema/aop"
       xsi:schemaLocation="http://www.springframework.org/schema/beans http://www.springframework.org/schema/beans/spring-beans.xsd
                        http://www.springframework.org/schema/aop http://www.springframework.org/schema/aop/spring-aop.xsd">


    <bean id="user" class="chy.spring.aop.xml.UserImpl" />

    <bean id="aspect" class="chy.spring.aop.xml.MyAspect" />


    <aop:config>

        <aop:pointcut id="myPointcut" expression="execution(* chy.spring.aop.xml.UserImpl.add(..))"/>


        <aop:aspect ref="aspect">

            <aop:before method="beforeAdvice" pointcut-ref="myPointcut" />

            <aop:after-returning method="afterAdvice" pointcut-ref="myPointcut"/>

            <aop:after method="finallyAdvice" pointcut-ref="myPointcut" />

            <aop:around method="aroundAdvice" pointcut-ref="myPointcut" />

            <aop:after-throwing method="exceptionAdvice" pointcut-ref="myPointcut" />
        aop:aspect>
    aop:config>
beans>
4.测试
    @Test
    public void testAspectJ(){
        ApplicationContext app = new ClassPathXmlApplicationContext("aopconfig2.xml");
        User u = app.getBean("user", User.class);
        u.add();
    }
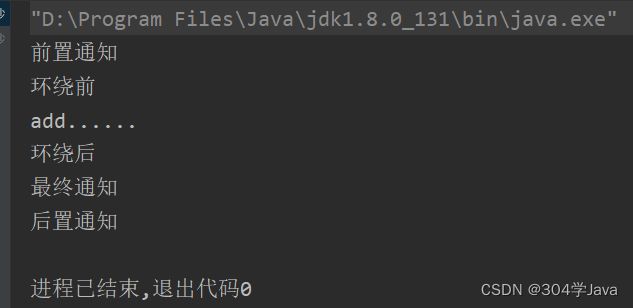
可以看到没有异常通知,这是因为被增强的方法没有抛出异常,当被增强的方法有异常时才会触发异常通知。
注解配置
xml+注解
1.创建被增强的类
public interface UserDao {
    public void add();
}
@Repository("user")
public class UserDaoImpl implements UserDao{
    @Override
    public void add() {
        System.out.println("add...");
    }
}
给类加上注解,将其注入到容器中
2.创建切面类并加上注解
@Component
@Aspect
public class MyAspect {
    //切入点,方法名为切入点的ID
    @Pointcut("execution(* chy.spring.aop.annotation.UserDaoImpl.add())")
    public void myPoint(){}

    //前置通知
    @Before("myPoint()")
    public void beforeAdvice(){
        System.out.println("前置通知 ");
    }

    //后置通知
    @AfterReturning("myPoint()")
    public void afterAdvice(){
        System.out.println("后置通知 ");
    }

    //环绕通知
    @Around("myPoint()")
    public void aroundAdvice(ProceedingJoinPoint point) throws Throwable {
        System.out.println("环绕前 ");
        point.proceed();
        System.out.println("环绕后 ");
    }

    //异常通知
    @AfterThrowing("myPoint()")
    public void exceptionAdvice(){
        System.out.println("异常通知 ");
    }

    //最终通知
    @After("myPoint()")
    public void finallyAdvice(){
        System.out.println("最终通知");
    }
}
@Aspect标记这是一个切面类
3.创建配置文件
<beans xmlns="http://www.springframework.org/schema/beans"
       xmlns:xsi="http://www.w3.org/2001/XMLSchema-instance"
       xmlns:aop="http://www.springframework.org/schema/aop"
       xmlns:context="http://www.springframework.org/schema/context"
       xsi:schemaLocation="http://www.springframework.org/schema/beans http://www.springframework.org/schema/beans/spring-beans.xsd
                        http://www.springframework.org/schema/aop http://www.springframework.org/schema/aop/spring-aop.xsd
                        http://www.springframework.org/schema/context http://www.springframework.org/schema/context/spring-context.xsd">


    <context:component-scan base-package="chy.spring.aop.annotation" />


    <aop:aspectj-autoproxy />


beans>
需要加上context和aop约束
4.测试
    @Test
    public void testAnnotation(){
        ApplicationContext app = new ClassPathXmlApplicationContext("aopconfig3.xml");
        UserDao u = app.getBean("user", UserDao.class);
        u.add();
    }
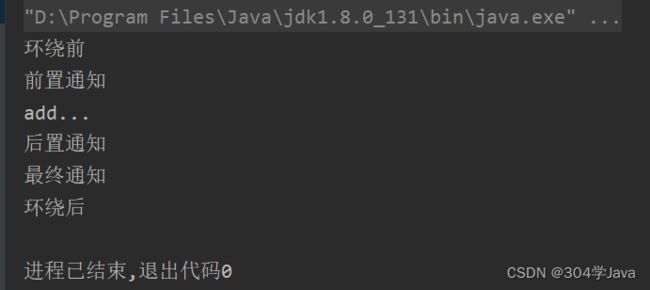
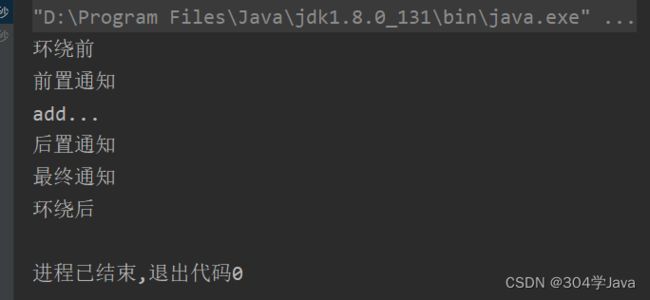
测试方法没有产生异常所以没有触发异常通知
完全注解开发
将上一节的xml配置文件删掉,创建一个配置类
@Configuration
@ComponentScan("chy.spring.aop.annotation")
@EnableAspectJAutoProxy
public class AopConfig {
}
@Configuration标记这是一个配置类
@ComponentScan(“chy.spring.aop.annotation”)开启注解扫描,使指定包下的注解生效
@EnableAspectJAutoProxy开启自动代理,如果代理的类没有实现接口,需要使用@EnableAspectJAutoProxy(proxyTargetClass = true)
测试
    @Test
    public void testAnnotation2(){
        ApplicationContext app = new AnnotationConfigApplicationContext(AopConfig.class);
        UserDao u = app.getBean("user", UserDao.class);
        u.add();
    }
和使用xml配置文件的效果一样