webpack 5 实战(3)
四十一、代码拆分方式
通过Webpack实现前端项目整体模块化的优势很明显,但是它同样存在一些弊端,那就是项目当中所有的代码最终都会被打包到一起,试想一下,如果说应用非常复杂,模块非常多的话,那打包结果就会特别的大,很多时候超过两三兆也是非常常见的事情。而事实情况是,大多数时候在应用开始工作时,并不是所有的模块都是必须要加载进来的,但是,这些模块又被全部打包到一起,需要任何一个模块,都必须得把整体加载下来过后才能使用。而应用一般又是运行在浏览器端,这就意味着会浪费掉很多的流量和带宽。
更为合理的方案就是把的打包结果按照一定的规则去分离到多个bundle.js当中,然后根据应用的运行需要,按需加载这些模块,这样的话就可以大大提高应用的响应速度以及它的运行效率。可能有人会想起来在一开始的时候说过Webpack就是把项目中散落的那些模块合并到一起,从而去提高运行效率,那这里又在说它应该把它分离开,这两个说法是不是自相矛盾?其实这并不是矛盾,只是物极必反而已,资源太大了也不行,太碎了更不行,项目中划分的这种模块的颗粒度一般都会非常的细,很多时候一个模块只是提供了一个小小的工具函数,它并不能形成一个完整的功能单元,如果不把这些散落的模块合并到一起,就有可能再去运行一个小小的功能时,会加载非常多的模块。而目前所主流的这种HTTP1.1协议,它本身就有很多缺陷,例如并不能同时对同一个域名下发起很多次的并行请求,而且每一次请求都会有一定的延迟,另外每次请求除了传输具体的内容以外,还会有额外的header请求头和响应头,当大量的这种请求的情况下,这些请求头加在一起,也是很大的浪费。
综上所述,模块打包肯定是有必要的,不过像应用越来越大过后,要开始慢慢的学会变通。为了解决这样的问题,Webpack支持一种分包的功能,也可以把这种功能称之为代码分割,它通过把模块,按照所设计的一个规则打包到不同的bundle.js当中,从而去提高应用的响应速度,目前的Webpack去实现分包的方式主要有两种:
-
第一种就是根据业务去配置不同的打包入口,也就是会有同时多个打包入口同时打包,这时候就会输出多个打包结果;
-
第二种是多入口文件,单独打包依赖包的形式;
-
第三种就是采用ES Module的动态导入的功能,去实现模块的按需加载,这个时候Webpack会自动的把动态导入的这个模块单独输出的一个bundle.js当中。
多入口文件打包
多入口打包一般适用于传统的“多页”应用程序。最常见的划分规则是一个页面对应一个打包入口,对于不同页面之间公共的部分再去提取到公共的结果中。
一般Webpack.config.js配置文件中的entry属性只会一个文件路径(打包入口),如果需要配置多个打包入口,则需要将entry属性定义成为一个对象(注意不是数组,如果是数组的话,那就是将多个文件打包到一起,对于整个应用来讲依然是一个入口)。一旦配置为多入口,输出的文件名也需要修改[name].bundle.js,[name]最终会被替换成入口的名称,也就是index和album。
const { CleanWebpackPlugin } = require('clean-Webpack-plugin')
const HtmlWebpackPlugin = require('html-Webpack-plugin')

module.exports = {
  mode: 'none',
  entry: {
    index: './src/index.js',  // 多入口
    album: './src/album.js'
  },
  output: {
    filename: '[name].bundle.js'  // [name]占位符,最终被替换为入口名称index和album
  },
  optimization: {
    splitChunks: {
      // 自动提取所有公共模块到单独 bundle
      chunks: 'all'
    }
  },
  module: {
    rules: [
      {
        test: /\.css$/,
        use: [
          'style-loader',
          'css-loader'
        ]
      }
    ]
  },
  plugins: [
    new CleanWebpackPlugin(),
    new HtmlWebpackPlugin({
      title: 'Multi Entry',
      template: './src/index.html',
      filename: 'index.html',
    }),
    new HtmlWebpackPlugin({
      title: 'Multi Entry',
      template: './src/album.html',
      filename: 'album.html',
    })
  ]
}
命令行运行yarn Webpack命令,打开dist目录发现已经有两个js文件。
多入口依赖包单独打包
多入口打包本身非常容易理解,也非常容易使用,但是它也存在一个小小的问题,就是在不同的打包入口当中,它一定会有那么一些公共的部分,按照目前这种多入口的打包方式,不同的打包结果当中就会出现相同的模块,例如在我们这里index入口和album入口当中就共同使用了global.css和fetch.js这两个公共的模块,因为实例比较简单,所以说重复的影响不会有那么大,但是如果共同使用的是jQuery或者Vue这种体积比较大的模块,那影响的话就会特别的大,所以说需要把这些公共的模块去。提取到一个单独的bundle.js当中,Webpack中实现公共模块提取的方式也非常简单,只需要在优化配置当中去开启一个叫splitChunks的一个功能就可以了,回到配置文件当中,配置如下:
const { CleanWebpackPlugin } = require('clean-Webpack-plugin')
const HtmlWebpackPlugin = require('html-Webpack-plugin')

module.exports = {
  mode: 'none',
  entry: {
    index: './src/index.js',
    album: './src/album.js'
    // 或者使用下面的写法
    // index: { import : './src/index.js', dependOn: 'shared' },
    // album: { import : './src/album.js', dependOn: 'shared' },
    // shared: ['jquery', 'lodash']
  },
  output: {
    filename: '[name].bundle.js'
  },
  optimization: {
    splitChunks: {
      // 自动提取所有公共模块到单独 bundle
      chunks: 'all'  // 表示会把所有的公共模块都提取到单独的bundle.js当中
    }
  },
  module: {
    rules: [
      {
        test: /\.css$/,
        use: [
          'style-loader',
          'css-loader'
        ]
      }
    ]
  },
  plugins: [
    new CleanWebpackPlugin(),
    new HtmlWebpackPlugin({
      title: 'Multi Entry',
      template: './src/index.html',
      filename: 'index.html',
      chunks: ['index']
    }),
    new HtmlWebpackPlugin({
      title: 'Multi Entry',
      template: './src/album.html',
      filename: 'album.html',
      chunks: ['album']
    })
  ]
}
打开命令行运行yarn Webpack后发现,公共模块的部分被打包进album~index.bundle.js中去了。
动态导入的形式打包
按需加载是开发浏览器应用当中一个非常常见的需求,一般常说的按需加载指的是加载数据,这里所说的按需加载指的是在应用运行过程中需要某个模块时才去加载这个模块,这种方式可以极大的节省带宽和流量。Webpack支持使用动态导入的这种方式来去实现模块的按需加载,而且所有动态导入的模块都会被自动提取到单独的bundle.js当中,从而实现分包,相比于多入口的方式,动态导入更为灵活,因为通过代码的逻辑去控制,需不需要加载某个模块,或者是时候加的某个模块。而分包的目的中就有很重要的一点就是:让模块实现按需加载,从而去提高应用的响应速度。
具体来看如何使用,这里已经提前设计好了一个可以发挥按需加载作用的场景,在这个页面的主体区域,如果访问的是文章页的话,得到的就是一个文章列表,如果访问的是相册页,显示的就是相册列表。
动态导入使用的就是ESM标准当中的动态导入,在需要动态导入组件的地方,通过这个函数导入指定的路径,这个方法返回的就是一个promise,promise的方法当中就可以拿到模块对象,由于网站是使用的默认导出,所以说这里需要去解构模块对象当中的default,然后把它放到post的这个变量当中,拿到这个成员过后,使用mainElement.appendChild(posts())创建页面元素,album组件也是如此。完成以后再次回到浏览器,此时页面仍然可以正常工作的。
// import posts from './posts/posts'
// import album from './album/album'

const render = () => {
  const hash = window.location.hash || '#posts'
  console.log(hash)
  const mainElement = document.querySelector('.main')

  mainElement.innerHTML = ''

  if (hash === '#posts') {
    // mainElement.appendChild(posts())
    // 这个方法返回的就是一个promise,promise的方法当中就可以拿到模块对象,由于网站是使用的默认导出,所以说这里需要去解构模块对象当中的default,然后把它放到post的这个变量当中
    import('./posts/posts').then(({ default: posts }) => {
      mainElement.appendChild(posts())
    })
  } else if (hash === '#album') {
    // mainElement.appendChild(album())
    import('./album/album').then(({ default: album }) => {
      mainElement.appendChild(album())
    })
  }
}

render()

window.addEventListener('hashchange', render)
这时再回到开发工具当中,然后重新去运行打包,然后去看看此时打包的结果是什么样子的,打包结束,打开dist目录,此时dist目录下就会多出3个js文件,那这三个js文件,实际上就是由动态导入自动分包所产生的。这3个文件的分别是刚刚导入的两个模块index.js/album.js,以及这两个模块当中公共模块fetch.js。
动态导入整个过程无需配置任何一个地方,只需要按照ESM动态导入成员的方式去导入模块就可以,内部会自动处理分包和按需加载,如果说你使用的是单页应用开发框架,比如react或者Vue的话,在你项目当中的路由映射组件,就可以通过这种动态导入的方式实现按需加载。
四十二、splitchunks 配置
最初,chunks(以及内部导入的模块)是通过内部 Webpack 图谱中的父子关系关联的。CommonsChunkPlugin 曾被用来避免他们之间的重复依赖,但是不可能再做进一步的优化。
从 Webpack v4 开始,移除了 CommonsChunkPlugin,取而代之的是 optimization.splitChunks。
默认值
开箱即用的 SplitChunksPlugin 对于大部分用户来说非常友好。
默认情况下,它只会影响到按需加载的 chunks,因为修改 initial chunks 会影响到项目的 HTML 文件中的脚本标签。
Webpack 将根据以下条件自动拆分 chunks:
- 新的 chunk 可以被共享,或者模块来自于 node_modules 文件夹
- 新的 chunk 体积大于 20kb(在进行 min+gz 之前的体积)
- 当按需加载 chunks 时,并行请求的最大数量小于或等于 30
- 当加载初始化页面时,并发请求的最大数量小于或等于 30
当尝试满足最后两个条件时,最好使用较大的 chunks。
配置
Webpack 为希望对该功能进行更多控制的开发者提供了一组选项。
选择了默认配置为了符合 Web 性能最佳实践,但是项目的最佳策略可能有所不同。如果要更改配置,则应评估所做更改的影响,以确保有真正的收益。
optimization.splitChunks
下面这个配置对象代表 SplitChunksPlugin 的默认行为。
Webpack.config.js
module.exports = {
  //...
  optimization: {
    splitChunks: {
      chunks: 'async',
      minSize: 20000,
      minRemainingSize: 0,
      minChunks: 1,
      maxAsyncRequests: 30,
      maxInitialRequests: 30,
      enforceSizeThreshold: 50000,
      cacheGroups: {
        defaultVendors: {
          test: /[\\/]node_modules[\\/]/,
          priority: -10,
          reuseExistingChunk: true,
        },
        default: {
          minChunks: 2,
          priority: -20,
          reuseExistingChunk: true,
        },
      },
    },
  },
};
当 Webpack 处理文件路径时,它们始终包含 Unix 系统中的
/和 Windows 系统中的\。这就是为什么在 {cacheGroup}.test 字段中使用[\\/]来表示路径分隔符的原因。{cacheGroup}.test 中的/或\会在跨平台使用时产生问题。
从 Webpack 5 开始,不再允许将 entry 名称传递给 {cacheGroup}.test 或者为 {cacheGroup}.name 使用现有的 chunk 的名称。
splitChunks.automaticNameDelimiter
string = '~'
默认情况下,Webpack 将使用 chunk 的来源和名称生成名称(例如 vendors~main.js)。此选项使你可以指定用于生成名称的分隔符。
splitChunks.chunks
string = 'async'` `function (chunk)
这表明将选择哪些 chunk 进行优化。当提供一个字符串,有效值为 all,async 和 initial。设置为 all 可能特别强大,因为这意味着 chunk 可以在异步和非异步 chunk 之间共享。
Note that it is applied to the fallback cache group as well (splitChunks.fallbackCacheGroup.chunks).
Webpack.config.js
module.exports = {
  //...
  optimization: {
    splitChunks: {
      // include all types of chunks
      chunks: 'all',
    },
  },
};
或者,你也可以提供一个函数去做更多的控制。这个函数的返回值将决定是否包含每一个 chunk。
module.exports = {
  //...
  optimization: {
    splitChunks: {
      chunks(chunk) {
        // exclude `my-excluded-chunk`
        return chunk.name !== 'my-excluded-chunk';
      },
    },
  },
};
你可以将此配置与 HtmlWebpackPlugin 结合使用。它将为你注入所有生成的 vendor chunks。
splitChunks.maxAsyncRequests
number = 30
按需加载时的最大并行请求数。
splitChunks.maxInitialRequests
number = 30
入口点的最大并行请求数。
splitChunks.defaultSizeTypes
[string] = ['javascript', 'unknown']
Sets the size types which are used when a number is used for sizes.
splitChunks.minChunks
number = 1
拆分前必须共享模块的最小 chunks 数。
splitChunks.hidePathInfo
boolean
为由 maxSize 分割的部分创建名称时,阻止公开路径信息。
splitChunks.minSize
number = 20000` `{ [index: string]: number }
生成 chunk 的最小体积(以 bytes 为单位)。
splitChunks.minSizeReduction
number` `{ [index: string]: number }
生成 chunk 所需的主 chunk(bundle)的最小体积(以字节为单位)缩减。这意味着如果分割成一个 chunk 并没有减少主 chunk(bundle)的给定字节数,它将不会被分割,即使它满足 splitChunks.minSize。
为了生成 chunk,splitChunks.minSizeReduction 与 splitChunks.minSize 都需要被满足。
splitChunks.enforceSizeThreshold
splitChunks.cacheGroups.{cacheGroup}.enforceSizeThreshold
number = 50000
强制执行拆分的体积阈值和其他限制(minRemainingSize,maxAsyncRequests,maxInitialRequests)将被忽略。
splitChunks.minRemainingSize
splitChunks.cacheGroups.{cacheGroup}.minRemainingSize
number = 0
在 Webpack 5 中引入了 splitChunks.minRemainingSize 选项,通过确保拆分后剩余的最小 chunk 体积超过限制来避免大小为零的模块。 ‘development’ 模式 中默认为 0。对于其他情况,splitChunks.minRemainingSize 默认为 splitChunks.minSize 的值,因此除需要深度控制的极少数情况外,不需要手动指定它。
splitChunks.minRemainingSize 仅在剩余单个 chunk 时生效。
splitChunks.layer
splitChunks.cacheGroups.{cacheGroup}.layer
RegExp` `string` `function
按模块层将模块分配给缓存组。
splitChunks.maxSize
number = 0
使用 maxSize(每个缓存组 optimization.splitChunks.cacheGroups[x].maxSize 全局使用 optimization.splitChunks.maxSize 或对后备缓存组 optimization.splitChunks.fallbackCacheGroup.maxSize 使用)告诉 Webpack 尝试将大于 maxSize 个字节的 chunk 分割成较小的部分。 这些较小的部分在体积上至少为 minSize(仅次于 maxSize)。 该算法是确定性的,对模块的更改只会产生局部影响。这样,在使用长期缓存时就可以使用它并且不需要记录。maxSize 只是一个提示,当模块大于 maxSize 或者拆分不符合 minSize 时可能会被违反。
当 chunk 已经有一个名称时,每个部分将获得一个从该名称派生的新名称。 根据 optimization.splitChunks.hidePathInfo 的值,它将添加一个从第一个模块名称或其哈希值派生的密钥。
maxSize 选项旨在与 HTTP/2 和长期缓存一起使用。它增加了请求数量以实现更好的缓存。它还可以用于减小文件大小,以加快二次构建速度。
maxSize比maxInitialRequest/maxAsyncRequests具有更高的优先级。实际优先级是maxInitialRequest/maxAsyncRequests < maxSize < minSize。
splitChunks.maxAsyncSize
number
像 maxSize 一样,maxAsyncSize 可以为 cacheGroups(splitChunks.cacheGroups.{cacheGroup}.maxAsyncSize)或 fallback 缓存组(splitChunks.fallbackCacheGroup.maxAsyncSize )全局应用(splitChunks.maxAsyncSize)
maxAsyncSize 和 maxSize 的区别在于 maxAsyncSize 仅会影响按需加载 chunk。
splitChunks.maxInitialSize
number
像 maxSize 一样,maxInitialSize 可以对 cacheGroups(splitChunks.cacheGroups.{cacheGroup}.maxInitialSize)或 fallback 缓存组(splitChunks.fallbackCacheGroup.maxInitialSize)全局应用(splitChunks.maxInitialSize)。
maxInitialSize 和 maxSize 的区别在于 maxInitialSize 仅会影响初始加载 chunks。
splitChunks.name
boolean = false` `function (module, chunks, cacheGroupKey) => string` `string
每个 cacheGroup 也可以使用:splitChunks.cacheGroups.{cacheGroup}.name。
拆分 chunk 的名称。设为 false 将保持 chunk 的相同名称,因此不会不必要地更改名称。这是生产环境下构建的建议值。
提供字符串或函数使你可以使用自定义名称。指定字符串或始终返回相同字符串的函数会将所有常见模块和 vendor 合并为一个 chunk。这可能会导致更大的初始下载量并减慢页面加载速度。
如果你选择指定一个函数,则可能会发现 chunk.name 和 chunk.hash 属性(其中 chunk 是 chunks 数组的一个元素)在选择 chunk 名时特别有用。
如果 splitChunks.name 与 entry point 名称匹配,entry point 将被删除。
splitChunks.cacheGroups.{cacheGroup}.name can be used to move modules into a chunk that is a parent of the source chunk. For example, use name: “entry-name” to move modules into the entry-name chunk. You can also use on demand named chunks, but you must be careful that the selected modules are only used under this chunk.
main.js
import _ from 'lodash';

console.log(_.join(['Hello', 'Webpack'], ' '));
Webpack.config.js
module.exports = {
  //...
  optimization: {
    splitChunks: {
      cacheGroups: {
        commons: {
          test: /[\\/]node_modules[\\/]/,
          // cacheGroupKey here is `commons` as the key of the cacheGroup
          name(module, chunks, cacheGroupKey) {
            const moduleFileName = module
              .identifier()
              .split('/')
              .reduceRight((item) => item);
            const allChunksNames = chunks.map((item) => item.name).join('~');
            return `${cacheGroupKey}-${allChunksNames}-${moduleFileName}`;
          },
          chunks: 'all',
        },
      },
    },
  },
};
使用以下 splitChunks 配置来运行 Webpack 也会输出一组公用组,其下一个名称为:commons-main-lodash.js.e7519d2bb8777058fa27.js(以哈希方式作为真实世界输出示例)。
在为不同的拆分 chunk 分配相同的名称时,所有 vendor 模块都放在一个共享的 chunk 中,尽管不建议这样做,因为这可能会导致下载更多代码。
splitChunks.usedExports
splitChunks.cacheGroups{cacheGroup}.usedExports
boolean = true
弄清哪些 export 被模块使用,以混淆 export 名称,省略未使用的 export,并生成有效的代码。 当它为 true 时:分析每个运行时使用的出口,当它为 “global” 时:分析所有运行时的全局 export 组合)。
splitChunks.cacheGroups
缓存组可以继承和/或覆盖来自 splitChunks.* 的任何选项。但是 test、priority 和 reuseExistingChunk 只能在缓存组级别上进行配置。将它们设置为 false以禁用任何默认缓存组。
Webpack.config.js
module.exports = {
  //...
  optimization: {
    splitChunks: {
      cacheGroups: {
        default: false,
      },
    },
  },
};
splitChunks.cacheGroups.{cacheGroup}.priority
number = -20
一个模块可以属于多个缓存组。优化将优先考虑具有更高 priority(优先级)的缓存组。默认组的优先级为负,以允许自定义组获得更高的优先级(自定义组的默认值为 0)。
splitChunks.cacheGroups.{cacheGroup}.reuseExistingChunk
boolean = true
如果当前 chunk 包含已从主 bundle 中拆分出的模块,则它将被重用,而不是生成新的模块。这可能会影响 chunk 的结果文件名。
Webpack.config.js
module.exports = {
  //...
  optimization: {
    splitChunks: {
      cacheGroups: {
        defaultVendors: {
          reuseExistingChunk: true,
        },
      },
    },
  },
};
splitChunks.cacheGroups.{cacheGroup}.type
function` `RegExp` `string
允许按模块类型将模块分配给缓存组。
Webpack.config.js
module.exports = {
  //...
  optimization: {
    splitChunks: {
      cacheGroups: {
        json: {
          type: 'json',
        },
      },
    },
  },
};
splitChunks.cacheGroups.test
splitChunks.cacheGroups.{cacheGroup}.test
function (module, { chunkGraph, moduleGraph }) => boolean` `RegExp` `string
控制此缓存组选择的模块。省略它会选择所有模块。它可以匹配绝对模块资源路径或 chunk 名称。匹配 chunk 名称时,将选择 chunk 中的所有模块。
为 {cacheGroup}.test 提供一个函数:
module.exports = {
  //...
  optimization: {
    splitChunks: {
      cacheGroups: {
        svgGroup: {
          test(module) {
            // `module.resource` contains the absolute path of the file on disk.
            // Note the usage of `path.sep` instead of / or \, for cross-platform compatibility.
            const path = require('path');
            return (
              module.resource &&
              module.resource.endsWith('.svg') &&
              module.resource.includes(`${path.sep}cacheable_svgs${path.sep}`)
            );
          },
        },
        byModuleTypeGroup: {
          test(module) {
            return module.type === 'javascript/auto';
          },
        },
      },
    },
  },
};
为了查看 module and chunks 对象中可用的信息,你可以在回调函数中放入 debugger; 语句。然后 以调试模式运行 Webpack 构建 检查 Chromium DevTools 中的参数。
向 {cacheGroup}.test 提供 RegExp:
Webpack.config.js
module.exports = {
  //...
  optimization: {
    splitChunks: {
      cacheGroups: {
        defaultVendors: {
          // Note the usage of `[\\/]` as a path separator for cross-platform compatibility.
          test: /[\\/]node_modules[\\/]|vendor[\\/]analytics_provider|vendor[\\/]other_lib/,
        },
      },
    },
  },
};
splitChunks.cacheGroups.{cacheGroup}.filename
string` `function (pathData, assetInfo) => string
仅在初始 chunk 时才允许覆盖文件名。 也可以在 output.filename 中使用所有占位符。
也可以在 splitChunks.filename 中全局设置此选项,但是不建议这样做,如果 splitChunks.chunks 未设置为 ‘initial’,则可能会导致错误。避免全局设置。
Webpack.config.js
module.exports = {
  //...
  optimization: {
    splitChunks: {
      cacheGroups: {
        defaultVendors: {
          filename: '[name].bundle.js',
        },
      },
    },
  },
};
若为函数,则:
Webpack.config.js
module.exports = {
  //...
  optimization: {
    splitChunks: {
      cacheGroups: {
        defaultVendors: {
          filename: (pathData) => {
            // Use pathData object for generating filename string based on your requirements
            return `${pathData.chunk.name}-bundle.js`;
          },
        },
      },
    },
  },
};
通过提供以文件名开头的路径 ‘js/vendor/bundle.js’,可以创建文件夹结构。
Webpack.config.js
module.exports = {
  //...
  optimization: {
    splitChunks: {
      cacheGroups: {
        defaultVendors: {
          filename: 'js/[name]/bundle.js',
        },
      },
    },
  },
};
splitChunks.cacheGroups.{cacheGroup}.enforce
boolean = false
告诉 Webpack 忽略 splitChunks.minSize、splitChunks.minChunks、splitChunks.maxAsyncRequests 和 splitChunks.maxInitialRequests 选项,并始终为此缓存组创建 chunk。
Webpack.config.js
module.exports = {
  //...
  optimization: {
    splitChunks: {
      cacheGroups: {
        defaultVendors: {
          enforce: true,
        },
      },
    },
  },
};
splitChunks.cacheGroups.{cacheGroup}.idHint
string
设置 chunk id 的提示。 它将被添加到 chunk 的文件名中。
Webpack.config.js
module.exports = {
  //...
  optimization: {
    splitChunks: {
      cacheGroups: {
        defaultVendors: {
          idHint: 'vendors',
        },
      },
    },
  },
};
Examples
Defaults: Example 1
// index.js

import('./a'); // dynamic import
// a.js
import 'react';

//...
结果: 将创建一个单独的包含 react 的 chunk。在导入调用中,此 chunk 并行加载到包含 ./a 的原始 chunk 中。
为什么:
- 条件1:chunk 包含来自 node_modules 的模块
- 条件2:react 大于 30kb
- 条件3:导入调用中的并行请求数为 2
- 条件4:在初始页面加载时不影响请求
这背后的原因是什么?react 可能不会像你的应用程序代码那样频繁地更改。通过将其移动到单独的 chunk 中,可以将该 chunk 与应用程序代码分开进行缓存(假设你使用的是 chunkhash,records,Cache-Control 或其他长期缓存方法)。
Defaults: Example 2
// entry.js

// dynamic imports
import('./a');
import('./b');
// a.js
import './helpers'; // helpers is 40kb in size

//...
// b.js
import './helpers';
import './more-helpers'; // more-helpers is also 40kb in size

//...
结果: 将创建一个单独的 chunk,其中包含 ./helpers 及其所有依赖项。在导入调用时,此 chunk 与原始 chunks 并行加载。
为什么:
- 条件1:chunk 在两个导入调用之间共享
- 条件2:helpers 大于 30kb
- 条件3:导入调用中的并行请求数为 2
- 条件4:在初始页面加载时不影响请求
将 helpers 的内容放入每个 chunk 中将导致其代码被下载两次。通过使用单独的块,这只会发生一次。我们会进行额外的请求,这可以视为一种折衷。这就是为什么最小体积为 30kb 的原因。
Split Chunks: Example 1
创建一个 commons chunk,其中包括入口(entry points)之间所有共享的代码。
Webpack.config.js
module.exports = {
  //...
  optimization: {
    splitChunks: {
      cacheGroups: {
        commons: {
          name: 'commons',
          chunks: 'initial',
          minChunks: 2,
        },
      },
    },
  },
};
此配置可以扩大你的初始 bundles,建议在不需要立即使用模块时使用动态导入。
Split Chunks: Example 2
创建一个 vendors chunk,其中包括整个应用程序中 node_modules 的所有代码。
Webpack.config.js
module.exports = {
  //...
  optimization: {
    splitChunks: {
      cacheGroups: {
        commons: {
          test: /[\\/]node_modules[\\/]/,
          name: 'vendors',
          chunks: 'all',
        },
      },
    },
  },
};
这可能会导致包含所有外部程序包的较大 chunk。建议仅包括你的核心框架和实用程序,并动态加载其余依赖项。
Split Chunks: Example 3
创建一个 custom vendor chunk,其中包含与 RegExp 匹配的某些 node_modules 包。
Webpack.config.js
module.exports = {
  //...
  optimization: {
    splitChunks: {
      cacheGroups: {
        vendor: {
          test: /[\\/]node_modules[\\/](react|react-dom)[\\/]/,
          name: 'vendor',
          chunks: 'all',
        },
      },
    },
  },
};
这将导致将 react 和 react-dom 分成一个单独的 chunk。 如果你不确定 chunk 中包含哪些包,请参考 Bundle Analysis 部分以获取详细信息。
四十三、import 动态导入配置
Webpack打包过程中利用动态导入的方式对代码进行拆包。之前使用import './title’的同步的方式进行导入,可以选择splitChunks选项进行配置。
四十四、runtimeChunk 优化配置
针对Webpack中的optimization的优化过程中,还有一个runtimeChunk的配置。
optimization.runtimeChunk
object` `string` `boolean
将 optimization.runtimeChunk 设置为 true 或 ‘multiple’,会为每个入口添加一个只含有 runtime 的额外 chunk。此配置的别名如下:
Webpack.config.js
module.exports = {
//...
	optimization: {
		runtimeChunk: {
			name: (entrypoint) => `runtime~${entrypoint.name}`,
		},
	},
};
值 “single” 会创建一个在所有生成 chunk 之间共享的运行时文件。此设置是如下设置的别名:
Webpack.config.js
module.exports = {
	//...
	optimization: {
		runtimeChunk: {
			name: 'runtime',
		},
	},
};
通过将 optimization.runtimeChunk 设置为 object,对象中可以设置只有 name 属性,其中属性值可以是名称或者返回名称的函数,用于为 runtime chunks 命名。
默认值是 false:每个入口 chunk 中直接嵌入 runtime。
Warning
对于每个 runtime chunk,导入的模块会被分别初始化,因此如果你在同一个页面中引用多个入口起点,请注意此行为。你或许应该将其设置为 single,或者使用其他只有一个 runtime 实例的配置。
Webpack.config.js
module.exports = {
	//...
	optimization: {
		runtimeChunk: {
			name: (entrypoint) => `runtimechunk~${entrypoint.name}`,
		},
	},
};
runtimeChunk,直观翻译是运行时的chunk文件,其作用是啥呢,通过调研了解了一波,在此记录下。
何为运行时代码?
形如import(‘abc’).then(res=>{})这种异步加载的代码,在Webpack中即为运行时代码。在VueCli工程中常见的异步加载路由即为runtime代码。
{
    path: '/about',
    name: 'About',
    // route level code-splitting
    // this generates a separate chunk (about.[hash].js) for this route
    // which is lazy-loaded when the route is visited.
    component: () => import(/* WebpackChunkName: "about" */ '../views/About.vue')
    // component: About
  }
搭建工程测试功效
1、搭建简单的vue项目,使用vuecli新建一个只需要router的项目,脚手架默认路由配置了一个异步加载的about路由,如上图所示
2、不设置runtimeChunk时,查看打包文件,此时不需要做任何操作,因为其默认是false,直接yarn build,此时生成的主代码文件的hash值为7d50fa23。

3、接着改变about.vue文件的内容,再次build,查看打包结果,发现app文件的hash值发生了变化。
设置runtimeChunk是将包含chunks 映射关系的 list单独从 app.js里提取出来,因为每一个 chunk 的 id 基本都是基于内容 hash 出来的,所以每次改动都会影响它,如果不将它提取出来的话,等于app.js每次都会改变。缓存就失效了。设置runtimeChunk之后,Webpack就会生成一个个runtime~xxx.js的文件。
然后每次更改所谓的运行时代码文件时,打包构建时app.js的hash值是不会改变的。如果每次项目更新都会更改app.js的hash值,那么用户端浏览器每次都需要重新加载变化的app.js,如果项目大切优化分包没做好的话会导致第一次加载很耗时,导致用户体验变差。现在设置了runtimeChunk,就解决了这样的问题。所以这样做的目的是避免文件的频繁变更导致浏览器缓存失效,所以其是更好的利用缓存。提升用户体验。
4、新建vue.config.js,配置runtimeChunk,第一次打包,然后修改about,在打包一次,查看2次打包之后app文件的hash值的变化。
// vue.config.js
module.exports = {
  productionSourceMap: false,
  configureWebpack: {
     runtimeChunk: true
  }
}
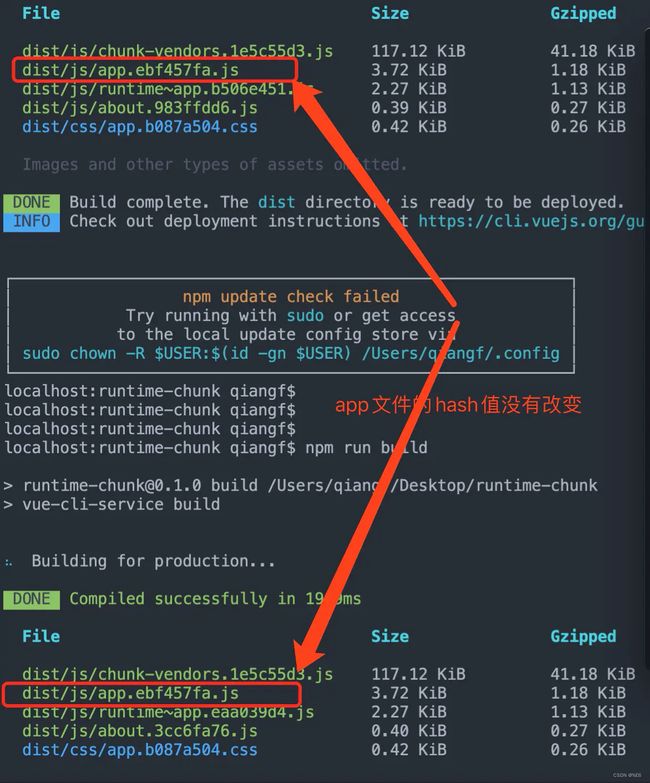
通过截图看到2次打包生成的app文件的hash值没有改变。和上面说的作用一致。
你以为这就完了?
1、查看下runtime~xxx.js文件内容:
function a(e){return i.p+"js/"+({about:"about"}[e]||e)+"."+{about:"3cc6fa76"}[e]+".js"}f
发现文件很小,且就是加载chunk的依赖关系的文件。虽然每次构建后app的hash没有改变,但是runtime~xxx.js会变啊。每次重新构建上线后,浏览器每次都需要重新请求它,它的 http 耗时远大于它的执行时间了,所以建议不要将它单独拆包,而是将它内联到我们的 index.html 之中。这边我们使用script-ext-html-Webpack-plugin来实现。(也可使用html-Webpack-inline-source-plugin,其不会删除runtime文件。)
// vue.config.js
const ScriptExtHtmlWebpackPlugin = require('script-ext-html-Webpack-plugin')
module.exports = {
  productionSourceMap: false,
  configureWebpack: {
    optimization: {
      runtimeChunk: true
    },
    plugins: [
      new ScriptExtHtmlWebpackPlugin({
        inline: /runtime~.+\.js$/  //正则匹配runtime文件名
      })
    ]
  },
  chainWebpack: config => {
    config.plugin('preload')
      .tap(args => {
        args[0].fileBlacklist.push(/runtime~.+\.js$/) //正则匹配runtime文件名,去除该文件的preload
        return args
      })
  }
}
重新打包,查看index.html文件
<!DOCTYPE html>
<html lang=en>

<head>
    <meta charset=utf-8>
    <meta http-equiv=X-UA-Compatible content="IE=edge">
    <meta name=viewport content="width=device-width,initial-scale=1">
    <link rel=icon href=/favicon.ico>
    <title>runtime-chunk</title>
    <link href=/js/about.cccc71df.js rel=prefetch>
    <link href=/css/app.b087a504.css rel=preload as=style>
    <link href=/js/app.9f1ba6f7.js rel=preload as=script>
    <link href=/css/app.b087a504.css rel=stylesheet>
</head>

<body><noscript><strong>We're sorry but runtime-chunk doesn't work properly without JavaScript enabled. Please enable it
            to continue.</strong></noscript>
    <div id=app></div>
    <script>(function (e) { function r(r) { for (var n, a, i = r[0], c = r[1], l = r[2], f = 0, s = []; f < i.length; f++)a = i[f], Object.prototype.hasOwnProperty.call(o, a) && o[a] && s.push(o[a][0]), o[a] = 0; for (n in c) Object.prototype.hasOwnProperty.call(c, n) && (e[n] = c[n]); p && p(r); while (s.length) s.shift()(); return u.push.apply(u, l || []), t() } function t() { for (var e, r = 0; r < u.length; r++) { for (var t = u[r], n = !0, a = 1; a < t.length; a++) { var c = t[a]; 0 !== o[c] && (n = !1) } n && (u.splice(r--, 1), e = i(i.s = t[0])) } return e } var n = {}, o = { "runtime~app": 0 }, u = []; function a(e) { return i.p + "js/" + ({ about: "about" }[e] || e) + "." + { about: "cccc71df" }[e] + ".js" } function i(r) { if (n[r]) return n[r].exports; var t = n[r] = { i: r, l: !1, exports: {} }; return e[r].call(t.exports, t, t.exports, i), t.l = !0, t.exports } i.e = function (e) { var r = [], t = o[e]; if (0 !== t) if (t) r.push(t[2]); else { var n = new Promise((function (r, n) { t = o[e] = [r, n] })); r.push(t[2] = n); var u, c = document.createElement("script"); c.charset = "utf-8", c.timeout = 120, i.nc && c.setAttribute("nonce", i.nc), c.src = a(e); var l = new Error; u = function (r) { c.onerror = c.onload = null, clearTimeout(f); var t = o[e]; if (0 !== t) { if (t) { var n = r && ("load" === r.type ? "missing" : r.type), u = r && r.target && r.target.src; l.message = "Loading chunk " + e + " failed.\n(" + n + ": " + u + ")", l.name = "ChunkLoadError", l.type = n, l.request = u, t[1](l) } o[e] = void 0 } }; var f = setTimeout((function () { u({ type: "timeout", target: c }) }), 12e4); c.onerror = c.onload = u, document.head.appendChild(c) } return Promise.all(r) }, i.m = e, i.c = n, i.d = function (e, r, t) { i.o(e, r) || Object.defineProperty(e, r, { enumerable: !0, get: t }) }, i.r = function (e) { "undefined" !== typeof Symbol && Symbol.toStringTag && Object.defineProperty(e, Symbol.toStringTag, { value: "Module" }), Object.defineProperty(e, "__esModule", { value: !0 }) }, i.t = function (e, r) { if (1 & r && (e = i(e)), 8 & r) return e; if (4 & r && "object" === typeof e && e && e.__esModule) return e; var t = Object.create(null); if (i.r(t), Object.defineProperty(t, "default", { enumerable: !0, value: e }), 2 & r && "string" != typeof e) for (var n in e) i.d(t, n, function (r) { return e[r] }.bind(null, n)); return t }, i.n = function (e) { var r = e && e.__esModule ? function () { return e["default"] } : function () { return e }; return i.d(r, "a", r), r }, i.o = function (e, r) { return Object.prototype.hasOwnProperty.call(e, r) }, i.p = "/", i.oe = function (e) { throw console.error(e), e }; var c = window["WebpackJsonp"] = window["WebpackJsonp"] || [], l = c.push.bind(c); c.push = r, c = c.slice(); for (var f = 0; f < c.length; f++)r(c[f]); var p = l; t() })([]);</script>
    <script src=/js/chunk-vendors.1e5c55d3.js></script>
    <script src=/js/app.9f1ba6f7.js></script>
</body>
</html>
index.html中已经没有对runtime~xxx.js的引用了,而是直接将其代码写入到了index.html中,故不会在请求文件,减少http请求。
runtimeChunk作用是为了线上更新版本时,充分利用浏览器缓存,使用户感知的影响到最低。
四十五、代码懒加载
https://www.jianshu.com/p/6fc86fa8ee81
模块懒加载本身与Webpack没有关系,Webpack可以让懒加载的模块代码打包到单独的文件中,实现真正的按需加载。Webpack会自动对异步代码进行分割。
示例代码如下:
function getComponent() {
    return import(/* WebpackChunkName: "lodash" */ 'lodash').then(({default: _})=>{
        var element = document.createElement('div')
        element.innerHTML = _.join(['a','b'],'-')
        return element
    })
}

document.addEventListener('click', ()=>{
    getComponent().then(element => {
        document.body.appendChild(element)
    })
})
需要配置@babel/preset-env的"useBuiltIns": "usage"
{
   "presets": [
     ["@babel/preset-env",{
       "targets": {
          "chrome": "67"
        },
        "useBuiltIns": "usage",
        "corejs": "3"
     }
     ],
     "@babel/preset-react"
   ],
    "plugins": [
      "@babel/plugin-syntax-dynamic-import"
    ]
}
实现了模块按需加载。
异步函数的方式:
async function getComponent(){
    const { default: _} = await import(/* WebpackChunkName: "lodash" */ 'lodash')
    const element = document.createElement('div')
    element.innerHTML = _.join(['a','b'],'-')
    return element
}


document.addEventListener('click', ()=>{
    getComponent().then(element => {
        document.body.appendChild(element)
    })
})
四十六、prefetch 与 preload
Webpack v4.6.0+ 增加了对预获取和预加载的支持。
在声明 import 时,使用下面这些内置指令,可以让 Webpack 输出 “resource hint(资源提示)”,来告知浏览器:
- prefetch(预获取):将来某些导航下可能需要的资源
- preload(预加载):当前导航下可能需要资源
下面这个 prefetch 的简单示例中,有一个 HomePage 组件,其内部渲染一个 LoginButton 组件,然后在点击后按需加载 LoginModal 组件。
LoginButton.js
//...
import(/* WebpackPrefetch: true */ './path/to/LoginModal.js');
这会生成 并追加到页面头部,指示着浏览器在闲置时间预取 login-modal-chunk.js 文件。
Tips:只要父 chunk 完成加载,Webpack 就会添加 prefetch hint(预取提示)。
与 prefetch 指令相比,preload 指令有许多不同之处:
- preload chunk 会在父 chunk 加载时,以并行方式开始加载。
- prefetch chunk 会在父 chunk 加载结束后开始加载。
- preload chunk 具有中等优先级,并立即下载。prefetch chunk 在浏览器闲置时下载。
preload chunk 会在父 chunk 中立即请求,用于当下时刻。prefetch chunk 会用于未来的某个时刻。 - 浏览器支持程度不同。
下面这个简单的 preload 示例中,有一个 Component,依赖于一个较大的 library,所以应该将其分离到一个独立的 chunk 中。
我们假想这里的图表组件 ChartComponent 组件需要依赖一个体积巨大的 ChartingLibrary 库。它会在渲染时显示一个 LoadingIndicator(加载进度条) 组件,然后立即按需导入 ChartingLibrary:
ChartComponent.js
//...
import(/* WebpackPreload: true */ 'ChartingLibrary');
在页面中使用 ChartComponent 时,在请求 ChartComponent.js 的同时,还会通过 请求 charting-library-chunk。假定 page-chunk 体积比 charting-library-chunk 更小,也更快地被加载完成,页面此时就会显示 LoadingIndicator(加载进度条) ,等到 charting-library-chunk 请求完成,LoadingIndicator 组件才消失。这将会使得加载时间能够更短一点,因为只进行单次往返,而不是两次往返。尤其是在高延迟环境下。
Tips:不正确地使用 WebpackPreload 会有损性能,请谨慎使用。
有时你需要自己控制预加载。例如,任何动态导入的预加载都可以通过异步脚本完成。这在流式服务器端渲染的情况下很有用。
const lazyComp = () =>
  import('DynamicComponent').catch((error) => {
    // 在发生错误时做一些处理
    // 例如,我们可以在网络错误的情况下重试请求
  });
如果在 Webpack 开始加载该脚本之前脚本加载失败(如果该脚本不在页面上,Webpack 只是创建一个 script 标签来加载其代码),则该 catch 处理程序将不会启动,直到 chunkLoadTimeout 未通过。此行为可能是意料之外的。但这是可以解释的 - Webpack 不能抛出任何错误,因为 Webpack 不知道那个脚本失败了。Webpack 将在错误发生后立即将 onerror 处理脚本添加到 script 中。
为了避免上述问题,你可以添加自己的 onerror 处理脚本,将会在错误发生时移除该 script。
<script
  src="https://example.com/dist/dynamicComponent.js"
  async
  onerror="this.remove()"
></script>
在这种情况下,错误的 script 将被删除。Webpack 将创建自己的 script,并且任何错误都将被处理而没有任何超时。
四十七、第三方扩展设置 CDN
什么是CDN
传送门
cdn全称是内容分发网络。其目的是让用户能够更快速的得到请求的数据。简单来讲,cdn就是用来加速的,他能让用户就近访问数据,这样就更更快的获取到需要的数据。举个例子,现在服务器在北京,深圳的用户想要获取服务器上的数据就需要跨越一个很远的距离,这显然就比北京的用户访问北京的服务器速度要慢。但是现在我们在深圳建立一个cdn服务器,上面缓存住一些数据,深圳用户访问时先访问这个cdn服务器,如果服务器上有用户请求的数据就可以直接返回,这样速度就大大的提升了。
如何设置CDN
Webpack中我们引入一个不想被打包的第三方包,可能是由于该包的体积过大或者其他原因,这对与Webpack打包来说是有优势的,因为减少第三包的打包会提高Webpack打包的速度。比如在实际使用中,我们使用到了lodash第三方包,我们又没有自己的CDN服务器,这是就需要借助别人的CDN服务器进行对该包的引入(一般是官方的CDN服务)。
有自己的CDN服务器
如果有自己的CDN服务器,我们可以在Webpack配置文件中的output中设置publicPath目录,其中写入CDN的服务器地址,如下:
output: {
    filename: 'js/[name].[contenthash:8].bundle.js',
    path: resolveApp('./dist'),
    publicPath: 'https://abc/cdn'
  },
使用第三方资源官方的CDN服务
在Webpack官网中,可以看到,设置externals属性,可以选择我们不需要打包的第三方资源,具体配置如下:
防止将某些 import 的包(package)打包到 bundle 中,而是在运行时(runtime)再去从外部获取这些扩展依赖(external dependencies)。
例如,从 CDN 引入 jQuery,而不是把它打包:
index.html
<script
  src="https://code.jquery.com/jquery-3.1.0.js"
  integrity="sha256-slogkvB1K3VOkzAI8QITxV3VzpOnkeNVsKvtkYLMjfk="
  crossorigin="anonymous"
></script>
Webpack.config.js
module.exports = {
  //...
  externals: {
    jquery: 'jQuery',
  },
};
这样就剥离了那些不需要改动的依赖模块,换句话,下面展示的代码还可以正常运行:
import $ from 'jquery';

$('.my-element').animate(/* ... */);
上面 Webpack.config.js 中 externals 下指定的属性名称 jquery 表示 import $ from 'jquery' 中的模块 jquery 应该从打包产物中排除。 为了替换这个模块,jQuery 值将用于检索全局 jQuery 变量,因为默认的外部库类型是 var,请参阅 externalsType。
虽然我们在上面展示了一个使用外部全局变量的示例,但实际上可以以以下任何形式使用外部变量:全局变量、CommonJS、AMD、ES2015 模块,在 externalsType 中查看更多信息。
四十八、打包 Dll 库
在Webpack4往后或者Webpack5,本身其打包的速度已经足够优化,因此在高版本Vue脚手架、React脚手架中已经移除了DLL库的使用。 但是从打包内容的多少以及打包的速度上来讲,如果使用了DLL库,它的确可以提高构建速度。
DLL库是什么
DllPlugin 和 DllReferencePlugin 用某种方法实现了拆分 bundles,同时还大幅度提升了构建的速度。“DLL” 一词代表微软最初引入的动态链接库(有一些东西可以进行共享,共享的东西可以提前准备好,将其变为一个库。将来在不同的项目中,对其进行使用的时候,只需要将该库导入即可)。
打包DLL库
这里已React和React Dom为例。
项目目录以及package.json
"devDependencies": {
    "react": "^17.0.2",
    "react-dom": "^17.0.2",
    "webpack": "^5.50.0",
    "webpack-cli": "^4.7.2"
  }
Webpack.config.js
const path = require('path')
const Webpack = require('Webpack')
const TerserPlugin = require('terser-Webpack-plugin')

module.exports = {
  mode: "production",
  entry: {
    react: ['react', 'react-dom']
  },
  output: {
    path: path.resolve(__dirname, 'dll'),
    filename: 'dll_[name].js',
    library: 'dll_[name]'
  },
  optimization: {
    minimizer: [
      new TerserPlugin({
        extractComments: false
      }),
    ],
  },
  plugins: [
    new Webpack.DllPlugin({
      name: 'dll_[name]',
      path: path.resolve(__dirname, './dll/[name].manifest.json')
    })
  ]
}
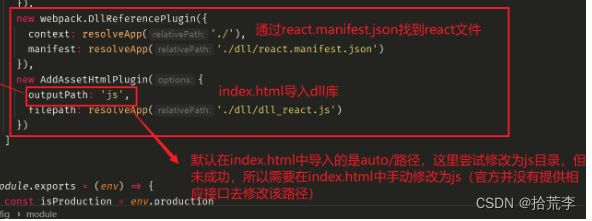
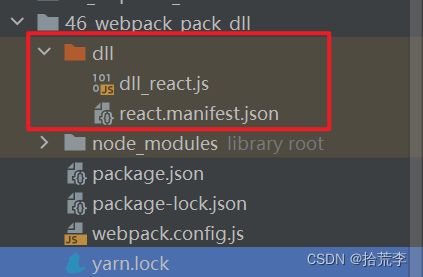
执行yarn dll后,发现dll目录中生成两个文件dll_react.js和react.manifest.json。其中在其他项目中使用该dll库时,会先引入react.manifest.json文件,根据其中的引用路径,再对应找到js文件进行打包。
react.manifest.json
{
  "name": "dll_react",
  "content": {
    "./node_modules/react/index.js": {
      "id": 294,
      "buildMeta": {
        "exportsType": "dynamic",
        "defaultObject": "redirect"
      },
      "exports": [
        "Children",
        "Component",
        "Fragment",
        "Profiler",
        "PureComponent",
        "StrictMode",
        "Suspense",
        "__SECRET_INTERNALS_DO_NOT_USE_OR_YOU_WILL_BE_FIRED",
        "cloneElement",
        "createContext",
        "createElement",
        "createFactory",
        "createRef",
        "forwardRef",
        "isValidElement",
        "lazy",
        "memo",
        "useCallback",
        "useContext",
        "useDebugValue",
        "useEffect",
        "useImperativeHandle",
        "useLayoutEffect",
        "useMemo",
        "useReducer",
        "useRef",
        "useState",
        "version"
      ]
    },
    "./node_modules/react-dom/index.js": {
      "id": 935,
      "buildMeta": {
        "exportsType": "dynamic",
        "defaultObject": "redirect"
      },
      "exports": [
        "__SECRET_INTERNALS_DO_NOT_USE_OR_YOU_WILL_BE_FIRED",
        "createPortal",
        "findDOMNode",
        "flushSync",
        "hydrate",
        "render",
        "unmountComponentAtNode",
        "unstable_batchedUpdates",
        "unstable_createPortal",
        "unstable_renderSubtreeIntoContainer",
        "version"
      ]
    }
  }
}
四十九、使用 Dll 库
Webpack.config.js
const resolveApp = require('./paths')
const HtmlWebpackPlugin = require('html-Webpack-plugin')
const { merge } = require('Webpack-merge')
const TerserPlugin = require('terser-Webpack-plugin')
const Webpack = require('Webpack')
const AddAssetHtmlPlugin = require('add-asset-html-Webpack-plugin')

// 导入其它的配置
const prodConfig = require('./Webpack.prod')
const devConfig = require('./Webpack.dev')

// 定义对象保存 base 配置信息
const commonConfig = {
  entry: {
    index: './src/index.js'
  },
  optimization: {
    minimizer: [
      new TerserPlugin({
        extractComments: false
      })
    ],
    runtimeChunk: false,
    splitChunks: {
      chunks: 'all',
      minSize: 20000,
      maxSize: 20000,
      minChunks: 1,
      cacheGroups: {
        reactVendors: {
          test: /[\\/]node_modules[\\/]/,
          filename: 'js/[name].vendor.js'
        }
      }
    }
  },
  resolve: {
    extensions: ['.js', '.json', '.wasm', '.jsx', '.ts', '.vue'],
    alias: {
      '@': resolveApp('./src')
    }
  },
  output: {
    filename: 'js/[name].[contenthash:8]._bundle.js',
    path: resolveApp('./dist'),

  },
  module: {
  plugins: [
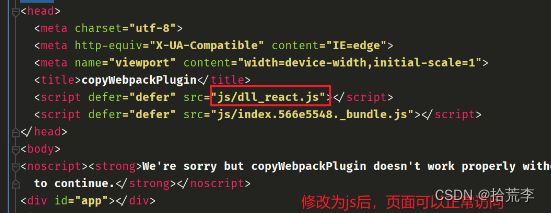
    new HtmlWebpackPlugin({
      title: 'copyWebpackPlugin',
      template: './public/index.html'
    }),
    new Webpack.DllReferencePlugin({
      context: resolveApp('./'),
      manifest: resolveApp('./dll/react.manifest.json')
    }),
    new AddAssetHtmlPlugin({
      outputPath: 'js',
      filepath: resolveApp('./dll/dll_react.js')
    })
  ]
}

module.exports = (env) => {
  const isProduction = env.production

  process.env.NODE_ENV = isProduction ? 'production' : 'development'

  // 依据当前的打包模式来合并配置
  const config = isProduction ? prodConfig : devConfig

  const mergeConfig = merge(commonConfig, config)

  return mergeConfig
}
五十、CSS 抽离和压缩
Webpack中,如果正常在js中引入css文件样式,在Webpack打包时会将改css文件也打包进入js的bundle中。我们希望在js中引入的css样式文件单独抽离出来并且打包和压缩,这里需要使用Webpack提供的MiniCssExtractPlugin来实现。
由于将css单独抽离打包的需求在开发阶段并不需要,且不适合,所以需要区分环境进行使用。在webpack.common.js和webpack。prod.js中分别进行单独配置。
const resolveApp = require('./paths')
const HtmlWebpackPlugin = require('html-webpack-plugin')
const { merge } = require('webpack-merge')
const TerserPlugin = require("terser-webpack-plugin");
const MiniCssExtractPlugin = require("mini-css-extract-plugin")

// 导入其它的配置
const prodConfig = require('./webpack.prod')
const devConfig = require('./webpack.dev')

// 定义对象保存 base 配置信息
const commonConfig = (isProduction) => {
  return {
    entry: {
      index: './src/index.js'
    },
    resolve: {
      extensions: [".js", ".json", '.ts', '.jsx', '.vue'],
      alias: {
        '@': resolveApp('./src')
      }
    },
    output: {
      filename: 'js/[name].[contenthash:8].bundle.js',
      path: resolveApp('./dist'),
    },
    optimization: {
      runtimeChunk: true,
      minimizer: [
        new TerserPlugin({
          extractComments: false,
        }),
      ]
    },
    module: {
      rules: [
        {
          test: /\.css$/,
          use: [
            isProduction ? MiniCssExtractPlugin.loader : 'style-loader',
            {
              loader: 'css-loader',
              options: {
                importLoaders: 1,
                esModule: false
              }
            },
            'postcss-loader'
          ]
        },
      ]
    },
    plugins: [
      new HtmlWebpackPlugin({
        title: 'copyWebpackPlugin',
        template: './public/index.html'
      })
    ]
  }
}

module.exports = (env) => {
  const isProduction = env.production

  process.env.NODE_ENV = isProduction ? 'production' : 'development'

  // 依据当前的打包模式来合并配置
  const config = isProduction ? prodConfig : devConfig

  const mergeConfig = merge(commonConfig(isProduction), config)

  return mergeConfig
}
在webpack.common.js中将配置文件作为function的导出数据使用,可以使用传参的方式来判断当前的环境(生产或者开发)
在webpack.prodd.js中
const CopyWebpackPlugin = require('copy-webpack-plugin')
const { CleanWebpackPlugin } = require('clean-webpack-plugin')
const MiniCssExtractPlugin = require("mini-css-extract-plugin")
const CssMinimizerPlugin = require("css-minimizer-webpack-plugin")

module.exports = {
  mode: 'production',
  optimization: {
    minimizer: [
      new CssMinimizerPlugin()
    ]
  },
  plugins: [
    new CleanWebpackPlugin(),
    new CopyWebpackPlugin({
      patterns: [
        {
          from: 'public',
          globOptions: {
            ignore: ['**/index.html']
          }
        }
      ]
    }),
    new MiniCssExtractPlugin({
      filename: 'css/[name].[hash:8].css'
    })
  ]
}
执行yarn build打包后,发现在dist目录中单独抽离出来了css目录及文件。并且在使用yarn serve开发环境时,样式文件也可以正常加载。
并且使用新的插件css-minimizer-webpack-plugin对css文件进行压缩。
五十一、TerserPlugin 压缩 JS
webapck中提供了压缩 js 代码的方式,可以移除无用代码、替换变量名等,减少编译后文件体积,提升加载速度。
production模式下编译的文件,文件及变量名被修改、空格换行被去除,即使自己没有进行配置,webpack 也会在我们设置 production的模式时默认添加一些属性,比如这里js代码压缩用到的就是 TerserPlugin 。
terser
TerserPlugin处理代码依赖的是 terser这个工具, terser 是可以直接安装并独立使用的,使用的时候有非常多的配置可以自行定义,具体可参考 官方文档
其中属于 compress options
arrows — 对象里的箭头函数函数体只有一句
arguments — arguments 参数进行转换
dead_code — 删除不可达的代码 (remove unreachable code)
以下属于 mangle options
toplevel — 顶层作用域要不要丑化
keep_classnames — 类名保留
keep_fnames — 保留函数名
通过 npm install terser安装依赖后,直接执行 terser 命令语句 npx terser ./src/index.js -o ./terser/default.js,这里没有进行配置,所以使用的是默认处理方式,只移除了换行。
webpack.prod.js
const CopyWebpackPlugin = require('copy-webpack-plugin')
const { CleanWebpackPlugin } = require('clean-webpack-plugin')
const MiniCssExtractPlugin = require("mini-css-extract-plugin")
const CssMinimizerPlugin = require("css-minimizer-webpack-plugin")
const TerserPlugin = require("terser-webpack-plugin")

module.exports = {
  mode: 'production',
  optimization: {
    minimize: true,
    minimizer: [
      new CssMinimizerPlugin(),
      new TerserPlugin({
        extractComments: false
      })
    ]
  },
  plugins: [
    new CleanWebpackPlugin(),
    new CopyWebpackPlugin({
      patterns: [
        {
          from: 'public',
          globOptions: {
            ignore: ['**/index.html']
          }
        }
      ]
    }),
    new MiniCssExtractPlugin({
      filename: 'css/[name].[hash:8].css'
    })
  ]
}
五十二、Scope Hoisting
Scope Hoistins是wepbpack3新增的功能,作用是对作用域进行提升,并且让webpack打包后的代码更小。运行更快。
我们之前看过源码,webpack打包会有很多的函数作用域。因为他是利用函数作用域来实现一个模块化。而且有大量的闭包,闭包太多性能是比较低的。scope hoisting可以将函数合并到一个模块中来运行。
在生产模式下,该插件是默认开启的
设置生产模式下的默认配置,有这个插件的使用。
在开发模式下使用也很简单
 plugins: [

    new webpack.optimize.ModuleConcatenationPlugin()
  ]
因为webpack已经内置过了,直接在Plugin属性上使用即可。
当我们配置后,打包后的文件会变得比较少。
可以看到调用的已经在同一个作用域了,看过之前源码的应该知道,如果普通开发模式下,我们是得通过闭包,将路劲放入webpack-require函数,然后这个函数再去调用wbepack-exports对象,在对象里面给我们的export去做代理或者赋值,然后再返回,才能拿到我们的函数来调用,而一旦使用这个插件后,可以看到他们两个的作用域已经是一样的了。这也是性能优化的地方。
注意事项: 内部的原理依赖于静态分析。esmodul是静态分析的,而commonjs是动态分析的。所以该插件是依赖于静态分析的,通过分析判断能不能进行作用域提升。如果我们的项目不是commonjs,那么我们的插件就可能发挥不了多大功能。所以建议以后尽量使用esmodule。而且引入第三方库时,最好也是通过esmodule导入
五十三、tree shaking(usedExports)
webpack.prod.js
const CopyWebpackPlugin = require('copy-webpack-plugin')
const { CleanWebpackPlugin } = require('clean-webpack-plugin')
const TerserPlugin = require("terser-webpack-plugin");

module.exports = {
  mode: 'development',
  devtool: false,
  optimization: {
    usedExports: true, // 做标记
    minimize: true, // 这三个结合起来用
    minimizer: [ // 去掉无用代码
      new TerserPlugin({
        extractComments: false,
      }),
    ]
  },
  plugins: [
    new CleanWebpackPlugin(),
    new CopyWebpackPlugin({
      patterns: [
        {
          from: 'public',
          globOptions: {
            ignore: ['**/index.html']
          }
        }
      ]
    }),
    // new webpack.optimize.ModuleConcatenationPlugin()
  ]
}
五十四、sideEffects(副作用)
注意 Webpack 不能百分百安全地进行 tree-shaking。有些模块导入,只要被引入,就会对应用程序产生重要的影响。一个很好的例子就是 全局样式 文件,或者 全局JS 文件。
src/style.css
body {
    background-color: chocolate;
}
src/todo.global.js
console.log('TODO');
src/index.js
import _ from 'lodash';
import { add, subtract } from './math';
import './todo.global';
import './style.css';

console.log(add(1, 2));
webpack.config.js
const HtmlWebpackPlugin = require('html-webpack-plugin');

module.exports = {
  mode: 'production',

  plugins: [
    new HtmlWebpackPlugin(),
  ],

  optimization: {
    usedExports: true,
  },
};
执行 npx webpack serve ,你会发现 style.css、 todo.global.js 都生效了,这是因为这两个文件不是使用的 ESmodules 方式将模块导出(export)的。
Webpack 认为这样的文件有“副作用”。具有副作用的文件不应该做 tree-shaking,因为这将破坏整个应用程序。
如何告诉 Webpack 你的代码无副作用,可以通过 package.json 有一个特殊的属性 sideEffects,就是为此而存在的。
sideEffects 有三个可能的值:
true:(默认值)这意味着所有的文件都有副作用,也就是没有一个文件可以 tree-shaking。
false:告诉 Webpack 没有文件有副作用,所有文件都可以 tree-shaking。
数组:是文件路径数组。它告诉 webpack,除了数组中包含的文件外,你的任何文件都没有副作用。因此,除了指定的文件之外,其他文件都可以安全地进行 tree-shaking。
Tip
“side effect(副作用)” 的定义是,在导入时会执行特殊行为的代码,而不是仅仅暴露一个 export 或多个 export。举例说明,例如 polyfill,它影响全局作用域,并且通常不提供 export。
package.json
{
  "sideEffects": true, // 所有的文件都有副作用,也就是没有一个文件可以 `tree-shaking`。
}
或
{
"sideEffects": [
    "./src/title.js"
  ],
}
或
{
  "sideEffects": ['*.css', '*.global.js'], // 告诉 Webpack 扩展名是 .css 或者 .global.js 文件视为有副作用,不要 `tree-shaking`
}
执行 npx webpack serve 可以发现上面示例中的 style.css、 todo.global.js 都被tree-shaking了
webpack 4 曾经不进行对 CommonJs 导出和 require() 调用时的导出使用分析。
webpack 5 增加了对一些 CommonJs 构造的支持,允许消除未使用的 CommonJs 导出,并从 require() 调用中跟踪引用的导出名称。
解释 tree shaking 和 sideEffects
sideEffects 和 usedExports(更多被认为是 tree shaking)是两种不同的优化方式。
sideEffects 更为有效 是因为它允许跳过整个模块/文件和整个文件子树。
usedExports 依赖于 terser 去检测语句中的副作用。它是一个 JavaScript 任务而且没有像 sideEffects 一样简单直接。而且它不能跳转子树/依赖由于细则中说副作用需要被评估。
五十五、Css-TreeShaking
去掉无用的css
purgecss-webpack-plugin
css
body {
  background-color: orange;
}

.abc {
  font-size: 100px;
}

.ef {
  background-color: #fff;
}
webpack.prod.js
const CopyWebpackPlugin = require('copy-webpack-plugin')
const { CleanWebpackPlugin } = require('clean-webpack-plugin')
const TerserPlugin = require("terser-webpack-plugin")
const MiniCssExtractPlugin = require('mini-css-extract-plugin')
const CssMinimizerPlugin = require("css-minimizer-webpack-plugin")
const PurgeCSSPlugin = require('purgecss-webpack-plugin')
const resolveApp = require('./paths')
const glob = require('glob')

module.exports = {
  mode: 'development',
  devtool: false,
  optimization: {
    usedExports: true, // 标记不被使用的函数
    minimize: true,
    minimizer: [
      new TerserPlugin({
        extractComments: false,
      }),
      new CssMinimizerPlugin()
    ]
  },
  plugins: [
    new CleanWebpackPlugin(),
    new CopyWebpackPlugin({
      patterns: [
        {
          from: 'public',
          globOptions: {
            ignore: ['**/index.html']
          }
        }
      ]
    }),
    new MiniCssExtractPlugin({
      filename: 'css/[name].css'
    }),
    new PurgeCSSPlugin({
      paths: glob.sync(`${resolveApp('./src')}/**/*`, { nodir: true }),
      safelist: function () {
        return {
          standard: ['body', 'html', 'ef']
        }
      }
    })
  ]
}
五十六、资源压缩
const CopyWebpackPlugin = require('copy-webpack-plugin')
const { CleanWebpackPlugin } = require('clean-webpack-plugin')
const TerserPlugin = require("terser-webpack-plugin")
const MiniCssExtractPlugin = require('mini-css-extract-plugin')
const CssMinimizerPlugin = require("css-minimizer-webpack-plugin")
const PurgeCSSPlugin = require('purgecss-webpack-plugin')
const CompressionPlugin = require("compression-webpack-plugin")
const resolveApp = require('./paths')
const glob = require('glob')

module.exports = {
  mode: 'production',
  optimization: {
    usedExports: true, // 标记不被使用的函数
    minimize: true,
    minimizer: [
      new TerserPlugin({
        extractComments: false,
      }),
      new CssMinimizerPlugin()
    ]
  },
  plugins: [
    new CleanWebpackPlugin(),
    new CopyWebpackPlugin({
      patterns: [
        {
          from: 'public',
          globOptions: {
            ignore: ['**/index.html']
          }
        }
      ]
    }),
    new MiniCssExtractPlugin({
      filename: 'css/[name].css'
    }),
    new PurgeCSSPlugin({
      paths: glob.sync(`${resolveApp('./src')}/**/*`, { nodir: true }),
      safelist: function () {
        return {
          standard: ['body', 'html', 'ef']
        }
      }
    }),
    new CompressionPlugin({
      test: /\.(css|js)$/, // 哪些资源压缩
      minRatio: 0.8, // 压缩比例 不能太小 默认即可
      threshold: 0, // 体积大于多少之后开始压缩
      algorithm: 'gzip' // 算法
    })
  ]
}
五十七、inlineChunkHtmlPlugin 使用
作用:把js文件直接注入到html里面,减少http请求
const CopyWebpackPlugin = require('copy-webpack-plugin')
const { CleanWebpackPlugin } = require('clean-webpack-plugin')
const TerserPlugin = require("terser-webpack-plugin")
const MiniCssExtractPlugin = require('mini-css-extract-plugin')
const CssMinimizerPlugin = require("css-minimizer-webpack-plugin")
const PurgeCSSPlugin = require('purgecss-webpack-plugin')
const CompressionPlugin = require("compression-webpack-plugin")
const InlineChunkHtmlPlugin = require('inline-chunk-html-plugin')
const resolveApp = require('./paths')
const glob = require('glob')
const HtmlWebpackPlugin = require('html-webpack-plugin')

module.exports = {
  mode: 'production',
  optimization: {
    usedExports: true, // 标记不被使用的函数
    minimize: true,
    minimizer: [
      new TerserPlugin({
        extractComments: false,
      }),
      new CssMinimizerPlugin()
    ]
  },
  plugins: [
    new CleanWebpackPlugin(),
    new CopyWebpackPlugin({
      patterns: [
        {
          from: 'public',
          globOptions: {
            ignore: ['**/index.html']
          }
        }
      ]
    }),
    new MiniCssExtractPlugin({
      filename: 'css/[name].css'
    }),
    new PurgeCSSPlugin({
      paths: glob.sync(`${resolveApp('./src')}/**/*`, { nodir: true }),
      safelist: function () {
        return {
          standard: ['body', 'html', 'ef']
        }
      }
    }),
    new CompressionPlugin({
      test: /\.(css|js)$/,
      minRatio: 0.8,
      threshold: 0,
      algorithm: 'gzip'
    }),
    new InlineChunkHtmlPlugin(HtmlWebpackPlugin, [/runtime.*\.js/])
  ]
}
五十八、webpack 打包 Library(自己实现的一些库)
const path = require('path')

module.exports = {
  mode: 'development',
  devtool: false,
  entry: './src/index.js',
  output: {
    filename: 'sy_utils.js',
    path: path.resolve(__dirname, 'dist'),
    libraryTarget: 'umd', //模块化规范
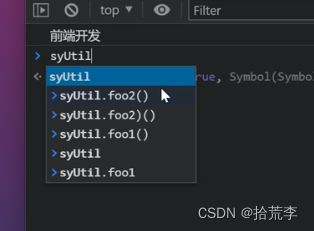
    library: 'syUtil',  //挂载到 syUtil
    globalObject: 'this'
  }
}
五十九、打包时间和内容分析
时间分析 speed-measure-webpack-plugin
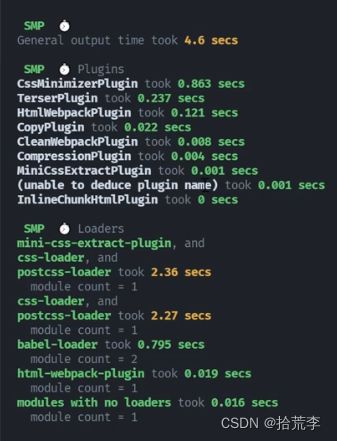
const resolveApp = require('./paths')
const HtmlWebpackPlugin = require('html-webpack-plugin')
const { merge } = require('webpack-merge')
const MiniCssExtractPlugin = require('mini-css-extract-plugin')

// 时间分析
const SpeedMeasurePlugin = require("speed-measure-webpack-plugin")
const smp = new SpeedMeasurePlugin()

// 导入其它的配置
const prodConfig = require('./webpack.prod')
const devConfig = require('./webpack.dev')

// 定义对象保存 base 配置信息
const commonConfig = (isProduction) => {
  return {
    entry: {
      index: './src/index.js'
    },
    resolve: {
      extensions: [".js", ".json", '.ts', '.jsx', '.vue'],
      alias: {
        '@': resolveApp('./src')
      }
    },
    output: {
      filename: 'js/[name].[contenthash:8].bundle.js',
      path: resolveApp('./dist'),
    },
    plugins: [
      new HtmlWebpackPlugin({
        title: 'copyWebpackPlugin',
        template: './public/index.html'
      })
    ]
  }
}

module.exports = (env) => {
  const isProduction = env.production

  process.env.NODE_ENV = isProduction ? 'production' : 'development'

  // 依据当前的打包模式来合并配置
  const config = isProduction ? prodConfig : devConfig

  const mergeConfig = merge(commonConfig(isProduction), config)

  return smp.wrap(mergeConfig)
}
对文件分析 webpack-bundle-analyzer
const CopyWebpackPlugin = require('copy-webpack-plugin')
const { CleanWebpackPlugin } = require('clean-webpack-plugin')
const TerserPlugin = require("terser-webpack-plugin")
const MiniCssExtractPlugin = require('mini-css-extract-plugin')
const CssMinimizerPlugin = require("css-minimizer-webpack-plugin")
const PurgeCSSPlugin = require('purgecss-webpack-plugin')
const CompressionPlugin = require("compression-webpack-plugin")
const InlineChunkHtmlPlugin = require('inline-chunk-html-plugin')
const resolveApp = require('./paths')
const glob = require('glob')
const HtmlWebpackPlugin = require('html-webpack-plugin')
const BundleAnalyzerPlugin = require('webpack-bundle-analyzer').BundleAnalyzerPlugin

module.exports = {
  mode: 'production',
  optimization: {
    usedExports: true, // 标记不被使用的函数
    minimize: true,
    minimizer: [
      new TerserPlugin({
        extractComments: false,
      }),
      new CssMinimizerPlugin()
    ]
  },
  plugins: [
    new CleanWebpackPlugin(),
    new CopyWebpackPlugin({
      patterns: [
        {
          from: 'public',
          globOptions: {
            ignore: ['**/index.html']
          }
        }
      ]
    }),
    new MiniCssExtractPlugin({
      filename: 'css/[name].css'
    }),
    new PurgeCSSPlugin({
      paths: glob.sync(`${resolveApp('./src')}/**/*`, { nodir: true }),
      safelist: function () {
        return {
          standard: ['body', 'html', 'ef']
        }
      }
    }),
    new CompressionPlugin({
      test: /\.(css|js)$/,
      minRatio: 0.8,
      threshold: 0,
      algorithm: 'gzip'
    }),
    new InlineChunkHtmlPlugin(HtmlWebpackPlugin, [/runtime.*\.js/]),
    new BundleAnalyzerPlugin()
  ]
}
六十、webpack和gulp有哪些区别
想必面试会经常被问到这个问题,本人做了一些总结 仅供参考:
面试,我觉得应该先把重点的工作原理说出来,gulp 其实是配置的任务流,一个一个执行,让它怎么执行,就怎么执行,webpack 是全是模块,给个入口,剩下的全交给它处理
- 工作原理不同:
webpack:- 首先通过入口文件(
entry)找到项目中所有的模块(module)。
将这些模块进行静态分析和处理,最终打包成一个或多个bundle文件。 - 在打包的过程中,
webpack会根据依赖关系进行代码拆分,将公共代码抽离成独立的chunk,使得代码的加载变得更加高效。 webpack还可以通过loader来转换非JavaScript文件,并且可以使用各种插件进行自定义构建流程和优化。
- 首先通过入口文件(
gulp:gulp通过定义不同的任务(task)来执行各种构建操作。- 通过
gulp.src获取需要进行处理的文件流,再通过一系列插件进行处理,最后通过gulp.dest输出到指定的位置。 gulp的插件可以进行多个操作,比如压缩、合并、重命名等,同时也可以定制自己的插件并加以使用。
HMR是Webpack的一个功能,即热模块替换,它可以在不刷新浏览器的情况下更新模块。和热更新不同,HMR只会更新其中一个模块,而不是整个页面。这种机制是针对模块化开发而设计的。Gulp并没有自带的HMR功能,但可以使用一些插件或工具来实现类似的效果。例如,使用gulp-connect、browser-sync和lite-server等插件,可以实现自动刷新浏览器,节省手动刷新时间。但是,它们并没有模块热替换的功能。如果需要使用模块热替换,还是需要结合webpack等打包工具来实现。- webpack可以很容易地做
tree-shaking,gulp不行 - 但是gulp解决不了模块化js文件的问题,于是使用
ts或者配置sea.js、require.js的插件用来解决js模块化,而webpack本身就是模块化为核心。。 gulp在单页面应用方面输出乏力,而且对流行的单页技术有些难以处理(比如 Vue 单文件组件,使用 gulp 处理就会很困难,而 webpack 一个 loader 就能轻松搞定)- 使用方式上不同,
webpack里面有大量的loader和plugin用来处理和打包资源文件,gulp有大量的插件,根据定义不同的task任务去处理和打包资源 - gulp更易于学习,易于使用,webpack相对学习难度更难一些
- 这里没有明确的好坏界限,只是看你的项目使用场景而做选择,也不乏有很多大型项目使用
gulp,比如vscode
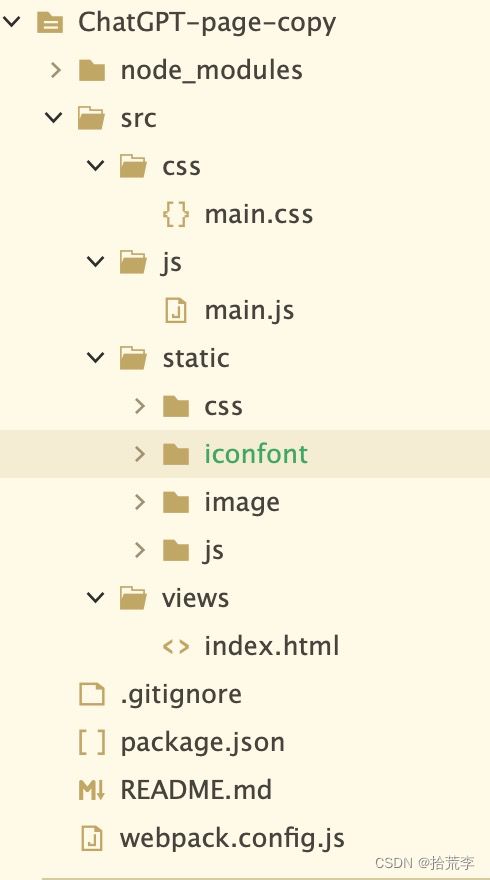
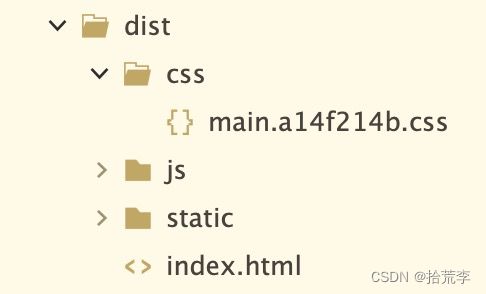
文末配上一个多页面打包的案例
const webpack = require("webpack");
const path = require("path");
const glob = require("glob");
const HtmlWebpackPlugin = require("html-webpack-plugin");
const copyWebpackPlugin = require("copy-webpack-plugin");
const CleanWebpackPlugin = require("clean-webpack-plugin");
const MiniCssExtractPlugin = require("mini-css-extract-plugin")

// 自动读取views目录
var srcDir = path.resolve("./src/views/*.html"); // /Users/liuchongyang/site/ChatGPT-page/src/views/**/*.html
var pathArray = glob.sync(srcDir); // [ '/Users/liuchongyang/site/ChatGPT-page/src/views/index.html' ]

function generateFile(data) {
	var fileArray = [];
	for (var i = 0; i < data.length; i++) {
		var item = data[i].split("/");
		fileArray.push(item[item.length - 1]);
	}
	return fileArray;
}
var resourceArray = generateFile(pathArray); //[ 'index.html' ]
// const resourceArray = ["index", "about"];

// 自动生成html
function generateHtml(data) {
	var htmlArray = [];
	for (var i = 0; i < data.length; i++) {
		htmlArray.push(
			new HtmlWebpackPlugin({
				filename: data[i],
				template: "./src/views/" + data[i],
				inject: true,
				// hash: true,
				// chunks: ["bundle", "commons", "vendor", "" + data[i] + ""],
				// minify: {
				//   removeAttributeQuotes: true,
				//   removeComments: true,
				//   collapseWhitespace: true,
				//   removeScriptTypeAttributes: true,
				//   removeStyleLinkTypeAttributes: true
				// }
			})
		);
	}
	return htmlArray;
}

//读取所有.js文件,动态设置多入口
// function getEntry() {
//   var entry = {};
//   //读取src目录下page下的所有.js文件
//   glob.sync('./src/js/*.js')
//     .forEach(function (name) {
//       const key = path.basename(name).slice(0, path.basename(name).length - 3) + '';
//       entry[key] = [name, './src/css/main.css'];
//     });

//   return entry;
// };
const config = {
	mode: "production",
	/* entry: {
	  index: ["./src/views/index/index.js", "./src/main.js"],
	  about: "./src/views/about/about.js"
	}, */
	entry: {
		"main": [
			"./src/js/main.js",
			"./src/css/main.css"
		]
	},
	output: {
		filename: "js/[name].[hash:8].js",
		path: path.resolve(__dirname, "dist"),
		publicPath: "/"
	},
	devServer: {
		host:"localhost",
		port:"8080",
		compress:true,  //启动gzip压缩
		hot: true,
		open: true,
		hotOnly: true,
		historyApiFallback: true,
		contentBase: "./src", //
		watchContentBase: true, // 监听 contentBase 下文件变化 热更新
	},
	plugins: [
		new CleanWebpackPlugin(["dist"]),
		...generateHtml(resourceArray),
		/* new HtmlWebpackPlugin({
		  filename: "index.html",
		  // template: "./src/index/index.html",
		  template: path.resolve(__dirname, "src/views", "index/index.html"),
		  chunks: ["index", "commons", "list", "vendor"],
		  hash: true,
		  minify: {
		    removeAttributeQuotes: true,
		    removeComments: true,
		    collapseWhitespace: true,
		    removeScriptTypeAttributes: true,
		    removeStyleLinkTypeAttributes: true
		  }
		}),
		new HtmlWebpackPlugin({
		  filename: "about.html",
		  template: "./src/views/about/about.html",
		  hash: true,
		  chunks: ["about", "commons", "list", "vendor"],
		  minify: {
		    removeAttributeQuotes: true,
		    removeComments: true,
		    collapseWhitespace: true,
		    removeScriptTypeAttributes: true,
		    removeStyleLinkTypeAttributes: true
		  }
		}), */
		new webpack.HotModuleReplacementPlugin(),
		new webpack.NoEmitOnErrorsPlugin(),
		new copyWebpackPlugin(
			[{
				from: path.resolve(__dirname, "./src/static"),
				to: "./static",
				ignore: [".*"]
			}]),
		new webpack.NamedModulesPlugin(),
		new webpack.HotModuleReplacementPlugin(),
		new MiniCssExtractPlugin({
			filename: 'css/[name].[hash:8].css'
		})
	],
	// optimization: {
	//   runtimeChunk: {
	//     name: "bundle"
	//   },
	//   splitChunks: {
	//     chunks: "initial",
	//     minSize: 0,
	//     minChunks: 1,
	//     maxAsyncRequests: 5,
	//     maxInitialRequests: 5,
	//     name: true,
	//     cacheGroups: {
	//       //项目公共组件
	//       common: {
	//         chunks: "initial",
	//         name: "commons",
	//         minChunks: 2,
	//         maxInitialRequests: 15,
	//         minSize: 0
	//       },
	//       //第三方组件
	//       vendor: {
	//         test: /node_modules/,
	//         chunks: "initial",
	//         name: "vendor",
	//         priority: 10,
	//         enforce: true
	//       }
	//     }
	//   }
	// },
	module: {
		rules: [{
				test: /\.css$/,
				use: [
					MiniCssExtractPlugin.loader,
					{
						loader: 'css-loader',
						options: {
							importLoaders: 1,
							esModule: false
						}
					}
				]
			},
			{
				test: /\.(png|svg|jpg|gif)$/,
				use: [{
					loader: "file-loader",
					options: {
						name: "img/[name]-[hash:6].[ext]"
					}
				}]
			},
			{
				test: /\.(woff|woff2|eot|ttf|otf)$/,
				use: ["file-loader"]
			},
			{
				test: /\.vue$/,
				use: ['vue-loader']
			}
		]
	}
};

module.exports = config;
package.json
 "scripts": {
    "dev": "webpack serve",
	"build": "webpack"
  },
  "devDependencies": {
    "clean-webpack-plugin": "^0.1.19",
	"copy-webpack-plugin": "^5.0.0",
    "css-loader": "^1.0.0",
    "express": "^4.16.3",
    "file-loader": "^1.1.11",
    "glob": "^7.1.2",
    "html-webpack-plugin": "^3.2.0",
    "mini-css-extract-plugin": "^0.9.0",
    "postcss-loader": "^4.2.0",
    "style-loader": "^0.21.0",
    "webpack": "^4.46.0",
    "webpack-cli": "^4.3.0",
    "webpack-dev-middleware": "^3.1.3",
    "webpack-dev-server": "^3.1.4"
  }
}

