Ubuntu2022.04+cuda12.1+torch2.1
1 换源
国内的源,速度优势明显。常用的有清华、阿里等。
# 1)系统软件源
# vim /etc/apt/sources.list
# 默认注释了源码镜像以提高 apt update 速度,如有需要可自行取消注释
------------
deb https://mirrors.tuna.tsinghua.edu.cn/ubuntu/ jammy main restricted universe multiverse
# deb-src https://mirrors.tuna.tsinghua.edu.cn/ubuntu/ jammy main restricted universe multiverse
deb https://mirrors.tuna.tsinghua.edu.cn/ubuntu/ jammy-updates main restricted universe multiverse
# deb-src https://mirrors.tuna.tsinghua.edu.cn/ubuntu/ jammy-updates main restricted universe multiverse
deb https://mirrors.tuna.tsinghua.edu.cn/ubuntu/ jammy-backports main restricted universe multiverse
# deb-src https://mirrors.tuna.tsinghua.edu.cn/ubuntu/ jammy-backports main restricted universe multiverse

deb http://security.ubuntu.com/ubuntu/ jammy-security main restricted universe multiverse
# deb-src http://security.ubuntu.com/ubuntu/ jammy-security main restricted universe multiverse

# 预发布软件源,不建议启用
# deb https://mirrors.tuna.tsinghua.edu.cn/ubuntu/ jammy-proposed main restricted universe multiverse
# # deb-src https://mirrors.tuna.tsinghua.edu.cn/ubuntu/ jammy-proposed main restricted universe multiverse
-------------------
# 2) pip源
$ sudo apt update
$ sudo apt install python3-pip
$ pip install pip -U  # 升级最新的版本
$ pip --version
$ pip 22.0.2 from /usr/lib/python3/dist-packages/pip (python 3.10)

# 修改pip源为清华源
pip config set global.index-url https://pypi.tuna.tsinghua.edu.cn/simple
2 下载Anaconda
 wget https://repo.anaconda.com/archive/Anaconda3-2023.09-0-Linux-x86_64.sh
 bash Anaconda3-2023.09-0-Linux-x86_64.sh
 source  ~/.bashrc
 vim ~/.bashrc
 --------------------
# >>> conda initialize >>>
# !! Contents within this block are managed by 'conda init' !!
__conda_setup="$('/home/woodman/anaconda3/bin/conda' 'shell.bash' 'hook' 2> /dev/null)"
if [ $? -eq 0 ]; then
    eval "$__conda_setup"
else
    if [ -f "/home/woodman/anaconda3/etc/profile.d/conda.sh" ]; then
        . "/home/woodman/anaconda3/etc/profile.d/conda.sh"
    else
        export PATH="/home/woodman/anaconda3/bin:$PATH"
    fi
fi
unset __conda_setup
# <<< conda initialize <<<
conda deactivate
#export PATH=/home/woodman/anaconda3/bin:$PATH
# 下面这个是我对终端界面的设置,个人习惯,更改或注释
export PS1="\[\e]0;\u@ \w\a\]${debian_chroot:+($debian_chroot)}\[\033[01;32m\]\u\[\033[01;32m\]:[\W]$"
------------------------------
# Conda 也换源清华
$ conda config --set show_channel_urls yes #生成该~/.condarc之后再修改。
 ----
channels:
  - defaults
show_channel_urls: true
default_channels:
  - https://mirrors.tuna.tsinghua.edu.cn/anaconda/pkgs/main
  - https://mirrors.tuna.tsinghua.edu.cn/anaconda/pkgs/r
  - https://mirrors.tuna.tsinghua.edu.cn/anaconda/pkgs/msys2
custom_channels:
  conda-forge: https://mirrors.tuna.tsinghua.edu.cn/anaconda/cloud
  msys2: https://mirrors.tuna.tsinghua.edu.cn/anaconda/cloud
  bioconda: https://mirrors.tuna.tsinghua.edu.cn/anaconda/cloud
  menpo: https://mirrors.tuna.tsinghua.edu.cn/anaconda/cloud
  pytorch: https://mirrors.tuna.tsinghua.edu.cn/anaconda/cloud
  pytorch-lts: https://mirrors.tuna.tsinghua.edu.cn/anaconda/cloud
  simpleitk: https://mirrors.tuna.tsinghua.edu.cn/anaconda/cloud
----
conda clean -i 清除索引缓存
conda config --show-sources
3 Anaconda 环境的创建和删除
# 创建的时候就把常用的软件给安装了
$conda create -n woodman python=3.11 ipykernel psutil jupyter jupyterlab nodejs numpy matplotlib

$conda activate woodman
$python -m ipykernel install --user --name woodman --display-name "torch2.1"
$cat ~/.local/share/jupyter/kernels/woodman/kernel.json

$jupyter kernelspec list
$jupyter kernelspec remove kernel_name

# 删除
$ conda remove -n your_env_name(虚拟环境名称) --all
$ conda remove --name your_env_name  package_name  # 删除环境中的某个包

# 备份安装的软件
conda list -e > requirements.txt
conda install --yes --file requirements.txt

pip freeze > requirements.txt
pip install -r requirements.txt


#顺手再把torch给安装了。
#PyTorch中torch、torchvision、torchaudio、torchtext版本对应关系
#https://blog.csdn.net/shiwanghualuo/article/details/122860521

#CPU
$pip3 install torch torchvision torchaudio --index-url https://download.pytorch.org/whl/cpu

#GPU,cu121是nvidia-smi:CUDA Version: 12.0
$pip install torch==2.1.0+cu121 torchvision==0.16.0+cu121 torchaudio==2.1.0+cu121 -f https://download.pytorch.org/whl/torch_stable.html
4 Nvidia f u
显卡的驱动安装本来应该放在第2位,不过考虑到它这个复杂程度后,我给放在了最后。
先上各种链接,其实需要的网址和命令在后面已全部列出。
https://docs.nvidia.com/cuda/cuda-installation-guide-linux/index.html
https://developer.nvidia.com/cuda-downloads
https://developer.nvidia.com/CUDA-toolkit-archive

# CUDA,NVIDIA Driver 之间的版本对应关系表格
https://docs.nvidia.com/cuda/cuda-toolkit-release-notes/index.html
cuda下载全新版本,我一般习惯使用(1)的方式
(1)
# Driver Installer
# 查看显卡支持的驱动版本,一般下载“recommended”
# server 版本能更好的适应炼丹环境
$ubuntu-drivers devices
----
driver   : nvidia-driver-535-server-open - distro non-free recommended
--------
$ubuntu-drivers install nvidia-driver-535-server-open

# Base Installer
# “recommended”
# Installation Instructions:
wget https://developer.download.nvidia.com/compute/cuda/12.3.0/local_installers/cuda_12.3.0_545.23.06_linux.run
# 只选Cuda Toolkit XX.X, Driver前面安装了,其他也非必须。
sudo sh cuda_12.3.0_545.23.06_linux.run

# 安装完成后,/usr/local/ 路径下有 cuda 和 cuda-12.1,
# 注意 cuda 是软链接,指向 cuda-12.1

$cd /usr/local/
$file cuda
(2)
# Base Installer
# Installation Instructions:
wget https://developer.download.nvidia.com/compute/cuda/repos/ubuntu2204/x86_64/cuda-ubuntu2204.pin
sudo mv cuda-ubuntu2204.pin /etc/apt/preferences.d/cuda-repository-pin-600
wget https://developer.download.nvidia.com/compute/cuda/12.3.0/local_installers/cuda-repo-ubuntu2204-12-3-local_12.3.0-545.23.06-1_amd64.deb
sudo dpkg -i cuda-repo-ubuntu2204-12-3-local_12.3.0-545.23.06-1_amd64.deb
sudo cp /var/cuda-repo-ubuntu2204-12-3-local/cuda-*-keyring.gpg /usr/share/keyrings/
sudo apt-get update
sudo apt-get -y install cuda-toolkit-12-3
#Driver Installer
#NVIDIA Driver Instructions (choose one option)
#To install the legacy kernel module flavor:
sudo apt-get install -y cuda-drivers
#To install the open kernel module flavor:
sudo apt-get install -y nvidia-kernel-open-545
sudo apt-get install -y cuda-drivers-545
-------
# 若已安装,先删除再安装
sudo apt-get --purge remove nvidia-kernel-source-XXX
sudo apt-get install --verbose-versions nvidia-kernel-open-XXX
sudo apt-get install --verbose-versions cuda-drivers-XXX系统环境配置
$ sudo vim ~/.bashrc
-----------
# cuda-20231111
export CUDA_HOME=$CUDA_HOME:/usr/local/cuda
export PATH=/usr/local/cuda/bin:$PATH
export LD_LIBRARY_PATH=/usr/local/cuda/lib64:$LD_LIBRARY_PATH
----------------
$ source ~/.bashrc
$ nvcc -V
安装 cuDnn
科学上网会快一点,用QQ邮箱注册一个账号即可。
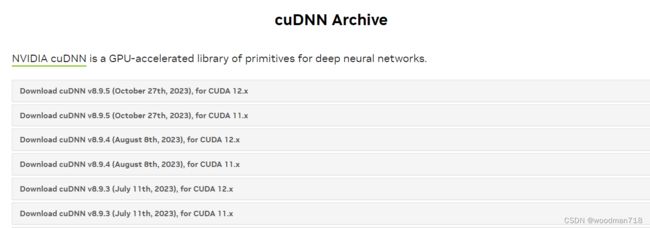

tar -xf cudnn-linux-x86_64-8.9.5.30_cuda12-archive.tar.xz
mv cudnn-linux-x86_64-8.9.5.30_cuda12-archive  cuda

sudo cp cuda/include/cudnn*.h /usr/local/cuda/include
sudo cp cuda/lib/libcudnn* /usr/local/cuda/lib64
sudo chmod a+r /usr/local/cuda/include/cudnn*.h /usr/local/cuda/lib64/libcudnn*

#验证安装是否成功

cat /usr/local/cuda/include/cudnn_version.h | grep CUDNN_MAJOR -A 2
参考:
3090显卡+CUDA11.0+torch1.7.1_torch1.7.1和cuda11.0怎么下载-CSDN博客
[NVIDIA] Ubuntu 20.04 安装 nvidia-460 + cuda-11.2_a100 460 cuda11.2-CSDN博客
U20.4 升级 pytorch 1.11_pip升级torch_woodman718的博客-CSDN博客