SpringBoot+Vue整合Token(自我学习记录)
SpringBoot+Vue整合Token
Token
- Token其实就是客户端访问资源的通关令牌,当客户端拥有这个Token,就可以无阻碍的访问资源,适用于前后分离的项目,这里使用Springboot+Vue来整合Token。
- Token的验证机制过程:
①当客户端输入账号和密码时,通过请求接口将账号密码传回服务器端
②服务器端对客户端传回来的账号密码进行验证,验证通过后,根据制定好的机制(这里使用JWT)生成一个独一无二的Token(具有时效性)
③将服务器端生成的Token返回客户端,让客户端存储Token
④之后当客户端每次向服务器端发起请求的时候,必须携带Token保存在请求header中
⑤服务器端根据客户端传递过来的Token解析验证用户信息,若Token不正确或已过期,则返回错误信息,若验证通过,则返回相应的请求结果 - 注意:客户端的每次成功登录都会产生一个Token,Token具有时效性,只要在时效内每个Token都可以使用,可以想办法得到一个用户只有一个Token的效果,每次登录产生一个Token后,之前的Token即使没有过期也不能使用。
SpringBoot
- 引入依赖(在pom.xml中)
这里使用JWT来生成Token
		<dependency>
			<groupId>com.auth0groupId>
			<artifactId>java-jwtartifactId>
			<version>3.9.0version>
		dependency>


		<dependency>
			<groupId>org.jsongroupId>
			<artifactId>jsonartifactId>
			<version>20190722version>
		dependency>
- 新增配置类(在config配置包中)
TokenInterceptor(Token拦截器)
@Component
public class TokenInterceptor implements HandlerInterceptor {
    @Override
    public boolean preHandle(HttpServletRequest request, HttpServletResponse response, Object handler) throws Exception {

        //跨域请求会首先发一个option请求,直接返回正常状态并通过拦截器
        if(request.getMethod().equals("OPTIONS")){
            response.setStatus(HttpServletResponse.SC_OK);
            return true;
        }
        response.setCharacterEncoding("utf-8");
        //这里的"token",前端header传回来的token参数名字是什么这里就叫什么
        String token = request.getHeader("token");
        if (token!=null){
            boolean result= TokenUtils.verify(token);
            if (result){
                System.out.println("通过拦截器");
                return true;
            }
        }
        response.setContentType("application/json; charset=utf-8");
        try {
            JSONObject json=new JSONObject();
            json.put("msg","token verify fail");
            json.put("code","500");
            response.getWriter().append(json.toString());
            System.out.println("认证失败,未通过拦截器");
        } catch (Exception e) {
            return false;
        }
        /**
         * 还可以在此处检验用户存不存在等操作
         */
        return false;
    }
}
WebConfiguration(配置拦截器)
@Configuration
public class WebConfiguration implements WebMvcConfigurer {

    @Autowired
    private TokenInterceptor tokenInterceptor;

    /**
     * 解决跨域请求
     * @param registry
     */
    @Override
    public void addCorsMappings(CorsRegistry registry) {
        registry.addMapping("/**")
                .allowedHeaders("*")
                .allowedMethods("*")
//                .allowedOrigins("*")
                .allowedOriginPatterns("*")
                .allowCredentials(true);
    }

    /**
     * 异步请求配置
     * @param configurer
     */
    @Override
    public void configureAsyncSupport(AsyncSupportConfigurer configurer) {
        configurer.setTaskExecutor(new ConcurrentTaskExecutor(Executors.newFixedThreadPool(3)));
        configurer.setDefaultTimeout(30000);
    }

    /**
     * 配置拦截器、拦截路径
     * 每次请求到拦截的路径,就会去执行拦截器中的方法
     * @param configurer
     */
    @Override
    public void addInterceptors(InterceptorRegistry registry) {
        List<String> excludePath = new ArrayList<>();
        //排除拦截,除了注册登录(此时还没token),其他都拦截
        excludePath.add("/register");     //注册
        excludePath.add("/login");  //登录
        excludePath.add("/login1");  //token登录
        excludePath.add("/selectUserList");  //用户列表
//        excludePath.add("/getBookList");     //书本
        excludePath.add("/doc.html");     //swagger
        excludePath.add("/swagger-ui.html");     //swagger
        excludePath.add("/swagger-resources/**");     //swagger
        excludePath.add("/v2/api-docs");     //swagger
        excludePath.add("/webjars/**");     //swagger
//        excludePath.add("/static/**");  //静态资源
//        excludePath.add("/assets/**");  //静态资源
        registry.addInterceptor(tokenInterceptor)
                .addPathPatterns("/**")
                .excludePathPatterns(excludePath);
        WebMvcConfigurer.super.addInterceptors(registry);

    }
}
- 新增工具类(在utils工具包中)
TokenUtils(Token工具类,用于生成和效验Token)
public class TokenUtils {

    //token到期时间  1000等于1秒
//    private static final long EXPIRE_TIME= 10*60*60*1000;
    private static final long EXPIRE_TIME= 30*1000;
    //密钥盐
    private static final String TOKEN_SECRET="litianpei**3nkjnj??";

    /**
     * 生成token
     * @param user
     * @return
     */
    public static String sign(User user){

        String token=null;
        try {
            Date expireAt=new Date(System.currentTimeMillis()+EXPIRE_TIME);
            token = JWT.create()
                    //发行人
                    .withIssuer("auth0")
                    //存放数据
                    .withClaim("account",user.getAccount())
                    .withClaim("password",user.getPassword())
                    //过期时间
                    .withExpiresAt(expireAt)
                    .sign(Algorithm.HMAC256(TOKEN_SECRET));
        } catch (IllegalArgumentException|JWTCreationException je) {

        }
        return token;
    }


    /**
     * token验证
     * @param token
     * @return
     */
    public static Boolean verify(String token){

        try {
            //创建token验证器
            JWTVerifier jwtVerifier= JWT.require(Algorithm.HMAC256(TOKEN_SECRET)).withIssuer("auth0").build();
            DecodedJWT decodedJWT=jwtVerifier.verify(token);
            System.out.println("认证通过:");
            System.out.println("account: " + decodedJWT.getClaim("account").asString());
            System.out.println("过期时间:      " + decodedJWT.getExpiresAt());
        } catch (IllegalArgumentException |JWTVerificationException e) {
            //抛出错误即为验证不通过
            return false;
        }
        return true;
    }

}
- 新增响应类和返回类
响应类 BaseResponse
@Data
public class BaseResponse<T> {
    private String code;
    private String message;
    private T data;

    /**
     *
     * 默认构造方法
     *
     * @param code
     *            状态码
     * @param message
     *            接口信息
     * @param data
     *            接口数据
     */
    public BaseResponse(String code, String message, T data) {
        super();
        this.code = code;
        this.message = message;
        this.data = data;
    }

    /**
     * 默认构造方法
     */
    public BaseResponse() {
        super();
    }

}
返回类
public class RespGenerator {
    /**
     * 接口调用成功时出参
     *
     * @param data
     *            接口返回数据
     * @return
     */
    @SuppressWarnings({ "unchecked", "rawtypes" })
    public static BaseResponse returnOK(Object data) {
        return new BaseResponse("200", "接口调用成功!", data);
    }

    /**
     * 调用失败
     *
     * @param code
     *            错误码
     * @param message
     *            错误信息
     * @return
     */
    public static BaseResponse<Object> returnError(String code, String message) {
        return new BaseResponse<Object>(code, message, null);
    }

    /**
     * 调用失败
     *
     * @param message
     *            错误信息
     * @return
     */
    public static BaseResponse<Object> returnError(String message) {
        return new BaseResponse<Object>("-1", message, null);
    }

}
- 改造登录接口
根据客户端传回来的账号密码进行验证,验证通过后使用Token工具类(TokenUtils)生成一个Token返回客户端。
    @GetMapping("/login1")
    @ApiOperation(value = "登录接口token", notes = "登录接口token")
    @ApiImplicitParams({
            @ApiImplicitParam(name = "account", value = "用户名", paramType = "String"),
            @ApiImplicitParam(name = "password", value = "密码", paramType = "String"),
            @ApiImplicitParam(name = "token", value = "token", paramType = "header")
    })
    public BaseResponse<HashMap> login(@RequestParam(value = "account") String account, @RequestParam(value = "password") String password){
        User user = userService.selectUserByAccountAndPassword(account,password);
        System.out.println("userList"+user);
        if(user!=null){  //根据账号密码查询用户信息,如果账号密码不匹配,查询出来的用户信息就为null,若用户信息不为null,则设置user值
            user.setAccount(account);
            user.setPassword(password);
            System.out.println(user.getAccount());
            System.out.println(user.getPassword());
        }
        String token= TokenUtils.sign(user);
        HashMap<String,Object> hs=new HashMap<>();
        hs.put("token",token);
        return RespGenerator.returnOK(hs);
    }
- 改造查询书本信息接口
 @GetMapping("/getBookList")
    @ApiOperation(value = "查询所有书本信息", notes = "查询所有书本信息接口")
    @ApiImplicitParams({
            @ApiImplicitParam(name = "token", value = "token", paramType = "header")
    })
    public List<Book> getBookList(HttpServletRequest request){
        String token = request.getHeader("token");
        List<Book> bookList = bookService.getBookList();
        System.out.println(token);
        return bookList;
    } return bookList;
    }
Vue
- 安装Router
使用以下命令安装Router(可以在命令后面加版本号,安装的版本最好对应Vue的版本,以免版本太高会出错)
npm install vue-router
不懂安装流程可以直接上官网Vue Router
- 安装Vuex
使用以下命令安装Vuex(可以在命令后面加版本号,安装的版本最好对应Vue的版本,以免版本太高会出错)
npm install vuex@next --save
不懂安装流程可以直接上官网Vuex
- 安装axios
使用以下命令安装axios(可以在命令后面加版本号,安装的版本最好对应Vue的版本,以免版本太高会出错)
npm install axios
不懂安装流程可以直接上官网axios
- 在src文件夹中新建文件夹和文件
src/router/index.js
src/store/index.js
src/utils/request.js

- 在main.js添加配置
import router from './router'
import store from './store/index.js'
import axios from 'axios'
Vue.prototype.$axios = axios
import instance from './utils/request.js' //axios 封装

new Vue({
  router,
  store,
  render: h => h(App),
}).$mount('#app')
- 配置router/index.js
添加路由前置守卫beforeEach拦截路由请求
router.beforeEach((to,from,next)=>{
	if(to.path==='/login'||to.path==='/register'||to.path==='/'){
		next()
	}else{
		let accountToken = localStorage.getItem('token');
		console.log("token为:"+accountToken);
		if(accountToken==null||accountToken==''){
			alert("没有权限,请重新登录");
			return next('/login');
		}else{
			next();
		}
	}
})
- 配置utils/request.js
添加请求拦截器,在请求头中加Token
axios.interceptors.request.use(
	config=>{
		if(localStorage.getItem('token')){
			config.headers.token=localStorage.getItem('token');
		}
		return config;
	},
	error=>{
		return Promise.reject(error);
	}
)
- 配置store/index.js
const store = new Vuex.Store({
	state:{
		account:localStorage.getItem('account')?localStorage.getItem('account'):null,
		token:localStorage.getItem('token')?localStorage.getItem('token'):null,
	},
	mutations:{
		setAccount(state,account){
			state.account=account
			localStorage.setItem('account',JSON.stringify(account))
		},
		setToken(state,token){
			localStorage.setItem('token',token)
			state.token=token
		},
		logout(state){
			localStorage.removeItem('token')
			state.token=null
			localStorage.removeItem('account')
			state.account=null
		}
	},
})
- 修改登录方法
login(account, password) {
				this.$axios.get('login', {
					params: {
						account: account,
						password: password
					}
				}).then(res => {
					if (res.data.code == 200) {
						this.$store.commit('setToken', res.data.data.token)
						this.$store.commit('setAccount', this.loginForm.account)
						this.$router.push({
							path: '/index'
						})
					} else {
						alert(res.data)
					}
				}).catch(err => {
					console.log(err)
				})
			}
- 修改获取图书列表信息的方法
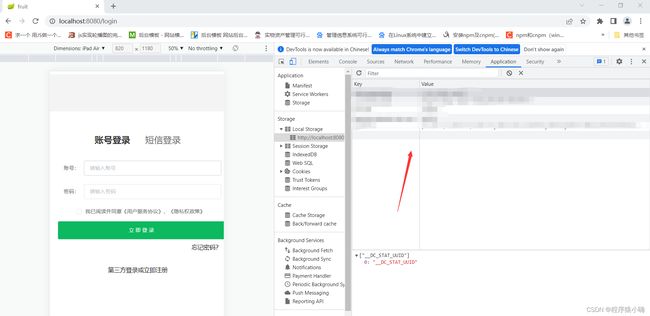
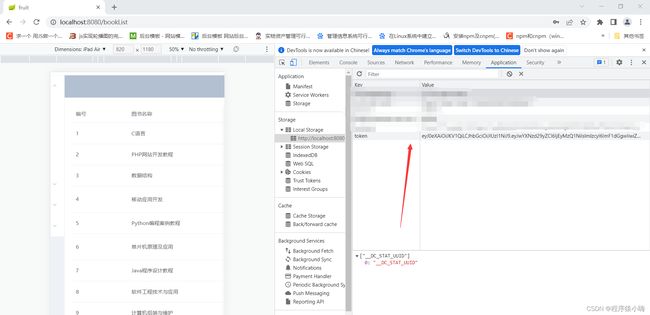
客户端登录后产生的Token会存储在本地,之后每次请求服务器端时都必须携带Token保存在header中,将Token传回服务器端进行验证,验证通过后才能返回相应的结果。
getBookList(){
	this.$axios.get('getBookList', {
					headers: {
						'Content-Type': "application/json;charser=UTF-8",
						'token': this.$store.state.token
					}, //将登录获得token返回给接口请求头,接口需要验证token才能实现
				})
				.then(res => {
					//用户登录后,会把token缓存在本地
					//中途用户如果刷新网页,会重新调用后台接口,根据登录后缓存的token值判断是否过期
					//当后台判断请求的token已过期,不会把数据成功返回,会返回code:500报错码(token没过期成功调用接口则不会返回code,只会返回数据)
					console.log(res)
					if (!('code' in res.data)) { //如果在后台返回的数据字段中没有code报错码的字段,则成功将数据赋值给前台
						this.books = res.data
					} else {
						console.log('清空本地缓存的token')
						localStorage.removeItem('token')
						//需要再自动刷新一次页面,使网页检查是否有本地缓存的token
						window.location.reload()
					}
				})
				.catch(err => {
					console.log(err);
				});
}


