Android Studio基础ListView之BaseAdapter
Android Studio基础ListView之BaseAdapter
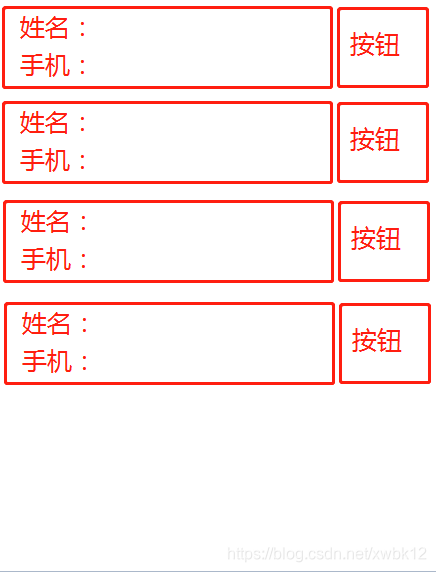
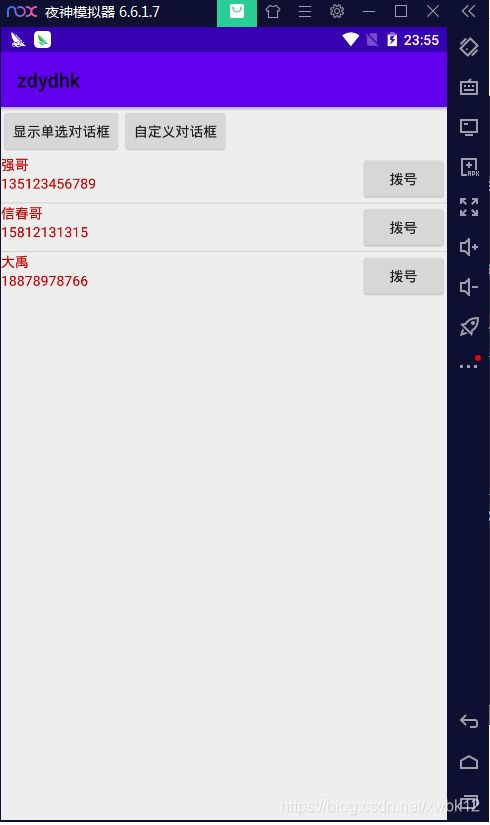
完成的样式的如下:
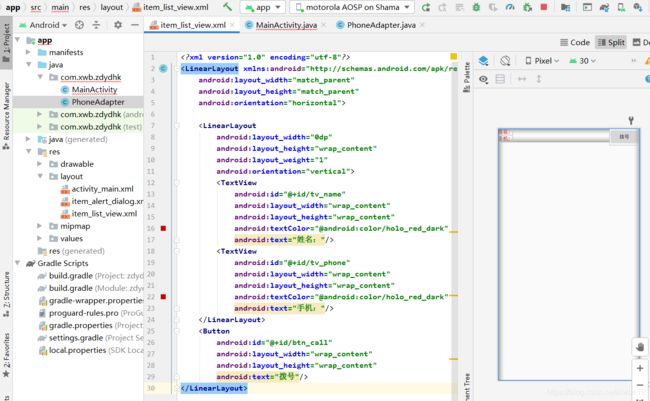
第一步:布局XML设置
第二步:设置数据源使用map方法
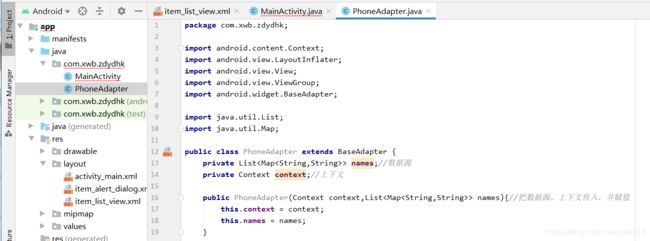
第三步:使用适配器baseAdapter,新建新的java文件PhoneAdapter.java
继承BaseAdapter的所有的方法,并重新所有的方法
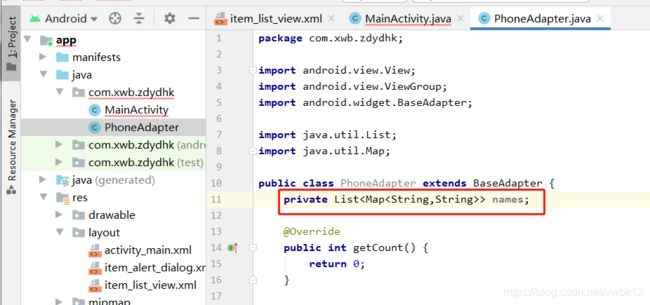
第一个是数据源:在重新的方法中告诉PhoneAdapter.java的数据源 List
在PhoneAdapter.java添加数据源
第二个是上下文:自己定义的
第三个设置构造方法,需要把数据源、上下文传入,并赋值
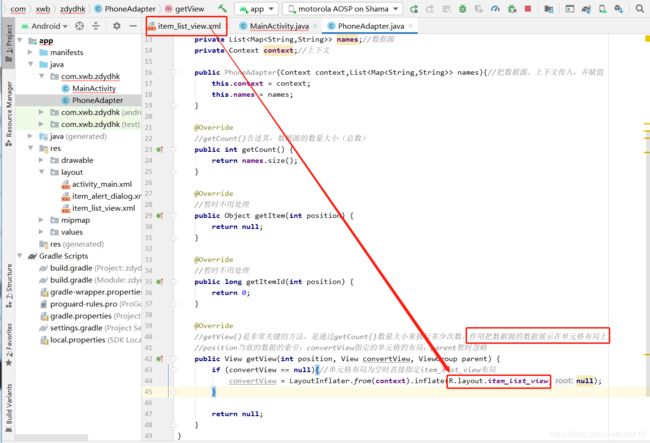
第四个:把数据源的数据展示在单元格布局上
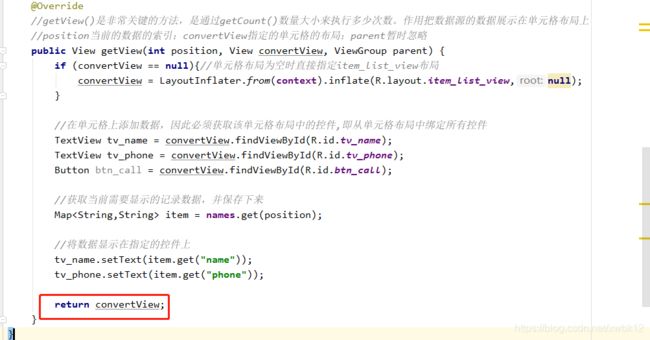
第五个:在单元格上添加数据,因此必须获取该单元格布局中的控件,即从单元格布局中绑定所有控件
第六个:获取当前需要显示的记录数据,并保存下来
第七个:将数据显示在指定的控件上,按钮无法显示的数据。
PhoneAdapter.java的所有源码信息:
package com.xwb.zdydhk;

import android.content.Context;
import android.view.LayoutInflater;
import android.view.View;
import android.view.ViewGroup;
import android.widget.BaseAdapter;
import android.widget.Button;
import android.widget.TextView;

import java.util.List;
import java.util.Map;

public class PhoneAdapter extends BaseAdapter {
    private List> names;//数据源
    private Context context;//上下文

    public PhoneAdapter(Context context,List> names){//把数据源、上下文传入,并赋值
        this.context = context;
        this.names = names;
    }

    @Override
    //getCount()告述其,数据源的数量大小(总数)
    public int getCount() {
        return names.size();
    }

    @Override
    //暂时不用处理
    public Object getItem(int position) {
        return null;
    }

    @Override
    //暂时不用处理
    public long getItemId(int position) {
        return 0;
    }

    @Override
    //getView()是非常关键的方法,是通过getCount()数量大小来执行多少次数。作用把数据源的数据展示在单元格布局上
    //position当前的数据的索引;convertView指定的单元格的布局;parent暂时忽略
    public View getView(int position, View convertView, ViewGroup parent) {
        if (convertView == null){//单元格布局为空时直接指定item_list_view布局
            convertView = LayoutInflater.from(context).inflate(R.layout.item_list_view,null);
        }

        //在单元格上添加数据,因此必须获取该单元格布局中的控件,即从单元格布局中绑定所有控件
        TextView tv_name = convertView.findViewById(R.id.tv_name);
        TextView tv_phone = convertView.findViewById(R.id.tv_phone);
        Button btn_call = convertView.findViewById(R.id.btn_call);

        //获取当前需要显示的记录数据,并保存下来
        Map item = names.get(position);

        //将数据显示在指定的控件上
        tv_name.setText(item.get("names"));
        tv_phone.setText(item.get("phone"));

        return convertView;
    }
}
第四步:调用自定义的Adapter,并将适配器指定给ListView的对象。
package com.xwb.zdydhk;

import androidx.appcompat.app.AlertDialog;
import androidx.appcompat.app.AppCompatActivity;

import android.content.DialogInterface;
import android.os.Bundle;
import android.view.View;
import android.widget.ArrayAdapter;
import android.widget.Button;
import android.widget.ListView;
import android.widget.SimpleAdapter;
import android.widget.Toast;

import java.util.ArrayList;
import java.util.HashMap;
import java.util.List;
import java.util.Map;

public class MainActivity extends AppCompatActivity implements View.OnClickListener {

    @Override
    protected void onCreate(Bundle savedInstanceState) {
        super.onCreate(savedInstanceState);
        setContentView(R.layout.activity_main);
        Button btn_single = findViewById(R.id.btn_single);
        btn_single.setOnClickListener(this);
        Button btn_alert_customer = findViewById(R.id.btn_alert_customer);
        btn_alert_customer.setOnClickListener(this);
        //获取ListView控件
        ListView lv_demo = findViewById(R.id.lv_demo);

        //定义数据源为数组
        //String[] names = {"强哥","信春哥","大禹"};
        //使用数据集合List
        List> names = new ArrayList<>();
        Map map = new HashMap();
        map.put("name","强哥");
        map.put("phone","135123456789");
        names.add(map);
        map = new HashMap();
        map.put("name","信春哥");
        map.put("phone","15812131315");
        names.add(map);
        map = new HashMap();
        map.put("name","大禹");
        map.put("phone","18878978766");
        names.add(map);

        //单元格布局可以自定义,也可以使用安卓自带的
        //安卓自带的,使用SimpleAdapter。
        // new SimpleAdapter第一个参数为类名.this。第二个参数为数据源必须是数据集合List。第三个参数为单元格布局,第四个参数from显示Key。
        // 第五个参数把该KEY放在单元格哪个控件上,这里是放在安卓自带布局的ID上。
//        SimpleAdapter simpleAdapter = new SimpleAdapter(MainActivity.this,names, android.R.layout.simple_list_item_1,new String[]{"name"},new int[]{android.R.id.text1});
//
//        //将适配器指定给ListView的对象
//        lv_demo.setAdapter(simpleAdapter);

        //----------------------------
        //创建数据源对象(数据适配器)ArrayAdapter(参数1(上下文),参数2(安卓默认自带布局),参数3(安卓默认自带布局的控件ID),参数4(数据源为数组))
        //android.R.xx官方提供资源
        //ArrayAdapter不支持多属性数据,SimpleAdapter支持多种复杂属性的数据
        //ArrayAdapter adapter = new ArrayAdapter(MainActivity.this,android.R.layout.simple_list_item_1,android.R.id.text1,names);

        //将适配器指定给ListView的对象
        //lv_demo.setAdapter(adapter);
        //------------------------------

        //创建自定义的Adapter对象,数据源对象(数据适配器)BaseAdapter(参数1(上下文),参数2(数据源数据))
        PhoneAdapter adapter = new PhoneAdapter(MainActivity.this,names);
        //将适配器指定给ListView的对象
        lv_demo.setAdapter(adapter);
    }
    @Override
    public void onClick(View v){
        AlertDialog.Builder builder = new AlertDialog.Builder(this);
        switch (v.getId()){
            case R.id.btn_single:
                builder.setTitle("单选对话框").setIcon(R.mipmap.ic_launcher).setSingleChoiceItems(new String[]{"中国", "德国", "日本"}, 0, new DialogInterface.OnClickListener() {
                    @Override
                    public void onClick(DialogInterface dialog, int which) {
                        Toast.makeText(MainActivity.this,"选中的"+which,Toast.LENGTH_SHORT).show();
                    }
                });
                break;
            case R.id.btn_alert_customer:
                //setView(R.layout.item_alert_dialog)为自定义的对话框
                builder.setTitle("自定义对话框").setIcon(R.mipmap.ic_launcher).setView(R.layout.item_alert_dialog);
                break;
            }
        AlertDialog ad = builder.create();
        ad.show();
    }
}
第五步:APP运行效果
