MAC+VSCode+Latex 配置Latex编写环境
title: MAC+VSCode+Latex 配置Latex编写环境
categories:
- VSCode
- MAC
- Latex
tags:
- VSCode
- MAC
- VSCode
MAC+VSCode+Latex 配置Latex编写环境
安装VsCode
自行去官网下载安装VsCode就可以,下载地址
安装Mac Tex
这里我建议还是安装Latex吧,如果你的电脑空间不够了可以尝试安装Basic Tex,关于Basic Tex的相关内容我在之前的博文中讲过了(ps:其实他还是存在一些问题的,因此建议安装的是MacTex)。下面是安装MacTex的话可以通过如下命令进行安装:
brew cask install basictex

export PATH=/usr/local/texlive/2019basic/bin/x86_64-darwin:$PATH
// 打开usr.local隐藏路径,可以打开finder然后shift+command+G


// 安装相关包,安装包使用 tlmgr install命令进行安装
sudo tlmgr update --self --repository http://mirrors.tuna.tsinghua.edu.cn/CTAN/systems/texlive/tlnet

sudo tlmgr install latexmk --repository http://mirrors.tuna.tsinghua.edu.cn/CTAN/systems/texlive/tlnet
配置VsCode
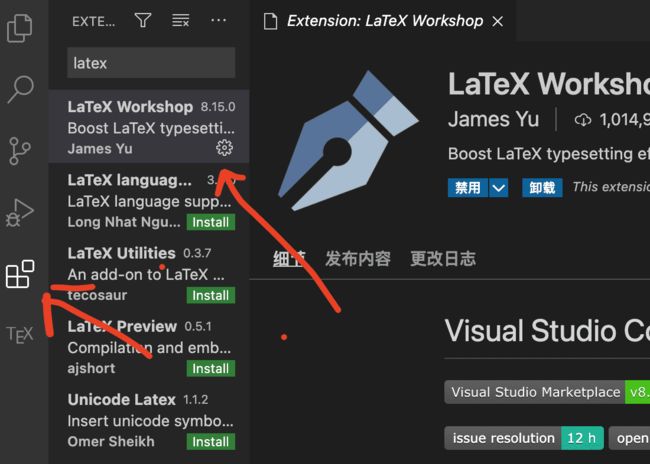
安装Latex WorkShop插件
在VsCode中安装latex workshop插件,如下图:
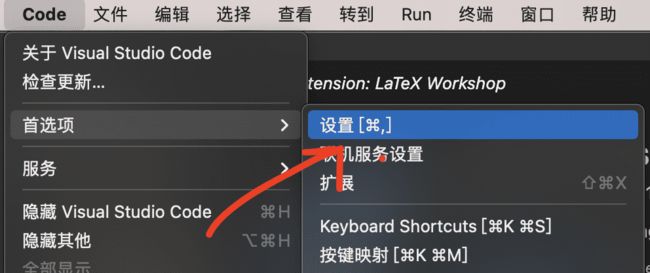
配置设置
进入用户设置:
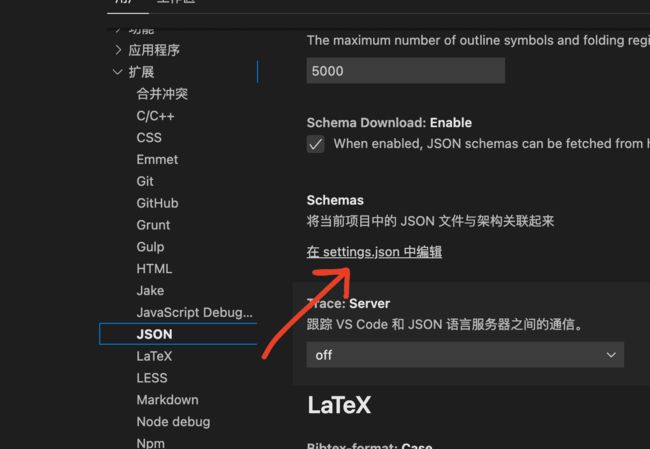
打开扩展->Json中的用户设置:
将下述内容添加到{}中即可:
  "latex-workshop.latex.recipes": [{
  "name": "xelatex",
  "tools": [
      "xelatex"
  ]
}, {
  "name": "latexmk",
  "tools": [
      "latexmk"
  ]
},

{
  "name": "pdflatex -> bibtex -> pdflatex*2",
  "tools": [
      "pdflatex",
      "bibtex",
      "pdflatex",
      "pdflatex"
  ]
}
],
"latex-workshop.latex.tools": [{
"name": "latexmk",
"command": "latexmk",
"args": [
  "-synctex=1",
  "-interaction=nonstopmode",
  "-file-line-error",
  "-pdf",
  "%DOC%"
]
}, {
"name": "xelatex",
"command": "xelatex",
"args": [
  "-synctex=1",
  "-interaction=nonstopmode",
  "-file-line-error",
  "%DOC%"
]
}, {
"name": "pdflatex",
"command": "pdflatex",
"args": [
  "-synctex=1",
  "-interaction=nonstopmode",
  "-file-line-error",
  "%DOC%"
]
}, {
"name": "bibtex",
"command": "bibtex",
"args": [
  "%DOCFILE%"
]
}],
"latex-workshop.view.pdf.viewer": "tab",
"latex-workshop.latex.clean.fileTypes": [
"*.aux",
"*.bbl",
"*.blg",
"*.idx",
"*.ind",
"*.lof",
"*.lot",
"*.out",
"*.toc",
"*.acn",
"*.acr",
"*.alg",
"*.glg",
"*.glo",
"*.gls",
"*.ist",
"*.fls",
"*.log",
"*.fdb_latexmk"
],
完成上述步骤之后重启VsCode即可。
至于中文的设置可以通过引用
\documentclass[UTF8]{ctexart}
来实现.


