RabbitMQ (三) --------- RabbitMQ 消息发送和接收
目录
- 一、RabbitMQ 的消息发送和接收机制
- 二、AMQP 中的消息路由
- 三、Exchange 类型
- 四、Java 发送和接收 Queue 的消息
-
- 1. 创建 Maven 工程 rabbitmq-send-java
- 2. 编写消息发送类
- 3. 创建 Maven 工程 rabbitmq-receive-java
- 4. 编写消息接受类
- 五、Java 绑定 Exchange 发送和接收消息
-
- 1. Exchange 的 direct 消息绑定
- 2. Exchange 的 fanout 消息绑定
- 3. Exchange 的 topic 消息绑定
- 4. 事务消息
- 5. 消息的发送者确认模式
- 6. 消息的消费者确认模式
一、RabbitMQ 的消息发送和接收机制
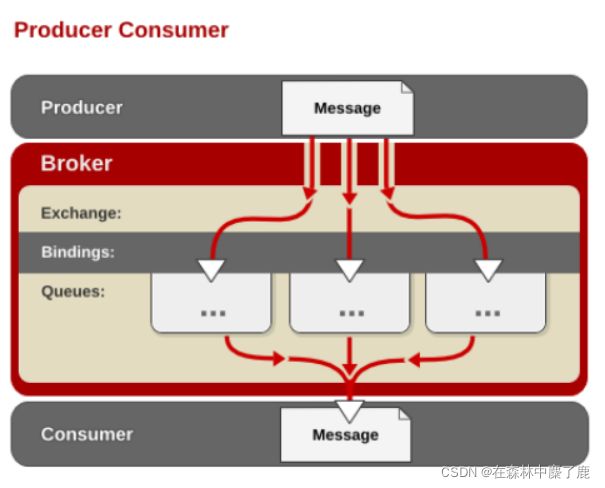
所有 MQ 产品从模型抽象上来说都是一样的过程:
消费者 (consumer) 订阅某个队列。生产者 (producer) 创建消息,然后发布到队列(queue)中,最后将消息发送到监听的消费者。

上面是 MQ 的基本抽象模型,但是不同的 MQ 产品有有者不同的机制,RabbitMQ 实际基于AMQP 协议的一个开源实现,因此RabbitMQ内部也是AMQP的基本概念。
RabbitMQ的内部接收如下:
- Message
消息,消息是不具体的,它由消息头和消息体组成。消息体是不透明的,而消息头则由一系列的可选属性组成,这些属性包括 routing-key (路由键)、priority (相对于其他消息的优先权)、delivery-mode (指出该消息可能需要持久性存储) 等。
- Publisher
消息的生产者,也是一个向交换器发布消息的客户端应用程序。
- Exchange
交换器,用来接收生产者发送的消息并将这些消息路由给服务器中的队列。
- Binding
绑定,用于消息队列和交换器之间的关联。一个绑定就是基于路由键将交换器和消息队列连接起来的路由规则,所以可以将交换器理解成一个由绑定构成的路由表。
- Queue
消息队列,用来保存消息直到发送给消费者。它是消息的容器,也是消息的终点。一个消息可投入一个或多个队列。消息一直在队列里面,等待消费者连接到这个队列将其取走。
- Connection
网络连接,比如一个 TCP 连接。
- Channel
信道,多路复用连接中的一条独立的双向数据流通道。信道是建立在真实的 TCP 连接内地虚拟连接,AMQP 命令都是通过信道发出去的,不管是发布消息、 订阅队列还是接收消息,这些动作都是通过信道完成。因为对于操作系统来说建立和销毁 TCP 都是非常昂贵的开销,所以引入了信道的概念,以复用一条 TCP 连接。
- Consumer
消息的消费者,表示一个从消息队列中取得消息的客户端应用程序。
- Virtual Host
虚拟主机,表示一批交换器、消息队列和相关对象。虚拟主机是共享相同的 身份认证和加密环境的独立服务器域。每个 vhost 本质上就是一个 mini 版的 RabbitMQ 服务器,拥有自己的队列、交换器、绑定和权限机制。vhost 是 AMQP 概念的基础,必须在连接时指定,RabbitMQ 默认的 vhost 是 / 。
- Broker
表示消息队列服务器实体。
二、AMQP 中的消息路由
AMQP 中消息的路由过程和 Java 开发者熟悉的 JMS 存在一些差别,AMQP 中增加了Exchange 和 Binding 的角色。生产者把消息发布到 Exchange 上,消息最终到达队列并被消费者接收,而 Binding 决定交换器的消息应该发送到那个队列。
三、Exchange 类型
Exchange 分发消息时根据类型的不同分发策略有区别,目前共四种类型:direct、fanout、topic、headers 。headers 匹配 AMQP 消息的 header 而不是路由键,此外 headers 交换器和 direct 交换器完全一致,但性能差很多,目前几乎用不到了,所以直接看另外三种类型。
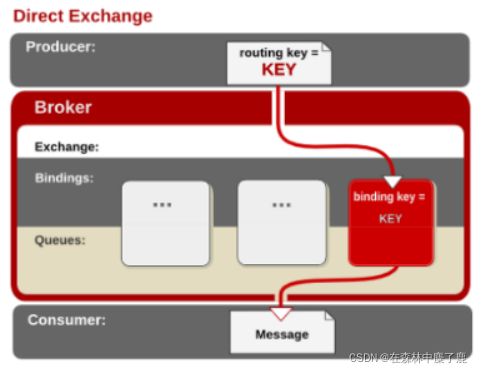
1、direct
消息中的路由键 (routing key) 如果和 Binding 中的 binding key 一致, 交换器就将消息发到对应的队列中。路由键与队列名完全匹配,如果一个队列绑定到交换机要求路由键为 dog,则只转发 routing key 标记为 dog 的消息,不会转发 dog.puppy,也不会转发 dog.guard 等等。它是完全匹配、单播的模式。
每个发到 fanout 类型交换器的消息都会分到所有绑定的队列上去。fanout 交换器不处理路由键,只是简单的将队列绑定到交换器上,每个发送到交换器的消息都会被转发到与该交换器绑定的所有队列上。很像子网广播,每台子网内的主机都获得了一份复制的消息。fanout 类型转发消息是最快的。
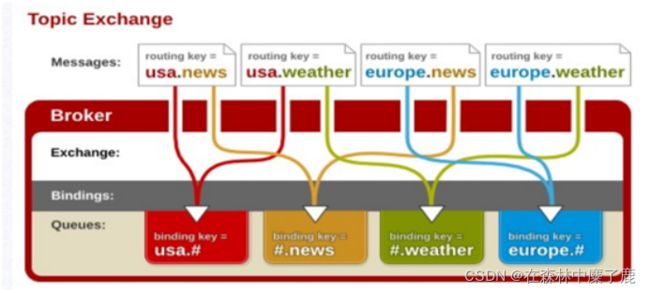
topic 交换器通过模式匹配分配消息的路由键属性,将路由键和某个模式进行匹配,此时队列需要绑定到一个模式上。它将路由键和绑定键的字符串切分成单词,这些单词之间用点隔开。它同样也会识别两个通配符:符号#和符号*。#匹配 0 个或多个单词,*匹配不多不少一个单词。
四、Java 发送和接收 Queue 的消息
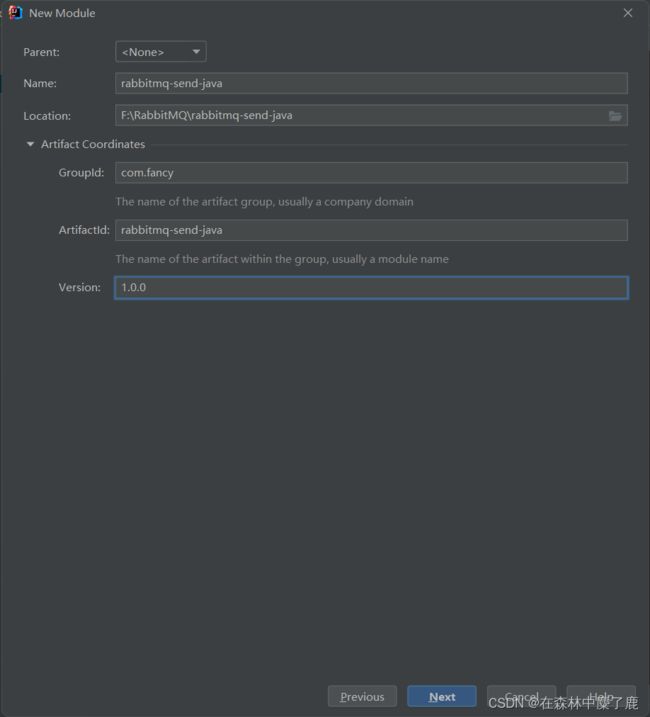
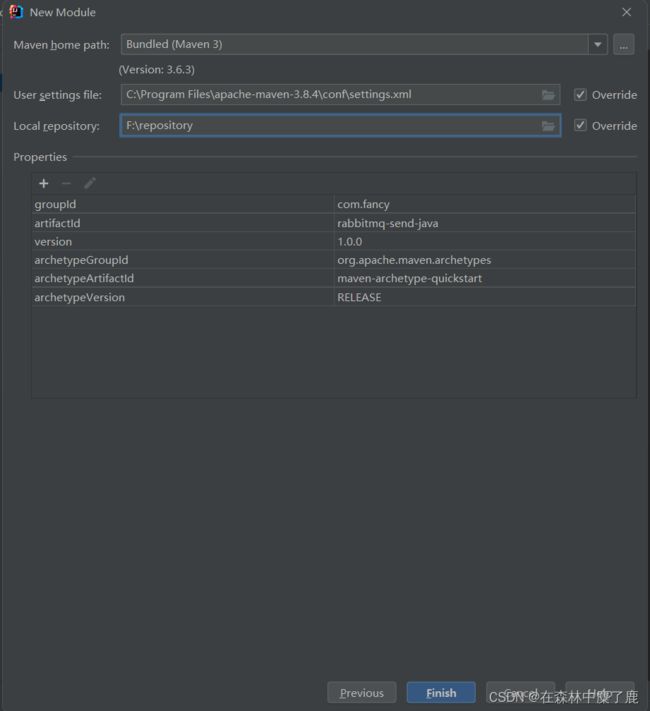
1. 创建 Maven 工程 rabbitmq-send-java
<dependency>
  <groupId>com.rabbitmqgroupId>
  <artifactId>amqp-clientartifactId>
  <version>5.1.1version>
dependency>
2. 编写消息发送类
项目中创建 com.fancy.rabbitmq.queue.send 类
package com.fancy.rabbitmq.queue;

import com.rabbitmq.client.Channel;
import com.rabbitmq.client.Connection;
import com.rabbitmq.client.ConnectionFactory;

import java.io.IOException;
import java.nio.charset.StandardCharsets;
import java.util.concurrent.TimeoutException;

public class Send {

    public static void main(String[] args) throws IOException, TimeoutException {

        // 创建链接工厂对象
        ConnectionFactory factory = new ConnectionFactory();
        // 设置 RabbitMQ 的主机 IP
        factory.setHost("192.168.160.133");
        // 设置 RabbitMQ 的端口号
        factory.setPort(5672);
        // 设置访问用户名
        factory.setUsername("root");
        // 设置访问密码
        factory.setPassword("aszhuo123");
        // 定义链接对象
        Connection connection = null;
        // 定义通道对象
        Channel channel = null;
        // 实例化链接对象
        connection = factory.newConnection();
        // 实例化通道对象
        channel = connection.createChannel();

        String message = "Hello World!";

        // 创建队列, 名字为 myQueue
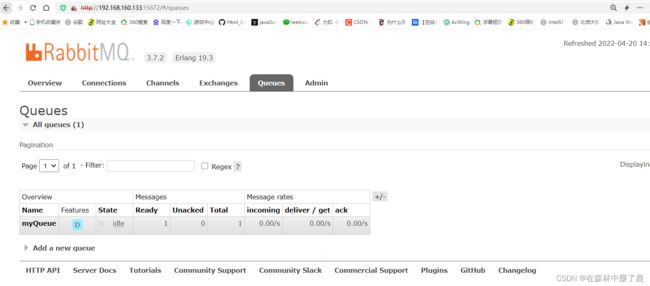
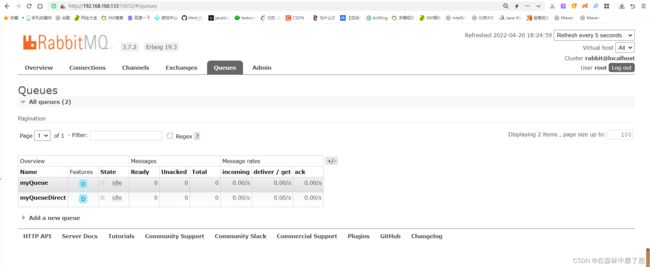
        channel.queueDeclare("myQueue", true, false, false, null);
        // 发送消息到指定队列
        channel.basicPublish("", "myQueue", null, message.getBytes(StandardCharsets.UTF_8));
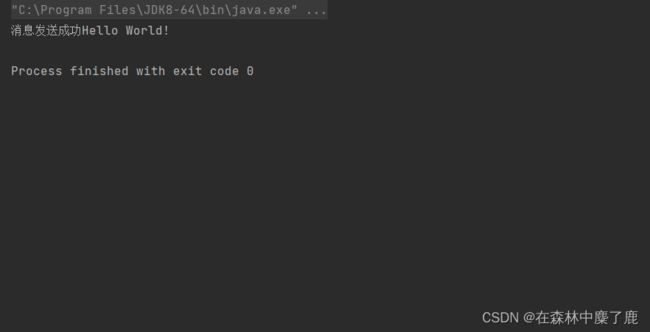
        System.out.println("消息发送成功" + message);
        channel.close();
        connection.close();
    }
}
3. 创建 Maven 工程 rabbitmq-receive-java
加入 Maven 依赖
<dependencies>
	<dependency>
	    <groupId>com.rabbitmqgroupId>
	    <artifactId>amqp-clientartifactId>
	    <version>5.1.1version>
	dependency>
dependencies>
4. 编写消息接受类
在项目中创建,com.fancy.rabbitmq.queue.Receive 类
package com.fancy.rabbitmq.queue;

import com.rabbitmq.client.*;

import java.io.IOException;
import java.util.concurrent.TimeoutException;

public class Receive {

    public static void main(String[] args) throws IOException, TimeoutException {
        ConnectionFactory factory = new ConnectionFactory();
        factory.setUsername("root");
        factory.setPassword("aszhuo123");
        factory.setHost("192.168.160.133");
        // 建立代理服务器到连接
        Connection conn = factory.newConnection();
        // 获得信道
        final Channel channel = conn.createChannel();
        // 声明队列
        channel.queueDeclare("myQueue", true, false, false, null);
        // 消费消息
        boolean autoAck = true;
        String consumerTag = "Hello World!";
        // 接受消息
        // 参数一 队列名称
        // 参数二 是否自动确认消息
        // 参数三 为消息标签, 用来区分不同的消费者, 这里暂时为""
        // 参数四 消费者回调方法用于编写处理消息的具体代码, 例如打印或消息写入数据库
        channel.basicConsume("myQueue", autoAck, consumerTag, new DefaultConsumer(channel){

            @Override
            public void handleDelivery(String consumerTag, Envelope envelope, AMQP.BasicProperties properties, byte[] body) throws IOException {
                String bodyStr = new String(body, "UTF-8");
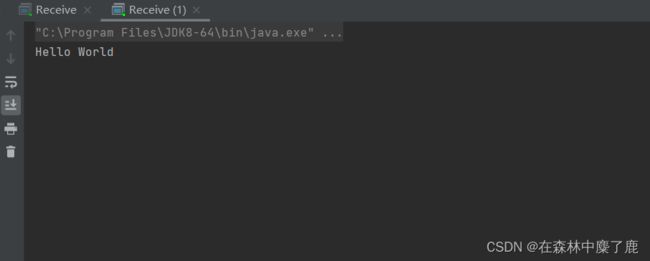
                System.out.println(bodyStr);
            }
        });
        channel.close();
        conn.close();
    }
}
注意:
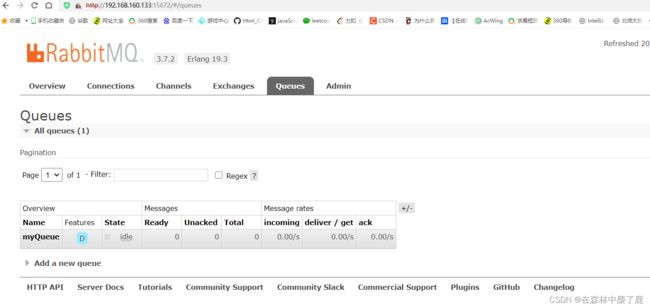
1、Queue 的消息只能被同一个消费者消费,如果没有消费监听队列那么消息会存放到队列中持久化保存,直到有消费者来消费这个消息,如果以有消费者监听队列则立即消费发送到队列中的消息。
2、Queue 的消息可以保证每个消息都一定能被消费。
五、Java 绑定 Exchange 发送和接收消息
AMQP 协议中的核心思想就是生产者和消费者的解耦,生产者从不直接将消息发送给队列。
生产者通常不知道是否一个消息会被发送到队列中,只是将消息发送到一个交换机。先由 Exchange 来接收,然后 Exchange 按照特定的策略转发到 Queue 进行存储。Exchange 就类似于一个交换机,将各个消息分发到相应的队列中。
在实际应用中我们只需要定义好 Exchange 的路由策略,而生产者则不需要关心消息会发送到哪个 Queue 或被哪些 Consumer 消费。在这种模式下生产者只面向 Exchange 发布消息,消费者只面向 Queue 消费消息,Exchange 定义了消息路由到 Queue 的规则,将各个层面的消息传递隔离开,使每一层只需要关心自己面向的下一层,降低了整体的耦合度。
1. Exchange 的 direct 消息绑定
编写 direct 消息发送类
rabbitmq-send-java 项目中创建,com.fancy.rabbitmq.direct.Send 类
package com.fancy.rabbitmq.direct;

import com.rabbitmq.client.Channel;
import com.rabbitmq.client.Connection;
import com.rabbitmq.client.ConnectionFactory;

import java.io.IOException;
import java.nio.charset.StandardCharsets;
import java.util.concurrent.TimeoutException;

public class Send {

    public static void main(String[] args) throws IOException, TimeoutException {
        // 创建链接工厂对象
        ConnectionFactory factory = new ConnectionFactory();
        // 设置 RabbitMQ 的主机 IP
        factory.setHost("192.168.160.133");
        // 设置 RabbitMQ 的端口号
        factory.setPort(5672);
        // 设置 访问用户名
        factory.setUsername("root");
        // 设置 访问密码
        factory.setPassword("aszhuo123");
        // 定义 链接对象
        Connection connection = null;
        // 定义 通道对象
        Channel channel = null;
        // 实例化连接对象
        connection = factory.newConnection();
        // 实例化通道对象
        channel = connection.createChannel();

        String message = "Hello World";
        String exchangeName = "myExchange";

        // 参数 1 为 队列名称
        // 参数 2 为 是否持久化
        // 参数 3 为 消费完成后是否自动删除队列
        // 参数 4 为 是否排外的
        channel.queueDeclare("myQueueDirect", true, false, false, null);

        // 指定 Exchange 的类型
        // 参数 1 为 交换机名称
        // 参数 2 为 交换机类型取值为 direct、queue、topic、 headers
        // 参数 3 为 是否为持久化消息 true 表示持久化消息 false 表示非持久化消息

        channel.exchangeDeclare(exchangeName, "direct", true);

        channel.queueBind("myQueueDirect", exchangeName, "directRoutingKey");

        // 发送消息到 RabbitMQ
        // 参数 1 我们自定义的交换机名称
        // 参数 2 自定义的 RoutingKey 值
        // 参数 3 设置消息的属性, 可以通过消息属性设置消息是否是持久化的
        // 参数 4 具体要发送的消息信息
        channel.basicPublish(exchangeName, "myRoutingKey", null, message.getBytes(StandardCharsets.UTF_8));
        System.out.println("消息发送成功: " +  message);

        // channel.close();
        // connection.close();

    }
}
注意 :使用 direct 消息模式时必须要指定 RoutingKey (路由键) ,将指定的消息绑定到指定的路由键上。
编写 direct 消息接收类
rabbitmq-Receive-java 项目中创建,com.fancy.rabbitmq.direct.Receive 类
package com.fancy.rabbitmq.direct;

import com.rabbitmq.client.*;

import java.io.IOException;
import java.util.concurrent.TimeoutException;

public class Receive {
    public static void main(String[] args) throws IOException, TimeoutException {
        //创建链接工厂对象
        ConnectionFactory factory=new ConnectionFactory();
        //设置RabbitMQ的主机IP
        factory.setHost("192.168.160.133");
        //设置RabbitMQ的端口号
        factory.setPort(5672);
        //设置访问用户名
        factory.setUsername("root");
        //设置访问密码
        factory.setPassword("aszhuo123");
        //定义链接对象
        Connection connection=null;
        //定义通道对象
        Channel channel=null;
        //实例化链接对象
        connection=factory.newConnection();
        //实例化通道对象
        channel=connection.createChannel();
        String message ="Hello World!";
        channel.queueDeclare("myQueueDirect", true, false, false, null);
        String exchangeName="myExchange";
        //指定Exchange的类型
        //参数1为 交换机名称
        //参数2为交换机类型取值为 direct、queue、topic、headers
        //参数3 为是否为持久化消息 true表示持久化消息 false表示非持久化
        channel.exchangeDeclare(exchangeName, "direct", true);

        channel.queueDeclare("myQueueDirect", true, false, false, null);

        channel.queueBind("myQueueDirect", exchangeName, "directRoutingKey");

        channel.basicConsume("myQueueDirect", true, "", new DefaultConsumer(channel) {
            @Override
            public void handleDelivery(String consumerTag,
                                       Envelope envelope,
                                       AMQP.BasicProperties properties,
                                       byte[] body) throws IOException {
                //获取消息数据
                String bodyStr = new String(body, "UTF-8");
                System.out.println(bodyStr);
            }
        });
//            channel.close();
//            conn.close();
    }
}
注意:
1、使用 Exchange 的 direct 模式时接收者的 RoutingKey 必须要与发送时的 RoutingKey 完全一致否则无法获取消息。
2、接收消息时队列名也必须要发送消息时的完全一致。
2. Exchange 的 fanout 消息绑定
编写 fanout 消息发送类
在 rabbitmq-send-java 项目中创建,com.fancy.rabbitmq.fanout.Send 类
package com.fancy.rabbitmq.fanout;

import com.rabbitmq.client.Channel;
import com.rabbitmq.client.Connection;
import com.rabbitmq.client.ConnectionFactory;

import java.io.IOException;
import java.nio.charset.StandardCharsets;
import java.util.concurrent.TimeoutException;

public class Send {
    public static void main(String[] args) throws IOException, TimeoutException {

        // 创建链接工厂对象
        ConnectionFactory factory = new ConnectionFactory();
        // 设置 RabbitMQ 的主机 IP
        factory.setHost("192.168.160.133");
        // 设置 RabbitMQ 的端口号
        factory.setPort(5672);
        // 设置 访问用户名
        factory.setUsername("root");
        // 设置 访问密码
        factory.setPassword("aszhuo123");
        // 定义 链接对象
        Connection connection = null;
        // 定义 通道对象
        Channel channel = null;
        // 实例化连接对象
        connection = factory.newConnection();
        // 实例化通道对象
        channel = connection.createChannel();

        String message = "Hello and World";
        String exchangeName = "fanoutExchange";

        // 由于使用 Fanout 类型的交换机, 因此消息的接收方可能会有多个, 因此不建议在消息发送时创建队列
        // 以及绑定交换机, 建议在消费者中创建队列并绑定交换机
        // 但是发送消息时,至少应该确保交换机存在
        // channel.queueDeclare("fanoutQueue", true, false, false, null);

        channel.exchangeDeclare(exchangeName, "fanout", true);

        // channel.queueBind("fanoutQueue", "fanoutExchange", "");
        // channel.queueBind("myQueueFanout", exchangeName, "directRoutingKey");
        // 发送消息到 RabbitMQ
        // 参数 1 我们自定义的交换机名称
        // 参数 2 自定义的 RoutingKey 值
        // 参数 3 设置消息的属性, 可以通过消息属性设置消息是否是持久化的
        // 参数 4 具体要发送的消息信息
        channel.basicPublish(exchangeName, "", null, message.getBytes(StandardCharsets.UTF_8));
        System.out.println("消息发送成功: " +  message);

        channel.close();
        connection.close();
    }
}
注意:
fanout 模式的消息需要将一个消息同时绑定到多个队列中因此这里不能创建并指定某个队列。
编写 fanout 消息接收类
package com.fancy.rabbitmq.fanout;

import com.rabbitmq.client.*;

import java.io.IOException;
import java.util.concurrent.TimeoutException;

public class Receive {
    public static void main(String[] args) throws IOException, TimeoutException {
        ConnectionFactory factory = new ConnectionFactory();
        factory.setUsername("root");
        factory.setPassword("aszhuo123");
        factory.setHost("192.168.160.133");
        //建立到代理服务器到连接
        Connection conn = factory.newConnection();
        //获得信道
        final Channel channel = conn.createChannel();
        //声明交换器
        String exchangeName = "fanoutExchange";
        channel.exchangeDeclare(exchangeName, "fanout", true);
        //声明队列
        String queueName = channel.queueDeclare().getQueue();;
        String routingKey = "";
        //绑定队列,通过键 hola 将队列和交换器绑定起来
        channel.queueBind(queueName, exchangeName, routingKey);
        //消费消息
        boolean autoAck = true;
        String consumerTag = "";
        //接收消息
        //参数1 队列名称
        //参数2 是否自动确认消息 true表示自动确认 false表示手动确认
        //参数3 为消息标签 用来区分不同的消费者这列暂时为""
        // 参数4 消费者回调方法用于编写处理消息的具体代码(例如打印或将消息写入数据库)
        channel.basicConsume(queueName,autoAck,consumerTag,new DefaultConsumer(channel) {
            @Override
            public void handleDelivery(String consumerTag,
                                       Envelope envelope,
                                       AMQP.BasicProperties properties,
                                       byte[] body) throws IOException {
                //获取消息数
                String bodyStr = new String(body, "UTF-8");
                System.out.println(bodyStr);
            }
        });
    }
}
注意:
1、使用 fanout 模式获取消息时不需要绑定特定的队列名称,只需使用channel.queueDeclare().getQueue(),获取一个随机的队列名称,然后绑定到指定的 Exchange 即可获取消息,即 fanout 模式只根据 exchange 获取消息。
2、这种模式中可以同时启动多个接收者只要都绑定到同一个 Exchang 即可让所有接收者同时接收同一个消息是一种广播的消息机制。
3. Exchange 的 topic 消息绑定
编写 topic 消息发送类
在 rabbitmq-send-java 项目中创建,com.fancy.rabbitmq.topic.Send 类
package com.fancy.rabbitmq.topic;

import com.rabbitmq.client.Channel;
import com.rabbitmq.client.Connection;
import com.rabbitmq.client.ConnectionFactory;

import java.io.IOException;
import java.util.concurrent.TimeoutException;

public class Send {

    public static void main(String[] args) throws IOException, TimeoutException {
        //创建链接工厂对象
        ConnectionFactory factory=new ConnectionFactory();
        factory.setHost("192.168.160.133");//设置RabbitMQ的主机IP
        factory.setPort(5672);//设置RabbitMQ的端口号
        factory.setUsername("root");//设置访问用户名
        factory.setPassword("aszhuo123");//设置访问密码
        Connection connection=null;//定义链接对象
        Channel channel=null;//定义通道对象
        connection=factory.newConnection();//实例化链接对象
        channel=connection.createChannel();//实例化通道对象
        String message ="Hello or World!";
        String exchangeName="myExchangeTopic";
        //指定Exchange的类型
        //参数1为 交换机名称
        //参数2为交换机类型取值为 direct、queue、topic、headers
        //参数3 为是否为持久化消息 true表示持久化消息 false表示非持久化
        channel.exchangeDeclare(exchangeName, "topic", true);
        //发送消息到RabbitMQ
        //参数1 我们自定义的交换机名称
        //参数2 自定义的RoutingKey值
        //参数3 设置消息的属性,可以通过消息属性设置消息是否是持久化的
        //参数4 具体要发送的消息信息
        channel.basicPublish(exchangeName,"test.myRoutingKey",null,message.getBytes("UTF-8"));
        System.out.println("消息发送成功: "+message);
        channel.close();
        connection.close();
    }
注意:
在 topic 模式中必须要指定 Routingkey ,并且可以同时指定多层的 RoutingKey,每个层次之间使用点分隔即可,例如 test.myRoutingKey
编写 topic 的消息接收类
package com.fancy.rabbitmq.topic;

import com.rabbitmq.client.*;

import java.io.IOException;
import java.util.concurrent.TimeoutException;

public class Receive {
    public static void main(String[] args) throws IOException, TimeoutException {
        ConnectionFactory factory = new ConnectionFactory();
        factory.setUsername("root");
        factory.setPassword("aszhuo123");
        factory.setHost("192.168.160.133");
        //建立到代理服务器到连接
        Connection conn = factory.newConnection();
        //获得信道
        final Channel channel = conn.createChannel();
        //声明交换器
        String exchangeName = "myExchangeTopic";
        channel.exchangeDeclare(exchangeName, "topic", true);
        //声明队列
        String queueName = channel.queueDeclare().getQueue();
        String routingKey = "test.#";
        //绑定队列,通过键 将队列和交换器绑定起来
        channel.queueBind(queueName, exchangeName, routingKey);
        //消费消息
        boolean autoAck = true;
        String consumerTag = "";
        //接收消息
        //参数1 队列名称
        //参数2 是否自动确认消息 true表示自动确认 false表示手动确认
        //参数3 为消息标签 用来区分不同的消费者这列暂时为""
        // 参数4 消费者回调方法用于编写处理消息的具体代码(例如打印或将消息写入数据库)
        channel.basicConsume(queueName, autoAck, consumerTag, new DefaultConsumer(channel) {
            @Override
            public void handleDelivery(String consumerTag,
                                       Envelope envelope,
                                       AMQP.BasicProperties properties,
                                       byte[] body) throws IOException {
                // 获取消息数据
                String bodyStr = new String(body, "UTF-8");
                System.out.println("test.#----"+bodyStr);
            }
        });
    }
}
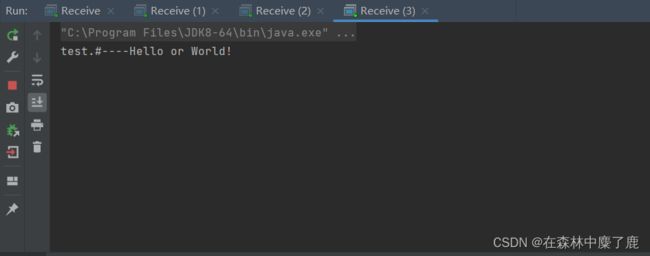
topic 模式的消息接收时必须要指定 RoutingKey 并且可以使用 # 和 *来做统配符号,#表示通配任意一个单词 *表示通配任意多个单词,例如消费者的 RoutingKey 为 test.# 或#.myRoutingKey都可以获取 RoutingKey为test.myRoutingKey 发送者发送的消息
4. 事务消息
事务消息与数据库的事务类似,只是 MQ 中的消息是要保证消息是否会全部发送成功,防止丢失消息的一种策略。
RabbitMQ 有两种方式来解决这个问题:
- 通过AMQP提供的事务机制实现。
- 使用发送者确认模式实现。
事务使用
事务的实现主要是对信道 (Channel) 的设置,主要的方法有三个:
- channel.txSelect() 声明启动事务模式。
- channel.txCommint() 提交事务。
- channel.txRollback() 回滚事务。
编写消息发送类
rabbitmq-send-java 项目中创建,com.fancy.rabbitmq.transaction.Send 类
package com.fancy.rabbitmq.transaction;

import com.rabbitmq.client.Channel;
import com.rabbitmq.client.Connection;
import com.rabbitmq.client.ConnectionFactory;

import java.io.IOException;
import java.nio.charset.StandardCharsets;
import java.util.concurrent.TimeoutException;

public class Send {
    public static void main(String[] args) throws IOException, TimeoutException {
        ConnectionFactory factory = new ConnectionFactory();
        factory.setHost("192.168.160.133");
        factory.setPort(5672);
        factory.setUsername("root");
        factory.setPassword("aszhuo123");
        Connection connection = null;
        Channel channel = null;
        connection = factory.newConnection();
        channel = connection.createChannel();

        String message = "Hello hhh World";

        String exchangeName = "transactionExchange";
        channel.exchangeDeclare(exchangeName, "direct", true);

        String routingKey = "transactionRoutingKey";

        // 声明事务
        channel.txSelect();

        channel.basicPublish(exchangeName, routingKey, null, message.getBytes(StandardCharsets.UTF_8));

        // 提交事务
        channel.txCommit();

        System.out.println("消息发送成功 : " + message);
        channel.close();
        connection.close();
    }
}
编写消息接收类
package com.fancy.rabbitmq.transaction;

import com.rabbitmq.client.*;

import java.io.IOException;
import java.util.concurrent.TimeoutException;

public class Receive {

    public static void main(String[] args) throws IOException, TimeoutException {

        ConnectionFactory factory = new ConnectionFactory();
        factory.setUsername("root");
        factory.setPassword("aszhuo123");
        factory.setHost("192.168.160.133");

        Connection connection = factory.newConnection();
        final Channel  channel  = connection.createChannel();

        String exchangeName = "transactionExchange";
        channel.exchangeDeclare(exchangeName, "direct", true);

        String queueName = channel.queueDeclare().getQueue();
        String routingKey = "transactionRoutingKey";

        //绑定队列,通过键 hola 将队列和交换器绑定起来
        channel.queueBind(queueName, exchangeName, routingKey);

        boolean autoAck = true;
        String consumerTag = "";

        channel.basicConsume(queueName, autoAck, consumerTag, new DefaultConsumer(channel){

            @Override
            public void handleDelivery(String consumerTag, Envelope envelope, AMQP.BasicProperties properties, byte[] body) throws IOException {
                String bodyStr = new String(body, "UTF-8");
                System.out.println(bodyStr);
            }
        });

//      channel.close();
//      connection.close();
    }
}
5. 消息的发送者确认模式
Confirm 发送方确认模式使用和事务类似,也是通过设置 Channel 进行发送方确认的,最终达到确保所有的消息全部发送成功。
Confirm 的三种实现方式:
方式一 :channel.waitForConfirms() 普通发送方确认模式
package com.fancy.rabbitmq.ack;

import com.rabbitmq.client.Channel;
import com.rabbitmq.client.Connection;
import com.rabbitmq.client.ConnectionFactory;

import java.io.IOException;
import java.nio.charset.StandardCharsets;
import java.util.concurrent.TimeoutException;

public class Send {

    public static void main(String[] args) throws IOException, TimeoutException, InterruptedException {
        ConnectionFactory factory = new ConnectionFactory();
        factory.setHost("192.168.160.133");
        factory.setPort(5672);
        factory.setUsername("root");
        factory.setPassword("aszhuo123");

        Connection connection = null;
        Channel channel = null;
        connection = factory.newConnection();
        channel = connection.createChannel();

        String message = "Hello Ack World";

        String queue = "ackQueue";
        channel.queueDeclare(queue, true, false, false, null);

        // 开启发送方确认模式
        channel.confirmSelect();

        long time = System.currentTimeMillis();

        for (int i = 0; i < 10000;  i ++ ) {
            message = "Hello Word" + i;
            channel.basicPublish("", "ackQueue", null, message.getBytes(StandardCharsets.UTF_8));
        }
        channel.waitForConfirms();
        System.out.println(System.currentTimeMillis() - time);
        System.out.println("消息发送成功: " + message );

        channel.close();
        connection.close();
    }
}
方式二 :channel.waitForConfirmsOrDie() 批量确认模式
package com.fancy.rabbitmq.ack;

import com.rabbitmq.client.Channel;
import com.rabbitmq.client.Connection;
import com.rabbitmq.client.ConnectionFactory;

import java.io.IOException;
import java.nio.charset.StandardCharsets;
import java.util.concurrent.TimeoutException;

public class Send {

    public static void main(String[] args) throws IOException, TimeoutException, InterruptedException {
        ConnectionFactory factory = new ConnectionFactory();
        factory.setHost("192.168.160.133");
        factory.setPort(5672);
        factory.setUsername("root");
        factory.setPassword("aszhuo123");

        Connection connection = null;
        Channel channel = null;
        connection = factory.newConnection();
        channel = connection.createChannel();

        String message = "Hello Ack World";

        String queue = "ackQueue";
        channel.queueDeclare(queue, true, false, false, null);

        // 开启发送方确认模式
        channel.confirmSelect();

        long time = System.currentTimeMillis();

        for (int i = 0; i < 10000;  i ++ ) {
            message = "Hello Word" + i;
            channel.basicPublish("", "ackQueue", null, message.getBytes(StandardCharsets.UTF_8));
        }
        channel.waitForConfirmsOrDie();
        System.out.println(System.currentTimeMillis() - time);
        System.out.println("消息发送成功: " + message );

        channel.close();
        connection.close();
    }
}
方式三 : channel.addConfirmListener() 异步监听发送方确认模式
package com.fancy.rabbitmq.ack;

import com.rabbitmq.client.Channel;
import com.rabbitmq.client.ConfirmListener;
import com.rabbitmq.client.Connection;
import com.rabbitmq.client.ConnectionFactory;

import java.io.IOException;
import java.nio.charset.StandardCharsets;
import java.util.concurrent.TimeoutException;

public class Send {

    public static void main(String[] args) throws IOException, TimeoutException, InterruptedException {
        ConnectionFactory factory = new ConnectionFactory();
        factory.setHost("192.168.160.133");
        factory.setPort(5672);
        factory.setUsername("root");
        factory.setPassword("aszhuo123");

        Connection connection = null;
        Channel channel = null;
        connection = factory.newConnection();
        channel = connection.createChannel();

        String message = "Hello Ack World";

        String queue = "ackQueue";
        channel.queueDeclare(queue, true, false, false, null);

        // 开启发送方确认模式
        channel.confirmSelect();

        long time = System.currentTimeMillis();

        for (int i = 0; i < 10000;  i ++ ) {
            message = "Hello Word" + i;
            channel.basicPublish("", "ackQueue", null, message.getBytes(StandardCharsets.UTF_8));
        }
        channel.addConfirmListener(new ConfirmListener() {
            @Override
            public void handleAck(long l, boolean b) throws IOException {
                System.out.println("未确认信息, 标识: " + l  + "----" + b);
            }

            @Override
            public void handleNack(long l, boolean b) throws IOException {
                System.out.println("已确认消息, 标识: " + l + "---多个消息: " + b );
            }
        });
        System.out.println(System.currentTimeMillis() - time);
        System.out.println("消息发送成功: " + message );

        channel.close();
        connection.close();
    }
}
6. 消息的消费者确认模式
为了保证消息从队列可靠地到达消费者,RabbitMQ 提供消息确认机制 ------------- message acknowledgment 。消费者在声明队列时,可以指定 noAck 参数,当 noAck = false 时,RabbitMQ 会等待消费者显式发回 ack 信号后才从内存 (和磁盘,如果是持久化消息的话) 中移去消息。否则,RabbitMQ 会在队列中消息被消费后立即删除它。
在 Consumer 中 Confirm 模式中分为手动确认和自动确认。
手动确认主要并使用以下方法:
basicAck()
用于肯定确认,multiple 参数用于多个消息确认。
basicRecover()
是路由不成功的消息可以使用 recovery 重新发送到队列中。
basicReject() :
是接收端告诉服务器这个消息我拒绝接收,不处理。可以设置是否放回到队列中还是丢掉,而且只能一次拒绝一个消息,官网中有明确说明不能批量拒绝消息,为解决批量拒绝消息才有了
basicNack。
basicNack() :
可以一次拒绝 N 条消息,客户端可以设置 basicNack 方法的 multiple 参数为 true。
在 rabbitmq-send-java 项目中创建,com.fancy.rabbitmq.ack.Send 类
package com.fancy.rabbitmq.ack;

import com.rabbitmq.client.Channel;
import com.rabbitmq.client.ConfirmListener;
import com.rabbitmq.client.Connection;
import com.rabbitmq.client.ConnectionFactory;

import java.io.IOException;
import java.nio.charset.StandardCharsets;
import java.util.concurrent.TimeoutException;

public class Send {

    public static void main(String[] args) throws IOException, TimeoutException, InterruptedException {

        ConnectionFactory factory = new ConnectionFactory();
        factory.setHost("192.168.160.133");
        factory.setPort(5672);
        factory.setUsername("root");
        factory.setPassword("aszhuo123");

        Connection connection = null;
        Channel channel = null;
        connection = factory.newConnection();
        channel = connection.createChannel();

        String message = "Hello ack World";
        String exchangeName = "myExchange";
        channel.queueDeclare("myQueueDirect", true, false, false, null);

        channel.exchangeDeclare(exchangeName, "direct", true);

        channel.basicPublish(exchangeName, "myRoutingKeyDirect", null, message.getBytes(StandardCharsets.UTF_8));

        System.out.println("消息发送成功: " + message);

        // channel.close();
        // connection.close();
    }
}
rabbitmq-receive-java 项目中创建,com.fancy.rabbitmq.ack.Receive 类
package com.fancy.rabbitmq.ack;

import com.rabbitmq.client.*;
import com.sun.scenario.effect.impl.sw.sse.SSEBlend_SRC_OUTPeer;

import java.io.IOException;
import java.util.concurrent.TimeoutException;

public class Receive {

    public static void main(String[] args) throws IOException, TimeoutException {
        ConnectionFactory factory = new ConnectionFactory();
        factory.setUsername("root");
        factory.setPassword("aszhuo123");
        factory.setHost("192.168.160.133");

        Connection connection = factory.newConnection();
        final Channel channel = connection.createChannel();

        String exchangeName = "myExchange";
        String queueName = "myQueueDirect";

        channel.queueDeclare(queueName, true, false, false, null);
        channel.exchangeDeclare(exchangeName, "direct", true);

        String routingKey = "myRoutingKeyDirect";
        channel.queueBind(queueName, exchangeName, routingKey);

        boolean autoAck = false;
        String consumerTag = "";

        channel.txSelect();
        channel.basicConsume(queueName, autoAck, consumerTag, new DefaultConsumer(channel) {

            @Override
            public void handleDelivery(String consumerTag, Envelope envelope, AMQP.BasicProperties properties, byte[] body) throws IOException {

                // 获取消息数据
                String bodyStr = new String(body, "UTF-8");
                System.out.println(bodyStr);
                // 获取当前消息的序列号
                long deliveryTag = envelope.getDeliveryTag();
                // 确认消息
                // 参数 1 用于 确定确认那条消息
                // 参数 2 false 表示确认这条消息, true 表示确认小于这个值的所有信息
                channel.basicAck(deliveryTag, false);
            }
        });

        // 开始提交事务
        channel.txCommit();
        // 回滚事务
        // channel.txRollback();

    }
}
注意:
如果开启了事务手动提交以后再开始事务,如果事务执行了回滚操作那么即使手动确认了消息那么消息也不会从队列中移除,除非使用事务执行提交以后才会移除。

