Web高并发解决方案
- # Director配置
- ifconfig eth0 172.16.100.10/16
- ifconfig eth0:0 172.16.100.1 broadcast 172.16.100.1 netmask 255.255.255.255 up
- route add -host 172.16.100.1 dev eth0:0
- echo 1 > /proc/sys/net/ipv4/ip_forward
- # varnish服务器修改内核参数来禁止响应对VIP的ARP广播请求
- echo 1 > /proc/sys/net/ipv4/conf/lo/arp_ignore
- echo 1 > /proc/sys/net/ipv4/conf/all/arp_ignore
- echo 2 > /proc/sys/net/ipv4/conf/lo/arp_announce
- echo 2 > /proc/sys/net/ipv4/conf/all/arp_announce
- # 配置VIP
- ifconfig lo:0 172.16.100.1 broadcast 172.16.100.1 netmask 255.255.255.255 up
- # 凡是到172.16.100.1主机的一律使用lo:0响应
- route add -host 172.16.100.1 dev lo:0
- # 在Director上配置Ipvs,笔者虚拟机有限,只演示单台配置
- ipvsadm -A -t 172.16.100.1:80 -s wlc
- ipvsadm -a -t 172.16.100.1:80 -r 172.16.100.11 -g -w 2
- ipvsadm -Ln
- vim /etc/hosts
- 10.10.10.1 node1.heartbeat.com node1
- 10.10.10.2 node2.heartbeat.com node2
- #用于实现两台director节点间域名解析,此操作node1、node2相同
- vim /etc/sysconfig/network
- #设置主机名
- hostname node1.heartbeat.com
- #修改主机名使之立即生效,node2也同样修改为node2.heartbeat.com
- ssh-keygen -t rsa
- #生成密钥
- ssh-copy-id -i .ssh/id_rsa.pub root@node2.heartbeat.com
- #将公钥复制给node2
- ssh node2 -- ifconfig
- #执行命令测试,此时应该显示node2的ip信息
- yum localinstall -y --nogpgcheck ./*
- #安装此目录中的所有rpm包
- cd /usr/share/doc/heartbeat-2.1.4
- cp authkeys /etc/ha.d/
- cp haresources /etc/ha.d/
- cp ha.cf /etc/ha.d/
- #拷贝heartbeat所需配置文件到指定目录下
- vim /etc/ha.d/ha.cf
- bcast eth1
- #定义心跳信息从那一块网卡传输
- node node1.heartbeat.com
- node node2.heartbeat.com
- #添加这两行,用于指明心跳信号传输范围
- vim /etc/ha.d/authkeys
- auth 2
- 2 sha1 [键入随机数]
- chmod 400 authkeys
- #保存退出并修改权限400
- vim /etc/ha.d/haresource
- node1.heartbeat.com 172.16.100.1/24/eth0/172.16.0.255 ldirectord::ldirectord.cf httpd
- #末行添加主节点域名,vip资源,广播地址,ldirectord资源,以及用户提供显示错误页面的httpd资源
- /usr/lib/heartbeat/ha_propagate
- #脚本用来同步ha.cf和authkeys文件到node2
- scp haresources node2:/etc/ha.d/
- #复制haresource到nod2
- cp /usr/share/doc/heartbeat-ldirectord-2.1.4/ldirectord.cf /etc/ha.d/ldirectord.cf
- #复制ldirector的配置文件
- checktimeout=5
- #当DR收不到realserver的回应,设定几秒后判定realserver当机或挂掉了,预设5秒。
- checkinterval=3
- #查询间隔,每个几秒侦测一次realserver
- autoreload=yes
- #配置文件发生改变是否自动重读
- quiescent=yes
- #静态链接,yes:表示侦测realserver宕机,将其权值至零(如果开启了persistent参数不要用yes);no:表示侦测到宕机realserver,随即将其对应条目从ipvsadm中删除。
- virtual=172.16.100.1:80
- real=172.16.100.11:80 gate 4
- fallback=127.0.0.1:80 gate #realserver全部失败,vip指向本机80端口。
- service=http
- request="test.html" #用于健康检测的url,realserver的相对路径为var/www/html目录
- receive="ok" #用于健康检测的url包含的关键字
- scheduler=wlc
- #persistent=600
- #持久链接:表示600s之内同意ip将访问同一台realserver
- protocol=tcp
- checktype=negotiate
- #检查类型:negotiate,表示DR发送请求,realserver恢复特定字符串才表示服务正常;connect,表示DR能够连线realserver即正常。
- checkport=80
- service heartbeat start
- ssh node2 -- 'service heartbeat start'
- #启动两节点heartbeat服务
|
|
- tar zxvf libiconv-1.13.1.tar.gz
- cd libiconv-1.13.1/
- ./configure --prefix=/usr/local
- make
- make install
- cd ../
- tar zxvf libmcrypt-2.5.8.tar.gz
- cd libmcrypt-2.5.8/
- ./configure
- make
- make install
- /sbin/ldconfig
- cd libltdl/
- ./configure --enable-ltdl-install
- make
- make install
- cd ../../
- tar zxvf mhash-0.9.9.9.tar.gz
- cd mhash-0.9.9.9/
- ./configure
- make
- make install
- cd ../
- ln -s /usr/local/lib/libmcrypt.la /usr/lib/libmcrypt.la
- ln -s /usr/local/lib/libmcrypt.so /usr/lib/libmcrypt.so
- ln -s /usr/local/lib/libmcrypt.so.4 /usr/lib/libmcrypt.so.4
- ln -s /usr/local/lib/libmcrypt.so.4.4.8 /usr/lib/libmcrypt.so.4.4.8
- ln -s /usr/local/lib/libmhash.a /usr/lib/libmhash.a
- ln -s /usr/local/lib/libmhash.la /usr/lib/libmhash.la
- ln -s /usr/local/lib/libmhash.so /usr/lib/libmhash.so
- ln -s /usr/local/lib/libmhash.so.2 /usr/lib/libmhash.so.2
- ln -s /usr/local/lib/libmhash.so.2.0.1 /usr/lib/libmhash.so.2.0.1
- ln -s /usr/local/bin/libmcrypt-config /usr/bin/libmcrypt-config
- tar zxvf mcrypt-2.6.8.tar.gz
- cd mcrypt-2.6.8/
- /sbin/ldconfig
- ./configure
- make
- make install
- cd ../
cd php-5.3.6
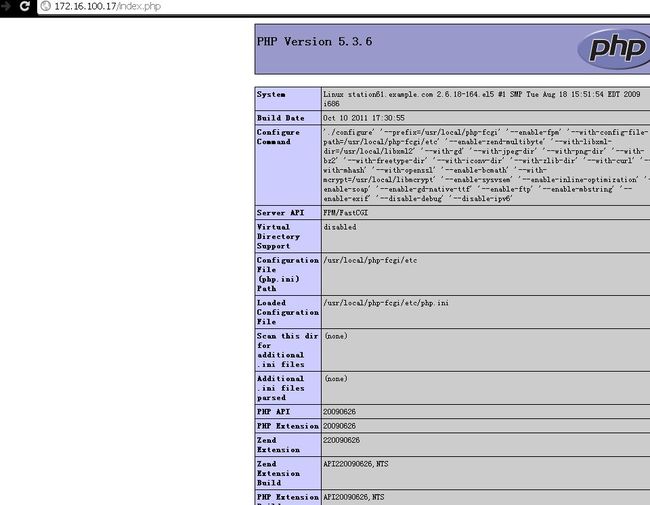
./configure --prefix=/usr/local/php-fcgi --enable-fpm --with-config-file-path=/usr/local/php-fcgi/etc --enable-zend-multibyte --with-libxml-dir=/usr/local/libxml2 --with-gd --with-jpeg-dir --with-png-dir --with-bz2 --with-freetype-dir --with-iconv-dir --with-zlib-dir --with-curl --with-mhash --with-openssl --enable-bcmath --with-mcrypt=/usr/local/libmcrypt --enable-sysvsem --enable-inline-optimization --enable-soap --enable-gd-native-ttf --enable-ftp --enable-mbstring --enable-exif --disable-debug --disable-ipv6
make
make install
cp php.ini-production /usr/local/php-fcgi/etc/php.ini
mkdir /usr/local/php-fcgi/ext
修改php.ini文件 手工修改: 查找/usr/local/php/etc/php.ini中的extension_dir = "./" 修改为 extension_dir = "/usr/local/php-fcgi/lib/php/extensions/no-debug-non-zts-20090626" 增加以下几行 extension = "memcache.so" 再查找output_buffering = Off 修改为 On 再查找 ;cgi.fix_pathinfo=0 去掉“;”号,防止Nginx文件类型错误解析漏洞。 (6)配置eAccelerator加速PHP: mkdir -p /usr/local/eaccelerator_cache vi /usr/local/php-fcgi/etc/php.ini 跳到配置文件的最末尾,加上以下配置信息: [eaccelerator] zend_extension="/usr/local/php-fcgi/lib/php/extensions/no-debug-non-zts-20090626eaccelerator.so" eaccelerator.shm_size="64" eaccelerator.cache_dir="/usr/local/eaccelerator_cache" eaccelerator.enable="1" eaccelerator.optimizer="1" eaccelerator.check_mtime="1" eaccelerator.debug="0" eaccelerator.filter="" eaccelerator.shm_max="0" eaccelerator.shm_ttl="3600" eaccelerator.shm_prune_period="3600" eaccelerator.shm_only="0" eaccelerator.compress="1" eaccelerator.compress_level="9"
/usr/sbin/groupadd www /usr/sbin/useradd -g www www mkdir -p /web chmod +w /web chown -R www:www /web
cd/usr/local/php-fcgi/etc/ cp php-fpm.conf.default php-fpm.conf vim !$ #取消下面3行前的分号 pm.start_servers = 20 pm.min_spare_servers = 5 pm.max_spare_servers = 35
ulimit -SHn 65535 /usr/local/php/sbin/php-fpm start
tar zxvf pcre-8.10.tar.gz cd pcre-8.10/ ./configure make && make install cd ../
tar zxvf nginx-1.1.3.tar.gz cd nginx-1.1.3/ ./configure --user=www \--group=www \--prefix=/usr/local/nginx \--with-http_stub_status_module \--with-http_ssl_module make && make install cd ../
mkdir -p /web/logs chmod +w /web/logs chown -R www:www /web/logs
rm -f /usr/local/nginx/conf/nginx.conf vi /usr/local/nginx/conf/nginx.conf
vi /usr/local/nginx/conf/fcgi.conf
ulimit -SHn 65535 /usr/local/nginx/sbin/nginx
vim /etc/rc.local
# tar -xzf libevent-1ast.1a.tar.gz # cd libevent-1.1a # ./configure --prefix=/usr # make # make install # cd .. # tar -xzf memcached-last.tar.gz # cd memcached# ./configure --prefix=/usr # make # make install
找到session.save_handler,并设为 session.save_handler = memcache,把session.save_path前面的分号去掉,并设置为 session.save_path = “tcp://127.0.0.1:11211″ session.save_handler = memcache session.save_path = “tcp://172.16.100.50:11211″ #memcached所在服务器地址或者某个目录下的 .htaccess : php_value session.save_handler “memcache” php_value session.save_path “tcp://172.16.100.50:11211″ #memcached所在服务器地址再或者在某个一个应用中:
-
-
error_reporting(E_ALL);
-
$memcache = new Memcache;
-
$memcache->connect('172.16.100.17', 11211) or die("Could not connect");
-
-
$memcache->set('key', 'This is a test!', 0, 60);
-
$val = $memcache->get('key');
-
echo $val;
-
?>
## 为MySQL建立用户和组 groupadd -g 3306 mysql useradd -g mysql -u 3306 -s /sbin/nologin -M mysql ## 二进制安装方式 tar xf mysql-5.5.15-linux2.6-i686.tar.gz -C /usr/local ln -sv /usr/local/mysql-5.5.15-linux.2.6-i686 /usr/local/mysql mkdir /mydata ## 创建数据保存目录 chown -R mysql:mysql /mydata/ cd /usr/local/mysql scripts/mysql_install_db --user=mysql --datadir=/mydata/data chown -R root . ## 加入启动脚本 cp support-files/mysql.server /etc/init.d/mysqld chkconfig --add mysqld ##修改配置文件 cp support-files/my-large.cnf /etc/my.cnf ## 加入mySQL命令export PATH=$PATH:/usr/local/mysql/bin ## 定义头文件ln -sv /usr/local/mysql/include /usr/include/mysqlldconfig
service mysqld start cd /root/lnmp
(1)Nginx的优化 一般来说nginx 配置文件中对优化比较有作用的为以下几项: worker_processes 8; nginx 进程数,建议按照cpu 数目来指定,一般为它的倍数。 worker_cpu_affinity 00000001 00000010 00000100 00001000 00010000 00100000 01000000 10000000; 为每个进程分配cpu,上例中将8 个进程分配到8 个cpu,当然可以写多个,或者将一个进程分配到多个cpu。 worker_rlimit_nofile 102400; 这个指令是指当一个nginx 进程打开的最多文件描述符数目,理论值应该是最多打开文件数(ulimit -n)与nginx 进程数相除,但是nginx 分配请求并不是那么均匀,所以最好与ulimit-n 的值保持一致。 use epoll; 使用epoll 的I/O 模型,这个不用说了吧。 worker_connections 102400; 每个进程允许的最多连接数, 理论上每台nginx 服务器的最大连接数为worker_processes*worker_connections。 keepalive_timeout 60; keepalive 超时时间。 client_header_buffer_size 4k; 客户端请求头部的缓冲区大小,这个可以根据你的系统分页大小来设置,一般一个请求头的大小不会超过1k,不过由于一般系统分页都要大于1k,所以这里设置为分页大小。分页大小可以用命令getconf PAGESIZE 取得。 open_file_cache max=102400 inactive=20s; 这个将为打开文件指定缓存,默认是没有启用的,max 指定缓存数量,建议和打开文件数一致,inactive 是指经过多长时间文件没被请求后删除缓存。 open_file_cache_valid 30s; 这个是指多长时间检查一次缓存的有效信息。 open_file_cache_min_uses 1; open_file_cache 指令中的inactive 参数时间内文件的最少使用次数,如果超过这个数字,文件描述符一直是在缓存中打开的,如上例,如果有一个文件在inactive 时间内一次没被使用,它将被移除。 (2)关于内核参数的优化:请修改文件/etc/sysctl.conf net.ipv4.tcp_max_tw_buckets = 6000 timewait 的数量,默认是180000。 net.ipv4.ip_local_port_range = 1024 65000 允许系统打开的端口范围。 net.ipv4.tcp_tw_recycle = 1 启用timewait 快速回收。 net.ipv4.tcp_tw_reuse = 1 开启重用。允许将TIME-WAIT sockets 重新用于新的TCP 连接。 net.ipv4.tcp_syncookies = 1 开启SYN Cookies,当出现SYN 等待队列溢出时,启用cookies 来处理。 net.core.somaxconn = 262144 web 应用中listen 函数的backlog 默认会给我们内核参数的net.core.somaxconn 限制到128,而nginx 定义的NGX_LISTEN_BACKLOG 默认为511,所以有必要调整这个值。 net.core.netdev_max_backlog = 262144 每个网络接口接收数据包的速率比内核处理这些包的速率快时,允许送到队列的数据包的最大数目。 net.ipv4.tcp_max_orphans = 262144 系统中最多有多少个TCP 套接字不被关联到任何一个用户文件句柄上。如果超过这个数字,孤儿连接将即刻被复位并打印出警告信息。这个限制仅仅是为了防止简单的DoS 攻击,不能过分依靠它或者人为地减小这个值,更应该增加这个值(如果增加了内存之后)。 net.ipv4.tcp_max_syn_backlog = 262144 记录的那些尚未收到客户端确认信息的连接请求的最大值。对于有128M 内存的系统而言,缺省值是1024,小内存的系统则是128。 net.ipv4.tcp_timestamps = 0 时间戳可以避免序列号的卷绕。一个1Gbps 的链路肯定会遇到以前用过的序列号。时间戳能够让内核接受这种“异常”的数据包。这里需要将其关掉。 net.ipv4.tcp_synack_retries = 1 为了打开对端的连接,内核需要发送一个SYN 并附带一个回应前面一个SYN 的ACK。也就是所谓三次握手中的第二次握手。这个设置决定了内核放弃连接之前发送SYN+ACK 包的数量。 net.ipv4.tcp_syn_retries = 1 在内核放弃建立连接之前发送SYN 包的数量。 net.ipv4.tcp_fin_timeout = 1 如果套接字由本端要求关闭,这个参数决定了它保持在FIN-WAIT-2 状态的时间。对端可以出错并永远不关闭连接,甚至意外当机。缺省值是60 秒。2.2 内核的通常值是180 秒,你可以按这个设置,但要记住的是,即使你的机器是一个轻载的WEB 服务器,也有因为大量的死套接字而内存溢出的风险,FIN- WAIT-2 的危险性比FIN-WAIT-1 要小,因为它最多只能吃掉1.5K 内存,但是它们的生存期长些。 net.ipv4.tcp_keepalive_time = 30 当keepalive 起用的时候,TCP 发送keepalive 消息的频度。缺省是2 小时。 (3)关于FastCGI 的几个指令: fastcgi_cache_path /usr/local/nginx/fastcgi_cache levels=1:2 keys_zone=TEST:10m inactive=5m; 这个指令为FastCGI 缓存指定一个路径,目录结构等级,关键字区域存储时间和非活动删除时间。 fastcgi_connect_timeout 300; 指定连接到后端FastCGI 的超时时间。 fastcgi_send_timeout 300; 向FastCGI 传送请求的超时时间,这个值是指已经完成两次握手后向FastCGI 传送请求的超时时间。 fastcgi_read_timeout 300; 接收FastCGI 应答的超时时间,这个值是指已经完成两次握手后接收FastCGI 应答的超时时间。 fastcgi_buffer_size 4k; 指定读取FastCGI 应答第一部分需要用多大的缓冲区,一般第一部分应答不会超过1k,由于页面大小为4k,所以这里设置为4k。 fastcgi_buffers 8 4k; 指定本地需要用多少和多大的缓冲区来缓冲FastCGI 的应答。 fastcgi_busy_buffers_size 8k; 这个指令我也不知道是做什么用,只知道默认值是fastcgi_buffers 的两倍。 fastcgi_temp_file_write_size 8k; 在写入fastcgi_temp_path 时将用多大的数据块,默认值是fastcgi_buffers 的两倍。 fastcgi_cache TEST 开启FastCGI 缓存并且为其制定一个名称。个人感觉开启缓存非常有用,可以有效降低CPU 负载,并且防止502 错误。 fastcgi_cache_valid 200 302 1h; fastcgi_cache_valid 301 1d; fastcgi_cache_valid any 1m; 为指定的应答代码指定缓存时间,如上例中将200,302 应答缓存一小时,301 应答缓存1 天,其他为1 分钟。 fastcgi_cache_min_uses 1; 缓存在fastcgi_cache_path 指令inactive 参数值时间内的最少使用次数,如上例,如果在5 分钟内某文件1 次也没有被使用,那么这个文件将被移除。 fastcgi_cache_use_stale error timeout invalid_header http_500; 不知道这个参数的作用,猜想应该是让nginx 知道哪些类型的缓存是没用的。


