创建一个ArcGIS for Android 新项目并显示出本地的地图
1,我的Android版本是:Android4.4.2.
2,我的ArcgisAndroidSDK是:arcgis-android-sdk-v10.2.3.
一,地图发布
首先需要在ArcCatalog(或Arcgis Server Manager,这个貌似需要将文件夹共享)中,发布地图服务.如何发布就不用说了,需要注意的是:
1)坐标系统选择'Projected Coordinate System'->'World'下的'WGS_1984_Web_Mercator';
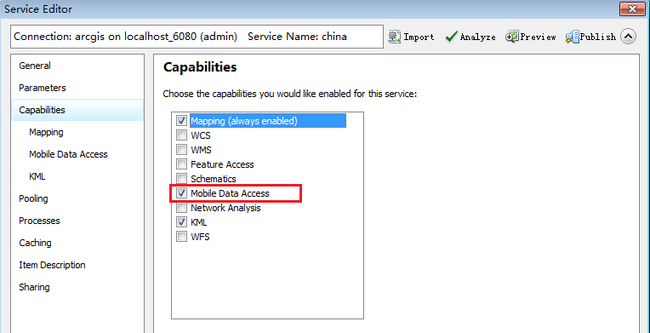
2)需要选择'Service Editor' 对话框中'Capabilities'选项卡中的 'Mobile Data Access'.如图:
二,在eclipse中创建Arcgis Project for Android
1,在"Package Explore"区域右键,选择"New"->"Project",选择"Arcgis for Android"项,如图:
2,点击"Next",并输入合适的项目名称,如图:
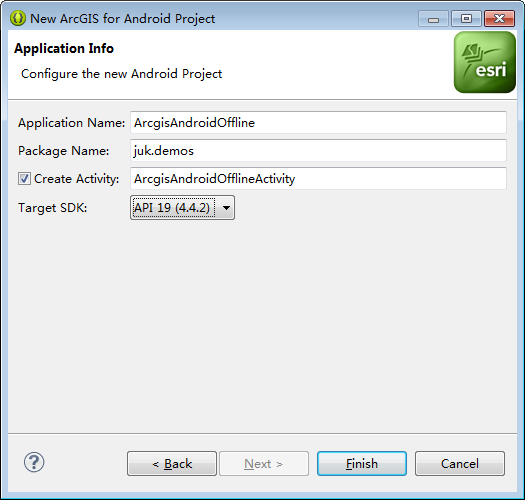
3,点击"Next"后,输入合适的包名,点击完成,如图(这里选择合适的Target SDK):
4,完成后,得到的package视图为:
三,加载地图
1,从第二步结束后,eclipse会创建默认的Activity(这里是'ArcgisAndroidOfflineActivity.java'),双击打开该 .java文件,修改为(注意使用IP):
 1 package spt.demos;
 2
 3 import android.app.Activity;
 4 import android.os.Bundle;
 5 import android.view.ViewGroup.LayoutParams;
 6
 7
 8 import com.esri.android.map.MapView;
 9 import com.esri.android.map.ags.ArcGISDynamicMapServiceLayer;
10
11
12 public class SampleWorldCitiesActivity extends Activity {
13
14     MapView mMapView;
15
16     /** Called when the activity is first created. */
17     @Override
18     public void onCreate(Bundle savedInstanceState) {
19         super.onCreate(savedInstanceState);
20         setContentView(R.layout.main);
21
22         mMapView = new MapView(this);
23         mMapView.setLayoutParams(new LayoutParams(LayoutParams.FILL_PARENT, LayoutParams.FILL_PARENT));
24         //注意,url中的'服务器名称'部分,即这里的'192.168.1.104'必须是'IP'(虽然我在ARCCatalog中发布地图时,设置为'localhost'.
25         //IPv4 地址 . . . . . . . . . . . . : 192.168.1.104.
26         ArcGISDynamicMapServiceLayer mMAP = new ArcGISDynamicMapServiceLayer("http://192.168.1.104:6080/arcgis/rest/services/china/MapServer");
27         mMapView.addLayer(mMAP);
28         setContentView(mMapView);    //这句不能省.
29
30     }
31
32     @Override
33     protected void onDestroy() {
34         super.onDestroy();
35  }
36     @Override
37     protected void onPause() {
38         super.onPause();
39         mMapView.pause();
40  }
41     @Override
42     protected void onResume() {
43         super.onResume();
44         mMapView.unpause();
45     }
46
47 }
2,另外,由于我的模拟器内存太小,所以额外需要配置根目录下的'AndroidManifest.xml'文件为(修改第4行) :
 1 <?xml version="1.0" encoding="utf-8"?>
 2 <manifest xmlns:android="http://schemas.android.com/apk/res/android"
 3       package="juk.demos"
 4       android:installLocation="auto"    --添加这行
 5       android:versionCode="1"
 6       android:versionName="1.0">
 7     <uses-sdk android:minSdkVersion="19" />
 8
 9
10 <uses-permission android:name="android.permission.INTERNET" />
11 <uses-permission android:name="android.permission.ACCESS_FINE_LOCATION" />
12 <uses-permission android:name="android.permission.WRITE_EXTERNAL_STORAGE" />
13 <uses-feature android:glEsVersion="0x00020000" android:required="true"/>
14
15
16 <application android:icon="@drawable/ic_launcher" android:label="@string/app_name">
17         <activity android:name=".TryOfflineActivity"
18                   android:label="@string/app_name">
19             <intent-filter>
20                 <action android:name="android.intent.action.MAIN" />
21                 <category android:name="android.intent.category.LAUNCHER" />
22             </intent-filter>
23         </activity>
24
25     </application>
26 </manifest>
具体见我的另一篇博客:Arcgis android - Installation error: INSTALL_FAILED_INSUFFICIENT_STORAGE
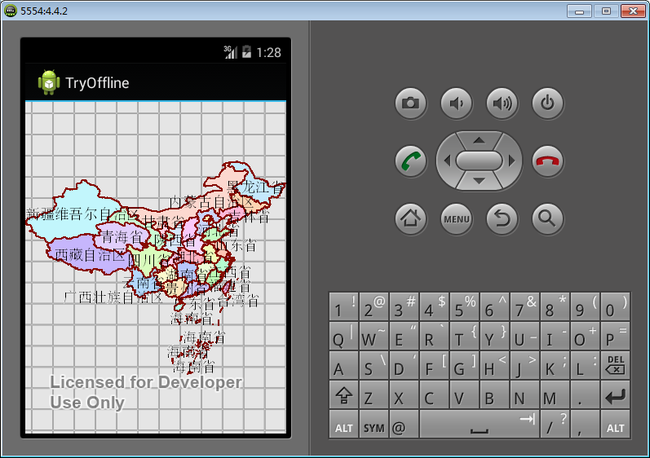
3,运行结果图为(over):


