SpringBoot从零集成Mybatis3记录
现在已经搭建了一个Spring Boot的小项目,现在想要集成Mybatis3,而且只想参考官方文档,特此将操作步骤进行记录。
参考mybatis-spring-boot-autoconfigure的官方文档:
mybatis-spring-boot-autoconfigure https://mybatis.org/spring-boot-starter/mybatis-spring-boot-autoconfigure/
一、 文中提到,需要的依赖有:
To use the MyBatis-Spring-Boot-Starter module, you just need to include the mybatis-spring-boot-autoconfigure.jar file and its dependencies(mybatis.jar, mybatis-spring.jar and etc …) in the classpath.
总结来说,所有需要的依赖有:
mybatis-spring-boot-starter
mybatis-spring-boot-autoconfigure
mybatis
mybatis-spring
所以我在项目的 bootstrap 模块中添加了上述四个依赖,我使用的版本是:

我是在项目根 pom 文件中添加了以下依赖管理,就是将以下依赖放在
            ...//    其他依赖


                org.mybatis
                mybatis
                ${org.mybatis.version}


                org.mybatis
                mybatis-spring
                ${version.mybatis.spring}


                org.mybatis.spring.boot
                mybatis-spring-boot-autoconfigure
                ${mybatis.springboot}


                org.mybatis.spring.boot
                mybatis-spring-boot-starter
                ${mybatis.springboot}

            ...//    其他依赖
然后在我的 bootstrap 模块的 pom 中添加正式的引用依赖:
            org.mybatis
            mybatis


            org.mybatis
            mybatis-spring


            org.mybatis.spring.boot
            mybatis-spring-boot-starter


            org.mybatis.spring.boot
            mybatis-spring-boot-autoconfigure
接下来,文档提到:
原来我们在 Spring 中使用 Mybatis 的时候,总是需要至少一个 SqlSessionFactory 以及至少一个 mapper interface 。
但是现在,MyBatis-Spring-Boot-Starter 将会替我们做以下诸多事情:
- 自动探索一个已经存在的 DataSource
- 通过该 DataSource 作为参数,使用 SqlSessionFactoryBean 创建并注册一个 SqlSessionFactory 实例。
- 将创建并注册从 SqlSessionFactory 获得的 SqlSessionTemplate 的实例。
- 自动扫描你的 mappers ,链接他们到 SqlSessionTemplate 并注册他们到Spring的上下文中,从而你可以将他们自动注入到你的类中。
二、高级扫描:
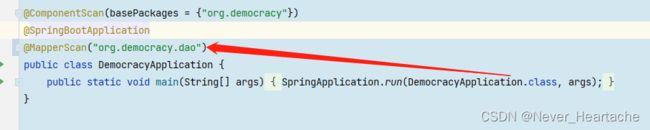
MyBatis-Spring-Boot-Starter 会默认扫描那些带有 @Mapper 注解的mapper,但是如果你想自定义注解或者想标记接口去扫描,你就必须使用@MapperScan 注解。
我这里使用的就是在项目启动类上添加了@MapperScan 注解:
三、 配置
与任何其他Spring Boot应用程序一样,MyBatis-Spring-Boot-Application配置参数存储在 apprament.properties(或 appplication.yml )中。
MyBatis使用前缀mybatis作为其属性。例如:
# application.yml
mybatis:
    type-aliases-package: com.example.domain.model
    type-handlers-package: com.example.typehandler
    configuration:
        map-underscore-to-camel-case: true
        default-fetch-size: 100
        default-statement-timeout: 30
在此步骤中,我只是添加了如下几个 mybatis 的配置:

至于,官方文档中给出的属性是横线分割样式的,而我使用的驼峰样式的时候也可以正常访问,因为在使用SpringBoot的时候,SpringBoot1.*的为驼峰法则,而SpringBoot2.*的命名为连字符。所以我仍然使用连字符,感觉可读性更好了。
以上,Mybatis-SpringBoot的基本配置就可以暂时告一段落了。
四、配置数据库连接
我这边主要就是借鉴了之前项目中的配置,然后引入两个相关依赖:
spring:
  datasource:
    name: druidDataSource
    driverClassName: com.mysql.jdbc.Driver
    url: jdbc:mysql://localhost:3306/democracy?useUnicode=true&zeroDateTimeBehavior=convertToNull&autoReconnect=true&characterEncoding=utf-8&useSSL=false
    username: root
    password: 123456
    testOnBorrow: true
    testWhileIdle: true
    timeBetweenEvictionRunsMillis: 60000
    minEvictableIdleTimeMillis: 30000
    validationQuery: SELECT 1
    max-active: 15
    max-idle: 10
    max-wait: 8000
这是数据库配置文件,然后引用的依赖有两个:
    mysql
    mysql-connector-java
    5.1.47


    com.alibaba
    druid
    1.2.9
然后就可以正常访问数据库了!