Spring Security Oauth2以及整合sso
Oauth2认证
第三方认证技术方案最主要是解决认证协议的通用标准问题,因为要实现跨系统认证,各系统之间遵循一定的接口协议。
Oauth协议为用户资源授权提供了一个安全的,开放的而又简单的标准,同时,任何第三方都可以使用Oauth认证服务,任何服务提供商都可以实现自身的Oauth认证服务,因而Oauth是开放的。业界提供了Oauth多种实现,如PHP、JS、Java等各种语言开发包,大大节约了程序员的时间,因而Oauth是简易的。互联网很多服务如openAPI,很多公司如google,yahoo等都提供了Oauth认证服务,这些都足以说明Oauth标准逐渐成为开发资源授权的标准。
常用术语
客户凭证:客户端的clientid和密码用于认证客户
令牌(token):授权服务器在接收到客户请求后,颁发的访问令牌
作用域:客户请求访问令牌时,由资源拥有者额外指定的细分权限
令牌类型
授权码:仅用于授权码类型,用于交换获取访问令牌和刷新令牌
访问令牌:用于代表一个用户或服务直接去访问受保护的资源
刷新令牌:用于去授权服务器获取一个刷新访问令牌
BearerToken:不管谁拿到Token都可以访问资源
Proof of Possession(Pop) token:可以校验clientid是否对token有明确的拥有权
授权模式
授权码模式
简化授权模式
密码模式
客户端模式
刷新令牌
Spring Security Oauth2
授权服务器
Authorize Endpoint:授权端点,进行授权
Token Endpoint:令牌端点,进行授权拿到对应的Token
Introspection Endpoint:校验端点,校验Token的合法性
Revocation Endpoint:撤销端点,撤销授权
Spring Security Oauth2架构图
[外链图片转存失败,源站可能有防盗链机制,建议将图片保存下来直接上传(img-3paLGYzo-1678521154983)(E:\TyporaFilePic\微服务\Spring Securty Oauth2架构图.jpg)]
1、用户访问,此时没有
token,OAuth2RestTemplate会报错,这个报错信息会被Oauth2ClientContextFilter捕获并重定向到认证服务器2、认证服务器通过
Authorization Endpoint进行授权,并通过AuthorizationServerTokenServices生成授权码并返回给客户端3、客户端拿到授权码去认证服务器通过
Token Endpoint调用AuthorizationServerTokenServices生成Token并返回给客户端4、客户端拿到
token去资源服务器访问资源,一般会通过Oauth2AuthenticationManager调用ResourceServerTokenServices进行校验,校验通过可以获取资源
Demo
引入依赖
<properties>
    <java.version>8java.version>

    <spring-cloud.version>Greenwich.SR2spring-cloud.version>
properties>
<dependencies>
    <dependency>
        <groupId>org.springframework.cloudgroupId>
        <artifactId>spring-cloud-starter-oauth2artifactId>
        <version>2.2.5.RELEASEversion>
    dependency>
    <dependency>
        <groupId>org.springframework.cloudgroupId>
        <artifactId>spring-cloud-starter-securityartifactId>
        <version>2.2.5.RELEASEversion>
    dependency>

    <dependency>
        <groupId>org.springframework.bootgroupId>
        <artifactId>spring-boot-starter-webartifactId>
    dependency>

    <dependency>
        <groupId>org.springframework.bootgroupId>
        <artifactId>spring-boot-starter-testartifactId>
        <scope>testscope>
    dependency>
dependencies>
<dependencyManagement>
    <dependencies>
        <dependency>
            <groupId>org.springframework.cloudgroupId>
            <artifactId>spring-cloud-dependenciesartifactId>
            <version>${spring-cloud.version}version>
            <type>pomtype>
            <scope>importscope>
        dependency>
    dependencies>
dependencyManagement>
SecurityOauth2配置类
@Configuration
@EnableWebSecurity
public class SecurityOauth2Configuration extends WebSecurityConfigurerAdapter {

    @Bean
    public PasswordEncoder getPasswordEncode() {
        return new BCryptPasswordEncoder();
    }

    @Override
    protected void configure(HttpSecurity httpSecurity) throws Exception {
        httpSecurity.csrf()
                .disable()
                .authorizeRequests()
           		// 放行的请求
                .antMatchers("/oauth/**", "/login/**", "/logout/**")
                .permitAll()
                .anyRequest()
                .authenticated()
                .and()
                // 表单认证都放行
                .formLogin()
                .permitAll();
    }
}
授权服务器配置
@Configuration
@EnableAuthorizationServer
public class AuthorizationServerConfiguration extends AuthorizationServerConfigurerAdapter {

    @Value("${application.customize.username:admin}")
    private String customizeUsername;

    @Value("${application.customize.password:123}")
    private String customizePassword;

    @Resource
    private PasswordEncoder passwordEncoder;

    @Override
    public void configure(ClientDetailsServiceConfigurer clients) throws Exception {
        clients.inMemory()
                // 配置Client id
                .withClient(customizeUsername)
                // 配置Client Secret
                .secret(passwordEncoder.encode(customizePassword))
                // 配置token的有效期
                .accessTokenValiditySeconds(3600)
                // 配置redirect uri,用于授权成功后跳转
                .redirectUris("https://www.baidu.com")
                // 配置申请的权限范围
                .scopes("all")
                // 配置grant_type,表示授权类型即授权模式
                .authorizedGrantTypes("authorization_code");
    }
}
配置资源服务器
@Configuration
@EnableResourceServer
public class ResourceServerConfiguration extends ResourceServerConfigurerAdapter {
    @Override
    public void configure(HttpSecurity httpSecurity) throws Exception {
        httpSecurity.authorizeRequests()
                .anyRequest()
                .authenticated()
                .and()
                .requestMatchers()
                .antMatchers("/user/**");
    }
}
自定义User
@AllArgsConstructor
public class User implements UserDetails {

    private String username;
    private String password;
    private List<GrantedAuthority> authorityList;

    @Override
    public Collection<? extends GrantedAuthority> getAuthorities() {
        return this.authorityList;
    }

    @Override
    public String getPassword() {
        return this.password;
    }

    @Override
    public String getUsername() {
        return this.username;
    }

    @Override
    public boolean isAccountNonExpired() {
        return true;
    }

    @Override
    public boolean isAccountNonLocked() {
        return true;
    }

    @Override
    public boolean isCredentialsNonExpired() {
        return true;
    }

    @Override
    public boolean isEnabled() {
        return true;
    }
}
注意一定要实现
UserDetails接口,并重写其中的方法
实现UserDetailsService接口
@Service
public class UserService implements UserDetailsService {

    @Value("${application.customize.username:admin}")
    private String customizeUsername;

    @Value("${application.customize.password:123}")
    private String customizePassword;

    @Value("${application.customize.permission.list:admin,normal,ROLE_hello,/main.html}")
    private String permissionList;

    @Resource
    private PasswordEncoder passwordEncoder;

    @Override
    public UserDetails loadUserByUsername(String username) throws UsernameNotFoundException {
        return new User(customizeUsername, passwordEncoder.encode(customizePassword), AuthorityUtils.commaSeparatedStringToAuthorityList(permissionList));
    }
}
使用的是自定义的
User类
编写Controller
@RestController
@RequestMapping("/user")
public class TestController {

    /**
     * 获取当前用户
     * @param authentication
     * @return
     */
    @GetMapping("/getCurrentUser")
    public Object getCurrentUser(Authentication authentication) {
        return authentication.getPrincipal();
    }
}
浏览器输入以下地址:
http://localhost:8080/oauth/authorize?response_type=code&client_id=admin&redirect_uri=https://www.baidu.com&scope=all
该地址参数与
AuthorizationServerConfiguration配置类配置的参数一致,输入用户名登录后,对admin账号进行授权,如下:

授权后会得到一个授权码,如下:
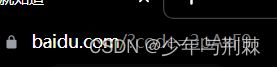
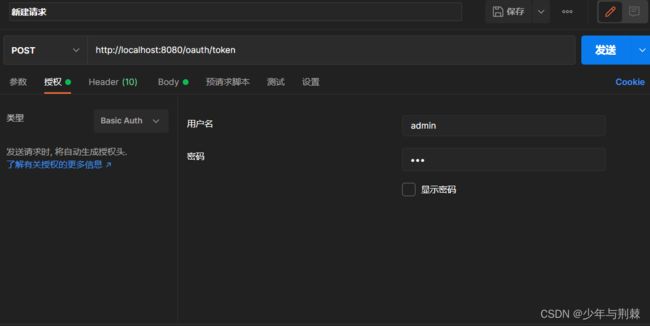
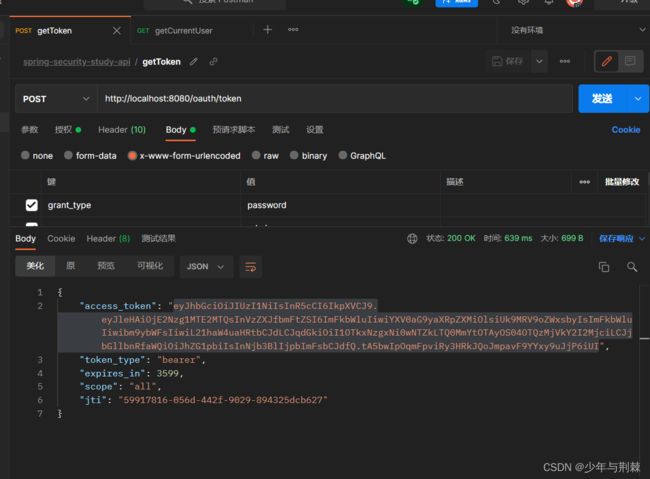
postman获取Token
postman使用post请求
http://localhost:8080/oauth/token获取token,如下填入账号密码进行授权:
如下填入配置的参数,其中code就是授权码

使用Token
使用方法如下

密码模式
注册
AuthenticationManager为Spring的Bean
@Bean
@SneakyThrows
public AuthenticationManager getAuthenticationManager() {
    return super.authenticationManagerBean();
}
继承
AuthorizationServerConfigurerAdapter的配置类配置密码模式
/**
     * 使用密码模式配置
     * @param endpointsConfigurer
     * @throws Exception
     */
@Override
public void configure(AuthorizationServerEndpointsConfigurer endpointsConfigurer) throws Exception {
    endpointsConfigurer.authenticationManager(authenticationManager)
        .userDetailsService(userService);
}
@Override
public void configure(ClientDetailsServiceConfigurer clients) throws Exception {
    clients.inMemory()
        // 配置Client id
        .withClient(customizeUsername)
        // 配置Client Secret
        .secret(passwordEncoder.encode(customizePassword))
        // 配置token的有效期
        .accessTokenValiditySeconds(3600)
        // 配置redirect uri,用于授权成功后跳转
        .redirectUris("https://www.baidu.com")
        // 配置申请的权限范围
        .scopes("all")
        // 配置grant_type,表示授权类型即授权模式
        .authorizedGrantTypes("password");
}
同时需要注入
AuthenticationManager以及UserDetailsService接口实现类
postman调用

Redis存储Token
引入依赖
<dependency>
    <groupId>org.springframework.bootgroupId>
    <artifactId>spring-boot-starter-data-redisartifactId>
    <version>3.0.4version>
dependency>

<dependency>
    <groupId>org.apache.commonsgroupId>
    <artifactId>commons-pool2artifactId>
    <version>2.11.1version>
dependency>
配置Redis
spring:
  redis:
    host: localhost
@Configuration
public class RedisConfiguration {

    @Resource
    private RedisConnectionFactory redisConnectionFactory;

    @Bean
    public TokenStore redisTokenStore() {
        return new RedisTokenStore(redisConnectionFactory);
    }
}
注入Bean
@Resource
@Qualifier("redisTokenStore")
private TokenStore tokenStore;

/**
 * 使用密码模式配置
 * @param endpointsConfigurer
 * @throws Exception
 * */
@Override
public void configure(AuthorizationServerEndpointsConfigurer endpointsConfigurer) throws Exception {
    endpointsConfigurer.authenticationManager(authenticationManager)
        .userDetailsService(userService)
        .tokenStore(tokenStore);
}
JWT
常见的认证机制
HTTP Basic Auth
HTTP Basic Auth简单点就是每次请求api时都提供用户的username和password,简而言之就是Basic Auth配合RESTful API使用的最简单的认证方式。只需要提供用户名密码即可。但由于有把用户名密码暴露给第三方客户端的风险,在生产环境下被使用的越来越少,因此,在开发对外开放的RESTful API时,尽可能的避免使用HTTP Basic Auth
Cookie Auth
Cookie 认证机制是为了一次请求认证在服务端创建一个session对象,同时在客户端的浏览器创建一个Cookie对象;通过客户端带上Cookie对象来与服务器的对象匹配来实现状态管理。默认的,当我们关闭浏览器的时候,cookie会被删除,但可以通过修改Cookie的expire time使cookie在一定时间内有效
OAuth
OAuth(开放授权,open Authorization)是一个开放的授权标准,允许用户让第三方应用访问该用户在某个web服务器上存储私密的资源(如照片、视频、联系人列表),而无需将用户名和密码提供给第三方应用。如网站,通过微信登录等,主要用于第三方登录。
OAuth允许用户提供一个令牌,而不是用户名和密码来访问他们存储在特定的服务器的数据,每一个令牌授权一个特定第三方系统(如视频编辑网站)在特定时间段(如,接下来的2小时内)访问指定资源。这样子,OAuth让用户可以授权第三方网站访问他们存储在另外的服务提供者的某些特定信息,而非所有内容。
这种基于OAuth的认证机制适用于个人消费者类的互联网产品,如社交类APP等应用,但是不太适合拥有自认证系统管理的企业应用
Token Auth
使用基于Token的身份验证方法,在服务端不需要存储用户的登录记录。大概的流程如下:
1、客户端使用用户名跟密码请求登录
2、服务端接收到请求,去验证用户名与密码
3、验证成功后,服务端会签发一个token,再把这个token发给客户端
4、客户端收到token以后可以把他存储起来,比如放在Cookie里
5、客户端每次向服务端请求资源的时候需要携带着服务端签发的token
6、服务端收到请求,然后校验客户端请求里面带着的Token,如果校验成功,就向客户端返回请求的数据
什么是JWT
JSON Web Token(JWT)是一个开放的行业标准(RFC 7519),它定义了一种简洁的、自包含的协议格式,用于通信双方传递json对象,传递的信息经过数字签名可以被验证和信任,JWT可以使用HMAC算法或使用RSA的公钥/私钥对来签名,防止被篡改。
JWT组成
一个JWT实际上就是一个字符串,它由三部分组成,头部、载荷与签名
头部
头部用于描述关于该JWT的最基本信息,例如其类型(即JWT)以及签名所用的算法,(如HMAC SHA256或RSA)等,这也可以被表示成一个JSON对象
{
    "alg":"HS256",
    "typ":"JWT"
}
alg:签名算法,这里使用的算法是HS256算法,typ是类型。我们可以对头部的JSON字符串进行Base64编码
负载
第二部分是负载,就是存放有效信息的地方。这个名称像特指飞机上承载的货物,这些有效信息包括三部分
标准中注册的声明(建议但不强制使用)
iss: jwt签发者
sub: jwt所面向的用户
aud: 接收jwt的一方
exp: jwt的过期时间,这个过期时间必须大于签发时间
nbf: 定义在什么时间之前,该jwt不可用
iat: jwt的签发时间
jti: jwt的唯一身份标识,主要用来作为一次性token,从而回避重放攻击
公共的声明
公共的声明可以添加任何信息,一般添加用户的相关信息或其他业务需要的必要信息,
但不要添加任何敏感信息,因为该部分在客户端可解密
私有的声明
私有声明是提供者和消费者共同定义的声明,一般不建议存放敏感信息,因为base64是对称解密,意味着该部分可以归类为明文信息
这个指的是自定义的claim。比如下面那个举例中的name都属于自定义claim。这些claim跟JWT标准规定的claim区别在于;jwt规定的claim,jwt的接收方在拿到jwt之后,都知道怎么对这些标准的claim进行校验;而private claim不会被校验,除非明确告诉接收方要对这些claim进行校验以及规则才行。
{
    “sub”:"12313",
    "name":"json done",
    "iat":123123
}
其中
sub是标准声明,name是自定义声明(公有的或私有的)
签名
jwt的第三部分是一个签证信息,这个签证信息由三部分组成
1、header(base64后的)
2、payload(bast64后的)
3、secret(盐,一定要保密)
这个部分需要base64加密后的header和base64加密后的payload使用,连接组成字符串,然后通过header中声明的加密方式进行加盐secret组合加密,然后就构成了jwt的第三部分。
JJWT生成token
引入依赖
<dependency>
     <groupId>io.jsonwebtokengroupId>
     <artifactId>jjwtartifactId>
     <version>0.9.1version>
dependency>
@Test
void jjwtBuilderTest() {
    // jwt构建对象
    JwtBuilder jwtBuilder = Jwts.builder()
        // 声明的标识
        .setId("hello jwt")
        // 主体,用户{"sub":"Rose"}
        .setSubject("Rose")
        // 创建日期
        .setIssuedAt(new Date())
        // 头部签名算法以及对应的盐
        .signWith(SignatureAlgorithm.HS256, "jwt secret");
    // 获取jwt的token
    String token = jwtBuilder.compact();
    System.out.println("jwt builder token value is\t"+ token);
}
解析token
@Test
void parseTokenTest() {
    final String token = "eyJhbGciOiJIUzI1NiJ9.eyJqdGkiOiJoZWxsbyBqd3QiLCJzdWIiOiJSb3NlIiwiaWF0IjoxNjc4NDY0ODg4fQ.Zvr2r4EjJ6zNxztSTxpFlob40WB6pkGfV0n36dhVQqU";
    Claims jwt_secret = Jwts.parser()
        .setSigningKey("jwt secret")
        .parseClaimsJws(token)
        .getBody();

    System.out.println("id:\t" + jwt_secret.getId() + "\n");
    System.out.println("subject:\t" + jwt_secret.getSubject() + "\n");
    System.out.println("issuedAt:\t" + jwt_secret.getIssuedAt() + "\n");
}
token过期校验
@Test
void jjwtBuilderHasExpTest() {
    long exp = System.currentTimeMillis() + 60 * 1000;

    // jwt构建对象
    JwtBuilder jwtBuilder = Jwts.builder()
        // 声明的标识
        .setId("hello jwt")
        // 主体,用户{"sub":"Rose"}
        .setSubject("Rose")
        // 创建日期
        .setIssuedAt(new Date())
        // 头部签名算法以及对应的盐
        .signWith(SignatureAlgorithm.HS256, "jwt secret")
        // 设置失效时间
        .setExpiration(new Date(exp));
    // 获取jwt的token
    String token = jwtBuilder.compact();
    System.out.println("jwt builder token value is\t"+ token);
}
Spring Security Oauth2整合JWT
JWTToken配置类
/**
 * JWTToken配置类
 */
@Configuration
public class JWTTokenConfiguration {

    @Value("${application.jwt.key:hello}")
    private String key;

    @Bean
    public TokenStore jwtTokenStore() {
        return new JwtTokenStore(jwtAccessTokenConverter());
    }

    @Bean
    public JwtAccessTokenConverter jwtAccessTokenConverter() {
        JwtAccessTokenConverter jwtAccessTokenConverter = new JwtAccessTokenConverter();
        // 配置jwt使用密钥
        jwtAccessTokenConverter.setSigningKey(key);
        return jwtAccessTokenConverter;
    }
}
授权服务器
/**
 * 授权服务器配置
 */
@Configuration
@EnableAuthorizationServer
public class AuthorizationServerConfiguration extends AuthorizationServerConfigurerAdapter {

    @Value("${application.customize.username:admin}")
    private String customizeUsername;

    @Value("${application.customize.password:123}")
    private String customizePassword;

    @Resource
    private PasswordEncoder passwordEncoder;
    @Resource
    private AuthenticationManager authenticationManager;
    @Resource
    private UserService userService;
    @Resource
    @Qualifier("jwtTokenStore")
    private JwtTokenStore jwtTokenStore;
    @Resource
    private JwtAccessTokenConverter jwtAccessTokenConverter;
    /**
     * 使用密码模式配置
     * @param endpointsConfigurer
     * @throws Exception
     */
    @Override
    public void configure(AuthorizationServerEndpointsConfigurer endpointsConfigurer) throws Exception {
        endpointsConfigurer.authenticationManager(authenticationManager)
                            .userDetailsService(userService)
                            .tokenStore(jwtTokenStore)
                            .accessTokenConverter(jwtAccessTokenConverter);
    }
    @Override
    public void configure(ClientDetailsServiceConfigurer clients) throws Exception {
        clients.inMemory()
                // 配置Client id
                .withClient(customizeUsername)
                // 配置Client Secret
                .secret(passwordEncoder.encode(customizePassword))
                // 配置token的有效期
                .accessTokenValiditySeconds(3600)
                // 配置redirect uri,用于授权成功后跳转
                .redirectUris("https://www.baidu.com")
                // 配置申请的权限范围
                .scopes("all")
                // 配置grant_type,表示授权类型即授权模式
                .authorizedGrantTypes("password");
    }
}
postman获取Token
扩展Token内容
实现接口
TokenEnhancer中的enhance方法
@Slf4j
public class JWTTokenEnhancer implements TokenEnhancer {
    @Value("#{${application.jwt.tokenEnhancer.map}}")
    private Map<String, Object> map;
    @Override
    public OAuth2AccessToken enhance(OAuth2AccessToken oAuth2AccessToken,
                                     OAuth2Authentication oAuth2Authentication) {
        log.info("application jwt tokenEnhancer map value is {}", JSON.toJSONString(map));
        ((DefaultOAuth2AccessToken)oAuth2AccessToken).setAdditionalInformation(map);
        return oAuth2AccessToken;
    }
}
注册对应的Bean
@Bean
public JWTTokenEnhancer jwtTokenEnhancer() {
    return new JWTTokenEnhancer();
}

@Bean
public TokenEnhancerChain tokenEnhancerChain() {
    return new TokenEnhancerChain();
}
在bean创建完成并赋值完成后,进行的初始化操作
@Resource
private JWTTokenEnhancer jwtTokenEnhancer;
@Resource
private TokenEnhancerChain tokenEnhancerChain;
private List<TokenEnhancer> tokenEnhancerList;
@PostConstruct
public void init() {
    // 配置JWT增强内容
    this.tokenEnhancerList = new ArrayList<TokenEnhancer>() {{
        add(jwtTokenEnhancer);
        add(jwtAccessTokenConverter);
    }};
    log.info("tokenEnhancer list value is {}", JSON.toJSONString(this.tokenEnhancerList));
    Assert.isTrue(tokenEnhancerList.size() > 0, "tokenEnhancerList add element Exception list size is zero");
    tokenEnhancerChain.setTokenEnhancers(tokenEnhancerList);
}
继承
AuthorizationServerConfigurerAdapter类重写configure方法
@Override
public void configure(AuthorizationServerEndpointsConfigurer endpointsConfigurer) throws Exception {
    endpointsConfigurer.authenticationManager(authenticationManager)
        .userDetailsService(userService)
        .tokenStore(jwtTokenStore)
        .accessTokenConverter(jwtAccessTokenConverter)
        .tokenEnhancer(tokenEnhancerChain);
}
解析JWT中的内容
@Value("${application.jwt.key:hello}")
private String key;

@GetMapping("/parse")
public Object parseToken(HttpServletRequest httpServletRequest) {
    Assert.isTrue(StringUtils.isNotEmpty(key), "reading configuration file application.jwt.key value is null");
    String header = httpServletRequest.getHeader("Authorization");
    String token = header.substring(header.indexOf("bearer") + 7);
    return Jwts.parser()
        .setSigningKey(key.getBytes(StandardCharsets.UTF_8))
        .parseClaimsJws(token).getBody();
}
refresh token
继承
AuthorizationServerConfigurerAdapter重写configure方法
@Override
public void configure(ClientDetailsServiceConfigurer clients) throws Exception {
    clients.inMemory()
        // 配置Client id
        .withClient(customizeUsername)
        // 配置Client Secret
        .secret(passwordEncoder.encode(customizePassword))
        // 配置token的有效期
        .accessTokenValiditySeconds(3600)
        // 配置redirect uri,用于授权成功后跳转
        .redirectUris("https://www.baidu.com")
        // 配置申请的权限范围
        .scopes("all")
        // 配置grant_type,表示授权类型即授权模式
        .authorizedGrantTypes("password", "refresh_token", "authorization_code");
}
Spring Security Oauth2 整合SSO
创建一个客户端项目并引入依赖,依赖信息详细见Demo>引入依赖,在启动类上添加
@EnableOAuth2Sso注解开启单点登录
客户端配置
server:
  port: 8081
  servlet:
    session:
      cookie:
        # 防止Cookie冲突,冲突时会导致登录验证不通过
        name: OAUTH2-CLIENT-SESSIONID-01
oauth2-server-url: http://localhost:8080
#与授权服务器配置对应
security:
  oauth2:
    client:
      client-id: admin
      client-secret: 123
      user-authorization-uri: ${oauth2-server-url}/oauth/authorize
      access-token-uri: ${oauth2-server-url}/oauth/token
    resource:
      jwt:
        key-uri: ${oauth2-server-url}/oauth/token_key
Controller
@RestController
@RequestMapping("/test")
public class TestController {
    /**
     * 获取当前用户信息
     * @param authentication
     * @return
     */
    @RequestMapping("/getCurrentUser")
    public Object getCurrentUser(Authentication authentication) {
        return authentication;
    }
}
本接口获取的是授权服务器的用户信息
授权服务器
继承
AuthorizationServerConfigurerAdapter类重写configure方法进行配置
@Override
public void configure(ClientDetailsServiceConfigurer clients) throws Exception {
    clients.inMemory()
        // 配置Client id
        .withClient(customizeUsername)
        // 配置Client Secret
        .secret(passwordEncoder.encode(customizePassword))
        // 配置token的有效期
        .accessTokenValiditySeconds(3600)
        // 配置刷新token有效期
        .refreshTokenValiditySeconds(864000)
        // 配置redirect uri,用于授权成功后跳转
        .redirectUris("http://localhost:8081/login")
        // 自动授权
        .autoApprove(true)
        // 配置申请的权限范围
        .scopes("all")
        // 配置grant_type,表示授权类型即授权模式
        .authorizedGrantTypes("password", "refresh_token", "authorization_code");
}

@Override
public void configure(AuthorizationServerSecurityConfigurer security) throws Exception {
    // 获取密钥需要身份认证,使用单点登录时需要配置
    security.tokenKeyAccess("isAuthenticated()");
}
在浏览器输入localhost:8081/test/getCurrentUser获取信息需要登录,登录成功会从8080端口跳转到8081端口