Swagger2之SpringBoot集成使用(一起来了解Swagger2带来的)

欢迎来到我的CSDN主页!
我是君易--鑨,一个在CSDN分享笔记的博主。
推荐给大家我的博客专栏《SpringBoot开发之Swagger2系列》。
如果感觉还不错的话请给我关注加三连吧!
前言
前面几期的博客中我们对于Mybatis-Plus了解的较多,都是接触的一些数据库相关的知识,今天给大家带来的是接口相关的知识,叫做——Swagger2。
一、数据回显格式
JsonResponseBody.java
package com.yx.yxbook.resp;

import io.swagger.annotations.ApiModel;
import io.swagger.annotations.ApiModelProperty;
import lombok.Data;

@Data
@ApiModel("响应对象")
public class JsonResponseBody {

    @ApiModelProperty("响应码")
    private Integer code;
    @ApiModelProperty("响应信息")
    private String msg;
    @ApiModelProperty("响应数据")
    private T data;
    @ApiModelProperty("响应条数(用于分页)")
    private Long total;

    private JsonResponseBody(JsonResponseStatus jsonResponseStatus, T data) {
        this.code = jsonResponseStatus.getCode();
        this.msg = jsonResponseStatus.getMsg();
        this.data = data;
    }

    private JsonResponseBody(JsonResponseStatus jsonResponseStatus, T data, Long total) {
        this.code = jsonResponseStatus.getCode();
        this.msg = jsonResponseStatus.getMsg();
        this.data = data;
        this.total = total;
    }

    public static  JsonResponseBody success() {
        return new JsonResponseBody(JsonResponseStatus.OK, null);
    }

    public static  JsonResponseBody success(T data) {
        return new JsonResponseBody(JsonResponseStatus.OK, data);
    }

    public static  JsonResponseBody success(T data, Long total) {
        return new JsonResponseBody(JsonResponseStatus.OK, data, total);
    }

    public static  JsonResponseBody unknown() {
        return new JsonResponseBody(JsonResponseStatus.UN_KNOWN, null);
    }

    public static  JsonResponseBody other(JsonResponseStatus jsonResponseStatus) {
        return new JsonResponseBody(jsonResponseStatus, null);
    }

}
JsonResponseStatus.java
package com.yx.yxbook.resp;

import lombok.Getter;

@Getter
public enum JsonResponseStatus {

    OK(200, "OK"),
    UN_KNOWN(500, "未知错误"),
    RESULT_EMPTY(1000, "查询结果为空!"),
    ;

    private final Integer code;
    private final String msg;

    JsonResponseStatus(Integer code, String msg) {
        this.code = code;
        this.msg = msg;
    }

}
可以在这个类中定义回显数据到页面的状态显示
二、Swagger2简介
1. 概述:
Swagger2是一个规范和完整的框架,用于生成、描述、调用和可视化Restful风格的web服务,现在我们使用spring boot 整合它。作用:
- 接口的文档在线自动生成;
- 功能测试;
2. 作用:
接口文档自动生成:
- Swagger2 可以根据代码中的注解自动生成 API 文档。通过在 Controller 类和方法上添加注解,如 、 等,Swagger2 能够收集这些信息并生成一个包含 API 接口详细信息的在线文档。这使得开发人员无需手动维护 API 文档,减轻了文档更新的负担。
@ApiOperation@ApiParam在线 API 文档可视化:
- Swagger2 提供了一个基于 Web 的可视化界面,使得开发人员和其他团队成员能够轻松查看和理解 API 的结构和功能。这个界面允许用户直接在浏览器中测试 API,了解每个接口的请求和响应格式,并提供了交互式的方式来探索和理解 API 的功能。
功能测试:
- Swagger2 不仅提供了 API 文档的生成和可视化,还可以通过界面上提供的测试功能进行功能测试。开发人员可以在 Swagger2 的界面上直接调用 API 接口,观察返回结果,确保每个接口按照预期工作。这样可以在开发阶段及时发现和修复问题。
与 Spring Boot 整合:
- Swagger2 可以很容易地与 Spring Boot 集成。通过添加相应的依赖和配置,Swagger2 可以自动扫描项目中的 API,并生成相应的文档。Spring Boot 的注解与 Swagger2 的注解可以很好地配合,使得整合变得非常简单。
3. 常用注解
| 注解 | 描述 |
|---|---|
| @Api | 将类标记为 Swagger 资源。 |
| @ApiImplicitParam | 表示 API 操作中的单个参数。 |
| @ApiImplicitParams | 允许多个 ApiImplicitParam 对象列表的包装器。 |
| @ApiModel | 提供有关 Swagger 模型的其他信息。 |
| @ApiModelProperty | 添加和操作模型属性的数据。 |
| @ApiOperation | 描述针对特定路径的操作或通常是 HTTP 方法。 |
| @ApiParam | 为操作参数添加额外的元数据。 |
| @ApiResponse | 描述操作的可能响应。 |
| @ApiResponses | 允许多个 ApiResponse 对象列表的包装器。 |
| @Authorization | 声明要在资源或操作上使用的授权方案。 |
| @AuthorizationScope | 描述 OAuth2 授权范围。 |
三、SpringBoot整合Swagger2
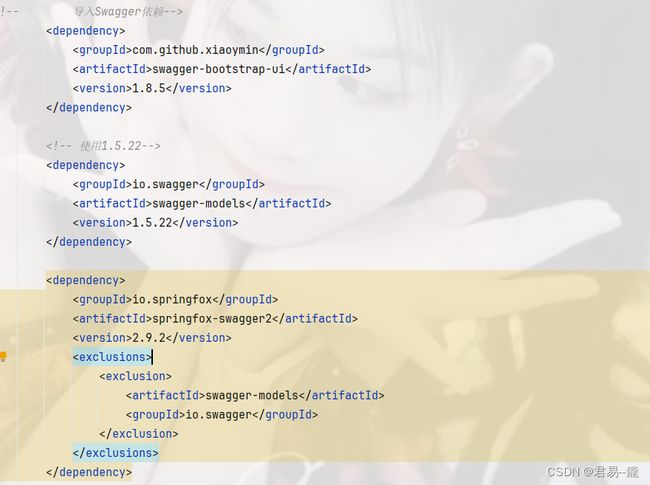
1. 导入pom依赖
            com.github.xiaoymin
            swagger-bootstrap-ui
            1.8.5


            io.swagger
            swagger-models
            1.5.22


            io.springfox
            springfox-swagger2
            2.9.2


                    swagger-models
                    io.swagger
2. 引入配置类
Swagger2Configuration.java
package com.yx.yxbook.config;
import io.swagger.annotations.ApiOperation;
import org.springframework.context.annotation.Bean;
import org.springframework.context.annotation.Configuration;
import org.springframework.context.annotation.Profile;
import org.springframework.web.servlet.config.annotation.ResourceHandlerRegistry;
import org.springframework.web.servlet.config.annotation.WebMvcConfigurationSupport;
import springfox.documentation.builders.ApiInfoBuilder;
import springfox.documentation.builders.PathSelectors;
import springfox.documentation.builders.RequestHandlerSelectors;
import springfox.documentation.service.ApiInfo;
import springfox.documentation.spi.DocumentationType;
import springfox.documentation.spring.web.plugins.Docket;
import springfox.documentation.swagger2.annotations.EnableSwagger2;
@Configuration
@EnableSwagger2
//@Profile({"dev", "test"}) dev(开发)、test(测试)、prod(生产)
public class Swagger2Configuration extends WebMvcConfigurationSupport {
/**
* 创建该API的基本信息 http://项目实际地址/doc.html
*/
private ApiInfo apiInfo() {
return new ApiInfoBuilder()
.title("SpringBoot集成Swagger2")
.description("测试系统")
.termsOfServiceUrl("https://www.baidu.com")
.version("1.0.0")
.build();
}
/**
* 创建API应用
*/
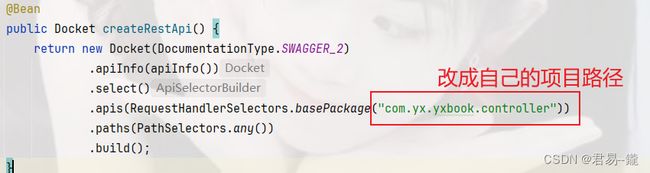
@Bean
public Docket createRestApi() {
return new Docket(DocumentationType.SWAGGER_2)
.apiInfo(apiInfo())
.select()
.apis(RequestHandlerSelectors.basePackage("com.zking.boot.controller"))
.paths(PathSelectors.any())
.build();
}
@Override
protected void addResourceHandlers(ResourceHandlerRegistry registry) {
registry.addResourceHandler("doc.html").addResourceLocations("classpath:/META-INF/resources/");
registry.addResourceHandler("/webjars/**").addResourceLocations("classpath:/META-INF/resources/webjars/");
}
}
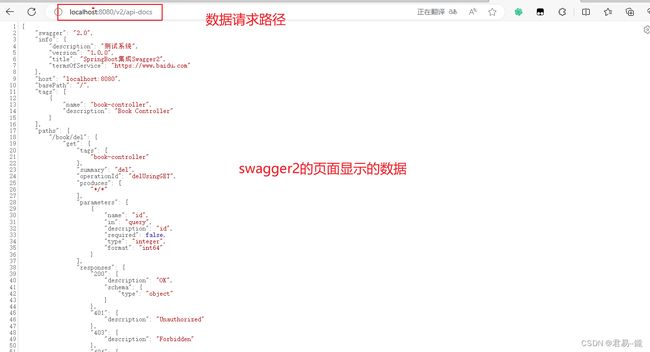
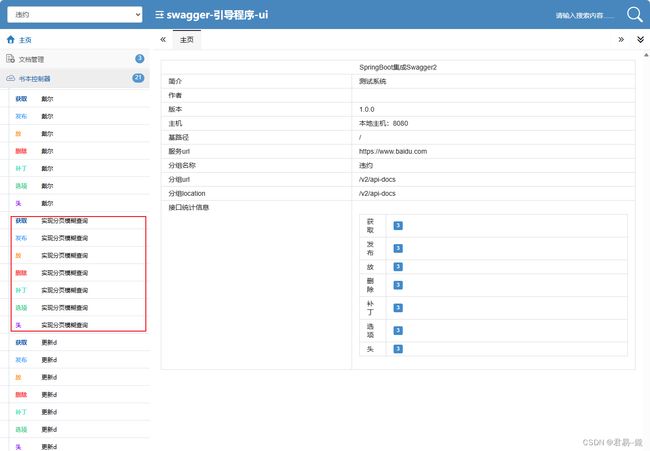
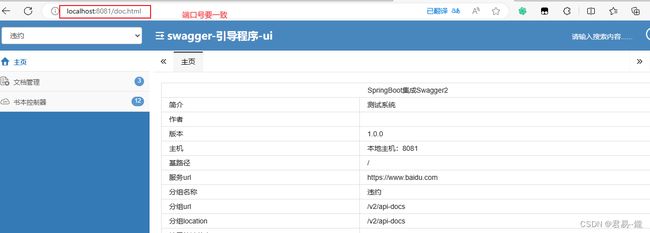
3. 初步的访问swagger网址
启动项目,项目默认访问路径+/doc.html即可
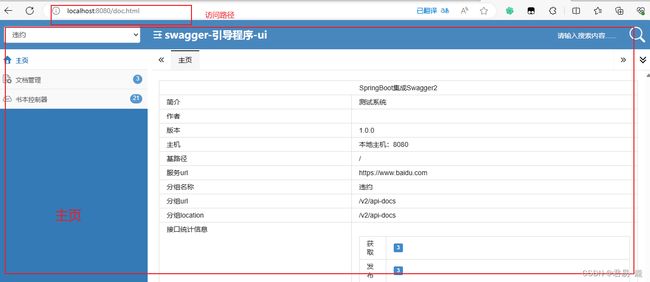
这个页面源于我们导入的swagger-models依赖。
4. 第三方工具引入接口
引入之后会显示出项目中的所有接口。
四、swagger基本使用


接下来是一些常用注解的使用
1.@Api
@Api注解用在类上,说明该类的作用。可以标记一个Controller类做为swagger文档资源。
| 属性 | 说明 |
|---|---|
| value | url的路径值 |
| tags | 如果设置这个值、value的值会被覆盖 |
| produces | 返回的格式类型例如:"application/json, application/xml" |
| consumes | 接收请求参数的类型例如:"application/json, application/xml" |
| protocols | Possible values: http, https, ws, wss. |
| authorizations | 高级特性认证时配置 |
示例:
@RestController
@Api(value = "书本管理",tags = {"书本管理"}) //tags可以代替value属性
@RequestMapping("/book")
public class BookController {
...
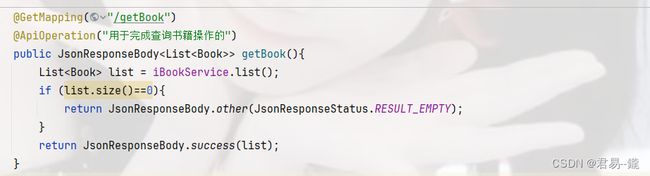
}2.@ApiOperation
@ApiOperation注解用在方法上,说明方法的作用,每一个url资源的定义。
| 属性 | 说明 |
|---|---|
| value | url的路径值 |
| tags | 如果设置这个值、value的值会被覆盖 |
| produces | 返回的格式类型例如:"application/json, application/xml" |
| consumes | 接收请求参数的类型例如:"application/json, application/xml" |
| hidden | 是否在文档中显示 |
| notes | 注释说明 |
| response | 返回的对象 |
| responseContainer | 这些对象是有效的 "List", "Set" or "Map".,其他无效 |
| responseReference | 指定对响应类型的引用。指定的引用可以是本地的,也可以是远程的*将按原样使用,并覆盖任何指定的response()类 |
| responseHeaders | 响应旁边提供的可能标题列表 |
| httpMethod | "GET", "HEAD", "POST", "PUT", "DELETE", "OPTIONS" and "PATCH" |
| code | http的状态码 默认 200实例化 |
示例:
 //    分页查询的请求方法  带模糊查询功能
    @RequestMapping("/list")
    @ApiOperation(value = "实现分页模糊查询")
    public Object list(String bookname){//传参的参数代表页数
//        实例化分页添加查询的参数对象
        QueryWrapper wrapper=new QueryWrapper<>();
//        设置查询条件  在sql语句中会自动追加条件   StringUtils.isNotEmpty判断模糊查询的条件是否为空
        wrapper.like(StringUtils.isNotEmpty(bookname),"bookname",bookname);

//        List list = iBookService.list();
//        实例化分页插件
//        第一个参数代表页码   第二个参数代表显示数据量
        Page page=new Page<>(1,5);
        Page page1 = iBookService.page(page, wrapper);
        return page1.getRecords();
} 
3. @ApiImplicitParams
@ApilmplicitParams 如果有多个参数,则需要使用多个 @ApilmplicitParam 注解来描述, 多个 @ApilmplicitParam 注解需要放在一个 @ApilmplicitParams 注解中
示例:
@ApiOperation(value = "新增书本信息", notes = "新增书本信息"
            ,produces = "application/json",consumes = "application/json")
@ApiImplicitParams({
            @ApiImplicitParam(name="bookname",value="书本名称",required = true,dataType = "String"),
            @ApiImplicitParam(name="price",value="书本价格",required = true,dataType = "Double"),
            @ApiImplicitParam(name="booktype",value="书本类型",required = true,dataType = "String")
})
@PostMapping("/addBook")
public JsonResponseBody addBook(@RequestParam String bookname,
                                   @RequestParam Double price,
                                   @RequestParam String booktype){
    return bookService.insert(Book.builder()
        .bookid(UUID.randomUUID().toString().replace("-",""))
        .bookname(bookname)
        .booktype(booktype)
        .price(price)
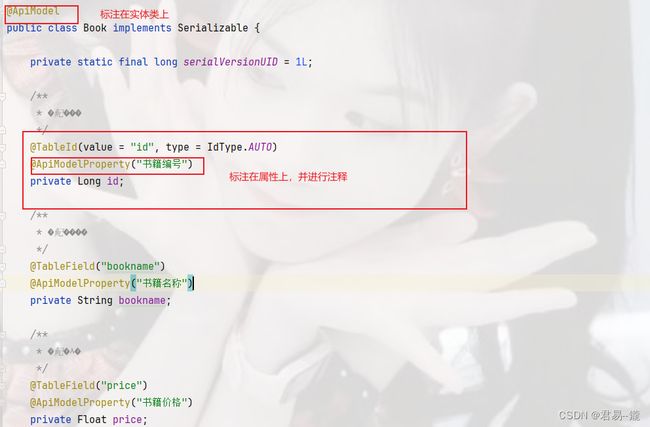
4. @ApiModel和@ApiModelProperty
@ApiModel注解描述一个Model的信息(这种一般用在post创建的时候,使用@RequestBody这样的场景,请求参数无法使用 @ApiImplicitParam注解进行描述的时候;
@ApiModelProperty注解描述一个model的属性。
@ApiModelProperty 属性说明
| 属性 | 说明 |
|---|---|
| value | 字段说明 |
| name | 参数名称 |
| dataType | 参数类型 |
| hidden | 在文档中隐藏 |
| required | 是否必要 |
| example | 举例说明 |
| notes | 注释说明 |
案例演示:
案例一
在实体对象中使用@ApiModel和@ApiModelProperty注解进行标识。
如果有属性想在接口测试上不显示,可以通过@ApiModelProperty的hide属性隐藏

在swagger官网可进行查看
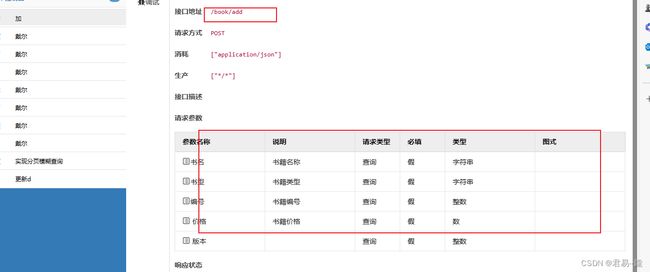
案例二:
在返回类型上使用

控制层使用该类返回数据类型
在swagger官网查询是就会有返回对象的说明

在第三方工具测试接口是就会给指定的字段显示说明

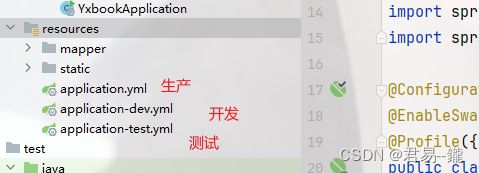
五、生产环境下屏蔽Swagger2
1. 修改Swagger2配置类
添加@Profile注解,指明在何种环境下可以使用Swagger2,一般情况下只有在开发(dev)和测试(test)环境下才可以使用Swagger2;而在生产(dev)环境下不能使用Swagger2。

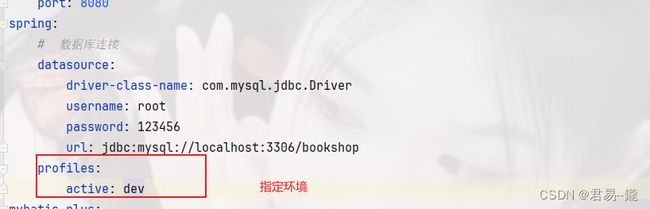
2.修改application.yml
赋值其余环境的yml文件,值修改其中的端口号
3.使用maven package打包测试
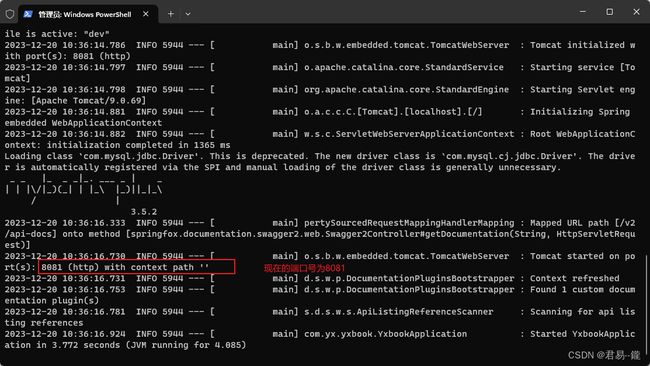
直接运行jar包,可能会出以下错误。

解决方式如下:
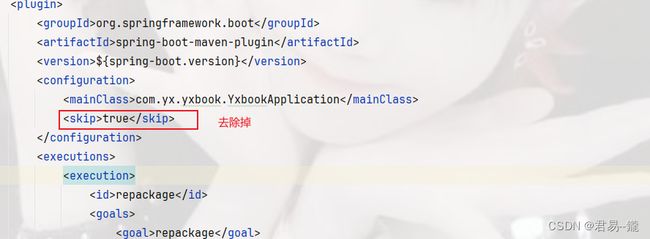
重新打包重新运行即可。
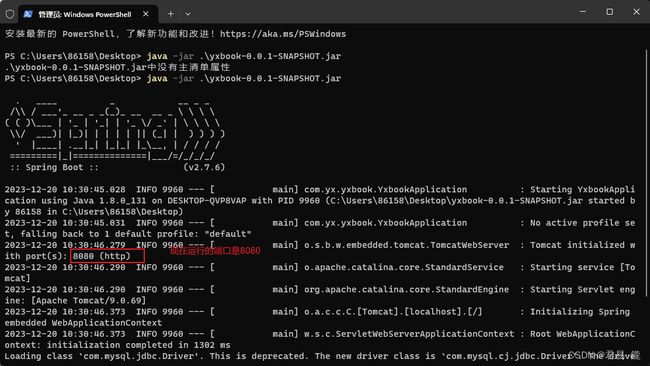
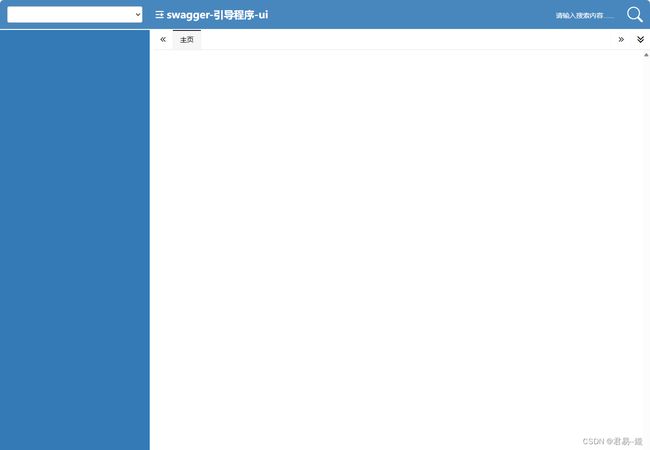
我们再去访问swagger官网查看,他什么都不会显示
当我们切换到指定的环境运行查看时,先要在yml文件添加一点东西
运行命令: java -jar .\yxbook-0.0.1-SNAPSHOT.jar --spring.profiles.active=环境
我们在去访问官网查看
本期的博客分享到此结束
各位老铁慢慢消化
下期博客博主会带来新货
三连加关注,阅读不迷路 !
