three.js学习笔记(一):THREE.Materail五种基础材质的使用
- MeshBasicMaterial(网格基础材质):基础材质,用于给几何体赋予一种简单的颜色,或者显示几何体的线框。
- MeshDepthMaterial(网格深度材质): 这个材质使用从摄像机到网格的距离来决定如何给网格上色。
- MeshLambertMaterial(网格 Lambert 材质): 这是一种考虑光照影响的材质,用于创建暗淡的、不光亮的物体。
- MeshNormalMaterial(网格法向材质):这是一种简单的材质,根据法向向量计算物体表面的颜色。
- MeshPhongMaterial(网格 Phong 式材质):这是一种考虑光照影响的材质,用于创建光亮的物体。
一、材质的共有属性
three.js提供了一个THREE.Materail 材质的抽象基类,所有其他材质类型都继承了以下属性和方法:
1、基础属性
-
id(标识符):此材质实例的唯一编号,并在材质创建时赋值。第一个材质的值从 0 开始,每新加一个材质,这个值就增加 1。
-
uuid(通用唯一识别码):这是生成的唯一 ID,在内部使用。
-
name(名称):可以通过这个属性赋予材质名称,用于调试的目的。
-
opacity(不透明度): 定义物体的透明度。与 transparent 属性一起使用。该属性的赋值范围从 0 到 1。
-
transparent(是否透明):定义此材质是否透明,可以通过opacity属性来控制透明程度。
-
默认值为false,所以如果需要做透明渲染效果,需要设置transparent设置为true。
-
如果使用 alpha(透明度)通道的纹理,该属性应该设置为 true。
-
-
overdraw(过度描绘):当你使用 THREE.CanvasRender 时,多边形会被渲染得稍微大一点。当使用这个渲染器渲染的物体有间隙时,可以将这个属性设置为 true。
-
visible(是否可见):定义该材质是否可见。默认为true,如果设置为 false,那么在场景中就看不到该物体。
-
side(侧面):通过这个属性,可以定义几何体的渲染哪一面。
-
默认值为 THREE.FrontSide(前面),定义将要渲染材质的前面(外侧)。
-
设置为 THREE.BackSide(后面),定义将要渲染材质的后面(内侧)。
-
设置为 THREE.DoubleSide(双侧),定义将要渲染材质的内外两侧。
-
-
needsUpdate(是否更新):对于材质的某些修改,需要告诉 Three.js 材质已经改变了。如果该属性设置为 true,Three.js会使用新的材质属性更新它的缓存。
在使用过程中需要注意的有一下三点:
(1)opacity和transparent需要一起搭配使用,在transparent为true时,opacity才会起作用,下面举例示范;
// 创建材质
let color = new THREE.Color(Math.random(), Math.random(), Math.random())
// 未向材质中添加 transparent 属性
const material = new THREE.MeshBasicMaterial({
  color: color,
  opacity: 0.5,
})
// 创建材质
let color = new THREE.Color(Math.random(), Math.random(), Math.random())
// 向材质中添加 transparent 属性
const material = new THREE.MeshBasicMaterial({
color: color,
transparent: true,
opacity: 0.5,
}) (2)当材质的属性发生改变时,需要将needsUpdate(指定需要重新编译材质)设置为true,才能触发材质的渲染更新。
window.addEventListener('click', e => {
  // 当鼠标移动的时候播放视频
  // 判断视频是否属于播放状态
  if (video.paused) {
    this.$nextTick(res => {
      video.load()
      video.play()
    })
    let texture = new THREE.VideoTexture(video)
    skyMaterial.map = texture
    skyMaterial.map.needsUpdate = true
  }
})
(3)side 决定了绘制那个面,还是两个面都进行绘制
material.side = THREE.DonbleSide
// 或者
const material = new THREE.MeshStandardMaterial({
  side: DonbleSide,
})
2、融合属性
-
blending(融合):该属性决定物体上的材质如何与背景融合。一般的融合模式是 THREE.NormalBlending,在这种模式下只显示材质的上层。
-
blendSrc(混合源):
-
除了使用标准融合模式之外,还可以通过设置 blendsrc、 blenddst 和 blendequation 来创建自定义的融合模式。
-
这个属性定义了该物体(源)如何与背景(目标)相融合。默认值为THREE.SrcAlphaFactor,即使用 alpha(透明度)通道进行融合。
-
-
blendDst(混合目标): 这个属性定义了融合时如何使用背景(目标),默认值为 THREE.OneMinusSrcAlphaFactor,其含义是目标也使用源的 alpha 通道进行融合,只是使用的值是 1(源的 alpha 通道值),必须将材质的blending设置为CustomBlending才能生效。
-
blendEquation(融合公式):定义了如何使用 blendsrc 和 blenddst 的值。默认值为使它们相加(AddEquation)。通过使用这三个属性,可以创建自定义的融合模式。
3、高级属性
-
depthTest / depthWrite:绘制不透明物体时,深度测试开启是能保证正确的遮挡关系,绘制透明物体时,关掉深度测试能保证正确的blend。
-
polygonOffset / polygonOffsetFactor / polygonOffsetUnits
-
alphatest:如果某个像素小于这个值,则不会显示。
二、各种材质说明
1、THREE.MeshBasicMaterial(网格基础材质):
-
定义:MeshBasicMaterial是一种比较简单的材质
-
特点:这种材质不受光照的影响,不考虑光照的影响,可以渲染基础的平面或者几何体。
(1)属性介绍
-
color(颜色):材质的颜色,默认值为白色 (0xffffff)。可以通过this.cube.material.color.set(value)改变材质颜色属性
-
xxxMap(纹理贴图):demo10
-
wireframe(线框):默认值为false(即渲染为平面多边形), 设置这个属性可以将材质渲染成线框。
-
wireframeLinewidth(线框线宽):如果已经打开了 wireframe,这个属性定义线框中线的宽度。
-
wireframeLinecap(线框线段端点):定义线两端的外观
-
round(默认值):圆
-
square:方
-
butt:平
-
-
wireframeLinejoin(线框线段连接点):这个属性定义了线段的连接点如何显示。可选的值有:
-
round:圆(默认值)
-
bevel:斜角
-
miter:尖角
-
-
shading(着色): 该属性定义如何着色。可选的值有:
-
THREE.SmoothShading(默认值,这个将产生一个平滑的对象,看不到单个面)
-
THREE.NoShading
-
THREE.FlatShading
-
-
vertexColors(顶点颜色)
-
可以通过这个属性给每个顶点定义不同的颜色。默认值为:THREE.NoColors。如果将这个值设置为 THREE.VertexColors,渲染器会采用 THREE.Geometry 对象的 colors 属性的值。
-
该属性对 CanvasRenderer不起作用,但对 WebGLRender 起作用。比如我们可以使用该属性为线段的不同部分设置不同的颜色。也可以使用这个属性为这种材质类型创建渐变效果。
-
-
fog(雾化): 该属性指定当前材质是否受全局雾化效果设置的影响,默认为true。如果将该属性设置为 false,那么我们全局雾化效果设置就不会影响当前对象的渲染。
(2)该材质所包含的的纹理贴图:
-
map:颜色贴图。
-
aoMap:该纹理的红色通道用作环境遮挡贴图,aoMap需要第二组UV。
-
envMap:环境贴图。
-
lightMap:光照贴图,lightMap需要第二组UV。
-
alphaMap:alpha贴图是一张灰度纹理,用于控制整个表面的不透明度。(黑色:完全透明;白色:完全不透明)。
-
specularMap:材质使用的高光贴图。
(3)使用示例:
示例一:颜色纹理贴图
// 导入纹理
// TextureLoader创建一个纹理加载器对象,可以加载图片作为几何体纹理
const textureLoader = new THREE.TextureLoader()
// 执行load方法,加载纹理贴图成功后,返回一个纹理对象Texture
const picTexture = textureLoader.load('./static/images/detail1.jpg')

// 添加物体:纹理贴图映射到一个矩形平面上
const cubeGeometry = new THREE.BoxBufferGeometry(1, 1, 1)

// 设置材质
const material = new THREE.MeshBasicMaterial({
  color: '#dda0dd',
  // 添加纹理贴图
  map: picTexture,
  transparent: true,
  opacity: 0.5,
  side: THREE.DoubleSide,
})
this.cube = new THREE.Mesh(cubeGeometry, material)
// 将物体添加到场景中
this.scene.add(this.cube)
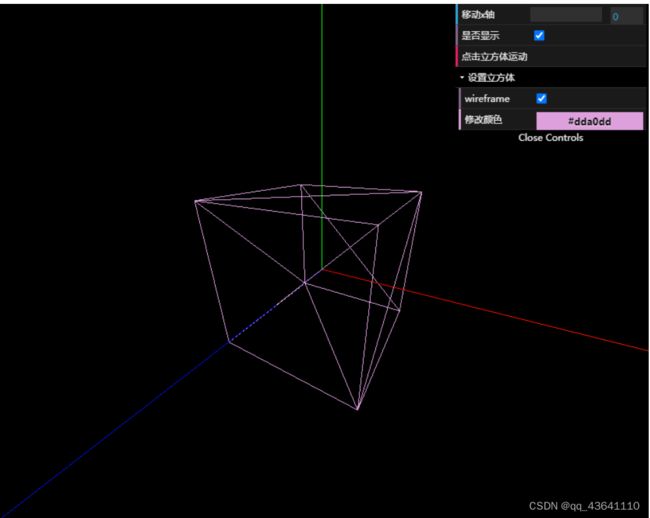
实例二:基础示例
// 添加物体
// 创建几何体
const geometry = new THREE.BoxGeometry(1, 1, 1)
// 创建材质
const material = new THREE.MeshBasicMaterial({ color: '#dda0dd' })
// 根据几何体和材质创建物体
this.cube = new THREE.Mesh(geometry, material)
// 将几何体添加到场景中
this.scene.add(this.cube)

// 创建 GUI
const gui = new dat.GUI()
gui
  .add(this.cube.position, 'x')
  .min(0)
  .max(5)
  .step(0.01)
  .name('移动x轴')
  .onChange(value => {
     console.log('值被修改了')
  })
  .onFinishChange(value => {
    console.log('完全停下来')
  })
// 修改物体的颜色
const params = {
  color: '#dda0dd',
  fn: () => {
    // 让立方体运动起来
    gsap.to(this.cube.position, { x: 10, duration: 2, yoyo: true, repeat: -1 })
  },
}

// 设置选项框
gui.add(this.cube, 'visible').name('是否显示')
// 点击触发某个事件
gui.add(params, 'fn').name('点击立方体运动')
// 添加文件夹(折叠选项)
let folder = gui.addFolder('设置立方体')
folder.add(this.cube.material, 'wireframe')
  folder
  .addColor(params, 'color')
  .onChange(value => {
    this.cube.material.color.set(value)
  })
  .name('修改颜色')
2、THREE.MeshDepthMaterial(网格深度材质):
一种按深度绘制几何体的材质。深度基于相机远近平面。白色最近,黑色最远。使用这种材质的物体,其外观不是由光照或者某个材质属性决定的,而是由物体到摄像机的距离决定的。我们可将这种材质与其他材质结合使用,从而很容易地创建出逐渐消失得效果。
(1)属性介绍:
- wireframe(线框):设置这个属性可以将材质渲染成线框,非常适用于调试。
- wireframeLinewidth(线框线宽): 在线框模式下,此属性决定线框的宽度。
(2)该材质所包含的的纹理贴图:
- map:颜色贴图。
- alphaMap:alpha贴图是一张灰度纹理,用于控制整个表面的不透明度。(黑色:完全透明;白色:完全不透明)。
- displacementMap:位移贴图会影响网格顶点的位置,与仅影响材质的光照和阴影的其他贴图不同,移位的顶点可以投射阴影,阻挡其他对象,以及充当真实的几何体。 可以通过设置displacementScale大小来调整位移贴图对网格的影响程度。
(3)使用示例:
	this.scene = new THREE.Scene()
    this.scene.overrideMaterial = new THREE.MeshDepthMaterial()

	// 环境光
	const ambientLight = new THREE.AmbientLight(0xffffff, 0.1) // 创建环境光
	this.scene.add(ambientLight) // 将环境光添加到场景

    addCube() {
      const cubeSize = Math.ceil(3 + Math.random() * 3)
      const cubeGeometry = new THREE.BoxGeometry(cubeSize, cubeSize, cubeSize)

      const cubeMaterial = new THREE.MeshLambertMaterial({
        color: 0xffffff,
      })

      this.cube = new THREE.Mesh(cubeGeometry, cubeMaterial)

      this.cube.castShadow = true
      this.cube.updateMatrix()

      // 设置方块位置
      this.cube.position.x = -50 + Math.round(Math.random() * 150)
      this.cube.position.y = Math.round(Math.random() * 10)
      this.cube.position.z = -150 + Math.round(Math.random() * 250)

      // 将方块添加到场景
      this.scene.add(this.cube)
    },

    // 更新属性
    updateFun() {
      this.camera.near = this.properties.near.value
      this.camera.far = this.properties.far.value

      this.camera.updateProjectionMatrix()
      const THIS = this
      THIS.scene.traverse(function (e) {
        if (e instanceof THREE.Mesh) {
          e.rotation.x += THIS.properties.speed.value
          e.rotation.y += THIS.properties.speed.value
          e.rotation.z += THIS.properties.speed.value
        }
      })
    },
由上图可以看出来,远近的明亮程度不一样,通过右上角gui相关数据调整相机的近面值及远面值。
这里要特别注意如下几个地方:
- 要把 THREE.MeshBasicMaterial 的 transparent 属性设置为 true,并指定一个融合模式。否则 THREE.js 不会执行任何融合操作,方块始终未纯绿色。
- 融合模式这里使用的是 THREE.MultiplyBlending,该模式会把前景色和背景色相乘,得到想要的结果。
- 当 THREE.SceneUtils.createMultiMaterialObject() 方法创建一个网格的时候,几何体会被复制,返回一个网格组(里面两个网格完全相同)。当渲染的物体有一个在别的物体上,并且有一个物体是透明的,那么渲染时会出现画面闪烁问题。这里我们通过缩小带有 THREE.MeshDepthMaterial 材质的网格,就可以避免这种现象。
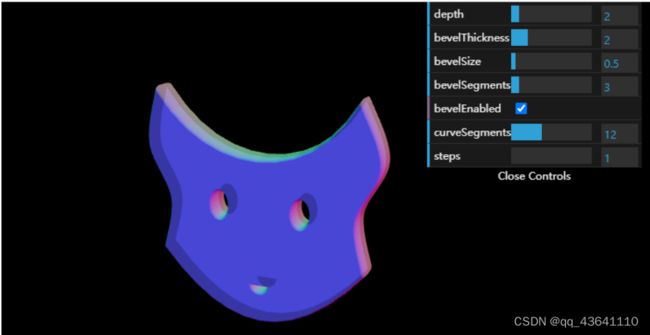
3、THREE.MeshNormalMaterial(法线网格材质)
一种把法向量映射到RGB颜色的材质,使用这种材质,每一面的颜色是由从该面向外指的法向量计算得到的。
(1)属性介绍:
- wireframe(线框)
- wireframeLinewidth(线框线宽)
- shading(着色方法)
- THREE.FlatShading:平面着色
- THREE.SmoothShading:平滑着色
(2)该材质所包含的的纹理贴图:
- bumpMap:用于创建凹凸贴图的纹理。
- normalMap:法线贴图的类型。
- displacementMap:位移贴图会影响网格顶点的位置,与仅影响材质的光照和阴影的其他贴图不同,移位的顶点可以投射阴影,阻挡其他对象,以及充当真实的几何体。 可以通过设置displacementScale大小来调整位移贴图对网格的影响程度。
(3)使用示例:
// 创建法向量纹理
var meshMaterial = new THREE.MeshNormalMaterial({
  flatShading: THREE.FlatShading,
  transparent: true,
  opacity: 0.7
});
4、THREE.MeshLambertMaterial(网格Lambert 材质)
- 定义:一种非光泽表面的材质,没有镜面高光。
- 特点:
- 适用于暗淡、不光亮表面,会对光源产生反应。
- 适用于暗淡、不光亮表面,会对光源产生反应。
- 这种材质可以用来创建暗淡的并不光亮的表面。
- 这可以很好地模拟一些表面(如未经处理的木材或石头),但不能用镜面高光(如上漆木材)模拟光泽表面。
(1)属性介绍
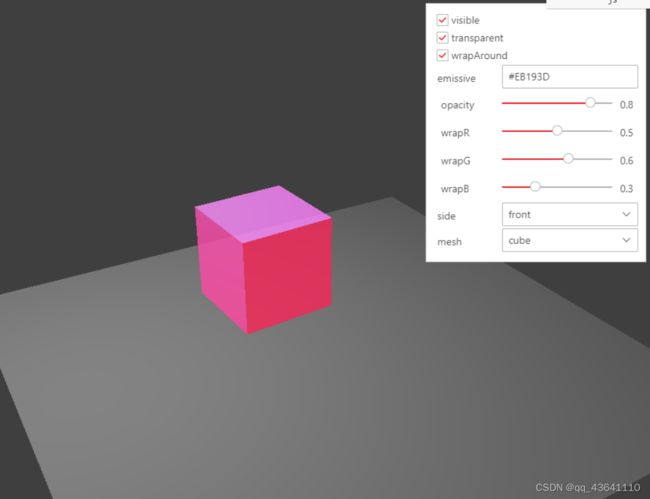
- ambient(环境色):这是材质的环境色。它跟上一章讲过的环境光源一起使用。这个颜色会与环境光提供的颜色相乘。默认值为白色。
- emissive(发射的):这是该材质的发射的颜色。它其实并不像一个光源,只是一种纯粹的、不受其它光照影响的颜色。默认值为黑色。
- wrapAround:如果这个属性设置为true,则启动半lambert光照技术。有了它,光下降得更微妙。如果网格有粗糙、黑暗的地区,启用此属性阴影将变得柔和并且分不更加均匀。
- wrapRGB:当wrapAround属性设置为true时,可以使用THREE.Vector3来控制光下降得速度。
在此有两个比较重要的属性:ambient(环境色)和 emissive(发射的)
- ambient跟AmbientLight 光源一起使用,这个颜色会与AmbientLight 光源的颜色相乘;默认为白色。
(2)该材质所包含的的纹理贴图:
- bumpMap:用于创建凹凸贴图的纹理。
- alphaMap:alpha贴图是一张灰度纹理,用于控制整个表面的不透明度。(黑色:完全透明;白色:完全不透明)。
- displacementMap:位移贴图会影响网格顶点的位置,与仅影响材质的光照和阴影的其他贴图不同,移位的顶点可以投射阴影,阻挡其他对象,以及充当真实的几何体。 可以通过设置displacementScale大小来调整位移贴图对网格的影响程度。
- emissiveMap:设置放射(发光)贴图。
- envMap:环境贴图。
- lightMap:光照贴图,lightMap需要第二组UV。
- normalMap:法线贴图的类型。
- specularMap:材质使用的高光贴图。
(3)使用实例
      // 创建网格模型
      const planeMaterial = new THREE.MeshLambertMaterial({
        color: 0x777777,
      }) // 材质对象Material
      const plane = new THREE.Mesh(geometry, planeMaterial)
      plane.receiveShadow = true

      // 设置平面位置
      plane.rotation.x = -0.5 * Math.PI
      plane.position.set(0, -20, 0)

      // 平面对象添加到场景中
      this.scene.add(plane)

      const sphereGeometry = new THREE.SphereGeometry(14, 20, 20)
      const cubeGeometry = new THREE.BoxGeometry(15, 15, 15)
      const planeGeometry = new THREE.PlaneGeometry(14, 14, 4, 4)

      // 创建材质
      this.meshMaterial = new THREE.MeshLambertMaterial({
        color: 0x7777ff,
      })

      // 创建球、方块、平面
      this.sphere = new THREE.Mesh(sphereGeometry, this.meshMaterial)
      this.cube = new THREE.Mesh(cubeGeometry, this.meshMaterial)
      this.plane = new THREE.Mesh(planeGeometry, this.meshMaterial)

      this.sphere.position.set(-12, 3, 2)
      this.cube.position = this.sphere.position
      this.plane.position = this.sphere.position
      this.activeMesh = this.sphere

      // 环境光
      const ambientLight = new THREE.AmbientLight(0xffffff, 0.1) // 创建环境光
      this.scene.add(ambientLight) // 将环境光添加到场景

      const spotLight = new THREE.SpotLight(0xffffff) // 创建聚光灯
      spotLight.position.set(-40, 60, -10)
      this.scene.add(spotLight)
5、THREE.MeshPhongMaterial(网格 Phong 材质)
通过 THREE.MeshPhongMaterial 可以创建一种具有镜面高光的光泽表面的材质。
(1)属性介绍
- ambient(环境色):这是材质的环境色。它跟上一章讲过的环境光源一起使用。这个颜色会与环境光提供的颜色相乘。默认值为白色。
- emissive(发射的):这是该材质的发射的颜色。它其实并不像一个光源,只是一种纯粹的、不受其它光照影响的颜色。默认值为黑色。
- wrapAround:如果这个属性设置为true,则启动半lambert光照技术。有了它,光下降得更微妙。如果网格有粗糙、黑暗的地区,启用此属性阴影将变得柔和并且分不更加均匀。
- wrapRGB:当wrapAround属性设置为true时,可以使用THREE.Vector3来控制光下降得速度。
- specular: 该属性指定该材质的光亮程度及高光部分的颜色。
- 如果将它设置成与 color 属性相同的颜色,将会得到一个更加类似金属的材质。
- 如果将它设置成灰色(grey),材质将变得更像塑料。
- shininess:该属性指定镜面高光部分的亮度。默认值:30。
- metal:如果此属性设置为 true,Three.js 会使用稍微不同的方式计算像素的颜色,以使物体看起来更像金属。要注意的是,这个效果非常小。
(2)该材质所包含的的纹理贴图:
- bumpMap:用于创建凹凸贴图的纹理。
- alphaMap:alpha贴图是一张灰度纹理,用于控制整个表面的不透明度。(黑色:完全透明;白色:完全不透明)。
- aoMap:该纹理的红色通道用作环境遮挡贴图,aoMap需要第二组UV。
- displacementMap:位移贴图会影响网格顶点的位置,与仅影响材质的光照和阴影的其他贴图不同,移位的顶点可以投射阴影,阻挡其他对象,以及充当真实的几何体。 可以通过设置displacementScale大小来调整位移贴图对网格的影响程度。
- emissiveMap:设置放射(发光)贴图。
- envMap:环境贴图。
- lightMap:光照贴图,lightMap需要第二组UV。
- normalMap:法线贴图的类型。
- specularMap:材质使用的高光贴图。
(3)使用详例
为实例物体一个光源(环境光与点光源),并使用该材质创建一个小球。可以看到这个材质看上去比较光亮。
// 创建球体
const loader = new THREE.TextureLoader();
const geometry = new THREE.SphereGeometry(50, 128, 128);
// 定义地球材质
const texture = loader.load('./static/images/earth_atmos_4096.jpg');
// 添加浮雕凹凸贴图
const bump = loader.load('./static/images/earth_bump.jpg');
// 添加高光贴图
const spec = loader.load('./static/images/earth_specular_2048.jpg');
// 创建材质
const material = new THREE.MeshPhongMaterial({
  map: texture,
  bumpMap: bump,
  bumpScale: 5,
  specularMap: spec,
  specular: new THREE.Color('#1a2948'),
  shininess: 2
});
const mesh = new THREE.Mesh(geometry, material);
mesh.name = 'earth';
// 添加地球到场景
this.scene.add(mesh);

// 添加光源
const ambientLight = new THREE.AmbientLight(0x999999);
const pointLight = new THREE.PointLight(0xffffff, 1, 200);
pointLight.position.set(0, 100, 0);
this.scene.add(ambientLight, pointLight);


