跟我学Windows Azure 五 使用Cloub Service连接Blob Service完成图片的上传
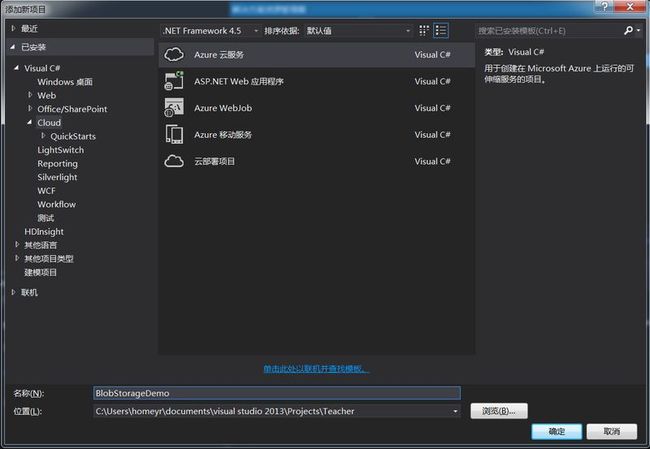
首先,我们创建一个云服务项目,用来演示我们的blob存储
下来我们修改我们我们云服务的名字
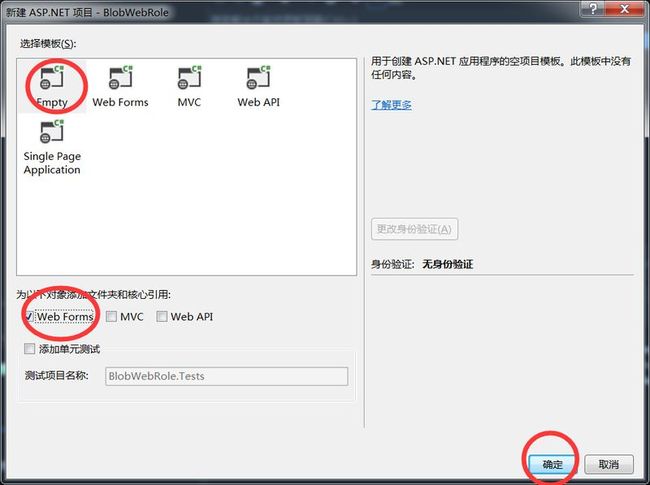
我们需要添加一个空的WebForm的项目
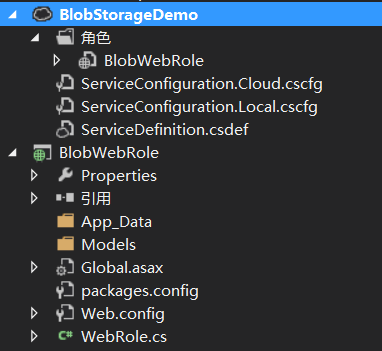
点击完成,我们可以看到我们的解决方案已经添加完成
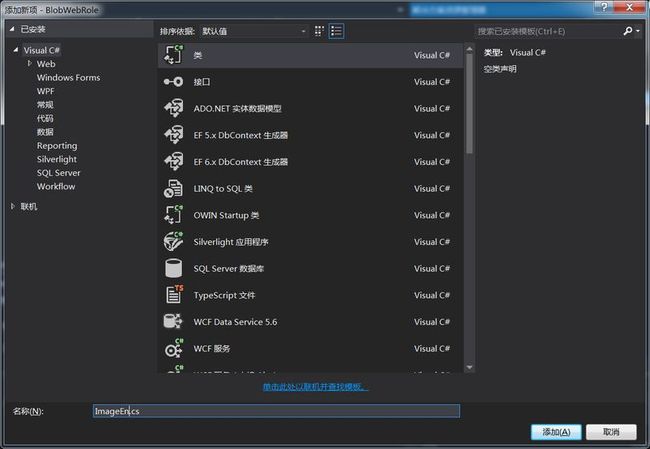
下来我们需要添加一个实体类,用来存储文件的信息.
下面是我们实体类的
using System;
using System.Collections.Generic;
using System.Linq;
using System.Web;
namespace BlobWebRole
{
public class ImageEn
{
public string BlobName { get; set; }
public Uri FileUri { get; set; }
public string FileName { get; set; }
public long Length { get; set; }
public string FolderName { get; set; }
public bool IsReadOnly { get; set; }
public bool IsExists { get; set; }
public string FullFileName { get; set; }
public string ExtendName { get; set; }
public string CreatorName { get; set; }
public DateTime CreateTime { get; set; }
}
}
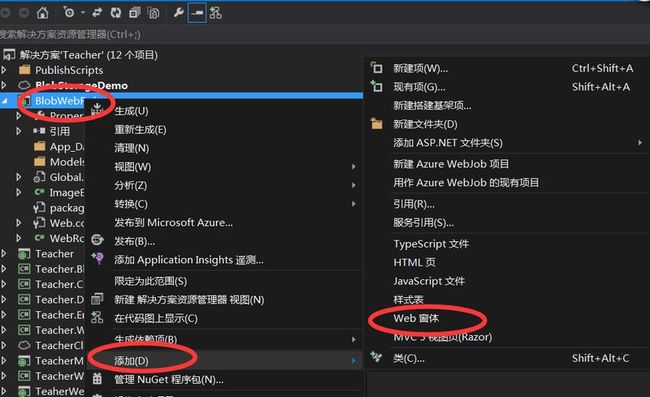
下来我们需要添加一个页面窗体,用来进行图片的显示和上传
下面是Default.aspx前台代码
<%@ Page Language="C#" AutoEventWireup="true" CodeBehind="Default.aspx.cs" Inherits="BlobWebRole.Default" %>
<!DOCTYPE html>
<html xmlns="http://www.w3.org/1999/xhtml">
<head runat="server">
<meta http-equiv="Content-Type" content="text/html; charset=utf-8"/>
<title></title>
</head>
<body>
<form id="form1" runat="server">
<div>
<div><!--上传图片-->
<asp:Label ID="lblFilePath" Text="上传文件" AssociatedControlID="fileUploadControl"
runat="server" />
<asp:FileUpload ID="fileUploadControl" runat="server" />
<asp:RequiredFieldValidator ID="filUploadValidator" ControlToValidate="fileUploadControl"
ValidationGroup="fileInfoGroup" ErrorMessage="请选择文件!" runat="Server">
</asp:RequiredFieldValidator>
<br />
<asp:Label ID="lblFileName" Text="文件名称:" AssociatedControlID="txtFileName" runat="server" />
<asp:TextBox ID="txtFileName" runat="server" />
<asp:RequiredFieldValidator ID="fileNameValidator" ControlToValidate="txtFileName"
ValidationGroup="fileInfoGroup" ErrorMessage="请输入文件名!" runat="Server">
</asp:RequiredFieldValidator>
<br />
<asp:Label ID="lblCreator" Text="创 建 者:" AssociatedControlID="txtCreator" runat="server" />
<asp:TextBox ID="txtCreator" runat="server" />
<asp:RequiredFieldValidator ID="submitterValidator" ControlToValidate="txtCreator"
ValidationGroup="fileInfoGroup" ErrorMessage="请输入创建者!" runat="Server">
</asp:RequiredFieldValidator>
<br />
<asp:Button ID="btnSave" Text="保存" CausesValidation="true" ValidationGroup="fileInfoGroup"
runat="server" OnClick="btnSave_Click" />
<br />
<br />
<asp:Label ID="statusMessage" runat="server" />
</div>
<div><!--列表显示图片-->
<asp:GridView ID="fileView" AutoGenerateColumns="false" DataKeyNames="BlobName" runat="server"
OnRowCommand="RowCommandHandler">
<Columns>
<asp:ButtonField Text="Delete" CommandName="DeleteItem" />
<asp:HyperLinkField HeaderText="Link" DataTextField="FileName" DataNavigateUrlFields="FileUri" />
<asp:BoundField DataField="CreatorName" HeaderText="Created by" />
<asp:BoundField DataField="FolderName" HeaderText="FolderName" />
<asp:BoundField DataField="IsReadOnly" HeaderText="IsReadOnly" />
<asp:BoundField DataField="IsExists" HeaderText="IsExists" />
<asp:BoundField DataField="FullFileName" HeaderText="FullFileName" />
<asp:BoundField DataField="ExtendName" HeaderText="ExtendName" />
<asp:BoundField DataField="CreateTime" HeaderText="CreateTime" />
</Columns>
</asp:GridView>
</div>
</div>
</form>
</body>
</html>
下来添加我们Default.aspx.cs后台代码
using System;
using System.Collections.Generic;
using System.Linq;
using System.Web;
using System.Web.UI;
using System.Web.UI.WebControls;
using Microsoft.WindowsAzure;
using Microsoft.WindowsAzure.Storage;
using Microsoft.WindowsAzure.Storage.Blob;
using System.IO;
using System.Collections.Specialized;
namespace BlobWebRole
{
public partial class Default : System.Web.UI.Page
{
private CloudBlobClient _BlobClient = null;
private CloudBlobContainer _BlobContainer = null;
private const string conContainerAddress = "imagefiles";
private const string conConfigStorageSetting = "BlobConnectionString";
protected void Page_Load(object sender, EventArgs e)
{
if (!IsPostBack)
{
this.EnsureContainerExists();
DisplayFileList();
}
}
private void EnsureContainerExists()
{
var container = GetContainer();
// 检查container是否被创建,如果没有,创建container
container.CreateIfNotExists();
var permissions = container.GetPermissions();
//对Storage的访问权限是可以浏览Container
permissions.PublicAccess = BlobContainerPublicAccessType.Container;
container.SetPermissions(permissions);
}
private CloudBlobContainer GetContainer()
{
//获取ServiceConfiguration.cscfg配置文件的信息
var account = CloudStorageAccount.Parse(CloudConfigurationManager.GetSetting("BlobConnectionString"));
var client = account.CreateCloudBlobClient();
//获得BlobContainer对象
return client.GetContainerReference(conContainerAddress);
}
protected void btnSave_Click(object sender, EventArgs e)
{
//获取扩展名
string extension = System.IO.Path.GetExtension(fileUploadControl.FileName);
//获得BlobContainer对象并把文件上传到这个Container
var blob = this.GetContainer().GetBlockBlobReference(Guid.NewGuid().ToString() + extension);
blob.UploadFromStream(fileUploadControl.FileContent);
////设置元数据到Blob
blob.Metadata["FileName"] = txtFileName.Text;
blob.Metadata["Length"] = fileUploadControl.FileContent.Length.ToString();
DirectoryInfo di = new DirectoryInfo(string.Format("{0}\\", conContainerAddress));
blob.Metadata["FolderName"] = di.Name;
FileInfo file = new FileInfo(fileUploadControl.PostedFile.FileName);
blob.Metadata["IsReadOnly"] = file.IsReadOnly.ToString();
blob.Metadata["IsExists"] = file.Exists.ToString();
blob.Metadata["FullFileName"] = file.FullName;
blob.Metadata["ExtendName"] = file.Extension;//extension
blob.Metadata["CreatorName"] = txtCreator.Text;
blob.Metadata["CreateTime"] = DateTime.Now.ToShortTimeString();
blob.SetMetadata();
//设置属性
blob.Properties.ContentType = fileUploadControl.PostedFile.ContentType;
blob.SetProperties();
//显示列表
DisplayFileList();
}
/// <summary>
/// 列表
/// </summary>
private void DisplayFileList()
{
var blobs = this.GetContainer().ListBlobs(null, false, BlobListingDetails.Metadata, null, null).OfType<CloudBlockBlob>();
var filesList = new List<ImageEn>();
//查询
foreach (var blobItem in blobs)
{
//实体字段
filesList.Add(new ImageEn()
{
FileUri = blobItem.Uri,
BlobName=blobItem.Name,
FileName = txtFileName.Text,
Length = long.Parse(blobItem.Metadata["Length"]),
FolderName = blobItem.Metadata["FileName"],
IsReadOnly = bool.Parse(blobItem.Metadata["IsReadOnly"]),
IsExists = bool.Parse(blobItem.Metadata["IsExists"]),
FullFileName = blobItem.Metadata["FullFileName"],
ExtendName = blobItem.Metadata["ExtendName"],
CreatorName = blobItem.Metadata["CreatorName"],
CreateTime = DateTime.Parse(blobItem.Metadata["CreateTime"])
});
}
//绑定列表
fileView.DataSource = filesList;
fileView.DataBind();
}
protected void RowCommandHandler(object sender, GridViewCommandEventArgs e)
{
//删除
if (e.CommandName == "DeleteItem")
{
// 获取索引
var index = Convert.ToInt32(e.CommandArgument);
var blobName = fileView.DataKeys[index].Value.ToString();
//Get the container
var blob = this.GetContainer().GetBlockBlobReference(blobName);
blob.Delete();
}
//更新列表
DisplayFileList();
}
}
}
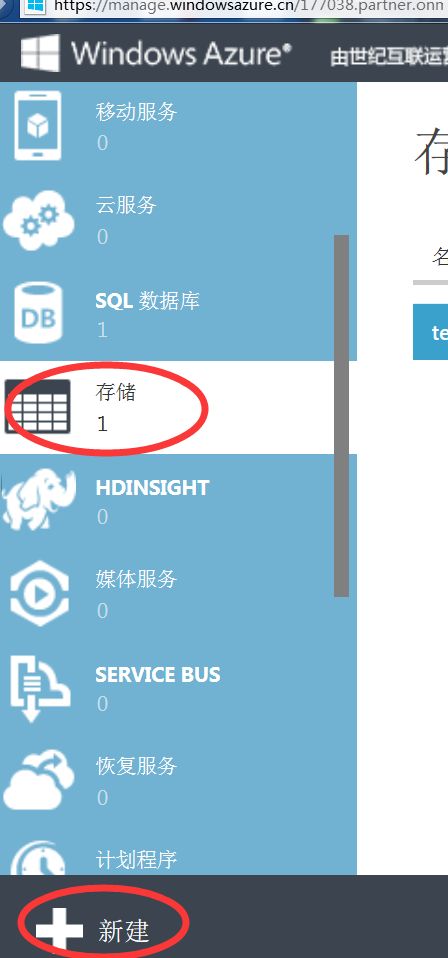
我们登陆WindowsAzure管理门户去添加一个存储.
我们添加名为teacherblob的存储服务
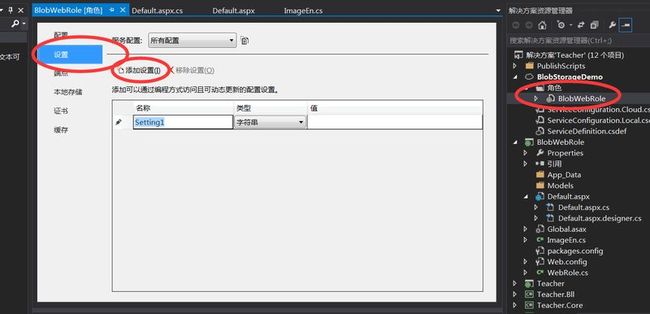
下来我们双击我们Studio2013中的云服务,点击设置,去设置他所要连接的设置
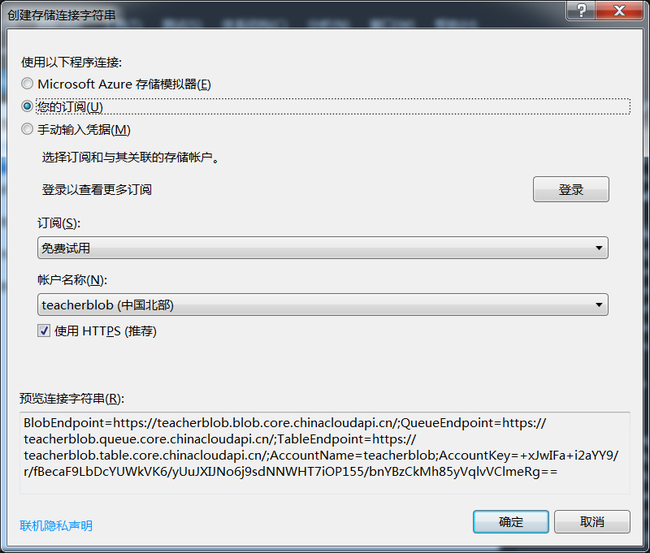
我们把连接字符串的名称叫做BlobConnectionstring,然后选择类型为连接字符串,然后值那里我们选择我的订约,然后会自动带出,我们刚才在Windows azure上建立的blob,选择他就可以了.
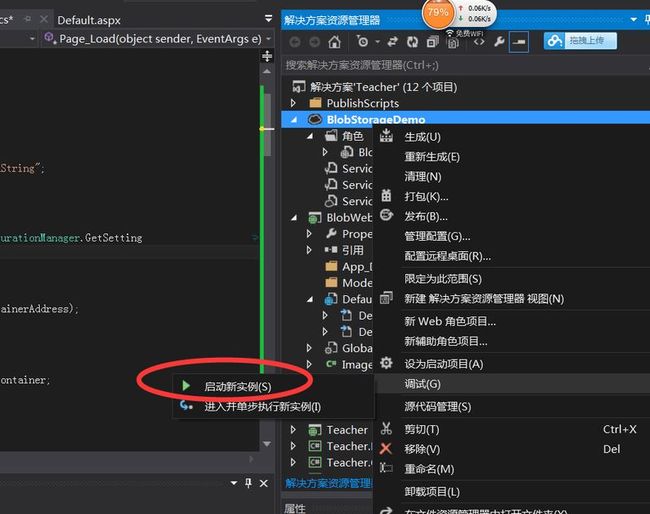
然后我们选择我们的BlobStorageDemo进行调试
我们在页面中输入需要上传得图片及对应的属性.点击保存按钮,保存按钮成功后,列表中会显示我们的图片文件信息.
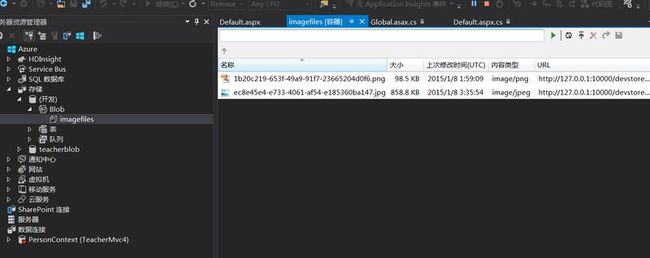
下来我们可以在我们studio中看到我们存储的文件
我们同时也可以使用azure storage explorer看到我们我们上传得文件
打完收工!
