OpenWrt应用开发入门教程
—— 我的开发日志
目录
1、SDK生成的方法
2、SDK工具包安装(解压缩,设置环境变量)
3、编译第1个C代码
4、编译Openwrt的IPK软件包
a) 编译MQTT C Client依赖的openSSL
b) 编译MQTT C Client动态库
c) 编译MQTT C Client示例
d) 编译出OpenWrt的ipk安装包
5、小结
1、SDK生成的方法
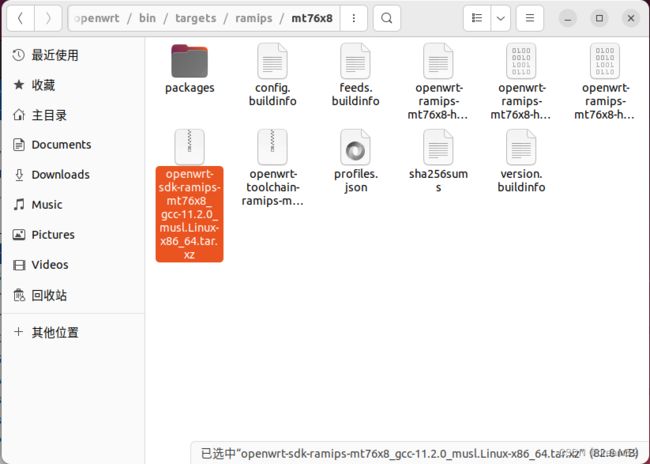
编译Openwrt时选中 Build the OpenWrt SDK, 编译后会在bin/targets/ramips/mt76x8目录下生成SDK压缩包。(以极路由1S( HC5661A)为例)
生成SDK工具包:
2、SDK工具包安装(解压缩,设置环境变量)
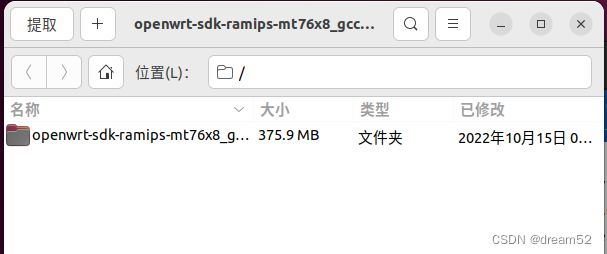
视窗解压法:直接双击SDK压缩包打开
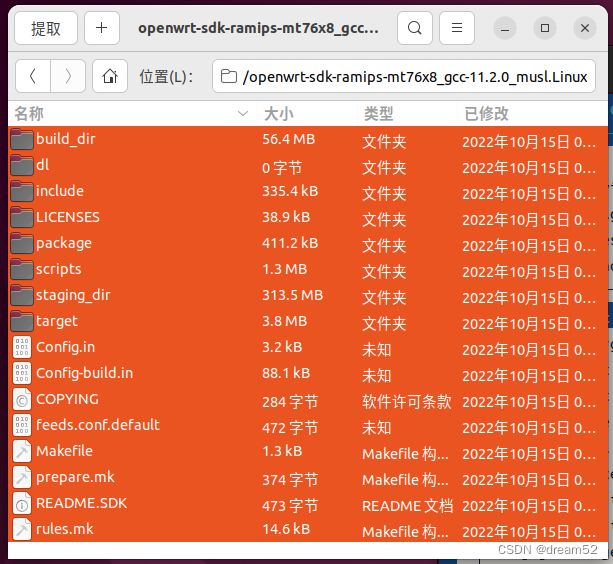
继续双击这里面的文件夹,并选中所有文件(因为我不想要这个文件夹名称太长)
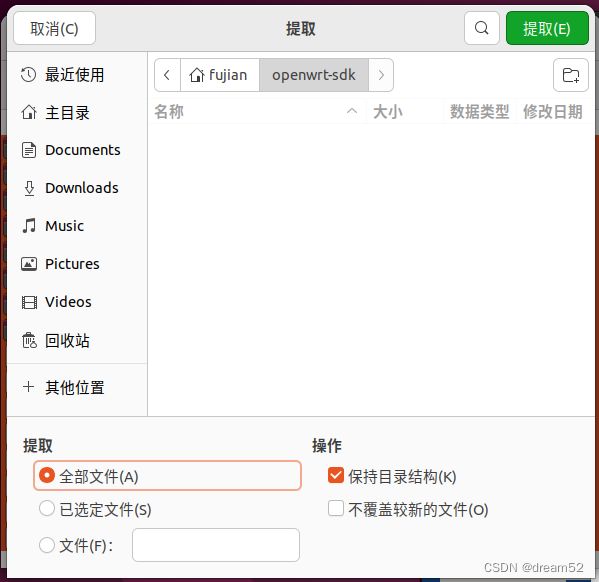
点击提取,选中事先在主目录下建好的openwrt-sdk
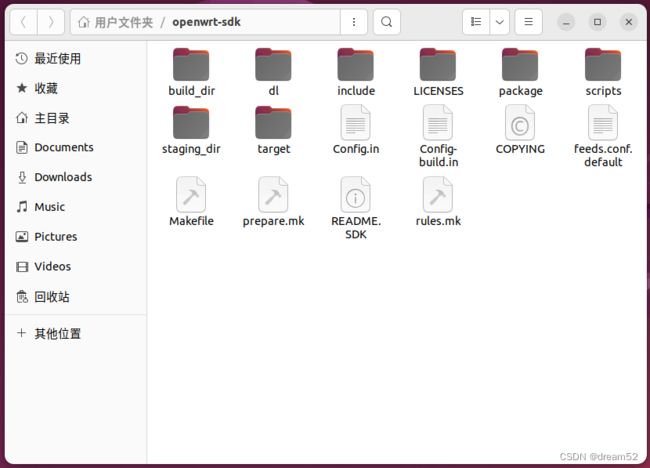
再点击提取,解压完后,openwrt-sdk目录下的文件:
上了一大堆图,SDK工具包终于解压完成了,还可以用tar指令解压。
环境变量设置,在终端命令窗口下:
export PATH=$PATH:~/openwrt-sdk/staging_dir/toolchain-mipsel_24kc_gcc-11.2.0_musl/bin
export STAGING_DIR=~/openwrt-sdk/staging_dir
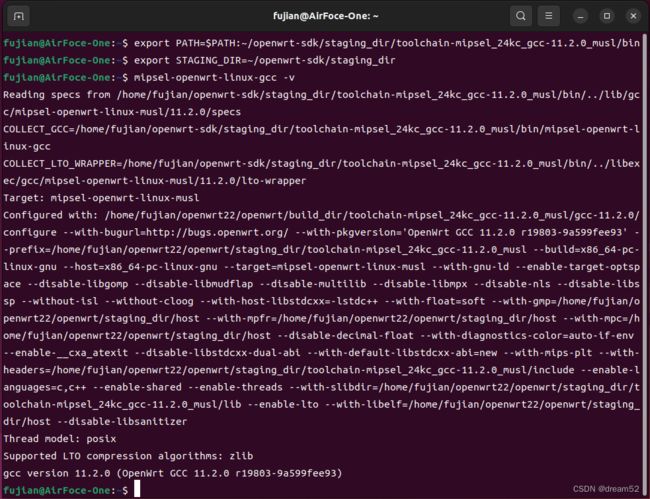
设置后验证一下,输入mipsel-openwrt-linux-gcc -v
提示gcc 版本号,则设置成功!
但是这种方式设置的环境变量,只在当前终端窗口下立即生效,关闭后,就需要重新设置才有效。
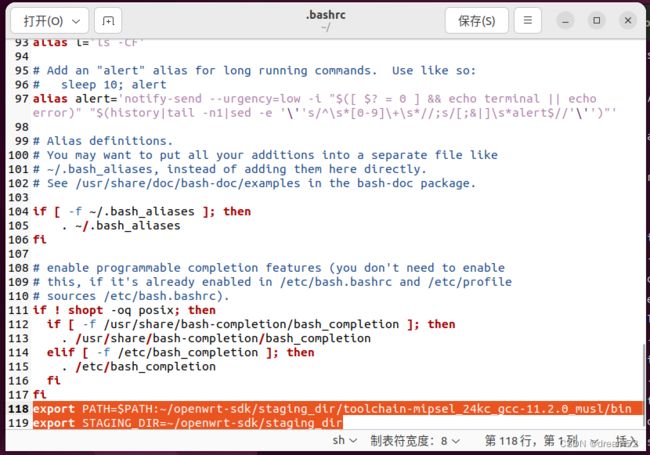
关于环境变量设置,网上有很多教程,这里不再详述,这里只讲一种方式,修改~/.bashrc文件,在最后一行添加上上面的指令
gedit ~/.bashrc
保存后,重新打开终端,再次mipsel-openwrt-linux-gcc -v 验证环境变量是否设置好,发现OK了。
3、编译第1个C代码
写第一个openwrt上的程序,当然是helloworld啦,迫不急待的想用mipsel-openwrt-linux-gcc交叉编译器试试看。
helloworld.c
#include
int main ()
{
	printf("hello world!\n");
	return 0;
}
和gcc用法一样,只是把gcc 替换成交叉编译的mipsel-openwrt-linux-gcc:
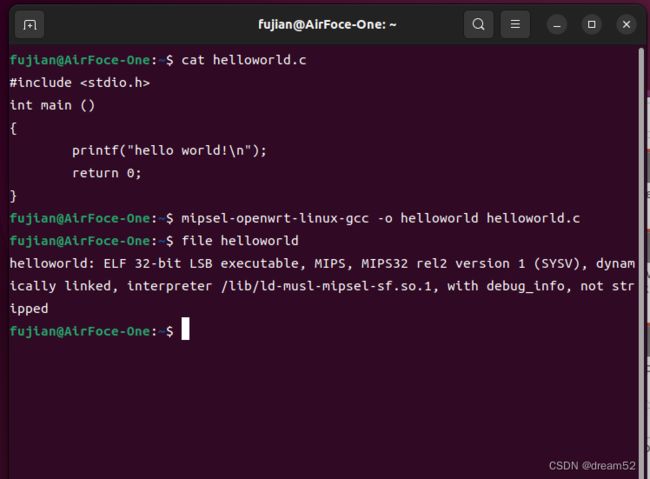
mipsel-openwrt-linux-gcc -o helloworld helloworld.c
编译完了,用file helloworld查看文件是不是对应路由器CPU执行的代码。
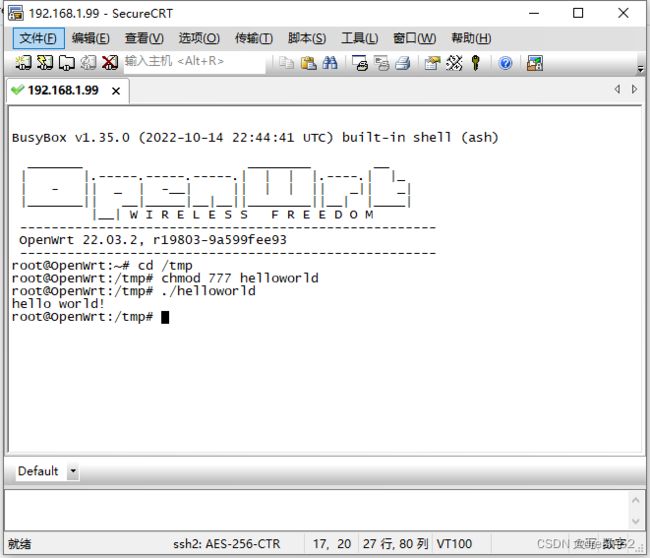
上传到路由器并执行
编译成功!
4、编译Openwrt的IPK软件包
helloworld程序的IPK就不编译了,因为网上也有,可以很容易找到。我这里编译一下MQTT C Client的动态链接库,并使用MQTT C Client动态库的例程,演示在OpenWrt下如何加入第三方动态链接库,并编译出IPK软件包。
MQTT C Client 库官网
Eclipse Paho | The Eclipse FoundationThe Eclipse Foundation - home to a global community, the Eclipse IDE, Jakarta EE and over 415 open source projects, including runtimes, tools and frameworks.https://www.eclipse.org/paho/index.php?page=clients/c/index.php官网中,是克隆后直接make和make install, 这样会直接安装到Ubuntu上,我们是要编译出OpenWrt上使用的库,所以呢,我们先克隆源代码,但不编译这么快,因为我们OpenWrt的库里缺少openssl,我们要把openssl库也编译成Openwrt的。
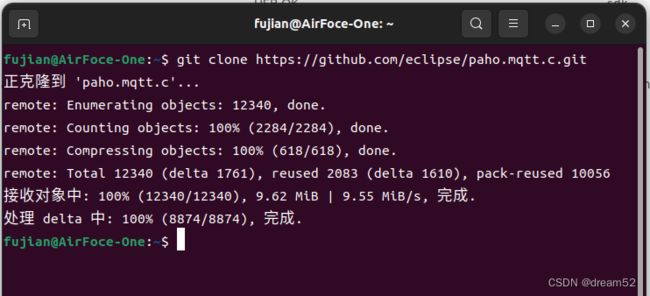
克隆MQTT C Client 库
git clone https://github.com/eclipse/paho.mqtt.c.git克隆好,先放着。
a) 编译MQTT C Client依赖的openSSL
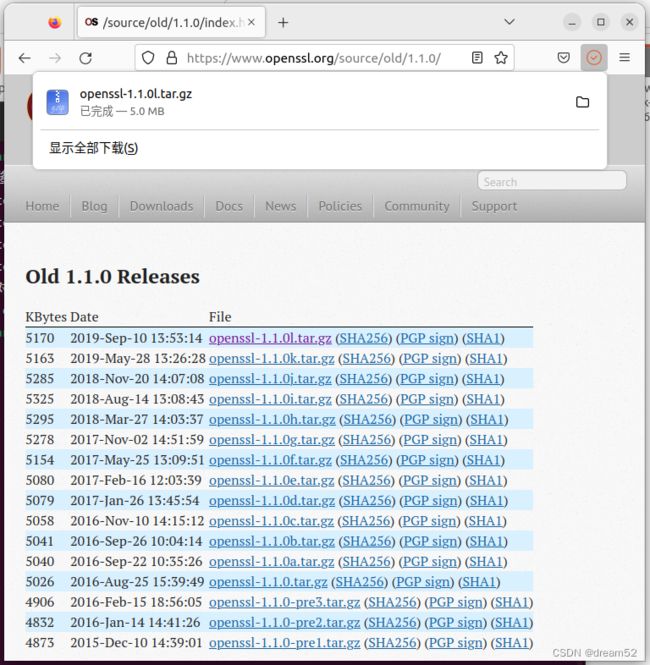
接着下载openssl, 下载这个就不用git了,太慢了,直接浏览器下载
网址:/source/old/1.1.0/index.html
我这选了1.1.0l版本,最新是3.0版本。
下载好后,双击,解压到用户主目录里
接着打开终端,输入如下
cd openssl-1.1.0l
./config no-asm shared no-async --prefix=$PWD/../mylib --cross-compile-prefix=mipsel-openwrt-linux-
gedit Makefile
make
make install
./config 参数说明
-
no-asm : 在交叉编译过程中不使用汇编代码代码加速编译过程。
-
shared : 编译连接成动态库。
-
no-async: Openwrt编译工具中没有GNU C的ucontext库,加上才不会报错。
-
--prefix=$PWD/../mylib : 指定编译后安装路径
-
--cross-compile-prefix=mipsel-openwrt-linux-: 指定交叉编译工具链gcc前缀。
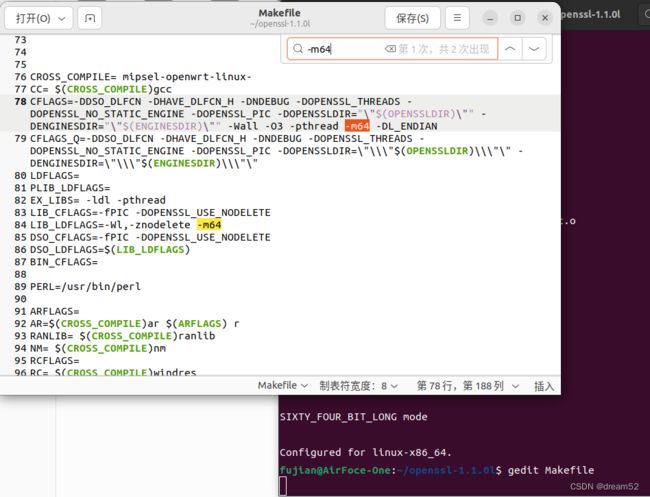
gedit Makefile:修改Makefile,把两处-m64 删除,因为我们的目标系统是32位的,不然会报错。
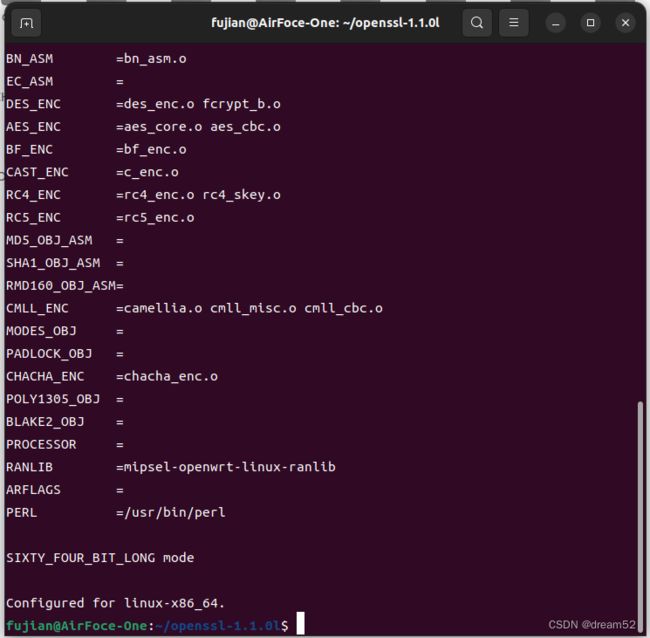
执行完 ./config no-asm shared no-async --prefix=$PWD/../mylib --cross-compile-prefix=mipsel-openwrt-linux- 截图
gedit Makefile 截图,查找-m64 只有两处,删除后保存文件。
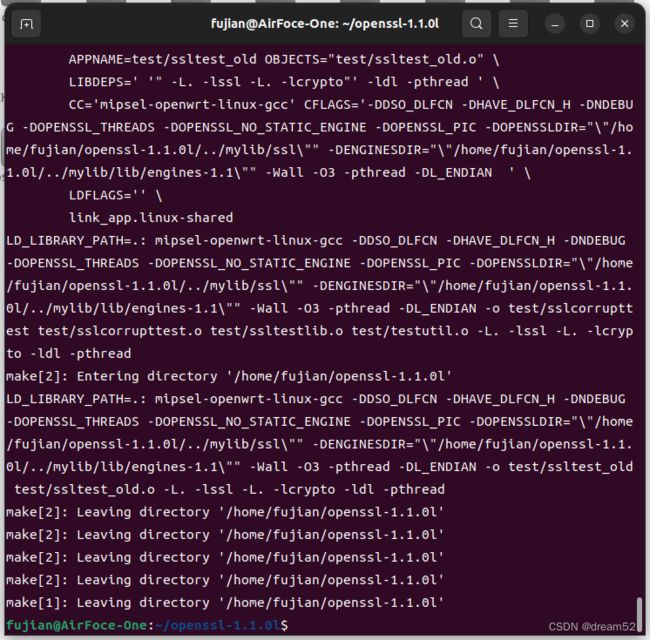
make 完后截图:
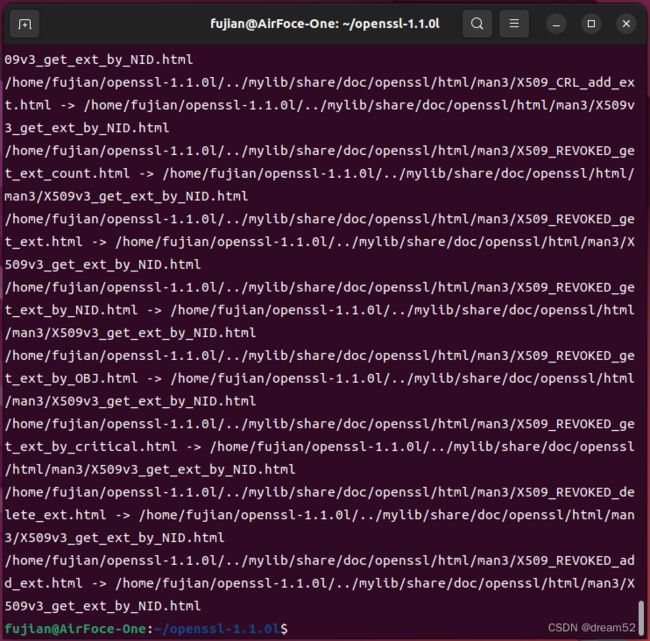
make install 后截图:
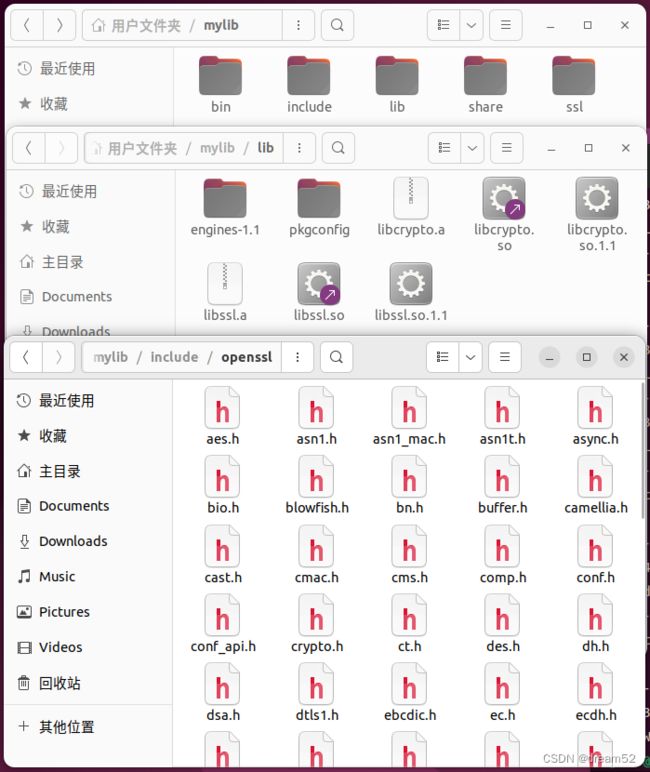
编译完并安装后在上一级目录的mylib文件里已经生成了动态连接库和头文件:
b) 编译MQTT C Client动态库
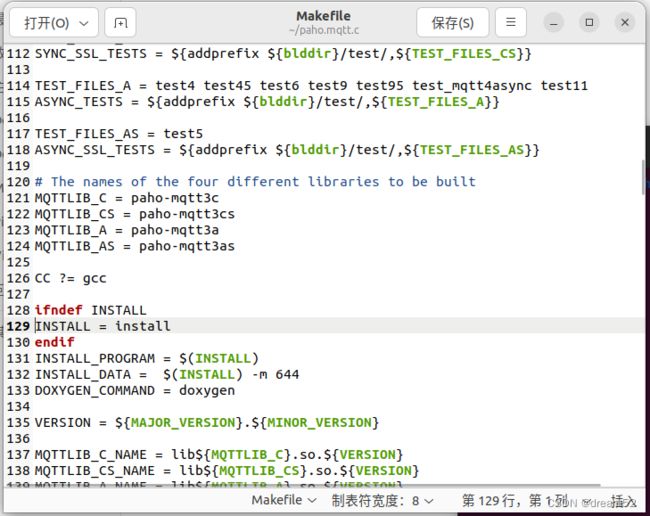
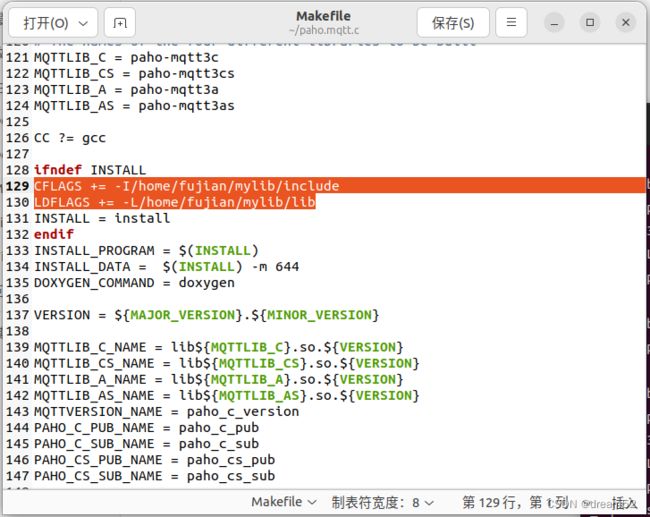
终端进入到之前克隆好的paho.mqtt.c目录中,gedit Makefile 修改Makefile。
在129行中插入
CFLAGS += -I/home/fujian/mylib/include
LDFLAGS += -L/home/fujian/mylib/lib
并把184行的-lanl 删除
删除后保存文件。
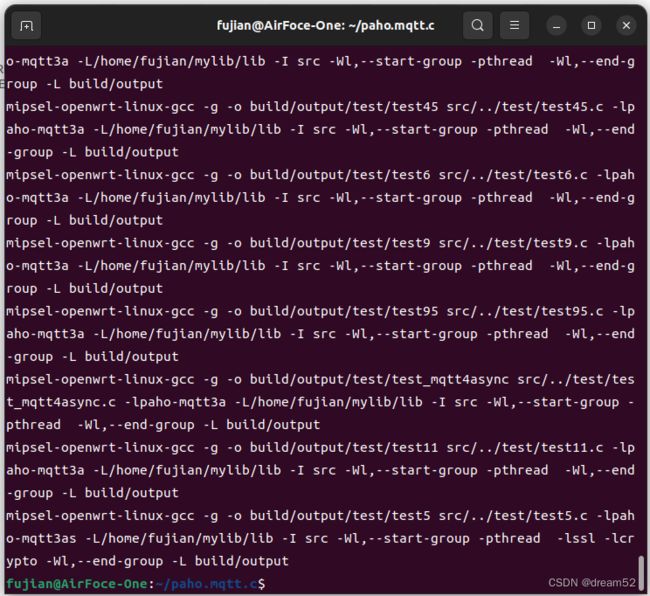
然后开始编译
make CC=mipsel-openwrt-linux-gcc编译完成截图:
不需要make install了,因为我们不是安装在ubuntu上用的。
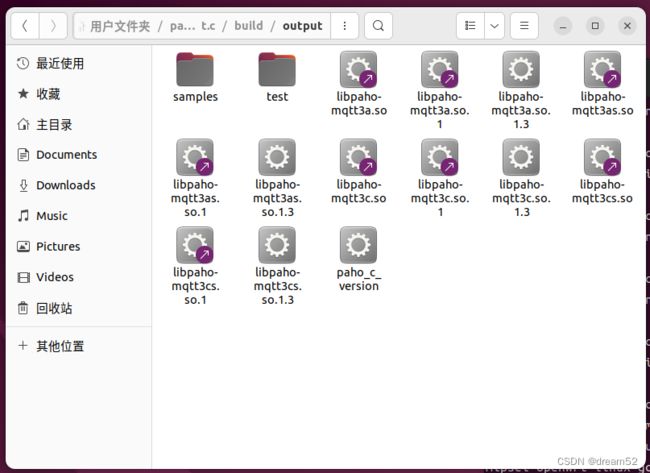
编译完后,在build/output目录中已生成了.so动态链接库
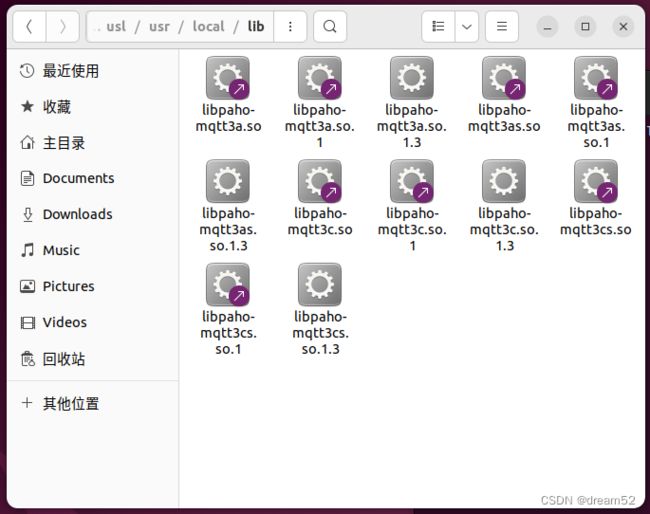
把这12个lib开头的文件拷贝到SDK编译链工具包里的库文件夹下
/home/fujian/openwrt-sdk/staging_dir/toolchain-mipsel_24kc_gcc-11.2.0_musl/usr/local/lib
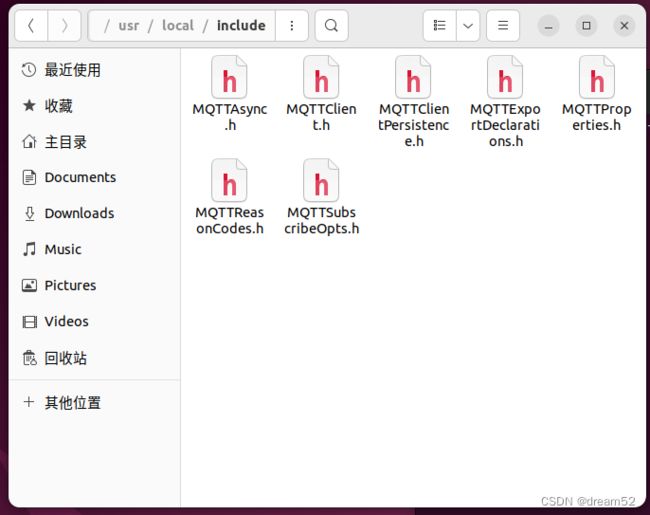
再把paho.mqtt.c/src 目录中的MQTTAsync.h MQTTClient.h MQTTClientPersistence.h
MQTTExportDeclarations.h MQTTProperties.h MQTTReasonCodes.h MQTTSubscribeOpts.h
拷贝到
/home/fujian/openwrt-sdk/staging_dir/toolchain-mipsel_24kc_gcc-11.2.0_musl/usr/local/include
(如果要问我,为什么知道是这些头文件,因为我编译了Unbuntu用的,并make install了一下,就发现只需要这些头文件,如果不确定,把所有.h文件拷过去也没什么问题)
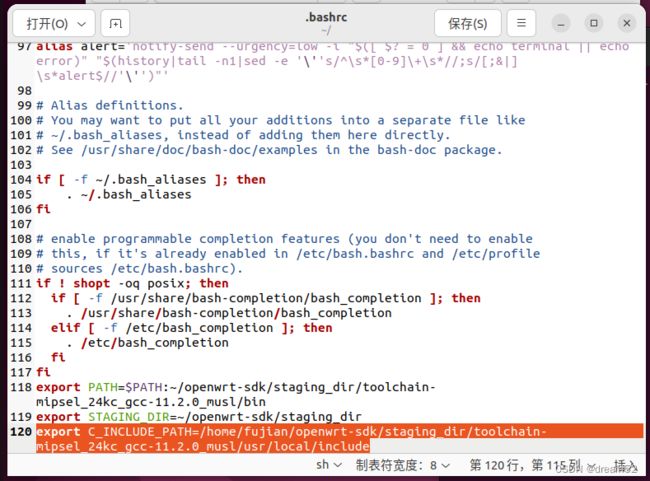
然后再gedit ~/.bashrc
末尾添加
export C_INCLUDE_PATH=/home/fujian/openwrt-sdk/staging_dir/toolchain-mipsel_24kc_gcc-11.2.0_musl/usr/include
添加它的目的是编译时,让gcc能找到MQTT的相关头文件。
c) 编译MQTT C Client示例
到这里我们要写的c代码已经可以把动态库的头文件包含进来了,试试看,编译MQTT C Client的演示代码
mqttexamples.c
#include "stdio.h"
#include "stdlib.h"
#include "string.h"
#include "MQTTClient.h"

#define ADDRESS     "tcp://192.168.10.1:1883"
#define CLIENTID    "ExampleClientPub"
#define TOPIC       "MQTT-Examples"
#define PAYLOAD     "Hello World!"
#define QOS         1
#define TIMEOUT     10000L

int main(int argc, char* argv[])
{
    MQTTClient client;
    MQTTClient_connectOptions conn_opts = MQTTClient_connectOptions_initializer;
    MQTTClient_message pubmsg = MQTTClient_message_initializer;
    MQTTClient_deliveryToken token;
    int rc;

    MQTTClient_create(&client, ADDRESS, CLIENTID,
        MQTTCLIENT_PERSISTENCE_NONE, NULL);
    conn_opts.keepAliveInterval = 20;
    conn_opts.cleansession = 1;

    if ((rc = MQTTClient_connect(client, &conn_opts)) != MQTTCLIENT_SUCCESS)
    {
        printf("Failed to connect, return code %d\n", rc);
        exit(-1);
    }
    pubmsg.payload = PAYLOAD;
    pubmsg.payloadlen = strlen(PAYLOAD);
    pubmsg.qos = QOS;
    pubmsg.retained = 0;
    MQTTClient_publishMessage(client, TOPIC, &pubmsg, &token);
    printf("Waiting for up to %d seconds for publication of %s\n"
            "on topic %s for client with ClientID: %s\n",
            (int)(TIMEOUT/1000), PAYLOAD, TOPIC, CLIENTID);
    rc = MQTTClient_waitForCompletion(client, token, TIMEOUT);
    printf("Message with delivery token %d delivered\n", token);
    MQTTClient_disconnect(client, 10000);
    MQTTClient_destroy(&client);
    return rc;
}
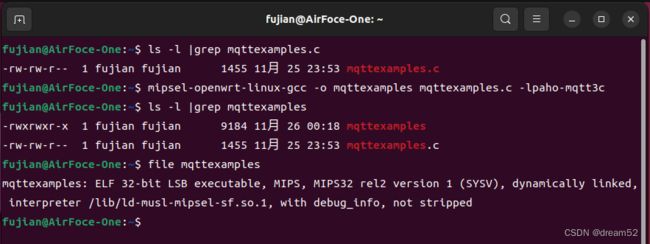
执行mipsel-openwrt-linux-gcc -o mqttexamples mqttexamples.c -lpaho-mqtt3c
进行编译,编译成功后用 file mqttexamples 查看编译出来的文件信息。
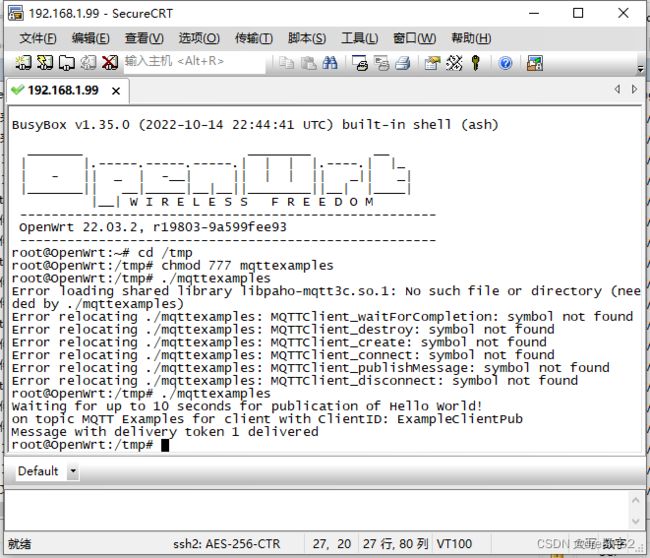
上传至OpenWrt路由器/tmp目录下去运行(路由器已安装MQTT服务器(mosquitto),并允许匿名登陆)
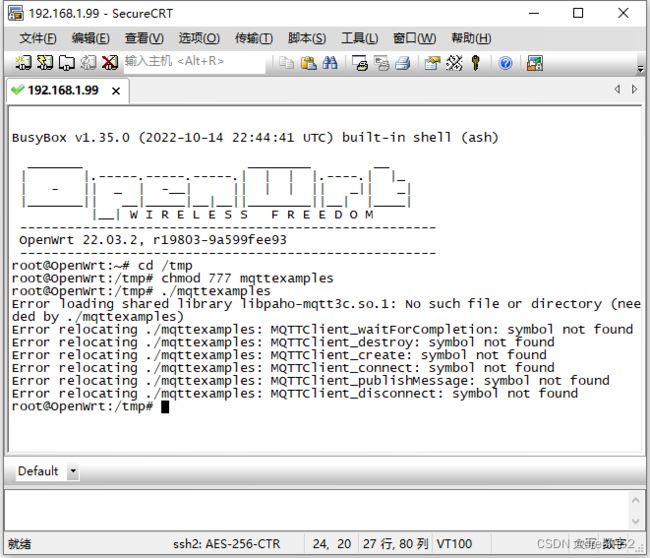
啊哦~ 运行报错,加载共享库libpaho-mqtt3c.so.1时 报没有这样的文件或文件夹。
那是因为我们还没有上传编译出来的库,把之前编译复制出来的lib库,全部上传到路由器的/usr/lib目录下,再次运行程序,发现能正常工作啦!
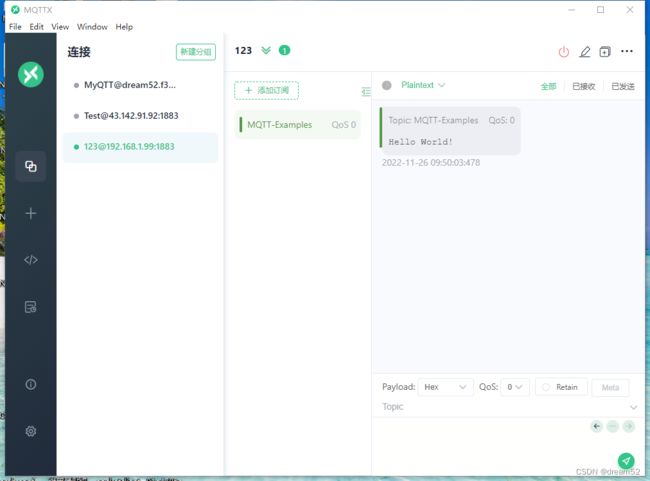
同时Windows 上已订阅MQTT-Examples主题的客户端软件也接收到了信息
d) 编译出OpenWrt的ipk安装包
现在来准备编译ipk的文件,现在看看我们要准备的目录结构
mqttexamples                        //目录
     |-----Makefile                 //顶层Makefile文件
     |-----src                      //目录
            |-----mqttexamples.c    //C源代码
            |-----Makefile          //源代码层Makefile文件
顶层Makefile文件
include $(TOPDIR)/rules.mk

PKG_NAME:=mqttexamples
PKG_RELEASE:=1.0

PKG_BUILD_DIR := $(BUILD_DIR)/$(PKG_NAME)


include $(INCLUDE_DIR)/package.mk

define Package/$(PKG_NAME)/extra_provides
       echo "libpaho-mqtt3c.so.1";
endef

define Package/mqttexamples
	SECTION:=utils
	CATEGORY:=Utilities
	TITLE:=MQTT examples
endef

define Package/mqttexamples/description
	a MQTT Client Program run on OpenWRT.
endef

define Build/Prepare
	mkdir -p $(PKG_BUILD_DIR)
	$(CP) ./src/* $(PKG_BUILD_DIR)/
endef

define Package/mqttexamples/install
	$(INSTALL_DIR) $(1)/usr/sbin
	$(INSTALL_BIN) $(PKG_BUILD_DIR)/mqttexamples $(1)/usr/sbin/mqttexamples
endef

$(eval $(call BuildPackage,mqttexamples))
源代码层Makefile文件
CC = gcc
FLAG = -Wall

mqttexamples:
	$(CC) $(FLAG) mqttexamples.c -o mqttexamples -lpaho-mqtt3c

clean:
	rm *.o mqttexamples
mqttexamples.c文件 上面有,这里就不贴了。把文件按上面的目录结构组织好,把它放到openwrt-sdk/package目录中,之后,终端在openwrt-sdk目录下,make menuconfig 一下,看看mqttexamples是不是出现在上面了。
只是进来看看而已。 退出,保存或不保存都可以,因为并没有修改啥。
接着我们来单独编译mqttexamples,执行:
make package/mqttexamples/compile V=99
编译发现错误,找不到MQTTClient.h头文件:
看来还是得把7个MQTT开对的头文件直接放入SDK编译链工具目录下的include目录中,目录为:
/home/fujian/openwrt-sdk/staging_dir/toolchain-mipsel_24kc_gcc-11.2.0_musl/include
再次执行make package/mqttexamples/compile V=99
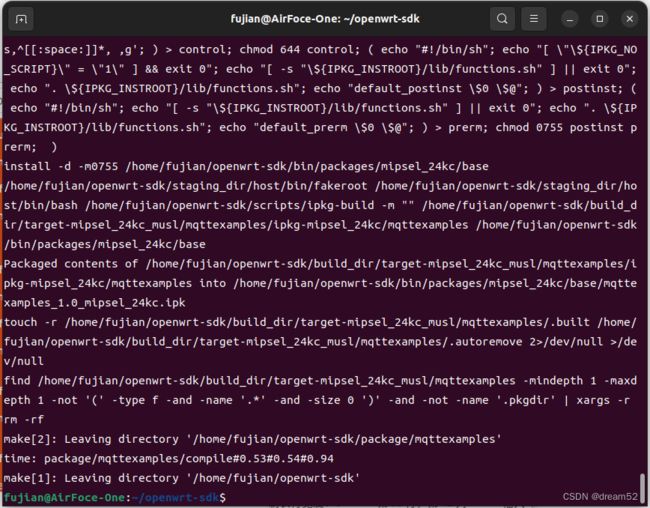
编译完成后截图:
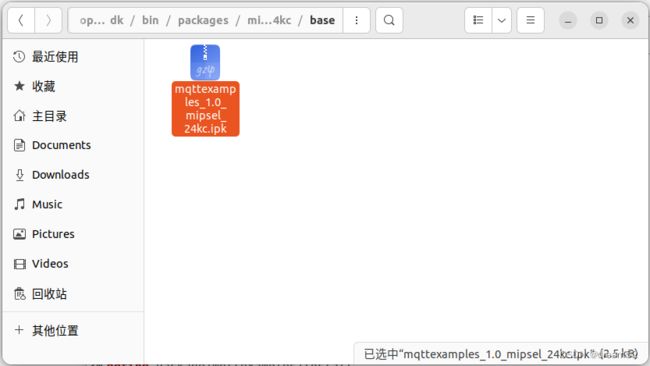
没有提示错误就是编译成功啦,看看/home/fujian/openwrt-sdk/bin/packages/mipsel_24kc/base
已经生成了IPK安装包,也不清楚这个IPK安装的时候,会不会把动态库一起安装。
上传至路由器的/tmp目录,还特意把之前拷贝到/usr/lib下的那些动态库删除,安装IPK,并运行程序,结果是报错了,重新拷回动态库,再运行,又正常啦。
上传IPK,安装,运行截图:
5、小结
最终IPK是编译出来,但是IPK安装的时候没把动态库一起安装,在实际应用中,对用户不友好,这也是不行的,还需要进一步研究。另外,这个示例代码并没有用到ssl连接,只是编译phao-mqtt.c时没有这个库的话会报错,所以编译后的程序不需要把openssl的动态链接库也上传到路由器也能正常运行。

