SpringBoot集成swagger-配置
SpringBoot集成swagger-配置01
学习目标
-
- SpringBoot集成swagger-配置01
-
- 1、使用Swagger
- 2、配置Swagger
SpringBoot集成Swagger 需要 springfox,两个jar包
- Springfox-swagger2
- swagger-springmvc
1、使用Swagger
要求:jdk 1.8 + 否则swagger2无法运行
步骤:
1、新建一个SpringBoot-web项目
2、添加Maven依赖
<!-- https://mvnrepository.com/artifact/io.springfox/springfox-swagger2 -->
<dependency>
   <groupId>io.springfox</groupId>
   <artifactId>springfox-swagger2</artifactId>
   <version>2.9.2</version>
</dependency>
<!-- https://mvnrepository.com/artifact/io.springfox/springfox-swagger-ui -->
<dependency>
   <groupId>io.springfox</groupId>
   <artifactId>springfox-swagger-ui</artifactId>
   <version>2.9.2</version>
</dependency>
3、编写HelloController,测试确保运行成功!
4、要使用Swagger,我们需要编写一个配置类-SwaggerConfig来配置 Swagger
@Configuration
@EnableSwagger2 //开启swagger2,swagger老版,swagger2新版
public class SwaggerConfig {

}
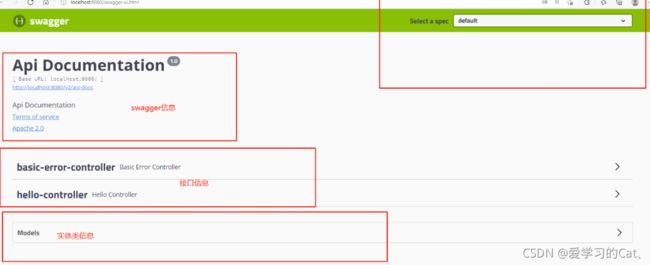
5、访问测试 :http://localhost:8080/swagger-ui.html ,可以看到swagger的界面;
测试的时候,遇到个bug
org.springframework.context.ApplicationContextException: Failed to start bean ‘documentationPluginsBootstrapper’; nested exception is java.lang.NullPointerException
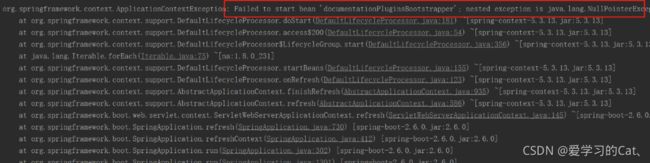
一定注意,如果是最新版本的,之前的注解@EnableSwagger2就会一直报错,一般IDEA创建SpringBoot项目时候,默认最新版本,我用的2.6.0所以报错
解决办法:把SpringBoot版本往低降降就好了

2、配置Swagger
1、Swagger实例Bean是Docket,所以通过配置Docket实例来配置Swaggger。
@Bean //配置docket以配置Swagger具体参数
public Docket docket() {
  return new Docket(DocumentationType.SWAGGER_2);
}
进入Docket看源码:
public Docket(DocumentationType documentationType) {
        this.apiInfo = ApiInfo.DEFAULT;
        this.groupName = "default";
        this.enabled = true;
        this.genericsNamingStrategy = new DefaultGenericTypeNamingStrategy();
        this.applyDefaultResponseMessages = true;
        this.host = "";
        this.pathMapping = Optional.absent();
        this.apiSelector = ApiSelector.DEFAULT;
        this.enableUrlTemplating = false;
        this.vendorExtensions = Lists.newArrayList();
        this.documentationType = documentationType;
    }
进入DocumentationType源码:

2、可以通过apiInfo()属性配置文档信息
//配置文档信息
private ApiInfo apiInfo() {
  Contact contact = new Contact("联系人名字", "http://xxx.xxx.com/联系人访问链接", "联系人邮箱");
  return new ApiInfo(
          "swagger 学习日记", // 标题
          "清幽现云山,虚静出内功", // 描述
          "v1.0", // 版本
          "http://terms.service.url/组织链接", // 组织链接
          contact, // 联系人信息
          "Apach 2.0 许可", // 许可
          "许可链接", // 许可连接
          new ArrayList<>()// 扩展
 );
}
进入ApiInfo源码:
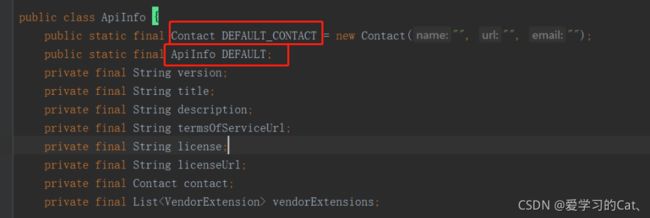
static {
        DEFAULT = new ApiInfo("Api Documentation", "Api Documentation", "1.0", "urn:tos", DEFAULT_CONTACT, "Apache 2.0", "http://www.apache.org/licenses/LICENSE-2.0", new ArrayList());
    }
3、Docket 实例关联上 apiInfo()
@Configuration
@EnableSwagger2
public class SwaggerConfig{

    /**
     * 配置了swagger的Docket的bean实例,用Docket对象接管了他原来的默认配置ApiInfo
     * @return
     */
    @Bean
    public Docket docket(){
        return new Docket(DocumentationType.SWAGGER_2)
                .apiInfo(apiInfo());
    }

    /**
     * 配置swagger信息apiInfo() 里面要传入一个 apiInfo
     */

    private ApiInfo apiInfo(){

        //作者信息
        Contact contact = new Contact("多啦A梦", "https://www.baidu.com/", "[email protected]");

        return new ApiInfo(
                "swagger 学习日记",
                "清幽现云山,虚静出内功",
                "1.0",
                "https://www.baidu.com/",
                contact,
                "Apache 2.0",
                "http://www.apache.org/licenses/LICENSE-2.0",
                new ArrayList());

    }
4、重启项目,访问测试 http://localhost:8080/swagger-ui.html 看下效果;

剩下内容请看swagger专栏,这里按内容区分发出
链接: swagger第二部分知识点讲解.