TensorRT优化部署实战项目:YOLOv5人员检测
系列文章目录
第一章 YOLOv5模型训练集标注、训练流程
第二章 YOLOv5模型转ONNX,ONNX转TensorRT Engine
第三章 TensorRT量化
文章目录
- 系列文章目录
- 前言
- 一、配置深度学习环境
- 二、YOLOv5训练自定义数据
-
- 2.1 标注数据
- 2.2 准备数据集
- 2.3 训练
- 2.4 可视化
-
-
- 2.4.1 wandb
- 2.4.2 TensorBoard
- 2.5 测试评估模型
-
- 总结
前言
学习笔记–恩培老师
一、配置深度学习环境
Linux系统的话为了配置方便,可以直接使用autodl算力云服务器 (新人有10元免费优惠券。)
YOLOv5实战TensorRT部署-Windows
- 安装Visual Studio 2019vs下载链接https://visualstudio.microsoft.com/zh-hans/downloads/
最好下载2019版本与后面cMake相匹配 - 下载和安装nvidia显卡驱动
- 下载安装CUDA和cuDNN(11.6+8.5)
- 安装Anaconda
- 安装pytorch(python3.9+torch1.9)
YOLOv8项目克隆和安装
YOLOv5下载地址 https://github.com/ultralytics/yolov5
git clone https://github.com/ultralytics/yolov5  # clone
cd yolov5
pip install -r requirements.txt  # install
下载预训练权重文件并放置在新建立的weights文件夹下,先下载yolov5s.pt

4) 安装测试
命令参数说明 https://docs.ultralytics.com/modes/predict/
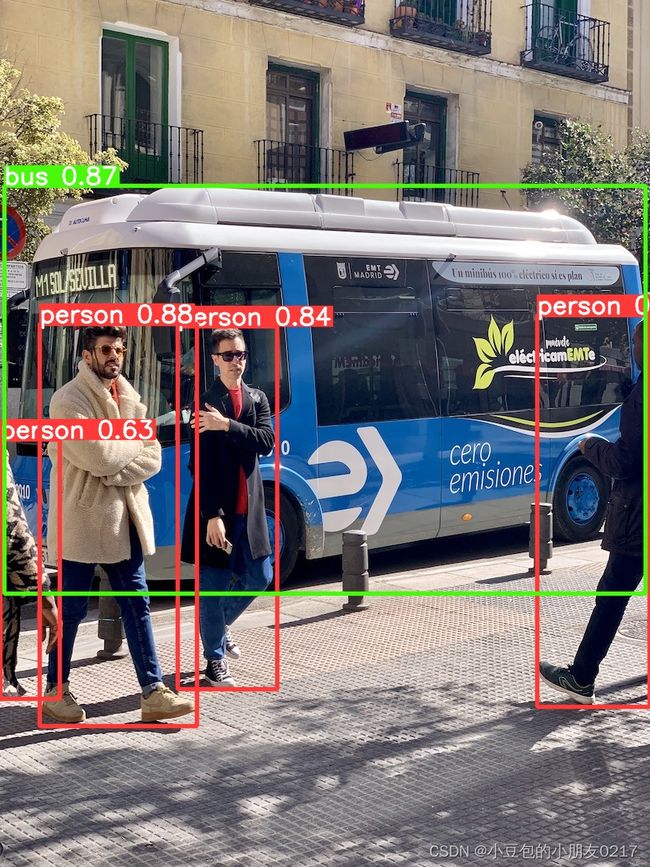
预测图片
yolo predict model=D:\code\pythonProject5\yolov5-master\yolov5-master\weights\yolov5s.pt source=D:\code\pythonProject5\yolov5-master\yolov5-master\data\images\bus.jpg
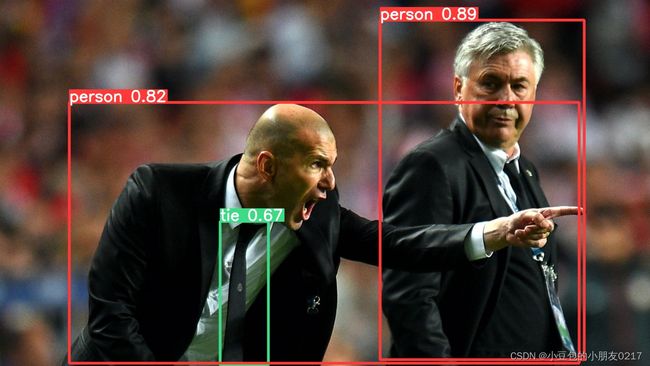
批量预测图片
yolo predict model=D:\code\pythonProject5\yolov5-master\yolov5-master\weights\yolov5s.pt source=D:\code\pythonProject5\yolov5-master\yolov5-master\data\images
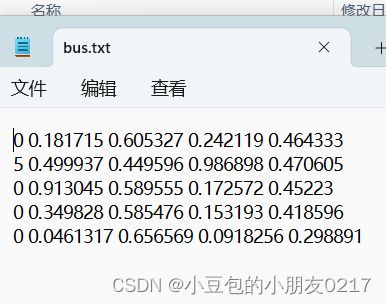
yolo predict model = D:\code\pythonProject5\yolov5-master\yolov5-master\weights\yolov5s.pt source=D:\code\pythonProject5\yolov5-master\yolov5-master\data\images\bus.jpg save_txt
yolo predict model=D:\code\pythonProject5\yolov5-master\yolov5-master\weights\yolov5s.pt source=0 show
二、YOLOv5训练自定义数据
2.1 标注数据
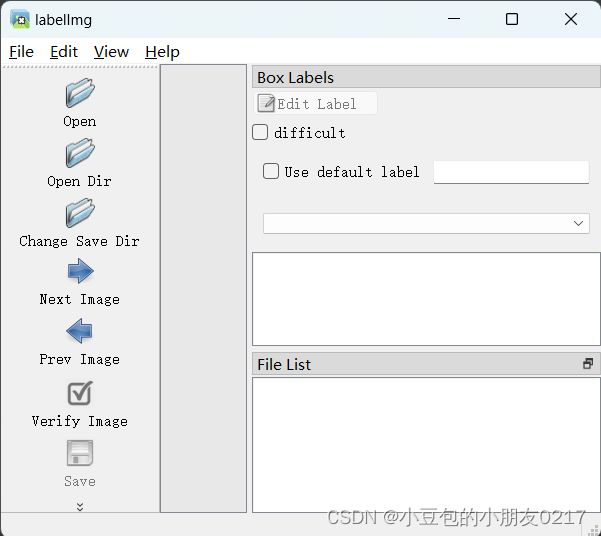
安装labelImg
pip install labelImg
lablelImg  #启动
选择旁边的Create RectBox 就可以选择矩形框,然后添加标签
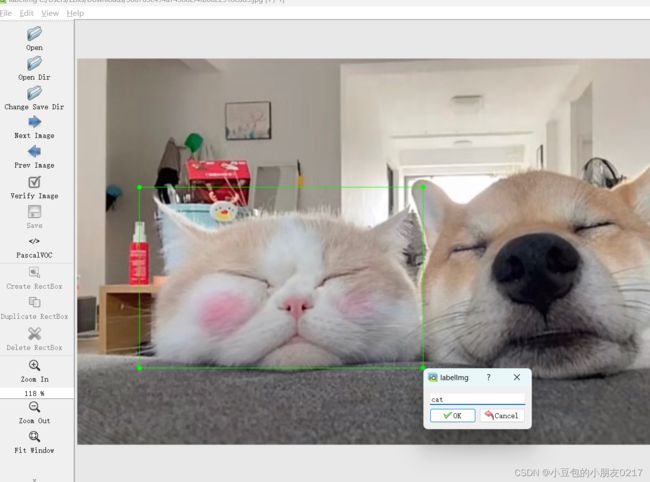
然后点击保存,即可得到两个文件,位置信息和类别信息。
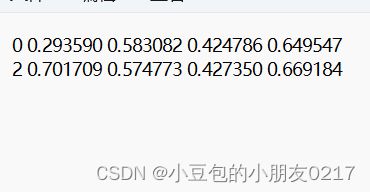
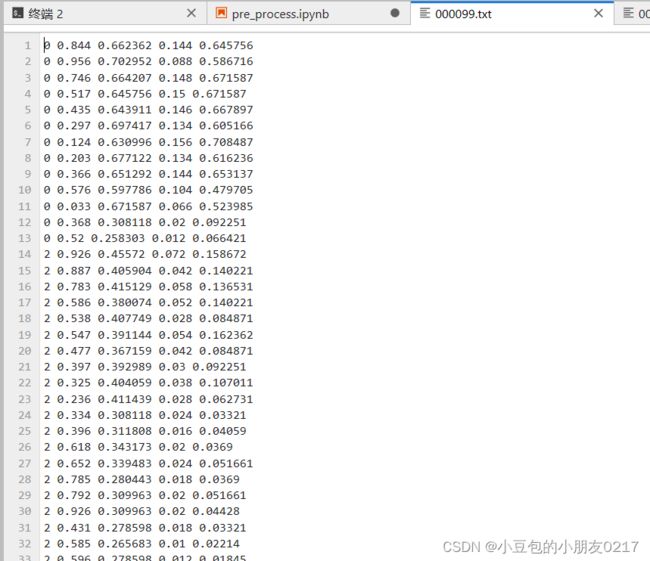
每行数据格式为:类别id,x_center,y_center,width,height;
第一个是类别id(必须从0开始),接下来是x,y,wh,归一化到(0-1)
2.2 准备数据集
- 采用公开数据集WiderPerson下载链接https://cvmart.net/dataSets/detail/243
下载好的文件目录如下

2. 转yolo格式,使用JupyterLab更加直观
打开Readme 可以看到class_label不是从0开始的,也不是按照yolo数据格式存储的x1,y1不是中心点坐标,而是左上角坐标,x2,y2是右下角坐标,所以需要进行yolo格式转换。

读取标注文件,转yolo格式
import cv2
import os
import numpy as np
import matplotlib.pyplot as plt
import glob
import shutil
import tqdm

#读取标注文件,转为yolo格式
def convert2yolo(imgId,savePathPrefix='./person_data/labels/train'):
    """

    :param imgId: 图片id
    :param savePathPrefix: 保存的yolo格式标注文件路径前缀
    :return yoloLabbelFile: yolo格式的标注文件路径
    """
    #打开标注文件
    lines = []
    oriLabelFile = './Annotations/'+imgId+".jpg.txt"

    #打开标注文件
    with open(oriLabelFile,'r') as f:
        # 读取所有行
        lines = f.readlines()
        # 转为list
        lines = [line.strip() for line in lines]
    # 第一行为图片宽和高,可以直接跳过
    boxes = lines[1:] #[class_label,x1,y1,x2,y2]
    boxes = [box.split(' ') for box in boxes]

    #读取标注文件对应图片
    imgFile = './Images/'+imgId +'.jpg'
    img = cv2.imread(imgFile)

    #转为yolo格式:类别id x_center y_center width height 归一化到0-1 保留6位小数
    yolo_boxes = []
    img_h,img_w, _ = img.shape
    for box in boxes:
        class_label = int(box[0])-1
        x1,y1,x2,y2 = [int(i) for i in box[1:]]
        x_center = round((x1+x2)/2/img_w,6)
        y_center = round((y1+y2)/2/img_h,6)
        width =round((x2-x1)/img_w,6)
        height = round((y2-y1)/img_h,6)
        yolo_boxes.append([class_label,x_center,y_center,width,height])

    #写入txt文件
    #生成yolo格式的标注文件
    # 生成yolo格式的标注文件
    yoloLabelFile = savePathPrefix + imgId + '.txt'
    with open(yoloLabelFile, 'w') as f:
        for yolo_box in yolo_boxes:
            f.write(' '.join([str(i) for i in yolo_box]) + '\n')
    if os.path.exists(yoloLabelFile):
        return yoloLabelFile
    else:
        return None
- 用来测试样本图片
import cv2
import matplotlib.pyplot as plt
import numpy as np

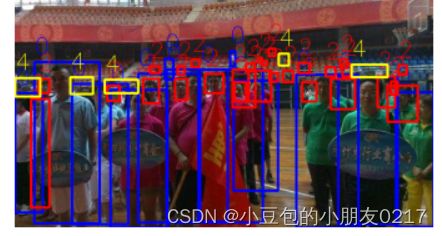
def yoloDraw(img, yoloLabelFile):
    """
    :param img: 图片(NumPy数组)
    :param yoloLabelFile: yolo格式的标注文件路径
    :return:
    """
    img_copy = img.copy()
    color_dict = {0: (255, 0, 0), 1: (0, 255, 0), 2: (0, 0, 255), 3: (255, 255, 0), 4: (0, 255, 255)}
    with open(yoloLabelFile, 'r') as f:
        lines = f.readlines()
        lines = [line.strip() for line in lines]
        boxes = [line.split(' ') for line in lines]
        for box in boxes:
            class_label = int(box[0])
            x_center, y_center, width, height = [float(i) for i in box[1:]]
            x1 = int((x_center - width / 2) * img_copy.shape[1])
            y1 = int((y_center - height / 2) * img_copy.shape[0])
            x2 = int((x_center + width / 2) * img_copy.shape[1])
            y2 = int((y_center + height / 2) * img_copy.shape[0])
            cv2.rectangle(img_copy, (x1, y1), (x2, y2), color_dict[class_label], 2)
            cv2.putText(img_copy, str(class_label), (x1, y1 - 10), cv2.FONT_HERSHEY_SIMPLEX, 0.9, color_dict[class_label], 1)

    plt.imshow(np.uint8(img_copy[:, :, ::-1]))
    plt.axis('off')
    plt.show()
随机取一个图片ID进行测试
test_imgId = '000099'
展示图片
 imgFile = './Images/' + test_imgId + '.jpg'
    # 复制到当前目录
    shutil.copy(imgFile, './')
    img = cv2.imread(imgFile)
    plt.imshow(img[:,:,::-1])
yoloLabelFile = convert2yolo(test_imgId,savePathPrefix='./')
with open('./classes.txt','w') as f:
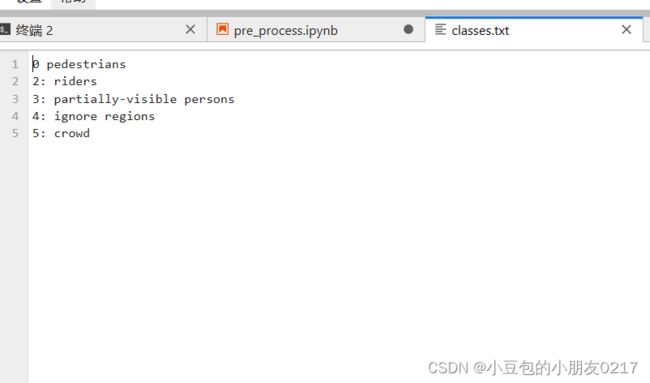
    f.writelines(['0 pedestrians\n','2: riders\n','3: partially-visible persons\n','4: ignore regions\n','5: crowd'])
yoloDraw(img,yoloLabelFile)
- 创建数据集目录
#创建多级文件路径 ./person_data/images/train,./person_data/images/val,./person_data/labels/train,./person_data/labels/val

if not os.path.exists('/person_data'):
    os.mkdir('./person_data')

if not os.path.exists('/person_data/images'):
    os.mkdir('./person_data/images')

if not os.path.exists('/person_data/images/train'):
    os.mkdir('./person_data/images/train')

if not os.path.exists('/person_data/images/val'):
    os.mkdir('./person_data/images/val')

if not os.path.exists('/person_data/images'):
    os.mkdir('./person_data/labels')

if not os.path.exists('/person_data/labels/train'):
    os.mkdir('./person_data/labels/train')

if not os.path.exists('/person_data/labels/val'):
    os.mkdir('./person_data/labels/val')
获取训练集和测试集文件并打印数量
#获取所有训练和测试图片的文件名
train_img_file_names =[]
with open('./train.txt','r') as f:
    train_img_file_names = f.readlines()
    train_img_file_names = [x.strip() for x in train_img_file_names]
with open('./val.txt','r') as f:
    val_img_file_names = f.readlines()
    val_img_file_names = [x.strip() for x in val_img_file_names]
print('train_img_file_names',len(train_img_file_names))
print('val_img_file_names',len(val_img_file_names))
对训练集和测试集进行处理
#处理训练集
for img_file_name in tqdm.tqdm(train_img_file_names,desc='train'):
    #转为yolo格式
    yoloLabelFile = convert2yolo(img_file_name,savePathPrefix='./person_data/labels/train/')
    if yoloLabelFile:
        #复制图片到指定路径
        imgFile = './Images/'+img_file_name+'.jpg'
        shutil.copy(imgFile,'./person_data/images/train/'+img_file_name+'.jpg')

#处理验证集
for img_file_name in tqdm.tqdm(val_img_file_names,desc='val'):
    #转为yolo格式
    yoloLabelFile = convert2yolo(img_file_name,savePathPrefix='./person_data/labels/val/')
    if yoloLabelFile:
        #复制图片到指定路径
        imgFile = './Images/'+img_file_name+'.jpg'
        shutil.copy(imgFile,'./person_data/images/val/'+img_file_name+'.jpg')
检查文件数量,验证一下处理前后数量是否一致。
print('train_img_file_names',len(os.listdir('./person_data/images/train')))
print('train_img_file_names',len(os.listdir('./person_data/labels/train')))
print('val_img_file_names',len(os.listdir('./person_data/labels/val')))
print('val_img_file_names',len(os.listdir('./person_data/labels/val')))
2.3 训练
复制yolov5/data下的coco128.yaml并重命名为person_data,并修改如下,

最后记得修改类别,yaml文件中只留下以下部分:
path: ../datasets/person_data  # dataset root dir
train: images/train  # train images (relative to 'path') 128 images
val: images/train  # val images (relative to 'path') 128 images
test:  # test images (optional)

# Classes
# nc:5
# names:[pedestrians,riders,partially-visible persons,ignore regions,crowd]
names:
  0: pedestrians
  1: riders
  2: partially-visible
  3: ignore regions
  4: crowd
再修改yolov5s的配置文件,在model/yolov5s.yaml,修改类别为5即可。

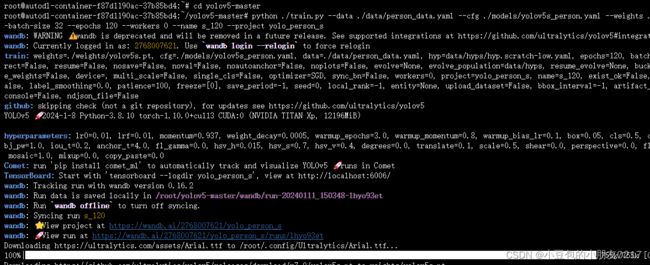
下载对应的预训练模型权重文件,可以放到weights目录下,设置本机最好性能参数,即可开始训练。
python ./train.py --data ./data/person_data.yaml --cfg ./models/yolov5s_person.yaml --weights ./weights/yolov5s.pt --batch-size 32 --epochs 120 --workers 0 --name s_120 --project yolo_person_s
训练开始,大概五六个小时
2.4 可视化
2.4.1 wandb
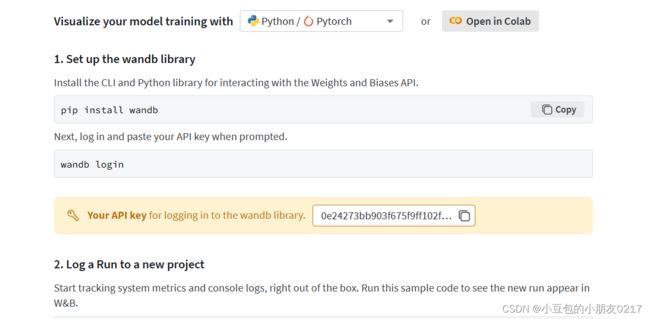
使用wandb进行可视化,推荐链接:wandb可视化
wandb官网链接:https://wandb.ai/site

2.4.2 TensorBoard
tensorboard --icgdir=./yolo_person_s
2.5 测试评估模型
测试模型
python detect.py --source ./000057.jpg --weights ./yolo_person_s/s_120/weights/best.pt --conf-thres 0.3

python detect.py --source ./c3.mp4 --weights ./yolo_person_s/s_120/weights/best.pt --conf-thres 0.3
评估模型
python val.py --data ./data/coco_person.yaml --weights ./yolo_person_s/s_120/weights/best.pt --batch-size 12
总结
后续内容将继续补充.
