Spring Boot 3 + Vue 3实战:实现用户登录功能
文章目录
- 一、实战概述
- 二、实战步骤
-
- (一)创建前端项目 - login-vue
-
- 1、创建Vue项目
- 2、安装axios模块
- 3、安装vue-router模块
- 4、安装less和less-loader模块
- 5、运行Vue项目
- 6、在浏览器里访问首页
- 7、在IDEA里打开Vue项目
- 8、创建登录Vue组件
- 9、创建首页Vue组件
- 10、创建路由视图
- 11、编写应用根组件
- 12、编写主入口脚本
- 13、设置反向代理和跨域支持
- 14、访问登录页面
- (二)创建后端项目 - LoginDemo
-
- 1、创建Spring Boot项目
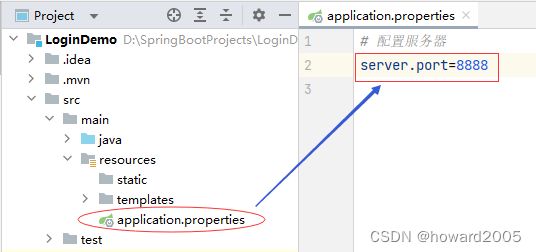
- 2、配置服务器端口号
- 3、启动应用,访问首页
- 4、创建用户实体类
- 5、创建结果实体类
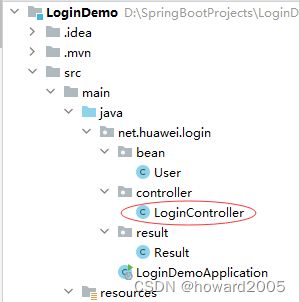
- 6、创建登录控制器
- (三)前后端整合测试
-
- 1、启动前端项目 - login-vue
- 2、启动后端项目 - LoginDemo
- 3、测试用户登录功能
- 三、实战总结
一、实战概述
-
该实战教程旨在指导开发者通过前后端分离的方式,搭建一个结合Vue.js前端框架和Spring Boot后端框架的登录系统。首先,从创建前端项目开始,利用Vue CLI快速生成项目结构,安装axios以实现HTTP请求功能,vue-router处理路由导航,less与less-loader用于样式预处理增强前端开发体验。完成基础设置后,开发者在IDEA中打开并继续构建前端页面,分别创建登录组件、首页组件以及配置路由视图。编写应用根组件,并设置主入口脚本,同时为解决跨域问题设置了反向代理。
-
接着进行后端项目的搭建,创建Spring Boot应用,配置服务器运行端口号,并启动服务确保能访问到后端首页。然后,为后端设计数据模型,创建用户实体类和结果实体类,以便于业务逻辑处理。最后,开发登录控制器以对接前端发送的登录请求。
-
整合测试阶段,分别启动前端login-vue项目和后端LoginDemo项目,前端调用后端接口进行登录验证,确保用户登录功能正常运作。此实战涵盖了项目初始化、模块安装、组件开发、路由配置、实体类设计、控制器编写及跨域解决方案等关键环节,有助于开发者理解和实践前后端交互开发流程。
二、实战步骤
(一)创建前端项目 - login-vue
1、创建Vue项目
2、安装axios模块
- Axios 是一款基于Promise的JavaScript库,主要用于浏览器和Node.js环境,提供了一种简单、高效的方式来处理前端与后端API之间的HTTP通信。它支持创建和发送GET、POST等多种HTTP请求,可处理JSON数据自动转换,并具有拦截请求/响应、取消请求、设置超时等功能。 Axios遵循Promise API设计,易于理解和使用,广泛应用于现代Web项目中进行异步数据交互。
- 进入
login-vue目录,执行命令:npm install axios --save

3、安装vue-router模块
- Vue Router是Vue.js官方的路由管理器,它通过将SPA(单页应用)的页面切分成多个组件,并实现了URL与组件间的映射关系。在Vue项目中,通过定义路由规则和嵌套路由,Vue Router能够实现视图与URL的同步切换,提供前端路由功能,支持动态路由、导航守卫等功能,为构建复杂单页应用提供了便捷的支持。
- 执行命令:
npm install vue-router@4 --save

4、安装less和less-loader模块
- Less是一种CSS预处理器,通过扩展CSS语法提供变量、嵌套规则、混合、函数等高级特性,使得样式编写更高效、模块化和易于维护。less-loader则是Webpack的一个加载器,用于将Less文件编译成浏览器可识别的CSS代码。在Vue项目中安装并配置less和less-loader后,即可在.vue文件或独立.less文件中编写Less代码,并在构建过程中自动转化为CSS样式。
- 执行命令:
npm install --save-dev less less-loader

5、运行Vue项目
6、在浏览器里访问首页
7、在IDEA里打开Vue项目
8、创建登录Vue组件
<template>
  <table class="login-table" border="0" cellpadding="10">
    <tr>
      <td align="center">用户名td>
      <td><input id='username' type="text" v-model="username" placeholder="请输入用户名"/>td>
    tr>
    <tr>
      <td align="center">密    码td>
      <td><input id='password' type="password" v-model="password" placeholder="请输入密码"/>td>
    tr>
    <tr align="center">
      <td colspan="2">
        <button @click="handleLogin">登录button>
      td>
    tr>
  table>
template>

<script setup>
import {ref} from 'vue';
import {useRouter} from 'vue-router';
import axios from "axios";

const router = useRouter();
const username = ref('');
const password = ref('');

async function handleLogin() {
  try {
    const response = await axios.post('/api/login', {username: username.value, password: password.value});
    console.log(response.data.code)
    if (response.data.code === 200) {
      router.replace('/index'); // 使用后端返回的路径
    } else if (response.data.code === 400) {
      alert('用户名或密码错误!请重新登录!');
      username.value = '';
      password.value = '';
      document.getElementById('username').focus();
    }
  } catch (error) {
    console.error("Error during login:", error.message); // 添加错误处理,打印错误信息
  }
}
script>

<style lang="less" scoped>
/* 重置table样式 */
.login-table {
  width: 100%;
  max-width: 300px;
  margin: 50px auto;
  border-collapse: collapse;
  border-spacing: 0;
  box-shadow: 0 2px 8px rgba(0, 0, 0, 0.1);
}

.login-table td {
  padding-bottom: 16px;
  padding-top: 16px;
  padding-right: 0px;
  padding-right: 8px;
  vertical-align: middle;
  text-align: left;
  border-bottom: 1px solid #ddd;
}

.login-table input[type="text"],
.login-table input[type="password"] {
  width: 100%;
  padding: 8px;
  border: 1px solid #ccc;
  border-radius: 4px;
  outline: none;
  box-sizing: border-box;
}

.login-table button {
  display: block;
  width: 100%;
  padding: 12px;
  background-color: #007bff;
  color: white;
  font-size: 16px;
  border: none;
  border-radius: 4px;
  cursor: pointer;
  text-align: center;
  transition: all 0.3s ease;

  &:hover,
  &:focus {
    background-color: #0056b3;
  }
}
style>
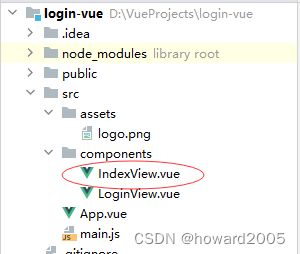
- 代码创建了一个登录表单,使用Vue响应式数据绑定用户输入,并在点击登录按钮时通过axios发送POST请求。根据后端返回的code进行判断:200则跳转至/index页面,400则提示错误并清空密码重置焦点。同时定义了简洁的登录界面样式。
9、创建首页Vue组件
<template>
  <div class="welcome-container">
    Welcome to Vue 3 World~
  div>
template>

<script>
export default {
  name: "IndexView"
}
script>

<style scoped>
.welcome-container {
  padding: 20px;
  border: 1px solid #ccc;
  border-radius: 5px;
  background-color: #f5f5f5;
  text-align: center;
  max-width: 400px;
  margin: 0 auto;
  color: red;
  font-weight: bold;
  font-size: 30px;
}
style>
- 该代码定义了一个Vue组件
IndexView,渲染一个居中显示的欢迎信息框,样式包括内边距、边框、背景色等,并通过CSS设置了自动水平居中布局及字体样式。
10、创建路由视图
// 引入Vue3以及新的vue-router
import { createRouter, createWebHistory } from 'vue-router';
import Login from '@/components/LoginView.vue';
import Index from "@/components/IndexView.vue";

// 定义路由
const routes = [
  {
    path: '/login',
    name: 'LoginView',
    component: Login
  },
  {
    path: '/index',
    name: 'IndexView',
    component: Index
  }
];

// 创建路由器实例
const router = createRouter({
  history: createWebHistory(),
  routes,
});

// 导出全局注册
export default router;
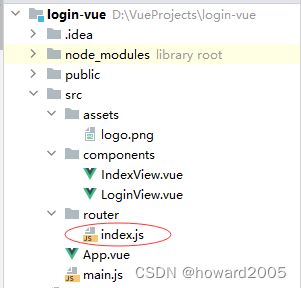
- 该代码引入Vue Router并定义了登录和首页两个路由,使用createRouter创建路由器实例,配置history模式,并导出用于全局注册。
11、编写应用根组件
<template>
  <div id="app">
    <img alt="Vue logo" src="./assets/logo.png">
    <router-view />
  </div>
</template>

<script>
</script>

<style lang="less">
#app {
  font-family: Avenir, Helvetica, Arial, sans-serif;
  -webkit-font-smoothing: antialiased;
  -moz-osx-font-smoothing: grayscale;
  text-align: center;
  color: #2c3e50;
}
</style>
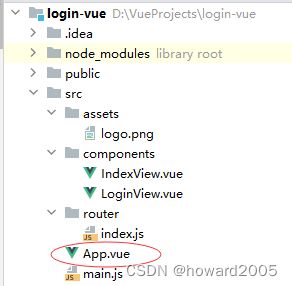
- 此代码为Vue应用的根组件(App.vue),包含一个logo图片和动态路由视图(
12、编写主入口脚本
// 导入Vue3的核心API,用于创建Vue应用实例
import {createApp} from 'vue';

// 导入根组件App.vue,它是整个应用程序的主视图模板
import App from './App.vue';

// 导入已配置好的路由模块(index.js或router.ts等),它管理着应用内的页面跳转逻辑
import router from "@/router";

// 使用createApp方法创建一个Vue应用实例,并注册全局路由配置
const app = createApp(App).use(router);

// 将Vue应用挂载到HTML文档中id为'app'的元素上
// 这将把整个应用程序渲染到这个DOM元素内部
app.mount('#app');
- 该代码导入Vue3核心API创建应用实例,引入根组件与路由配置,通过
createApp初始化应用并注册路由,最后将整个应用挂载到DOM中id为’app’的元素上。
13、设置反向代理和跨域支持
module.exports = {
  // 设置在保存文件时禁用ESLint自动检查
  lintOnSave: false,

  // 配置Vue开发服务器相关选项
  devServer: {
    // 配置HTTP代理,以便在开发过程中将特定请求转发到其他服务器
    proxy: {
      // 当请求以 '/api' 开头时进行代理
      '/api': {
        // 指定目标服务器地址(例如后台API接口)
        target: 'http://localhost:8888',

        // 设置为true,允许跨域请求时重写源信息(Origin header)
        changeOrigin: true,

        // 路径重写规则,将前端应用中'/api'前缀去掉,映射到后端服务器的实际路径上
        pathRewrite: { '^/api': '' },
      }
    }
  }
}
- 这段代码配置了Vue项目在开发环境下的行为:禁用了文件保存时的ESLint检查,并设置了一个开发服务器的代理服务。当开发环境中前端应用发起对
/api开头的请求时,该请求会被代理至http://localhost:8888服务器,并通过pathRewrite规则进行路径重写,解决前后端分离开发中的跨域问题。
14、访问登录页面
(二)创建后端项目 - LoginDemo
1、创建Spring Boot项目
2、配置服务器端口号
3、启动应用,访问首页
DOCTYPE html>
<html lang="en">
<head>
    <meta charset="UTF-8">
    <title>首页title>
head>
<body>
    <h3 style="text-align: center; color: red">Welcome to Spring Boot World~h3>
body>
html>
4、创建用户实体类
package net.huawei.login.bean;

/**
 * 功能:用户实体类
 * 作者:华卫
 * 日期:2024年01月14日
 */
public class User {
    private int id;
    private String username;
    private String password;

    public int getId() {
        return id;
    }

    public void setId(int id) {
        this.id = id;
    }

    public String getUsername() {
        return username;
    }

    public void setUsername(String username) {
        this.username = username;
    }

    public String getPassword() {
        return password;
    }

    public void setPassword(String password) {
        this.password = password;
    }

    @Override
    public String toString() {
        return "User{" +
                "id=" + id +
                ", username='" + username + '\'' +
                ", password='" + password + '\'' +
                '}';
    }
}
5、创建结果实体类
package net.huawei.login.result;

/**
 * 功能:结果实体类
 * 作者:华卫
 * 日期:2024年01月14日
 */
public class Result {
    private int code;

    public Result(int code) {
        this.code = code;
    }

    public int getCode() {
        return code;
    }

    public void setCode(int code) {
        this.code = code;
    }
}
- 该Java类为结果实体,包含一个表示状态码的整型变量code,通过构造函数初始化,并提供getter/setter方法,用于处理服务端响应的状态信息。
6、创建登录控制器
package net.huawei.login.controller;

import net.huawei.login.bean.User;
import net.huawei.login.result.Result;
import org.springframework.stereotype.Controller;
import org.springframework.web.bind.annotation.CrossOrigin;
import org.springframework.web.bind.annotation.PostMapping;
import org.springframework.web.bind.annotation.RequestBody;
import org.springframework.web.bind.annotation.ResponseBody;
import org.springframework.web.util.HtmlUtils;

/**
 * 功能:登录控制器
 * 作者:华卫
 * 日期:2024年01月14日
 */
@Controller
public class LoginController {
    @CrossOrigin
    @PostMapping(value = "api/login")
    @ResponseBody
    public Result login(@RequestBody User requestUser) {
        // 获取用户名和密码
        String username = requestUser.getUsername();
        String password = requestUser.getPassword();
        // 对html标签进行转义,防止XSS攻击
        username = HtmlUtils.htmlEscape(username);
        // 判断登录是否成功
        if (username.equals("无心剑") && password.equals("903213")) {
            return new Result(200);
        } else {
            System.out.println("用户名或密码有误!");
            return new Result(400);
        }
    }
}
- 该Java控制器处理登录请求,接收并校验用户提交的用户名密码,进行XSS防护,并根据预设数据判断登录是否成功,返回包含状态码的结果实体。
(三)前后端整合测试
1、启动前端项目 - login-vue
2、启动后端项目 - LoginDemo
3、测试用户登录功能
三、实战总结
- 该实战通过前后端分离方式,构建基于Vue.js与Spring Boot的登录系统。前端完成项目创建、页面组件开发和路由配置;后端搭建Spring Boot服务,设计实体类并实现登录控制器。整合阶段测试用户登录功能,确保前后端交互正常。
