k8s---配置资源管理
目录
配置资源管理的方式
secret
pod如何来引用secret???
陈述式创建:
声明式创建
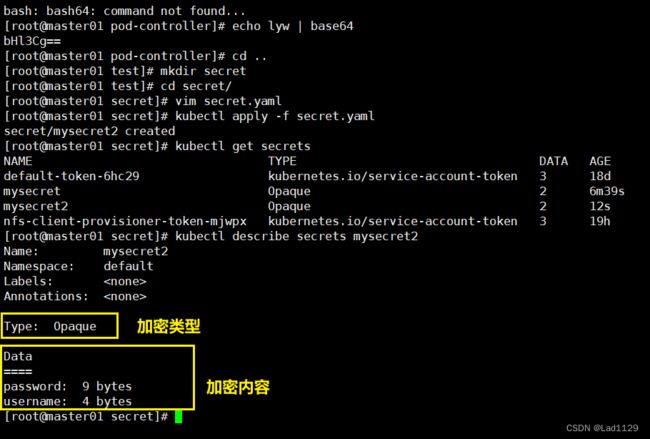
Secret创建加密文件
使用token挂载
环境变量使用
docker-registry
ConfigMap
陈述式
热更新
总结:
配置资源管理的方式
Secret
Configmap(必问)1.2加入的新特征
secret
secret:保存密码,token,敏感的k8s资源
这类数据可以存放在镜像当中,但是放在secret当中可以更方便的控制,减少暴露的风险。
通俗来讲就是保存加密信息。
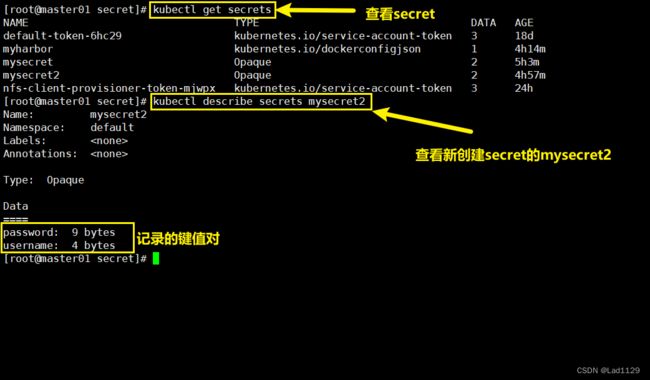
查看加密的token
kubectl get secrets| docker-registry | 存储docker仓库的认证信息,以及docker组件认证信息。(私有) |
| generic | 是secret的默认模式,Opaque base64加密编码的secret。用户自定义的密码、密钥等等。 |
| tls | TLS/SSL 用于存储证书和私钥。https |
| 系统自建的 | 用来访问系统的apiserver,pod会默认使用这个kubernetes.io/service-account-token创建的secret和apiserver通信。自动挂载到pod的/run/secret/kubernetes.io/serviceaccount. |
pod如何来引用secret???
3种方式
1、挂载的方式,secret挂载到pod当中的一个或者多个容器上的卷里面。
2、把secret作为容器的环境变量
3、docker-registry可以作为集群拉取镜像时使用。使用secret可以实现免密登录
主要用于 保存的是加密的内容,容器内部可以解密,可以直接引用。
陈述式创建:
默认类型(Opaque)---从指定文件提取信息
kubectl create secret generic mysecret --from-file=/opt/test/pod-controller/
username.txt --from-file=/opt/test/pod-controller/passwd.txt
声明式创建
Secret创建加密文件
apiVersion: v1
kind: Secret
metadata:
  name: mysecret2
type:
  Opaque
data:
  username: bHl3Cg==
  password: bGl1eWF3ZWkK
使用token挂载
apiVersion: v1
kind: Pod
metadata:
  name: mypod
spec:
  containers:
    - name: nginx
      image: nginx:1.22
      volumeMounts:
      - name: secrets
        mountPath: "/etc/secrets"
        readOnly: false
  volumes:
  - name: secrets
    secret:
      secretName: mysecret2
执行
kubectl apply -f test.yaml保存的是加密的内容,容器内部可以解密,可以直接引用。
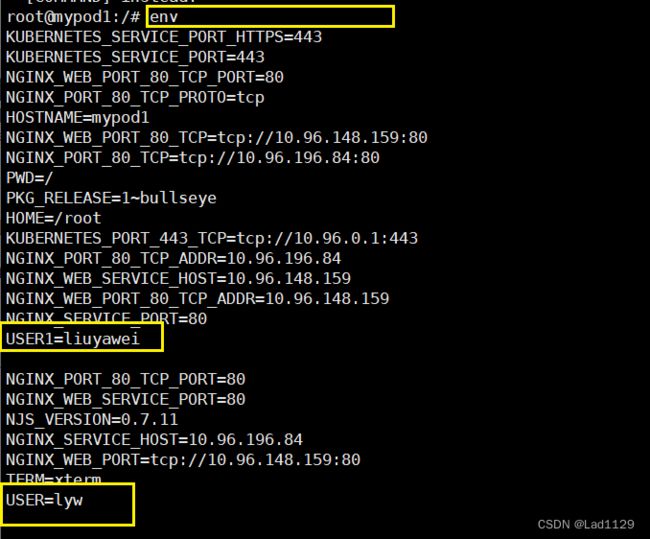
环境变量使用
apiVersion: v1
kind: Pod
metadata:
  name: mypod1
spec:
  containers:
    - name: nginx
      image: nginx:1.22
      env:
        - name: USER
          valueFrom:
            secretKeyRef:
              name: mysecret2
              key: username
        - name: USER1
          valueFrom:
            secretKeyRef:
              name: mysecret2
              key: password
#我给nginx1.22这个容器里面传了两个环境变量,这两个变量的值从secret来,分别是两条mysecret1的加密信息
docker-registry
kubectl create secret docker-registry myharbor --docker-server=192.168.10.40 --docker-username=admin --docker-password=123456apiVersion: v1
kind: Pod
metadata:
name: mypod2
spec:
containers:
- name: nginx2
image: hub.test.com/library/nginx:v1
imagePullSecrets:
- name: myharbor
nodeName: node01
ConfigMap
ConfigMap:保存的时不需要加密的信息。configmap时1.2引入的功能,应用程序会从配置文件,命令参数,以及环境变量中读取配置信息
configmap在创建容器中,给他注入我们需要的配置文件信息,既可以单个的属性也可以整个容器的配置文件。
陈述式
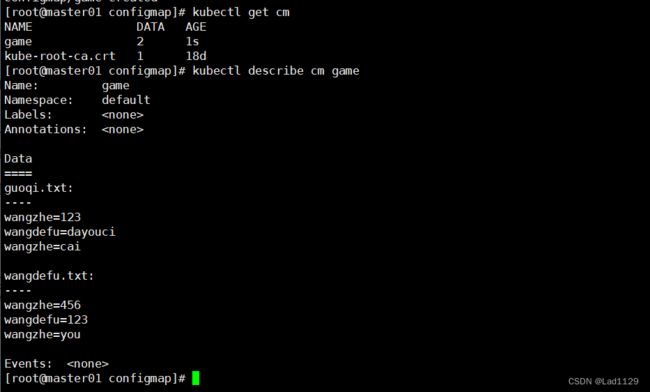
指定目录文件(定义两个文件1.txt 2.txt)
kubectl create configmap game --from-file=/opt/1.txt --from-file=/opt/2.txt陈述式---直接定义内容
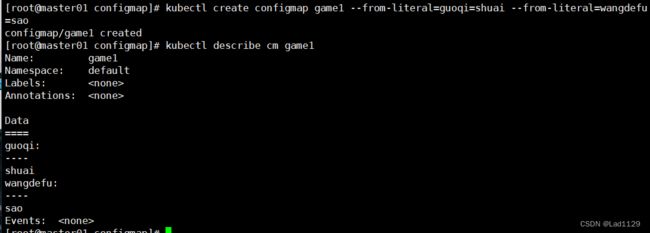
kubectl create configmap game1 --from-literal=guoqi=shuai --from-literal=wangdefu=sao声明式
apiVersion: v1
kind: ConfigMap
metadata:
  name: game
data:
  guoqi: shuai
  wangdefu: sao
  lyw: Liu
#config是键值对形式保存,一个键值对对应一个值
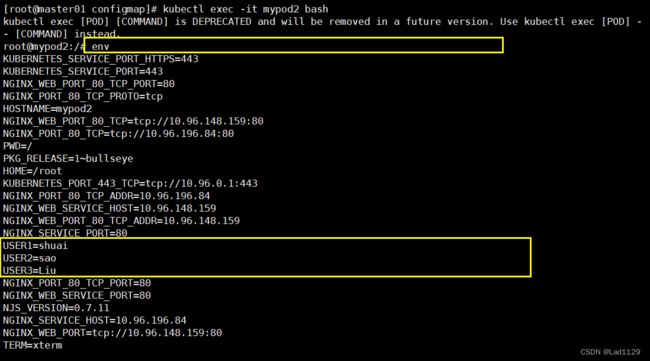
应用:定义达到环境变量
apiVersion: v1
kind: Pod
metadata:
  name: mypod2
spec:
  containers:
    - name: nginx3
      image: nginx:1.22
      env:
        - name: USER1
          valueFrom:
            configMapKeyRef:
              name: game
              key: guoqi
        - name: USER2
          valueFrom:
            configMapKeyRef:
              name: game
              key: wangdefu
        - name: USER3
          valueFrom:
            configMapKeyRef:
              name: game
              key: lyw
进入pod
热更新
触发滚动跟新
kubectl patch deployments.apps nginx1 --patch '{"spec": {"template": {"metadata": {"annotations": {"version/confgi": "20240116"}}}}}'nginx.conf----1
worker_processes  1;
events {
    worker_connections  1024;
}
http {
    default_type  application/octet-stream;
    sendfile        on;
    keepalive_timeout  65;
    server {
    listen       8080;
    listen  [::]:8080;
    server_name  localhost;

    #access_log  /var/log/nginx/host.access.log  main;

    location / {
        root   html;
        index  index.html index.htm;
    }

    error_page   500 502 503 504  /50x.html;
    location = /50x.html {
        root   /usr/share/nginx/html;
    }
}
}
nginx.yaml
apiVersion: apps/v1
kind: Deployment
metadata:
  name: nginx1
  labels:
    app: nginx1
spec:
  replicas: 3
  selector:
    matchLabels:
      app: nginx1
  template:
    metadata:
      labels:
        app: nginx1
    spec:
      containers:
      - name: nginx1
        image: nginx:1.22
        ports:
        - containerPort: 8080
        volumeMounts:
          - name: nginx-config
            mountPath: /etc/nginx/
          - name: nginx-mount
            mountPath: /usr/share/nginx/html
      volumes:
      - name: nginx-config
        configMap:
          name: nginx-conn
      - name: nginx-mount
        hostPath:
          path: /opt/html
          type: DirectoryOrCreate
nginx.conf-----2
worker_processes  1;
events {
    worker_connections  1024;
}
http {
    default_type  application/octet-stream;
    sendfile        on;
    keepalive_timeout  65;
    server {
    listen       8080;
    listen  [::]:8080;
    server_name  localhost;

    #access_log  /var/log/nginx/host.access.log  main;

    location / {
        root   html;
        index  index.html index.htm;
    }

    error_page   500 502 503 504  /50x.html;
    location = /50x.html {
        root   /usr/share/nginx/html;
    }
}
}
执行
kubectl create configmap nginx-con --from-file=/opt/test/secret/configmap/nginx/nginx.conf
#此处用nginx---1

kubectl apply -f nginx.yaml
查看创建的pod


kubectl edit cm nginx-conn
#修改为nginx---2
#修改完成后,大约30s-1min nginx.conf文件会同步为修改后的,修改后的配置文件后要重启nginx服务,此处用滚动更新

触发滚动更新:
kubectl patch deployments.apps nginx1 --patch '{"spec": {"template": {"metadata": {"annotations": {"version/confgi": "20240116"}}}}}'
数据卷使用configMap:
1、我们通过数据卷的形式,把配置文件传给了pod内部容器
2、config的热更新,在pod运行的情况下,对config的配置信息进行修改。直接生效 (反应到容器当中)。热更新---pod不会重启
3、configmap的热更新不会触发pod的滚动更新机制(deployment) version/config来触发滚动更新机制(deployment)
主要用于把配置文件传入pod,键值对形式保存的,非加密的信息
总结:
secret:保存加密文件,主要使用方式挂载方式。
configMap:把配置文件传给容器,主要方式也是挂载。
configMap的热更新: 热更新可以直接反应到容器的内部,也不会触发pod的更新机制。如果不是需要重启的配置,都可以直接生效。
version/config来触发滚动更新
需要重启的,可以重启pod。
更新:就是把配置信息重新传到容器内,重启也是一样。
configMap:就是把配置信息传给容器键值对形式保存的,非加密的信息。
