iOS Programming Camera 1
iOS Programming Camera 1
1 Displaying Images and UIImageView
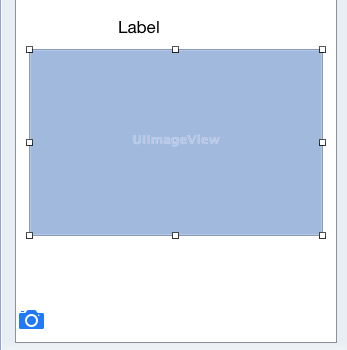
1.1 put an instance of UIImageView on the screen.
Then drag an instance of UIImageView onto the view and position it below the label.
A UIImageView displays an image according to its contentMode property.
UIImageView根据它的contentMode 属性来展示图片。
This property determines where to position and how to resize the content within the image view's frame.
这个属性决定了在哪儿和在image View的框架内怎样重新显示尺寸的内容。
UIImageView's default value for contentMode is UIViewContentModeScaleToFill, which will adjust the image to exactly match the bounds of the image view.
默认是UIViewContentModeScaleToFill。
If you keep the default, an image taken by the camera will be contorted to fit into the square UIImageView.
如果你采用默认设置,你的图片可能被扭曲以来适应方形的UIImageView。
@property (weak, nonatomic) IBOutlet UIImageView *imageView;
1.2 Adding a camera button
Now you need a button to initiate the photo-taking process.
现在你需要一个button 来初始化photo-taking process。
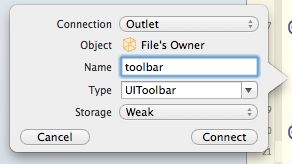
Instead, you will create an instance of UIToolbar and place it at the bottom of BNRDetailViewController's view.
你需要创建一个UIToolBar 的实例把它放在BNRDetailViewController's view 的底部。
A UIToolbar works a lot like a UINavigationBar – you can add instances of UIBarButtonItem to it.
where a navigation bar has two slots for bar button items, a toolbar has an array of bar button items. You can place as many bar button items in a toolbar as can fit on the screen.
一个navigation bar 有两个位置存放bar button items ,a toolbar 有一列 bar button items. 你可以存放任意数量的bar button items 只有屏幕允许。
By default, a new instance of UIToolbar that is created in a XIB file comes with one UIBarButtonItem.
默认情况下,一个UIToolbar 已经有一个UIBarButtonItem。
Select this bar button item and open the attribute inspector. Change the Identifier to Camera, and the item will show a camera icon
选中这个bar button item 并打开attribute inspector . 改变Identifier 到Camera,这样就会显示一个camera 标志。
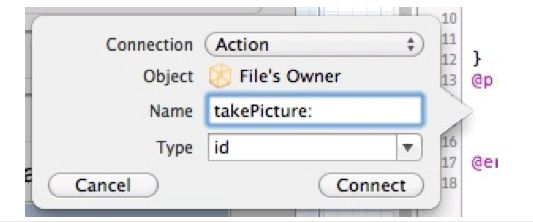
select the camera button by first clicking on the toolbar and then the button itself. Then Control-drag from the selected button to the implementation part of BNRDetailViewController.m
2 Taking Pictures and UIImagePickerController
In the takePicture: method, you will instantiate a UIImagePickerController and present it on the screen.
在takePic 中你将创建 一个UIImagePickerController并把它展现到屏幕上。
When creating an instance of UIImagePickerController, you must set its sourceType property and assign it a delegate.
当你创建一个UIImagePickerController的实例,你必须设置sourceType属性并分配给他一个delegate。
2.1 Setting the image picker's sourceType
The sourceType constant that tells the image picker where to get images.
sourceType告诉image picker 从哪里获取images。
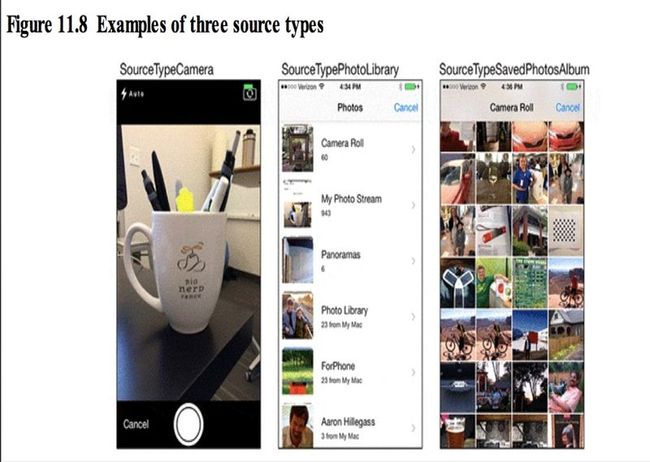
It has three possible values:
(1)UIImagePickerControllerSourceTypeCamera
The user will take a new picture.
用户将获得一个新的图片
(2)UIImagePickerControllerSourceTypePhotoLibrary
The user will be prompted to select an album and then a photo from that album.
将选择一个album 和在这个albu的一个photo 。
UIImagePickerControllerSourceTypeSavedPhotosAlbum
The user picks from the most recently taken photos.
从最近使用的photos中获取一个。
The first source type, UIImagePickerControllerSourceTypeCamera, will not work on a device that does not have a camera. So, before using this type, you have to check for a camera by sending the message isSourceTypeAvailable: to the UIImagePickerController class:
第一个source type ,UIImagePickerControllerSourceTypeCamera不会在没有相机的设备中使用。所以,在使用该类型之前,你需要检查一个camera 通过发送isSourceTypeAvailable给UIImagePickerController。
+ (BOOL)isSourceTypeAvailable:(UIImagePickerControllerSourceType)sourceType;
- (IBAction)takePicture:(id)sender
{
UIImagePickerController *imagePicker =
[[UIImagePickerController alloc] init];
// If the device has a camera, take a picture, otherwise,
// just pick from photo library
if ([UIImagePickerController
isSourceTypeAvailable:UIImagePickerControllerSourceTypeCamera]) {
imagePicker.sourceType = UIImagePickerControllerSourceTypeCamera;
} else {
imagePicker.sourceType =UIImagePickerControllerSourceTypePhotoLibrary;
}
}
2.2 Setting the image picker's delegate
设置image picker 的delegate
When the user selects an image from the UIImagePickerController's interface, the delegate is sent the message imagePickerController:didFinishPickingMediaWithInfo:. (If the user taps the cancel button, then the delegate receives the message imagePickerControllerDidCancel:.)
当用户从UIImagePickerController's界面中选中一个image时,这个delegate (接收到消息)被发送消息给imagePickerController:didFinishPickingMediaWithInfo。(如果用户选择了cancel button那么delegate会收到imagePickerControllerDidCancel消息。)
The image picker's delegate will be the instance of BNRDetailViewController.
@interface BNRDetailViewController ()
<UINavigationControllerDelegate, UIImagePickerControllerDelegate>
Why UINavigationControllerDelegate?
为什么会有UINavigationControllerDelegate ?
UIImagePickerController's delegate property is actually inherited from its superclass, UINavigationController, and while UIImagePickerController has its own delegate protocol, its inherited delegate property is declared to point to an object that conforms to UINavigationControllerDelegate.
UIImagePickerController's delegate属性其实继承自它的超类UINavigationController,当UIImagePickerController拥有它自己的delegate protocol ,它继承的delegate 属性被指向一个服从了UINavigationControllerDelegate的对象。
imagePicker.delegate = self;
2.3 Presenting the image picker modally
Once the UIImagePickerController has a source type and a delegate, it is time to get its view on the screen.
一旦UIImagePickerController有source type和delegate,就是该让view 显示在屏幕上了。
Unlike other UIViewController subclasses you have used, an instance of UIImagePickerController is presented modally.
不像其他的UIViewController的子类,UIImagePickerController的实例展现modally .
A modal view controller takes over the entire screen until it has finished its work.
一个modal view controller 占用了整个屏幕直到它完成工作。
To present a view controller modally, you send presentViewController:animated:completion: to the UIViewController whose view is on the screen.
你需要发送presentViewController:animated:completion给谁的view 在屏幕上的UIViewController。
// Place image picker on the screen
[self presentViewController:imagePicker animated:YES completion:nil];
2.4 Saving the image
you do not have a reference to the photo once the image picker is dismissed. To fix this, you are going to implement the delegate method imagePickerController:didFinishPickingMediaWithInfo:. This message is sent to the image picker's delegate when a photo has been selected.
你需要实现delegate 方法:imagePickerController:didFinishPickingMediaWithInfo。当一个photo 被选中,这个方法被送给image picker的委托 。
- (void)imagePickerController:(UIImagePickerController *)picker didFinishPickingMediaWithInfo:(NSDictionary *)info
{
// Get picked image from info dictionary
UIImage *image = info[UIImagePickerControllerOriginalImage];
// Put that image onto the screen in our image view
self.imageView.image = image;
// Take image picker off the screen -
// you must call this dismiss method
[self dismissViewControllerAnimated:YES completion:nil];
}
The solution, which you are going to implement in the next section, is to store images to disk and only fetch them into RAM when they are needed.
解决办法是把图片存储到disk,当它们的时候再去创建他们。


