【Linux】Zabbix + MPM + msmtp + mutt 监控MySQL + 邮件报警
Zabbix部署参考博文
http://blog.sina.com.cn/s/blog_5611597901017oe0.html
MPM安装配置参考博文和MPM官网下载地址
http://blog.chinaunix.net/uid-451-id-3338674.html
http://www.fromdual.com/download#mpm
其余Zabbix参考博文地址
http://blog.sina.com.cn/s/blog_416656f70100d3oj.html
http://13angel.iteye.com/blog/248989
http://www.douban.com/note/330082640/
安装各种依赖包和环境所需包 ...
https://lug.ustc.edu.cn/wiki/mirrors/help/centos
可以把yum源改成上面这个
yum -y install gcc gcc-c++ autoconf libjpeg libjpeg-devel libpng libpng-devel freetype freetype-devel libxml2 libxml2-devel zlib zlib-devel glibc glibc-devel glib2 glib2-devel bzip2 bzip2-devel ncurses ncurses-devel curl curl-devel e2fsprogs e2fsprogs-devel krb5 krb5-devel libidn libidn-devel openssl openssl-devel openldap openldap-devel nss_ldap openldap-clients openldap-servers
php以及连接mysql的组件
yum -y install httpd php php-mysql
apache依赖
yum -y install httpd-manual mod_ssl mod_perl mod_auth_mysql
php依赖
yum -y install php-gd php-xml php-mbstring php-ldap php-pear php-xmlrpc php-bcmath php-snmp lm_sensors lm_sensors-devel perl-DBD-MySQL
yum -y install mysql-connector-odbc mysql-devel libdbi-dbd-mysql mysql mysql-server
yum -y install net-snmp net-snmp-utils net-snmp-perl net-snmp-devel beecrypt-devel
yum -y install php-gd php-bcmath elfutils beecrypt php-snmp lm_sensors
yum -y install net-snmp net-snmp-devel net-snmp-utils
yum -y install curl curl-devel
yum -y install fping ##zabbix 使用 fping 替代了 ping 作为 icmp 的工具
mysql修改配置文件,因为yum源安装的是5.1版本,给一个配置模板...模板好像是5.5的
[mysqld]
user            = mysql
datadir         = /export/zabbix/mysql_data
socket          = /export/zabbix/mysql_socket/mysql.sock
port            = 3306
default-character-set = utf8

[client]
port            = 3306
socket          = /export/zabbix/mysql_socket/mysql.sock

[mysqld_safe]
log-error=/var/log/mysqld.log
pid-file=/var/run/mysqld/mysqld.pid

#--- GLOBAL ---#
character-set-server    = utf8
log-error               = /export/zabbix/mysql_log/error.log
pid-file                = /export/zabbix/mysql_data/mysql.pid
slow-query-log
slow_query_log_file     = /export/zabbix/mysql_log/slow.log
tmpdir                  = /export/zabbix/mysql_tmp/
long_query_time         = 1

#--------------#
thread_concurrency      = 16
thread_cache_size       = 512
table_open_cache        = 16384
table_definition_cache  = 16384
sort_buffer_size        = 2M
join_buffer_size        = 2M
read_buffer_size        = 4M
read_rnd_buffer_size    = 4M
key_buffer_size         = 64M
myisam_sort_buffer_size = 64M
tmp_table_size          = 256M
max_heap_table_size     = 256M
open_files_limit        = 65535
#query_cache_size       = 2G

#--- NETWORK ---#
back_log                = 1024
max_allowed_packet      = 16M
interactive_timeout     = 300
wait_timeout            = 300
skip-external-locking
max-connections         = 1000
skip-name-resolve

#--- REPL ---#
server-id               = 1073306
log-bin                 = mysql-bin
binlog_format           = mixed
expire_logs_days        = 7
relay-log               = relay-log
replicate-ignore-db     = test
log_slave_updates
skip-slave-start

#--- INNODB ---#
default-storage-engine          = INNODB
innodb_data_home_dir            = /export/zabbix/mysql_data
innodb_data_file_path           = ibdata1:256M:autoextend
innodb_file_per_table
innodb_log_group_home_dir       = /export/zabbix/mysql_log
innodb_buffer_pool_size         = 10G
innodb_additional_mem_pool_size = 128M
innodb_log_files_in_group       = 3
innodb_log_file_size            = 1024M
innodb_log_buffer_size          = 16M
innodb_flush_log_at_trx_commit  = 1
innodb_lock_wait_timeout        = 120
innodb_flush_method             = O_DIRECT
innodb_max_dirty_pages_pct      = 75
innodb_io_capacity              = 1000
innodb_thread_concurrency       = 32
innodb_open_files               = 65535
innodb_write_io_threads = 8
innodb_read_io_threads = 8

[mysqldump]
quick
max_allowed_packet = 128M

[mysql]
no-auto-rehash
default-character-set=utf8

[myisamchk]
key_buffer_size = 128M
sort_buffer_size = 128M
read_buffer = 2M
write_buffer = 2M

[mysqlhotcopy]
interactive-timeout
不细说MySQL的部署过程了,大致过程
1、建数据目录、日志目录、tmp目录
2、chown -R mysql.mysql 数据目录、日志目录、tmp目录
3、初始化mysql_install_db --defaults-file=/etc/my.cnf &
4、启动mysqld_safe --defaults-file=/etc/my.cnf &
5、系统建zabbix组合用户groupadd zabbix;useradd -g zabbix -d /home/zabbix -s /sbin/nologin zabbix
6、解压zabbix,编译配置参数说明:
--enable-server 安装 Zabbix Server
--enable-proxy 安装 Zabbix Proxy
--enable-agent 安装 Zabbix Agent
--with-mysql 使用 mysql 做数据库服务器
--with-net-snmp 支持 SNMP
--with-libcurl 支持 curl,用于 web 监控
我不需要网络设备监控,监控机器比较少,所以不用proxy和snmp,编译后的路径按照自己喜好放置吧
./configure --prefix=/usr/local/zabbix --with-mysql --enable-server --enable-agent --with-libcurl
编译完会显示以下信息
Configuration:

  Detected OS:           linux-gnu
  Install path:          /usr/local/zabbix
  Compilation arch:      linux

  Compiler:              gcc
  Compiler flags:        -g -O2  -I/usr/include/mysql  -g -pipe -Wp,-D_FORTIFY_SOURCE=2 -fexceptions -fstack-protector --param=ssp-buffer-size=4 -m64 -D_GNU_SOURCE -D_FILE_OFFSET_BITS=64 -D_LARGEFILE_SOURCE -fno-strict-aliasing -fwrapv -fPIC   -DUNIV_LINUX -DUNIV_LINUX

  Enable server:         yes
  Server details:
    With database:         MySQL
    WEB Monitoring:        cURL
    Native Jabber:         no
    SNMP:                  no
    IPMI:                  no
    SSH:                   no
    ODBC:                  no
    Linker flags:          -rdynamic      -L/usr/lib64/mysql
    Libraries:             -lm -ldl -lrt  -lresolv    -lmysqlclient             -lcurl

  Enable proxy:          no

  Enable agent:          yes
  Agent details:
    Linker flags:          -rdynamic
    Libraries:             -lm -ldl -lrt  -lresolv     -lcurl

  Enable Java gateway:   no

  LDAP support:          no
  IPv6 support:          no

***********************************************************
*            Now run 'make install'                       *
*                                                         *
*            Thank you for using Zabbix!                  *
*              <http://www.zabbix.com>                    *
***********************************************************
继续make install
7、MySQL建zabbix库、用户
insert into mysql.user(User,Host,Password) values ('zabbix','%',password('zabbix'));
flush privileges;grant all privileges on zabbix.* to 'zabbix'@'%';
show grants for zabbix; ##yum装的mysql5.1比较操蛋
create database zabbix
mysql> show grants for zabbix;
+-------------------------------------------------------------------------------------------------------+
| Grants for zabbix@%                                                                                   |
+-------------------------------------------------------------------------------------------------------+
| GRANT USAGE ON *.* TO 'zabbix'@'%' IDENTIFIED BY PASSWORD '*DEEF4D7D88CD046ECA02A80393B7780A63E7E789' |
| GRANT ALL PRIVILEGES ON `zabbix`.* TO 'zabbix'@'%'                                                    |
+-------------------------------------------------------------------------------------------------------+
2 rows in set (0.00 sec)

mysql> GRANT ALL PRIVILEGES ON `zabbix`.* TO 'zabbix'@'%' IDENTIFIED BY PASSWORD '*DEEF4D7D88CD046ECA02A80393B7780A63E7E789'
    -> ;
Query OK, 0 rows affected (0.00 sec)

mysql> flush privileges;
Query OK, 0 rows affected (0.00 sec)
8、注意依次导入./database/mysql/schema.sql ./database/mysql/images.sql ./database/mysql/data.sql
mysql -uzabbix -pzabbix zabbix <./database/mysql/schema.sql
mysql -uzabbix -pzabbix zabbix <./database/mysql/images.sql
mysql -uzabbix -pzabbix zabbix <./database/mysql/data.sql
9、检查一下/etc/services里面是否有以下四行,如果没有就加上
zabbix-agent    10050/tcp               # Zabbix Agent
zabbix-agent    10050/udp               # Zabbix Agent
zabbix-trapper  10051/tcp               # Zabbix Trapper
zabbix-trapper  10051/udp               # Zabbix Trapper
10、拷贝zabbix目录下的frontend/php内容到http server的主目录下:
cp -r frontends/php/* /var/www/html/zabbix/
11、启动Apache
service httpd start
将 Apache 设置为开机自动启动
chkconfig --add httpd
chkconfig --level 345 httpd on
httpd: Could not reliably determine the server's fully qualified domain name, using 127.0.0.1 for ServerName
vim /etc/httpd/conf/httpd.conf
找到#ServerName www.example.com:80 把#去掉,再重启apache即可,浏览器访问一下试试
12、修改zabbix_server配置文件
参考博文修改的内容
[root@localhost zabbix-2.0.2]# sed -i 's/^DBUser=.*$/DBUser=zabbix/g' /usr/local/zabbix/etc/zabbix_server.conf

[root@localhost zabbix-2.0.2]# sed -i 's/^.*DBPassword=.*$/DBPassword=111111/g' /usr/local/zabbix/etc/zabbix_server.conf

[root@localhost zabbix-2.0.2]# cp -r frontends/php /var/www/html/zabbix

[root@localhost zabbix-2.0.2]# cp misc/init.d/fedora/core/zabbix_server /etc/init.d/

[root@localhost zabbix-2.0.2]# cp misc/init.d/fedora/core/zabbix_agentd /etc/init.d/

[root@localhost zabbix-2.0.2]#sed -i 's/BASEDIR=\/usr\/local/BASEDIR=\/usr\/local\/zabbix/g' /etc/init.d/zabbix_server

[root@localhost zabbix-2.0.2]#sed -i 's/BASEDIR=\/usr\/local/BASEDIR=\/usr\/local\/zabbix/g' /etc/init.d/zabbix_agentd
我修改的内容
LogFile=/tmp/zabbix_server.log
DBName=zabbix
DBUser=zabbix
DBPassword=zabbix
DBSocket=/export/zabbix/mysql_socket/mysql.sock
FpingLocation=/usr/sbin/fping
要安装fping
下载地址:http://fping.org/
安装:
tar -zxvf fping.tar.gz
cd fping/
./configure
make && make install
which fping  <- FpingLocation的配置安装这个修改
fping failed: "(null): can't create socket (must run as root?) : Protocol not supported"
/usr/local/sbin/fping: can't create raw socket (must run as root?) : Operation not permitted
登录zabbix用户验证确实zabbix用户无法使用fping,权限问题,修改权限
chown root:root /usr/local/sbin/fping
chmod u+s /usr/local/sbin/fping
如果启动的时候提示pid找不到,那就改一下pid的相关项
然后做一下软连或者加上环境变量
[root@zabbixserver mpm]# cd /bin/
[root@zabbixserver bin]# ln -s /usr/local/zabbix/bin/zabbix_sender zabbix_sender
[root@zabbixserver bin]# ln -s /usr/local/zabbix/bin/zabbix_get  zabbix_get
13、修改php.ini配置文件
参考博文修改的内容
[root@localhost ~]#sed -i 's/^\(.*\)date.timezone =.*$/date.timezone = Asia\/Shanghai/g' /etc/php.ini

[root@localhost ~]#sed -i 's/^\(.*\)post_max_size =.*$/post_max_size = 16M/g' /etc/php.ini

[root@localhost ~]#sed -i 's/^\(.*\)max_execution_time =.*$/max_execution_time = 300/g' /etc/php.ini

[root@localhost ~]#sed -i 's/^\(.*\)max_input_time =.*$/max_input_time = 300/g' /etc/php.ini

[root@localhost ~]# /etc/init.d/zabbix_server start

[root@localhost ~]# /etc/init.d/zabbix_agentd start

[root@localhost ~]# /etc/init.d/httpd start
修改完php配置需要重启zabbix_server和apache
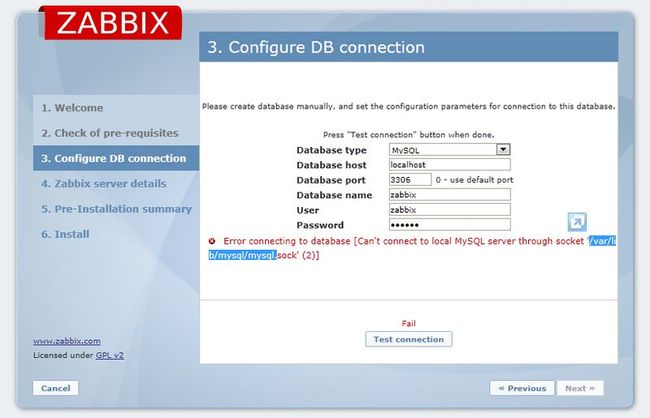
可以访问zabbix页面进行配置,下面提示连接不到MySQL
function DBconnect(&$error) {}代码段,代码里面没有指定socket,所以一般不是这块问题。
function DBconnect(&$error) {
        global $DB;

        if (isset($DB['DB'])) {
                $error = _('Cannot create another database connection.');
                return false;
        }

        $result = true;

        $DB['DB'] = null; // global db handler
        $DB['TRANSACTIONS'] = 0; // level of a nested transation
        $DB['TRANSACTION_NO_FAILED_SQLS'] = true; // true - if no statements failed in transaction, false - there are failed statements
        $DB['SELECT_COUNT'] = 0; // stats
        $DB['EXECUTE_COUNT'] = 0;

        if (!isset($DB['TYPE'])) {
                $error = 'Unknown database type.';
                $result = false;
        }
        else {
                $DB['TYPE'] = zbx_strtoupper($DB['TYPE']);

                switch ($DB['TYPE']) {
                        case ZBX_DB_MYSQL:
                                $DB['DB'] = @mysqli_connect($DB['SERVER'], $DB['USER'], $DB['PASSWORD'], $DB['DATABASE'], $DB['PORT']);
                                if (!$DB['DB']) {
                                        $error = 'Error connecting to database ['.trim(mysqli_connect_error()).']';
                                        $result = false;
                                }
                                else {
                                        DBexecute('SET NAMES utf8');
                                }

                                if ($result) {
                                        $dbBackend = new MysqlDbBackend();
                                }
                                break;
                        case ZBX_DB_POSTGRESQL:
                                $pg_connection_string =
                                        (!empty($DB['SERVER']) ? 'host=\''.pg_connect_escape($DB['SERVER']).'\' ' : '').
                                        'dbname=\''.pg_connect_escape($DB['DATABASE']).'\' '.
                                        (!empty($DB['USER']) ? 'user=\''.pg_connect_escape($DB['USER']).'\' ' : '').
                                        (!empty($DB['PASSWORD']) ? 'password=\''.pg_connect_escape($DB['PASSWORD']).'\' ' : '').
                                        (!empty($DB['PORT']) ? 'port='.pg_connect_escape($DB['PORT']) : '');

                                $DB['DB']= @pg_connect($pg_connection_string);
                                if (!$DB['DB']) {
                                        $error = 'Error connecting to database';
                                        $result = false;
                                }
                                elseif (false !== ($pgsql_version = pg_parameter_status('server_version'))) {
                                        if ((int) $pgsql_version >= 9) {
                                                // change the output format for values of type bytea from hex (the default) to escape
                                                DBexecute('SET bytea_output = escape');
                                        }
                                }

                                if ($result) {
                                        $dbBackend = new PostgresqlDbBackend();
                                }
                                break;
                        case ZBX_DB_ORACLE:
                                $connect = '';
                                if (!empty($DB['SERVER'])) {
                                        $connect = '//'.$DB['SERVER'];

                                        if ($DB['PORT'] != '0') {
                                                $connect .= ':'.$DB['PORT'];
                                        }
                                        if ($DB['DATABASE']) {
                                                $connect .= '/'.$DB['DATABASE'];
                                        }
                                }

                                $DB['DB'] = @oci_connect($DB['USER'], $DB['PASSWORD'], $connect);
                                if ($DB['DB']) {
                                        DBexecute('ALTER SESSION SET NLS_NUMERIC_CHARACTERS='.zbx_dbstr('. '));
                                }
                                else {
                                        $error = 'Error connecting to database';
                                        $result = false;
                                }

                                if ($result) {
                                        $dbBackend = new OracleDbBackend();
                                }
                                break;
                        case ZBX_DB_DB2:
                                $connect = '';
                                $connect .= 'DATABASE='.$DB['DATABASE'].';';
                                $connect .= 'HOSTNAME='.$DB['SERVER'].';';
                                $connect .= 'PORT='.$DB['PORT'].';';
                                $connect .= 'PROTOCOL=TCPIP;';
                                $connect .= 'UID='.$DB['USER'].';';
                                $connect .= 'PWD='.$DB['PASSWORD'].';';

                                $DB['DB'] = @db2_connect($connect, $DB['USER'], $DB['PASSWORD']);
                                if (!$DB['DB']) {
                                        $error = 'Error connecting to database';
                                        $result = false;
                                }
                                else {
                                        $options = array(
                                                'db2_attr_case' => DB2_CASE_LOWER,
                                        );
                                        db2_set_option($DB['DB'], $options, 1);
                                        if (isset($DB['SCHEMA']) && $DB['SCHEMA'] != '') {
                                                DBexecute('SET CURRENT SCHEMA='.zbx_dbstr($DB['SCHEMA']));
                                        }
                                }

                                if ($result) {
                                        $dbBackend = new Db2DbBackend();
                                }
                                break;
                        case ZBX_DB_SQLITE3:
                                if (file_exists($DB['DATABASE'])) {
                                        init_sqlite3_access();
                                        lock_sqlite3_access();
                                        try{
                                                $DB['DB'] = @new SQLite3($DB['DATABASE'], SQLITE3_OPEN_READWRITE);
                                        }
                                        catch (Exception $e) {
                                                $error = 'Error connecting to database';
                                                $result = false;
                                        }
                                        unlock_sqlite3_access();
                                }
                                else {
                                        $error = 'Missing database';
                                        $result = false;
                                }

                                if ($result) {
                                        $dbBackend = new SqliteDbBackend();
                                }
                                break;
                        default:
                                $error = 'Unsupported database';
                                $result = false;
                }
        }

        if ($result && !$dbBackend->checkDbVersion()) {
                $error = $dbBackend->getError();
                $result = false;
        }

        if (false == $result) {
                $DB['DB'] = null;
        }

        return $result;
}
1、mysql.sock文件位置问题
因为MySQL配置的路径各异,sock做个软连过去(上一步自检php环境,按照上面修改php.ini即可,别忘重启apach和zabbix)
cd /var/lib/mysql/ ;ln -s /export/zabbix/mysql_socket/mysql.sock mysql.sock
2、SELinux和iptables影响
service iptables stop
/usr/sbin/sestatus -v ##如果SELinux status参数为enabled即为开启状态
修改/etc/selinux/config 文件将SELINUX=enforcing改为SELINUX=disabled,然后reboot,注意最好先停掉mysql进程
3、测试
ie访问部署的这台机器比如192.168.1.2/zabbix,ie字体小,遨游和chrome好点
然后特么进不去页面,各种检查
zabbix log 有/tmp/zabbix_server.log 和 zabbix_agentd.log
httpd log /var/log/httpd/errlog。。。
然后想起来IE代理这个情况...买了个表
其他页面设置可以参考文章首的第一个链接
问题1:字体问题参考链接
http://blog.chinaunix.net/uid-11121450-id-3296646.html
问题2:页面的历史记录(history)乱码变成???>???>???
安装时在导入三个sql文件时,zabbix数据库中创建的表的字符集是latin1,修改为utf8,如果Zabbix里面没有建主机和监控项就drop databases,配置文件修改如下:
[mysqld]  ##这个节点下面增加

default-character-set = utf8
http://www.haogongju.net/art/2418891
问题3:启动zabbix_server提示缺失lib模块
[root@zabbixserver lib]# service zabbix_server start
zabbix_server: error while loading shared libraries: libmysqlclient.so.18: cannot open shared object file: No such file or directory
[root@zabbixserver lib]# ln -s /usr/local/mysql/lib/libmysqlclient.so.18 /usr/lib64/
下面的可以忽略
Zabbix自带的mysql监控的配置
因为Zabbix自带的监控脚本取的数据较少,还需要自己改一些东西,所以最后用的mysql_performance_monitor,所以带删除线的这块可以忽略
http://os.51cto.com/art/201104/253006.htm
http://my.oschina.net/zhongjuan/blog/89412
http://www.it165.net/os/html/201210/3677.html
上文中提到的xml和php获取地址
https://www.zabbix.com/wiki/howto/monitor/db/mysql/extensive_mysql_monitoring_including_replication
拿到xml以后,在zabbix中文界面里面的【组态】-【模板】的右边有一个【汇入】,把xml模板导入
php脚本需要放到监控机,配置文件目录/usr/local/zabbix/etc/
根据本机环境。 第一行加入:#!/usr/bin/php 在最后一行加入:?> 关闭调试:define('DEBUG',true); 为 define('DEBUG',False); 修改日志、数据文件路径: define('LOG',"/tmp/zabbix_".SYSTEM.".log"); define('DAT',"/tmp/zabbix_".SYSTEM.".dat"); define('UTIME',"/tmp/.zabbix_".SYSTEM.".utime"); define('DTIME',"/tmp/.zabbix_".SYSTEM.".dtime"); 修改:define('SYSTEM','mysql'.(DEBUG ? "-debug" : "")); 为:define('SYSTEM','mysql'); 打开系统日志功能://system("zabbix_sender -z $server -i ".DAT." >> ".LOG); 为:system("zabbix_sender -z $server -i ".DAT." >> ".LOG);
 注释file_put_contents(DAT,"$server $host 10051 ".SYSTEM.".$var $val\n",FILE_APPEND);且 下面增加以下文字: $cmd = "zabbix_sender -c $config_path -k ".SYSTEM.".$var -o $val -vv"; file_put_contents(DAT,"$cmd\n",FILE_APPEND); exec($cmd);
在zabbix_agentd.conf配置文件中加入
这个php报错还是需要注意的
UserParameter=mysql.daily,php /etc/zabbix/mysql.php daily 用户名 密码
UserParameter=mysql.live,php /etc/zabbix/mysql.php live 用户名 密码

daily:每天执行一次。【由zabbix_server轮询发起,默认86640秒即一天 zabbix agent类型 UDP协议】

live:按指定时间执行一次。【由zabbix_server轮询发起,默认120秒 zabbix agent类型 UDP协议】

php :执行php文件

/etc/zabbix/mysql.php:mysql.php文件所在的文件路径

用户名 密码:登录mysql数据库的账户与密码

重启zabbix_agentd
mysql.php里面还需要zabbix/bin下的部分执行文件的环境变量,否则会报一些错误,具体问题具体分析,修改mysql.php或者php.ini
sh: zabbix_sender: command not found
cd /usr/bin/ ;ln -s /usr/local/zabbix/bin/zabbix_sender zabbix_sender
ln -s /usr/local/zabbix/bin/zabbix_get zabbix_get
报错:
PHP Warning: Division by zero in /usr/local/zabbix/etc/mysql.php on line 470
PHP Warning: Division by zero in /usr/local/zabbix/etc/mysql.php on line 471
PHP Warning: Division by zero in /usr/local/zabbix/etc/mysql.php on line 472
chown zabbix.zabbix /tmp/zabbix_*
mysql.php 监控文件里面的命令执行失败大部分由于授权或者环境变量影响,/tmp下的日志文件属主权限、用户的.bash_profile是否导入,检查php zabbix_sender mysql的环境变量
因为Zabbix提供的监控脚本和监控项不太好用,所以决定使用第三方的一个插件mysql_performance_monitor!!!
【MPM】
1、安装环境
yum install -y perl-libwww-perl perl-File-Which perl-DBD-MySQL perl-Digest-SHA1 perl-Digest-SHA perl-Crypt-SSLeay perl-Time-HiRes
参考地址
http://blog.chinaunix.net/uid-451-id-3338674.html
http://www.fromdual.com/download#mpm
2、安装mpm
[root@zabbixserver package]# tar -zxvf mysql_performance_monitor-0.9.2.tar.gz

[root@zabbixserver package]# mv mysql_performance_monitor_agent mpm

[root@zabbixserver package]# mv mpm /usr/local/

#配置文件,配置详细看下面
[root@zabbixserver package]# vim /etc/zabbix_mpm.conf

[root@zabbixserver package]# chown zabbix /etc/zabbix_mpm.conf

[root@zabbixserver package]# mkdir /var/log/zabbix

[root@zabbixserver package]# touch /var/log/zabbix/FromDualMySQLagent.log

[root@zabbixserver package]# chown -R zabbix:zabbix /var/log/zabbix

#UserParameter的值修改为:注意mpm配置位置
[root@zabbixserver mpm]# vim /usr/local/zabbix/etc/zabbix_agentd.conf
UserParameter=FromDual.MySQL.check,/usr/local/mpm/FromDualMySQLagent.pl /usr/local/mpm/zabbix_mpm.conf

[root@zabbixserver bin]# usermod -G mysql zabbix
3、导入xml模板
修改主机系统名、Zabbix_server/agentd配置文件的必须一致,与zabbix web新建的主机名必须一致
xml模板没必要都导入,可以先将MySQL.mpm(前缀删了),对应agent配置也先加这一个,后期需要可以逐步加模板及监控项
MPM Server的配置(MPM Server监控自己zabbix server的MySQL)
[default] Type = mysqld Debug = 2 LogFile = /var/log/zabbix/FromDualMySQLagent.log CacheFileBase = /var/log/zabbix/cache/FromDualAgentCache Username = zabbix Password = zabbix MysqlHost = 127.0.0.1 MysqlPort = 3306 ZabbixServer = localhost Disabled = false [zabbixserver] Type = mysqld MysqlPort = 3306 Modules = mpm innodb mysql process server PidFile = /export/zabbix/mysql_data/mysql.pid
MPM Agent的配置
Type = mysqld Debug = 2 LogFile = /var/log/zabbix/FromDualMySQLagent.log CacheFileBase = /var/log/zabbix/cache/FromDualAgentCache Username = zabbix Password = zabbix MysqlHost = localhost MysqlPort = 3358 ZabbixServer = 192.168.201.107 Disabled = false [cobbler] Type = mysqld MysqlPort = 3306 Modules = mpm innodb mysql process server PidFile = /export/data/mysql/data/mysql.pid
4、报错及分析
(1)、MPM报找不到mysql.pid
#FromDualMySQLagent.log报找不到mysql.pid
15454:2014-06-27 10:28:33.222 - ERR : Cannot read PID file /export/zabbix/mysql_data/mysql.pid. Either file does not exist or I have no read permissions. Are you sure the process is running?

#修改一下权限
[root@zabbixserver bin]# usermod -G mysql zabbix
(2)、MPM说某个模块不存在,分析
#报FromDualMySQLinnodb模块不存在
15454:2014-06-27 10:28:33.146 - ERR : Module FromDualMySQLinnodb does not exist.
ERR : Can't locate Digest/SHA.pm in @INC (@INC contains: /usr/local/mpm/lib /usr/local/lib64/perl5 /usr/local/share/perl5 /usr/lib64/perl5/vendor_perl /usr/share/perl5/vendor_perl /usr/lib64/perl5 /usr/share/perl5 .) at /usr/local/mpm/lib/InnoDbStatus.pm line 9.
BEGIN failed--compilation aborted at /usr/local/mpm/lib/InnoDbStatus.pm line 9.
Compilation failed in require at /usr/local/mpm/lib/FromDualMySQLinnodb.pm line 26.
BEGIN failed--compilation aborted at /usr/local/mpm/lib/FromDualMySQLinnodb.pm line 26.
Compilation failed in require at (eval 15) line 3.

#先把mpm配置文件中的对应模块删除,zabbix web中主机关联的模板删除,然后重启agentd,看看是否还继续报错,如果不报了找对应模块的问题
#这个问题是因为perl少安装一个perl-Digest-SHA依赖包
下面的斜体部分都属于报错、排错部分,是针对某些非MPM官网包出现的问题,如果是官网下的MPM可以直接忽略...还是踏踏实实官网下载,别论坛或者扒别人的
测试及报错分析->>源地址http://634871.blog.51cto.com/624871/1382835
[root@localhost cache]# /usr/local/mpm/FromDualMySQLagent.pl /etc/zabbix_mpm.conf 1 [root@localhost ~]# tail -f /var/log/zabbix/FromDualMySQLagent.log 29318:2014-05-07 14:03:45.553 - INFO: FromDual Performance Monitor for MySQL (0.9.1) run started. 29318:2014-05-07 14:03:45.575 - WARN:       127.0.0.1, 10051, zabbix_server 29318:2014-05-07 14:03:45.575 - WARN:       Connection to zabbix server failed (rc=1305)!
29318:2014-05-07 14:03:45.620 - WARN:       127.0.0.1, 10051, zabbix_server 29318:2014-05-07 14:03:45.620 - WARN:       Connection to zabbix server failed (rc=1305)!
29318:2014-05-07 14:03:45.628 - WARN:       127.0.0.1, 10051, zabbix_server 29318:2014-05-07 14:03:45.628 - WARN:       Connection to zabbix server failed (rc=1305)!
29318:2014-05-07 14:03:45.650 - WARN:       127.0.0.1, 10051, zabbix_server 29318:2014-05-07 14:03:45.650 - WARN:       Connection to zabbix server failed (rc=1305)!
29318:2014-05-07 14:03:45.656 - WARN:       127.0.0.1, 10051, zabbix_server 29318:2014-05-07 14:03:45.656 - WARN:       Connection to zabbix server failed (rc=1305)!
29318:2014-05-07 14:03:45.670 - WARN:       127.0.0.1, 10051, zabbix_server 29318:2014-05-07 14:03:45.670 - WARN:       Connection to zabbix server failed (rc=1305)!
29318:2014-05-07 14:03:45.675 - WARN:       127.0.0.1, 10051, zabbix_server 29318:2014-05-07 14:03:45.676 - WARN:       Connection to zabbix server failed (rc=1305)!
29318:2014-05-07 14:03:45.676 - INFO: FromDual Performance Monitor for MySQL run finshed (rc=0).
扒了mpm代码
FromDualMySQLagent.pm的checkConnectionToZabbixServer
sub checkConnectionToZabbixServer { my $pServer = $_[0]; my $pPort   = $_[1]; my $pHost   = $_[2]; my $rc = 0; if ( $main::gParameter{'Debug'} >= INFO ) { &FromDualMySQLagent::mylog($main::gParameter{'LogFile'}, INFO, '      ' . (caller(0))[3]); } # This tag does NOT exist in templates!!!
  my $lKey    = 'FromDual.server.check'; my $lValue  = 1; if ( $main::gParameter{'Debug'} == DBG ) { &FromDualMySQLagent::mylog($main::gParameter{'LogFile'}, DBG, " Check connection to zabbix server."); } my $prg = 'zabbix_sender'; my $exe = which($prg); if ( ! defined($exe) ) { $rc = 1319; &FromDualMySQLagent::mylog($main::gParameter{'LogFile'}, ERR, " Cannot find program $prg (rc=$rc)."); return $rc; } my $cmd = "$exe --zabbix-server $pServer --port $pPort --host '$pHost' --key $lKey --value '$lValue'"; if ( $main::gParameter{'Debug'} == DBG ) { $cmd .= ' -vv'; &FromDualMySQLagent::mylog($main::gParameter{'LogFile'}, DBG, '      ' . $cmd); } if ( $main::gParameter{'Debug'} == DBG ) { system("$cmd >>" . $main::gParameter{'LogFile'} . " 2>&1"); } else { system("$cmd >/dev/null 2>&1"); } my $ret = $?; if ( $main::gParameter{'Debug'} == DBG ) { &FromDualMySQLagent::mylog($main::gParameter{'LogFile'}, DBG, " (ret=$ret)."); } if ( ($ret >> 8) == 0 ) { } elsif ( $ret == -1 ) { $rc = 1327; if ( $main::gParameter{'Debug'} == DBG ) { &FromDualMySQLagent::mylog($main::gParameter{'LogFile'}, ERR, " Failed to execute (ret=$ret / rc=$rc).\n$!\n"); } return $rc; } elsif ( $ret & 127 ) { $rc = 1328; if ( $main::gParameter{'Debug'} == DBG ) { &FromDualMySQLagent::mylog($main::gParameter{'LogFile'}, ERR, "      " . sprintf("Child died with signal %d, %s coredump", ($ret & 127), ($ret & 128) ? 'with' : 'without') . " (ret=$ret / rc =$rc)."); } return $rc; } else { $rc = 1329; if ( $main::gParameter{'Debug'} == DBG ) { &FromDualMySQLagent::mylog($main::gParameter{'LogFile'}, ERR, "      " . sprintf("Child exited with value %d", $ret >> 8) . " (ret=$ret / rc=$rc)."); } return $rc; } return $rc; }
sendData.pm的sendData
sub sendData { my $values_ref = shift; my $list_ref = shift; my $rc = 0; if ( $main::gParameter{'Debug'} >= INFO ) { &FromDualMySQLagent::mylog($main::gParameter{'LogFile'}, INFO, '    ' . (caller(0))[3]); } &writeDataToCacheFile::writeDataToCacheFile($values_ref,$list_ref); # MPM can be run in 2 modes now: locally or MaaS # We run MPM locally
  if ( lc($main::gParameter{'MaaS'}) ne 'on' ) { $rc = &FromDualMySQLagent::checkConnectionToZabbixServer($main::gParameter{'ZabbixServer'}, $main::gParameter{'ZabbixServerPort'}, $main::gParameter{'Hostname'}); # Connection to zabbix server seems OK
    if ( $rc == 0 ) { if ( $main::gParameter{'Debug'} == DBG ) { &FromDualMySQLagent::mylog($main::gParameter{'LogFile'}, DBG, " Connection to zabbix server seems OK."); } $rc = &sendCachedData::sendCachedData($main::gParameter{'ZabbixServer'}, $main::gParameter{'ZabbixServerPort'}); } # No success connecting to zabbix server
    else { $rc = 1305; &FromDualMySQLagent::mylog($main::gParameter{'LogFile'}, WARN, '      ' . $main::gParameter{'ZabbixServer'}. ', ' . $main::gParameter{'ZabbixServerPort'} . ', ' . $main::gParameter{'Hostname'}); &FromDualMySQLagent::mylog($main::gParameter{'LogFile'}, WARN, " Connection to zabbix server failed (rc=$rc)!"); } } # We run MPM as MaaS
  else { if ( lc($main::gParameter{'Methode'}) eq 'http' ) { $rc = &uploadData::uploadData(); } else { $rc = 1313; &FromDualMySQLagent::mylog($main::gParameter{'LogFile'}, ERR, " Could NOT upload data to MaaS Server (rc=$rc)."); } } return $rc; }
sendCachedData.pm的sendCachedData
sub sendCachedData { my $pServer = $_[0]; my $pPort   = $_[1]; my $rc = 0; if ( $main::gParameter{'Debug'} >= INFO ) { &FromDualMySQLagent::mylog($main::gParameter{'LogFile'}, INFO, '    ' . (caller(0))[3]); } if ( $main::gParameter{'Debug'} == DBG ) { &FromDualMySQLagent::mylog($main::gParameter{'LogFile'}, DBG, " Sending cache file to zabbix server."); } # File exists and is NOT empty
  if ( -f $main::gParameter{'CacheFile'} ) { if ( $main::gParameter{'Debug'} == DBG ) { &FromDualMySQLagent::mylog($main::gParameter{'LogFile'}, DBG, " Cache file found."); } my $exe = 'zabbix_sender'; $exe = which($exe); if ( ! defined($exe) ) { $rc = 1318; &FromDualMySQLagent::mylog($main::gParameter{'LogFile'}, ERR, "Cannot find program $exe."); } my $cmd = "$exe --zabbix-server $pServer --port $pPort --input-file $main::gParameter{'CacheFile'} --with-timestamps"; if ( $main::gParameter{'Debug'} == DBG ) { $cmd .= ' -vv'; &FromDualMySQLagent::mylog($main::gParameter{'LogFile'}, DBG, " $cmd"); } if ( $main::gParameter{'Debug'} == DBG ) { system("$cmd >>" . $main::gParameter{'LogFile'} . " 2>&1"); } else { system("$cmd >/dev/null 2>&1"); } my $ret = $?; $rc = 1301; if ( $main::gParameter{'Debug'} == DBG ) { &FromDualMySQLagent::mylog($main::gParameter{'LogFile'}, DBG, " (ret=$ret / rc=$rc)."); } if ( $ret == 0 ) { # Do not delete Cache File but just set it back to zero again
      &FromDualMySQLagent::clearCacheFile($main::gParameter{'CacheFile'}); } else { &FromDualMySQLagent::mylog($main::gParameter{'LogFile'}, ERR, " Load of cache file failed. rc=$rc"); } } else { if ( $main::gParameter{'Debug'} == DBG ) { &FromDualMySQLagent::mylog($main::gParameter{'LogFile'}, DBG, " No cache file " . $main::gParameter{'CacheFile'} . " found."); } } }
做了个测试脚本
#!/usr/bin/perl
my $cmd = "zabbix_sender --zabbix-server 127.0.0.1 --port 10051 --host 'zabbix_server' --key FromDual.server.check --value '1'"; system("$cmd >/dev/null 2>&1"); my $ret = $?; my $code = $ret >> 8; if ( ($ret >> 8) == 0 ) { printf "code 0" } else { printf "code is $code" }
[root@localhost cache]# zabbix_sender --zabbix-server 127.0.0.1 --port 10051 --host 'zabbixserver' --key FromDual.server.check --value '1' ;echo $?
info from server: "processed: 0; failed: 1; total: 1; seconds spent: 0.000028" sent: 1; skipped: 0; total: 1
2
说明还是有问题,继续排查中...
返回值2是shell内建命令使用错误(Bash文档上有说明)
https://www.zabbix.com/documentation/2.0/manpages/zabbix_sender zabbix_sender的说明
因为在zabbix web页面中,没有模板是符合 FromDual.server.check的,所以他会报错
一定注意模板的重要性,会遇到两个比较常见的问题
1、就是上面的check失败,/var/log/zabbix/FromDualMySQLagent.log 报:
3348:2014-05-09 14:25:19.099 - INFO: FromDual Performance Monitor for MySQL (0.9.1) run started.
3348:2014-05-09 14:25:19.130 - WARN: localhost, 10051, zabbixserver
3348:2014-05-09 14:25:19.130 - WARN: Connection to zabbix server failed (rc=1305)!
3348:2014-05-09 14:25:19.130 - INFO: FromDual Performance Monitor for MySQL run finshed (rc=0).
2、zabbix web页面主机监控状态会显示为红色的Z,并提示:
Received empty response from Zabbix Agent at [192.168.10.217]. Assuming that agent dropped connection because of access permission
这就是Server自己的模板确实造成,模板要和agent监控的模块匹配
决定改下FromDualMySQLagent.pm的checkConnectionToZabbixServer模块默认的$key值
  # This tag does NOT exist in templates!!!
  my $lKey    = 'FromDual.server.check'; 改为 # This tag does NOT exist in templates!!!
  my $lKey    = 'FromDual.MySQL.mpm.mpm_version'; 但是必须在/etc/zabbix_mpm.cnf的Modules中加入mpm
执行zabbix_sender测试
[root@zabbixserver cache]# zabbix_sender --zabbix-server 127.0.0.1 --port 10051 --host 'zabbixserver' --key FromDual.MySQL.mpm.mpm_version --value '1' ;echo $?
info from server: "processed: 1; failed: 0; total: 1; seconds spent: 0.000042" sent: 1; skipped: 0; total: 1
0
但是!FromDualMySQLagent.log 然后开始报:
3801:2014-05-09 14:53:26.283 - INFO: FromDual Performance Monitor for MySQL (0.9.1) run started.
3801:2014-05-09 14:53:26.301 - ERR : Load of cache file failed. rc=1301
3801:2014-05-09 14:53:26.301 - INFO: FromDual Performance Monitor for MySQL run finshed (rc=0).
what the fuck...
sendCachedData.pm的sendCachedData的
my $cmd = "$exe --zabbix-server $pServer --port $pPort --input-file $main::gParameter{'CacheFile'} --with-timestamps"; my $ret = $?; $rc = 1301; if ( $main::gParameter{'Debug'} == DBG ) { &FromDualMySQLagent::mylog($main::gParameter{'LogFile'}, DBG, " (ret=$ret / rc=$rc)."); } if ( $ret == 0 ) { # Do not delete Cache File but just set it back to zero again &FromDualMySQLagent::clearCacheFile($main::gParameter{'CacheFile'}); } else { &FromDualMySQLagent::mylog($main::gParameter{'LogFile'}, ERR, " Load of cache file failed. rc=$rc"); }
测试:
[root@zabbixserver cache]# zabbix_sender --zabbix-server 127.0.0.1 --port 10051 --input-file /var/log/zabbix/cache/FromDualAgentCache.zabbixserver.cache --with-timestamps ;echo $?
Sending failed. Use option -vv for more detailed output.
1
发现个问题,每次监控的mpm模块会把FromDualAgentCache.zabbixserver.cache文件中最后写入个空行,导致zabbix_sender读取失败
用其他模板中的模块去让他check即可解决
/usr/local/mpm/FromDualMySQLagent.pl /etc/zabbix_mpm.conf
在部署zabbix_agentd的时候报以下错误:
 6274:2014-05-13 23:37:11.745 - INFO: FromDual Performance Monitor for MySQL (0.9.2) run started.
 6274:2014-05-13 23:37:11.957 - ERR : Cannot read PID file /export/data/mysql/data/mysql.pid. Either file does not exist or I have no read permissions. Are you sure the process is running?
 6274:2014-05-13 23:37:11.958 - INFO: FromDual Performance Monitor for MySQL run finshed (rc=0).
解决方法usermod -G mysql zabbix
以下错误可以使用软连
 5941:2014-05-13 19:25:50.366 - INFO: FromDual Performance Monitor for MySQL (0.9.1) run started. 5941:2014-05-13 19:25:50.404 - ERR : DBI connect with database=mysql, host=localhost, port=3358 and user=zabbix failed: Can't connect to local MySQL server through socket '/var/lib/mysql/mysql.sock' (2)
 5941:2014-05-13 19:25:50.404 - DBG :     Database connection failed (rc=2400). 5941:2014-05-13 19:25:50.414 - ERR : DBI connect with database=mysql, host=localhost, port=3358 and user=zabbix failed: Can't connect to local MySQL server through socket '/var/lib/mysql/mysql.sock' (2)
 5941:2014-05-13 19:25:50.414 - DBG :     Database connection failed (rc=2600). 5941:2014-05-13 19:25:50.414 - INFO: FromDual Performance Monitor for MySQL run finshed (rc=0). mkdir -p /var/lib/mysql/ ;ln -s /export/data/mysql/tmp/mysql.sock mysql.sock
例如mkdir -p /var/lib/mysql/;cd /var/lib/mysql/ ;ln -s /export/data/mysql/tmp/mysql.sock mysql.sock
4、总结
上面基本上能遇到的问题都遇到了,总结一下:
1、Zabbix部署没什么难度,注意MySQL和php配置与Zabbix的一致即可,注意环境变量,若报找不到sock或者pid文件,但是找不到相关配置,最后办法可以ln做软连
2、mysql.php作为Zabbix自己的MySQL监控插件和Zabbix官网的监控模板不是很好用,推荐用MPM。MPM的原理就是通过/usr/local/mpm/FromDualMySQLagent.pl读取配置文件/etc/zabbix_mpm.conf中所需要的模块,然后调用/usr/local/mpm/lib下的各个模块读MySQL运行参数
3、别TM从什么网盘或者什么参考论坛下插件,一定要从第三方软件官网!查了一圈结果是MPM包的问题,官网的配上就好使
4、MPM不好使可以用zabbix_sender在agentd机器测试是否可以成功,MPM脚本中很多环节是依靠zabbix_sender的检查
5、在zabbix_server端可以用zabbix_get检查是否可以连通agentd端
6、MPM配置中的Modules中加上MPM他就会自动刷新,否则只能把脚本加到crontab中一分钟取一次数(http://blog.chinaunix.net/uid-451-id-3338674.html中最后“关于mpm的刷新频率”)
7、主机名、MPM和zabbix配置中的与zabbix web界面的要一致
8、MPM中Modules的模块一定要在zabbix web中导入相对应模板,否则会出现(下面仅实例,记得这个返回码是1)
[root@zabbixserver cache]# zabbix_sender --zabbix-server 127.0.0.1 --port 10051 --input-file /var/log/zabbix/cache/FromDualAgentCache.zabbixserver.cache --with-timestamps ;echo $?
info from server: "processed: 123; failed: 234; total: 357; seconds spent: 0.000042"
sent: 1; skipped: 0; total: 1
1
【Zabbix监控项目触发的动作,调用msmtp发邮件比较麻烦,使用msmtp配合mutt十分方便】
Zabbix监控动作传出的数据定义
$1 收件人 recipient=[email protected]
$2 标题 subject='服务器cobbler-MySQL server is down on cobbler的故障'
$3 邮件内容 message='MYSQL down'
【msmtp】
1、msmtp邮件插件下载地址:
http://sourceforge.net/projects/msmtp/files/msmtp/1.4.32/
[root@zabbixserver ~]# tar jxvf msmtp-1.4.32.tar.bz2
[root@zabbixserver ~]# cd ./msmtp-1.4.32
[root@zabbixserver msmtp-1.4.32]# ./configure --prefix=/usr/local/bin/msmtp ;make && make install ;
[root@zabbixserver etc]# cd /usr/local/etc/
[root@zabbixserver etc]# ln -s /export/zabbix/msmtprc msmtprc
[root@zabbixserver etc]# msmtp -P
2、msmtp配置参考:
http://www.docin.com/p-471069369.html
配置示例(使用时把配置文件的所有注释删掉)
[root@zabbixserver ~]# vim /usr/local/etc/msmtprc
account [email protected]
host smtp.explain.com
port 25  #特殊需修改,默认25
from [email protected]
auth login
tls off
user username
password passwd_user
account default:[email protected]
logfile /var/log/zabbix/zabbix_msmtp.log
touch /var/log/zabbix/zabbix_msmtp.log
chmod 600 .msmtprc
msmtp -P 命令测试msmtp配置是否正确
loaded system configuration file /usr/local/etc/msmtprc
loaded user configuration file /root/.msmtprc
falling back to default account
using account default from /root/.msmtprc
host                  = smtp.explain.com
port                  = 25
timeout               = off
protocol              = smtp
domain                = localhost
auth                  = LOGIN
user                  = username
password              = *
passwordeval          = (not set)
ntlmdomain            = (not set)
tls                   = off
tls_starttls          = on
tls_trust_file        = (not set)
tls_crl_file          = (not set)
tls_fingerprint       = (not set)
tls_key_file          = (not set)
tls_cert_file         = (not set)
tls_certcheck         = on
tls_force_sslv3       = off
tls_min_dh_prime_bits = (not set)
tls_priorities        = (not set)
auto_from             = off
maildomain            = (not set)
from                  = 605441885@qq.com
dsn_notify            = (not set)
dsn_return            = (not set)
keepbcc               = off
logfile               = /var/log/zabbix/zabbix_msmtp.log
syslog                = (not set)
aliases               = (not set)
reading recipients from the command line
上面说明检查配置成功,如果有报错,对应报错修改配置内容或者配置文件所在位置
3、测试
一般telnet不通的,比如telnet smtp.sina.com 25失败的,那先看看端口是不是受限了
msmtp [email protected] 回车后输入内容,然后Ctrl+d尝试发送邮件,观察/var/log/zabbix/zabbix_msmtp.log
4、脚本
#! /bin/sh
DEBUG=1
if [ $DEBUG -gt 0 ]
then
exec 2>>/export/zabbix/cache/zabbix_msmtp.log
set -x
fi
FROM='[email protected]'
MSMTP_ACCOUNT='[email protected]'
# Parameters (as passed by Zabbix):
# $1 : Recipient
# $2 : Subject
# $3 : Message
recipient=$1
subject=$2
message=$3
date=`date --rfc-2822`
sed 's/$/\r/' <<EOF | /usr/local/msmtp/bin/msmtp -C /usr/local/etc/msmtprc --account $MSMTP_ACCOUNT $recipient
From: <$FROM>
To: <$recipient>
Subject: $subject
Date: $date
$message
EOF
报警邮件有中文的话,foxmail收到邮件标题和内容都会是乱码,foxmail自动识别不好用,outlook比较好,但是太占用内存,网易的邮箱也还好,内容可以自己匹配字符集,但是标题也还是乱码。
可能遇到的报错
msmtp: /usr/local/etc/msmtprc: must have no more than user read/write permissions
把配置文件的权限修改一下
[root@zabbixserver etc]# chown zabbix,zabbix msmtprc
[root@zabbixserver etc]# chmod og-rwx msmtprc
[root@zabbixserver etc]# chmod u-wx msmtprc
建议把脚本放在zabbix_server.cnf默认的路径下
编译的path: zabbix/share/zabbix/alertscripts
然后授权zabbix
[root@zabbixserver alertscripts]# chown zabbix,zabbix msmtp.sh
5、测试
进入zabbix用户下,调用上述脚本测试,如果进不去zabbix用户,执行
[root@zabbixserver /]# usermod -s /bin/bash zabbix
【mutt】(mutt没有试用成功)
mutt邮件处理框图
http://blog.chinaunix.net/uid-20543672-id-3349607.html
我用的yum安装mutt
参考msmtp这里面的改配置文件
http://www.docin.com/p-471069369.html
[root@zabbixserver /]# vim muttrc
[root@zabbixserver /]# cd /root/
[root@zabbixserver ~]# ln -s /export/zabbix/muttrc .muttrc
1、mutt配置muttrc内容
set use_from=yes
set realname="[email protected]" set sendmail="/path/msmtp" set editor="vi" set from="[email protected]"
如果不加set from="[email protected]" 会报下面的错误
[root@localhost export]# echo "hahahaha" | mutt -s "MySQL down" [email protected]
msmtp: the server did not accept the mail
msmtp: server message: 550 5.7.1 Client does not have permissions to send as this sender msmtp: could not send mail (account default from /root/.msmtprc) Error sending message, child exited 69 (Service unavailable.). Could not send the message.
2、脚本配置
脚本路径是zabbix_server配置文件控制的,如下,所以需要把脚本放到这个目录下
AlertScriptsPath=/usr/bin/
3、脚本
#!/bin/bash
echo "$3" | mutt -s "$2" $1
【Zabbix邮件报警设置】
邮件报警,参考:
报警脚本 -> http://waringid.blog.51cto.com/65148/1142579/ <- 不太好用,用mutt自己写个简单的
配置 ->http://www.centoscn.com/CentosServer/log/2013/0807/1168.html
MPM对于MySQL实例是否存活的alive的监控是基于自己MPM脚本的,但是如果MySQL已经down了,MPM采集不到数据,MPM脚本会报错而sender不出来数据,导致拿不到实际MySQL状态
自己建模板、项目、触发器,利用zabbix的net模块的端口监控MySQL是否存活(存活状态是否健康还需要其他类型监控),参考链接:
http://www.linuxidc.com/Linux/2013-05/83780.htm
选择一个用户组(可以先新建一个组,并把用户加到这个组)
用户的邮箱地址可以在点击在用户-示警媒介中添加和配置
新建示警媒介类型(管理-示警媒介类型-创建媒体类型)
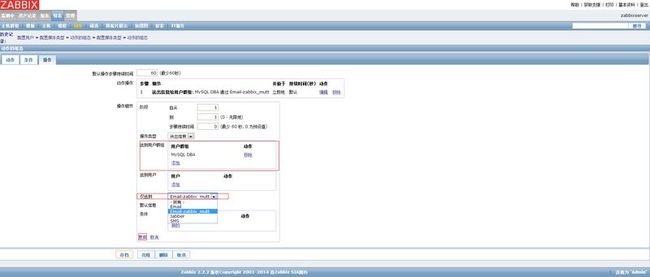
在动作中添加群组以及动作行为(组态-动作-操作)切记配置完点击更新,再点击存档
【部署客户端】
客户端部署比较简单,因为在server这边编译时候已经带了客户端,可以直接把server这边的客户端打个包,复制到监控机。上面示例中的mpm配置是用zabbixserver自己mysql做的一个配置,可以参考上面的配置。
##最好先检查一下server与agent间网络是否通

##server这边打好包,做分发
[root@zabbixserver ~]# cd /usr/local/
[root@zabbixserver local]# cp /path/zabbix-2.2.2/misc/init.d/fedora/core/zabbix_* zabbix/
[root@zabbixserver local]# tar -zcvf ./zabbix.tar.gz zabbix/
[root@zabbixserver local]# tar -zcvf ./mpm.tar.gz mpm/
[root@zabbixserver local]# scp ./zabbix.tar.gz root@ip:/usr/local/
[root@zabbixserver local]# scp ./mpm.tar.gz root@ip:/usr/local/

##Agent监控机
[root@ip local]# tar -zxvf zabbix.tar.gz
[root@ip local]# tar -zxvf mpm.tar.gz
[root@ip local]# chown -R zabbix.zabbix zabbix
[root@ip local]# chown -R zabbix.zabbix mpm
[root@ip local]# groupadd zabbix;useradd -g zabbix -d /home/zabbix -s /sbin/nologin zabbix
[root@ip local]# usermod -G mysql zabbix
[root@ip local]# cd path/zabbix/;mkdir cache zabbix_tmp;chown -R zabbix.zabbix cache/ zabbix_tmp/


[root@ip etc]# vim /usr/local/mpm/zabbix_mpm.conf
[default]
Type         = mysqld
Debug         = 2
LogFile       = /export/zabbix/cache/FromDualMySQLagent.log
CacheFileBase = /export/zabbix/cache/FromDualAgentCache
Username     = zabbix
Password     = zabbix
MysqlHost    = 127.0.0.1
MysqlPort    = 3358
ZabbixServer = 172.22.209.54
Disabled     = false
[DB22484]
Type         = mysqld
MysqlPort    = 3358
Modules      = mpm mysql process server innodb
PidFile      = /export/zabbix/mysql_data/mysql.pid


[root@ip etc]# vim zabbix_agentd.conf
Server=172.22.209.54
ServerActive=172.22.209.54
Hostname=DB22484
UserParameter=FromDual.MySQL.check,/usr/local/mpm/FromDualMySQLagent.pl /usr/local/mpm/zabbix_mpm.conf

[root@ip bin]# cd /usr/bin/;ln -s /usr/local/zabbix/bin/zabbix_sender zabbix_sender


[root@ip init.d]# service zabbix_agentd start
Starting zabbix_agentd:  /etc/init.d/functions: line 536: /usr/local/sbin/zabbix_agentd: 没有那个文件或目录
##/path/zabbix-2.2.2/misc/init.d/fedora/core/zabbix_*  这个里面的zabbix_agentd别忘该路径

[root@ip path]# touch /path/FromDualMySQLagent.log
[root@ip path]# chown -R zabbix:zabbix /path/zabbix/

##zabbix_agentd启了以后看看日志,是否有报错,只要rc不等于0就是有问题
【定制监控项目】
触发器语法:http://www.cnblogs.com/jiangxu67/p/3990372.html
MySQL主从关系的结构中,从库每天有备份计划,添加一个备份计划结果和备份文件大小的监控
先创建一个模板,例如名称:MySQL.backup_status。把一台测试机加入到模板里面
建一个应用集:MySQL Backup
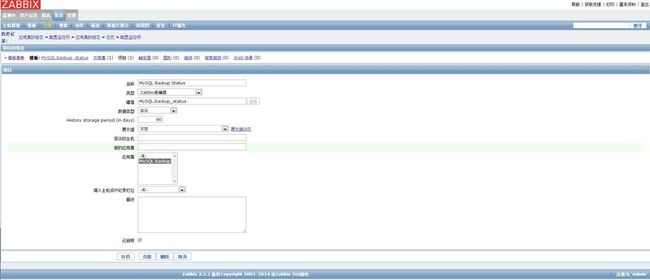
建一个监控项:MySQL Backup Status
存档以后,在已经添加该模板的主机上给zabbix_server发送测试数据:
[root@cobbler dumps]# zabbix_sender --zabbix-server 192.168.201.107 --port 10051 --host 'cobbler' --key MySQL.backup_status --value '1' ;echo $?
info from server: "processed: 1; failed: 0; total: 1; seconds spent: 0.000034"
sent: 1; skipped: 0; total: 1
0
从监控界面查看效果
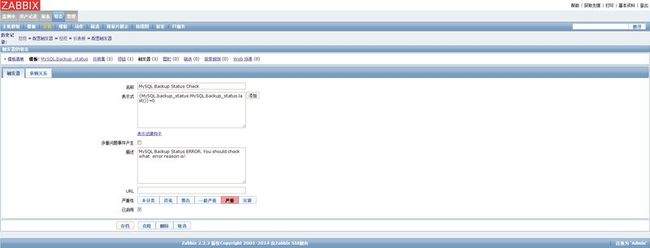
添加触发器:
给zabbix_server发送测试数据:
[root@cobbler dumps]# zabbix_sender --zabbix-server 192.168.201.107 --port 10051 --host 'cobbler' --key MySQL.backup_status --value '0' ;echo $?
info from server: "processed: 1; failed: 0; total: 1; seconds spent: 0.000027"
sent: 1; skipped: 0; total: 1
0
查看效果,此时“类型”选项中选触发器也可以,如图2:
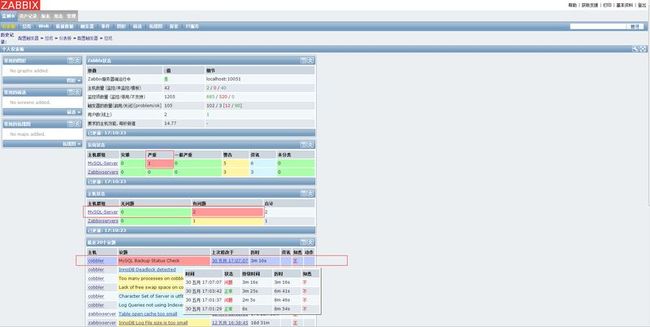
触发器的报警状态是闪烁的,在Zabbix WEB首页显示会更明显:
...弱弱的表示死锁的报警忽略,原因是那篇“MySQL锁和隔离级别浅析分析”测试时候导致的,显示绿色表示死锁问题已恢复。
回来继续说自制这个监控项,可以在主机MySQL定时备份计划部分脚本中多加一个备份结果判断,正常就执行上面zabbix_sender的命令把--value '1' 的状态发给zabbix_server反之发送个0,具体发什么定义什么自己定吧...上面例子和系统定义的返回码弄反了。
后期维护:
1、zabbix数据会慢慢增长,history和history_uint表的数据会很大,尤其是history_uint,可以根据下面网址的方法清理数据,也可以根据自身需要truncate这张表。
http://www.minunix.com/2012/12/zabbix-clean/
