openflow tutorial 开始openflow的学习(一)
首先不废话介绍openflow了,自己也还搞不清楚究竟是个什么玩意儿,概括不出什么内容来,先做试验,有个大体的感性了解回来再总结吧。
第一步,搭建环境,这一步就是安装工具,不同的系统环境搭建不一致,我的环境大体如下:
首先把虚拟机搞起来,Set up Virtual Machine,这一步主要是下载OpenFlowTutorial-101311.zip,里面是虚拟机的镜像OpenFlowTutorial-disk1.vdi
For the .zip archive, you need to set up a new VirtualBox VM. Open VirtualBox.
- Select New
- Press Continue in the next prompt.
- Name your VM OpenFlowTutorial, Operating System Linux, Version Ubuntu. Click Continue.
- Set the memory at 512MB and click Continue
- At that point VB should ask you to Create a new hard disk, or use the existing one. Select "Use existing hard disk".
- Click the icon to select the hard disk. This will open the Virtual Media Manager Window.
- Press Add, and find the extracted OpenFlowTutorial*.vdi from the previous steps. Click Select and then Continue.
- Your VM installation is complete. Press Done.
接下来要给虚拟机配置一下网络,首先要明确我们配置网络是干啥:
1.虚拟机可以上网;
2.宿主机可以通过putty访问虚拟机;
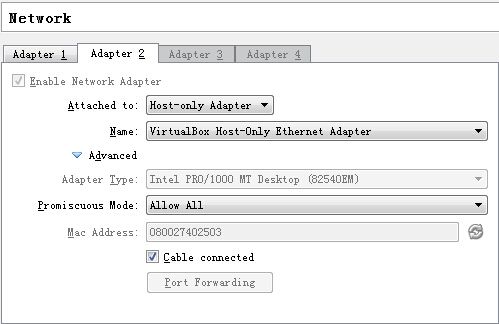
这就是tutorial里面要设置NAT和host-only两个网卡选项的原因。
从虚拟机ping主机和外网都可以ping通了。
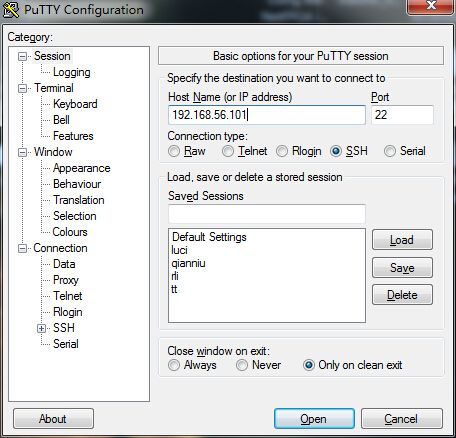
接下来就要在主机上通过SSH登陆虚拟机了。因为我是win7,所以使用putty,首先在Hostname中输入hostonly对应的IP地址。
然后打开下面的SSH,选中enable X11 forwarding
另外再主机中将本地连接设置为共享给hostonly,并且hostonly的IPv4要自动获取ip。否则不能从putty打开ssh。
通过ssh进入虚拟机之后,要在主机windows下安装Xming,然后打开Xming,然后在ssh中输入xterm -sb 500,就可以打开一个设置后的窗口Xming。
接下来就是在实验中使用各种工具:openflow controller ,openflow switch,dpctl,wireshark,iperf,mininet,cbench。
Start Network
接下里就是跟着手册输入命令,做实验。
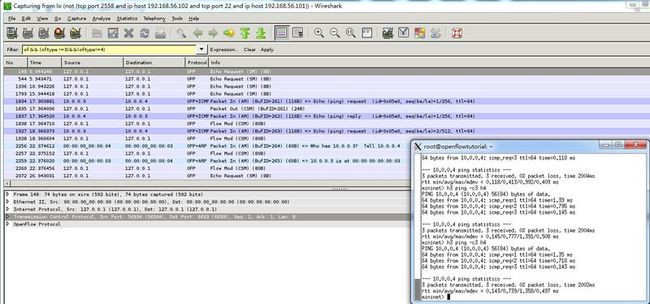
第一个实验主要是尝试建立如上图的拓扑结构,然后,h2和h3之间进行ping操作,修改流表进行控制。另外这里还介绍了两个工具,一个是wireshark抓包工具和iperf用于checking speeds between two computers.
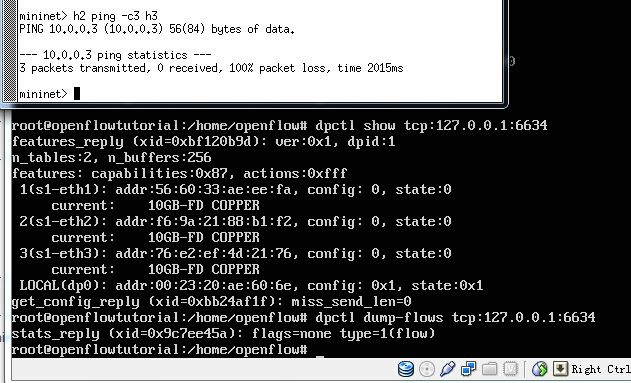
首先在拓扑刚建立的时候,h2和h3是ping不通的,因为没有添加流表。
这里涉及dpctl dump-flows tcp:127.0.0.1:6634,查看流表的命令。接下来通过
$ dpctl add-flow tcp:127.0.0.1:6634 in_port=2,actions=output:3
$ dpctl add-flow tcp:127.0.0.1:6634 in_port=3,actions=output:2
添加流表,我这里是h3和h4的,所以测试mininet> h3 ping -c3 h4,如下:
这个流表是有时间限制的,默认是60秒,可以通过
$ dpctl add-flow tcp:127.0.0.1:6634 in_port=2,idle_timeout=120,actions=output:3
来进行修改流表存在的时间。另外下面介绍了两个工具:wireshark和iperf,可以尝试着看看。
iperf只是一个命令,可以直接在ssh中输入,查看speed。


