centOS-64位通过YUM源安装nginx
第一步:在 /etc/yum.repos.d/ 目录下,建立名叫nginx.repo的软件源配置文件。
文件 nginx.repo 的内容是:
[nginx]

name=nginx repo

baseurl=http://nginx.org/packages/centos/$releasever/$basearch/

gpgcheck=0

enabled=1
第二步:使用命令 yum install nginx ,按照提示即可安装完毕;
第三步:使用命令 /etc/init.d/nginx start 启动nginx服务;
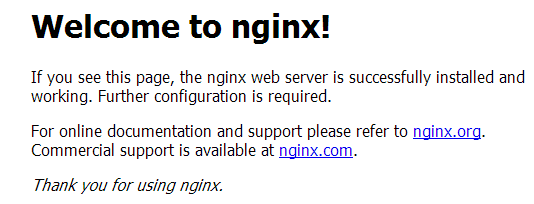
第四步:测试,在浏览器里输入服务器ip地址,即可出现 nginx 欢迎页面;

重启nginx命令:
service nginx restart;
nginx -s reload;
nginx安装路径:/etc/nginx
配置文件:/etc/nginx/nginx.conf
配置文件,首先修改/etc/nginx/nginx.conf文件:
[root@uxyc006060 nginx]# vi nginx.conf
user nginx;
worker_processes 2;
error_log /var/log/nginx/error.log warn;
pid /var/run/nginx.pid;
events {
worker_connections 1024;
}
http {
include /etc/nginx/mime.types;
default_type application/octet-stream;
log_format main '$remote_addr - $remote_user [$time_local] "$request" '
'$status $body_bytes_sent "$http_referer" '
'"$http_user_agent" "$http_x_forwarded_for"';
access_log /var/log/nginx/access.log main;
sendfile on;
#tcp_nopush on;
keepalive_timeout 65;
gzip on;
include /etc/nginx/conf.d/*.conf;
#upstream 后面的名字在后面还要用这里用的是backend
upstream backend

{

server 127.0.0.1:8080;

}
}
在修改/etc/nginx/conf.d文件
[root@uxyc006060 conf.d]# vi default.conf
server {
listen 80;
server_name localhost;
#charset koi8-r;
#access_log /var/log/nginx/log/host.access.log main;
# location / {
# root /usr/share/nginx/html;
# index index.html index.htm;
# }
location /{

proxy_redirect off;

proxy_set_header Host $host;

proxy_set_header X-Real-IP $remote_addr;

proxy_set_header X-Forwarded-For $proxy_add_x_forwarded_for;

proxy_pass http://backend;

}
#最后一行proxy_pass http://backend看着眼熟吧,backend就是前面upstream定义的名字
#error_page 404 /404.html;
# redirect server error pages to the static page /50x.html
#
error_page 500 502 503 504 /50x.html;
location = /50x.html {
root /usr/share/nginx/html;
}