Red Gate系列之八 SQL Connect 1.1.1.19 Edition 数据库连接及操作工具 完全破解+使用教程
Red Gate系列之八 SQL Connect 1.1.1.19 Edition 数据库连接及操作工具 完全破解+使用教程
Red Gate系列文章:
Red Gate系列之一 SQL Compare 10.2.0.1337 Edition 数据库比较工具 完全破解+使用教程
Red Gate系列之二 SQL Source Control 3.0.13.4214 Edition 数据库版本控制器 完全破解+使用教程
Red Gate系列之三 SQL Server 开发利器 SQL Prompt 5.3.4.1 Edition T-SQL智能感知分析器 完全破解+使用教程
Red Gate系列之四 SQL Data Compare 10.2.0.885 Edition 数据比较同步工具 完全破解+使用教程
Red Gate系列之五 .NET Reflector 7.6.1.824 Edition .NET程序反编译神器(另附插件安装教程) 完全破解+使用教程
Red Gate系列之六 SQL Test 1.0.12.3 Edition SQL测试工具 完全破解+使用教程
Red Gate系列之七 SQL Search 1.1.6.1 Edition SQL查询分析工具使用教程
Red Gate系列之八 SQL Connect 1.1.1.19 Edition 数据库连接及操作工具 完全破解+使用教程
一、使用教程
Connected database development in your Solution Explorer
This document last updated: 9 July 2012
Introduction
With SQL Connect, you can modify and source control databases in Microsoft Visual Studio alongside your existing projects.
SQL Connect projects are compatible with SQL Source Control and SQL Compare, so you and your team can work on databases in Visual Studio or SQL Server
Management Studio and share your changes with your preferred source control tool.
Installing SQL Connect
SQL Connect is an add-in for Microsoft Visual Studio. Ensure Visual Studio is already installed before installing SQL Connect.
To install SQL Connect:
1. Download the SQL Connect installer.
2. Run the installer and follow the instructions.
Creating a SQL Connect project
To create a new SQL Connect project:
1. Open Visual Studio.
2. In the SQL Connect window, click Create New SQL Connect Project. (If the SQL Connect window is not displayed, select SQL Connect under View.) Alternatively,
under File, go to New, and click New Project.
The New Project dialog box is displayed:
3. Under Installed Templates, select SQL Connect.
4. In the lower pane, specify a name and location for your project, and click OK.
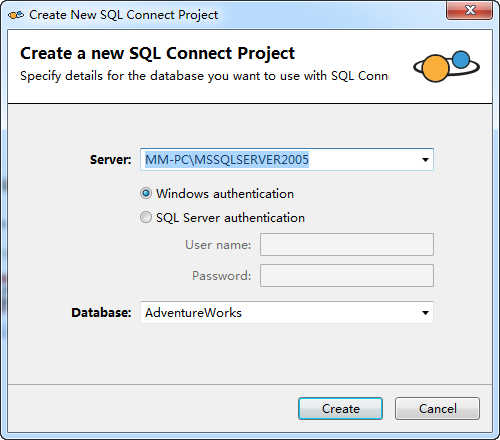
The Create New SQL Connect Project window is displayed:
5. Select the development database you want to use in your project, and click Create.
A database project is added to your Visual Studio solution:
Using an existing SQL Source Control database
SQL Connect can import databases linked to SQL Source Control 3.0.9 or higher, so teams can share databases whether they use Visual Studio or SQL Server
Management Studio.
To use an existing SQL Source Control database, you must first check out the database repository to a folder on your computer using your preferred source control
system. For more information, refer to your source control system's documentation.
Importing from SQL Source Control
To do this:
1. In the SQL Connect window, click Import From SQL Source Control. (If the SQL Connect window is not shown, select SQL Connect under View.)
The Import From SQL Source Control dialog box is displayed:
2. Click Browse, select your database folder (the folder your repository is checked out to), and click OK.
3. Click Import.
A database project is added to your Visual Studio solution:
4. Right-click the database project, and select Properties:
A new tab is displayed:
5. Select the development database you want to use in your project, and click Save in the Visual Studio toolbar.
The database is linked to your project.
synchronize the change
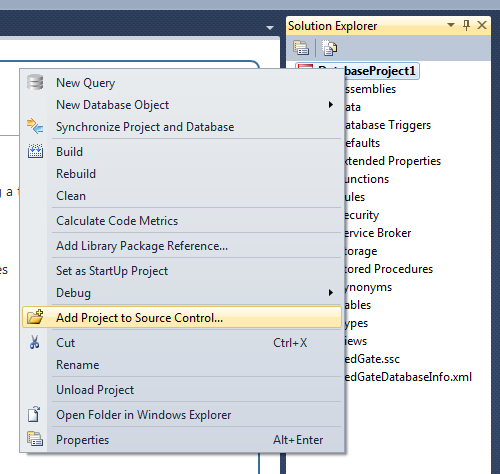
1.From the Solution Explorer window, you can right-click your project and then add it to source control:
2.Select the Team Project and then specify a location:
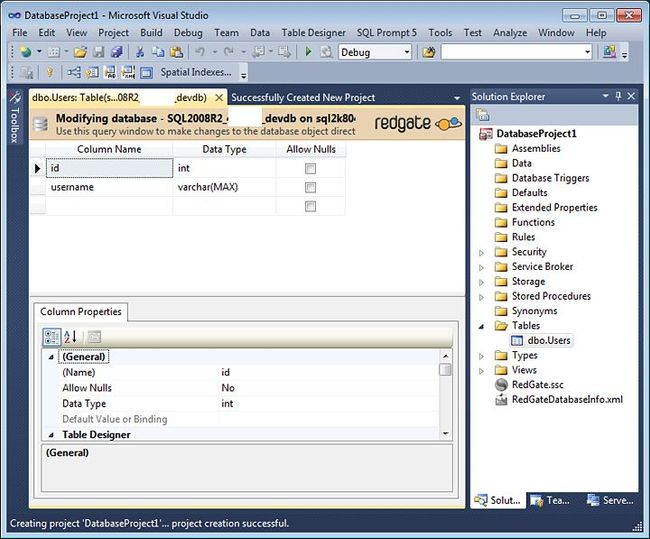
3.As an example, I’ll modify an existing table:
4.Now, all that’s left is to synchronize the change:
SQL Connect overview
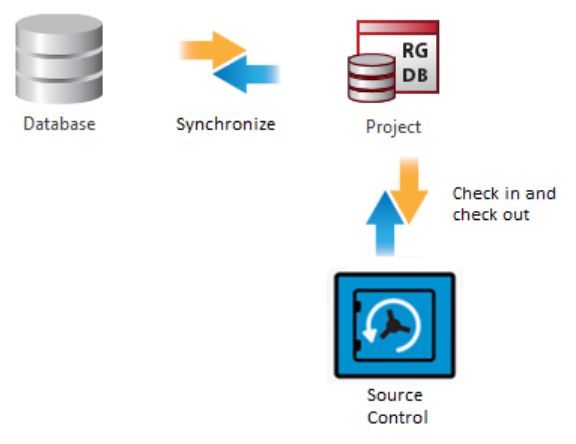
SQL Connect works by creating files in your project that represent the contents of your database. After you edit a database, the changes can be synchronized to the files
in your project. (Alternatively, you can edit the files and synchronize the changes backwards to the database.)
The files in your project can be checked in to source control using a third-party source control tool such as Subversion or Team Foundation Server. Members of your
team can then check out source-controlled files and synchronize them with their database, applying the changes you made.
Modifying a database
Modifying a database directly
To modify your database directly:
1. In the Solution Explorer, double-click an object you want to edit.
The object is displayed in a query window or graphical designer;
2. Make the changes you want, and click Execute Query (labelled Apply Changes to Database in some cases).
SQL Connect notifies you that the project and the database have become unsynchronized:
3. Click Synchronize to synchronize your database changes to the project.
Modifying a database by editing a SQL creation file
To modify your database by editing a project file:
1. In the Solution Explorer, right-click the object you want to edit.
2. Select Edit SQL File in Project:
The object is displayed in a document window:
3. Make the changes you want, and click Save Changes.
SQL Connect notifies you that the project and the database have become unsynchronized:
4. Click Synchronize to apply your changes to the database.
5.Click Edit SQL File in Project
6.Edit SQL
7.See and Edit for Table Designer
8.Edit Column
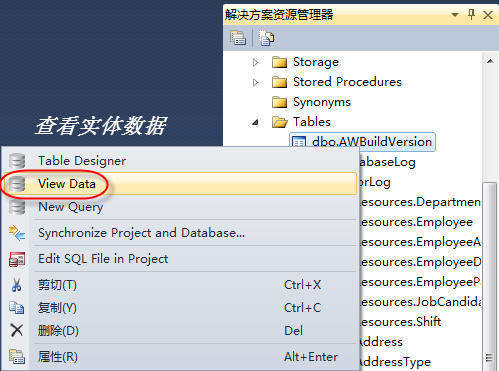
9.See View Data
10.Add and Edit Data
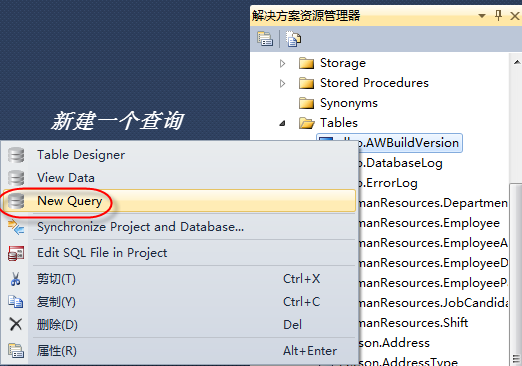
11.New Query
12.Use SQL Prompt Edit SQL
13.Select Table's Data
14.New Function,Stored Procedure,Table,View and More...
15.Edit Function,Stored Procedure,Table,View and More...
See Getting started guide(PDF)
As a big fan of SQL Compare and after being impressed by SQL Source Control, I was excited when I got a message to try out a new Red Gate product, SQL Connect.
While SQL Source Control and SQL Connect offer the same underlying ability – adding a database to source control – the key difference is that SQL Source Control works in tandem with SQL Server Management Studio whereas SQL Connect allows the ability to work on your database directly from Visual Studio.
The ability to continue working on different aspects of an application without switching environments is a blessing – think of the amount of time that’s lost and the disruptions that you usually go through tabbing through open windows or using preview windows. Some key benefits are:
- I’m mentioning it again because it really is critical: the ability to work on application-related and database-related projects in a single development environment.
- Ability to create and execute queries and stored procedures from Visual Studio.
- If some team members are already using SQL Source Control, SQL Connect can use the same repository.
The setup process is straightforward and simple so let’s go through a new installation.
1. If you don’t have a TFS hosting account, use the sign-up form and take advantage of the 30-day free trial that we offer.
2. Make sure that you have configured your client and I’d recommend creating a new Team Project using the instructions available in our knowledge base if you’re evaluating SQL Connect.
3. Before proceeding any further, take a look at the software requirements for SQL Connect.
4. If you have Visual Studio open, save any work and then close all instances that you have open.
5. Download the 28-day trial version of SQL Connect and then run the installer. Make sure that SQL Connect is selected and you can un-check SQL Prompt.
二、破解教程
打开Visual Studio -- 视图 -- SQL Connect
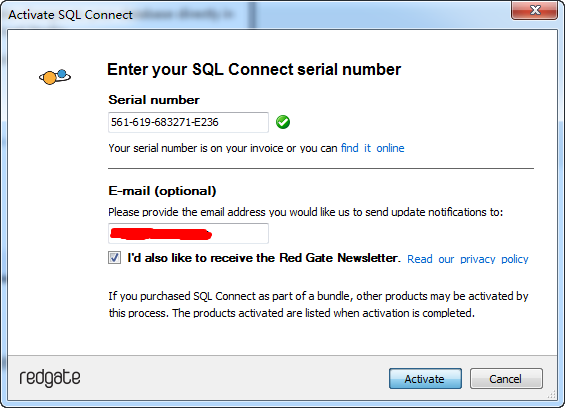
单击Help -- Enter Serial Number
打开Keygen注册机复制序列号到Activate SQL Connect窗口的文本框中
单击Activate注册,稍等一会会出现未能解析此远程名称:'licensing.red-gate.com'(请先断网再注册)
单击Activate Manually(离线注册)
复制1到2,复制3到4,然后单击Finish完成离线注册
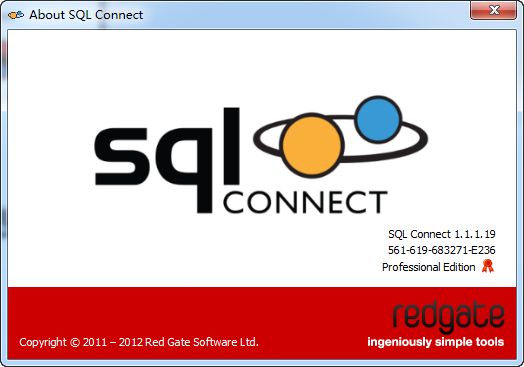
查看注册信息,破解成功!
See Help and Download:http://www.red-gate.com/products/sql-development/sql-connect/getting-started/
or:http://downloads.red-gate.com/SQLDeveloperBundle.exe
Adapted from:http://blog.discountasp.net/using-red-gate-sql-connect-with-discountasp-net-team-foundation-server/
Crack and Keygen:http://download.csdn.net/download/caizz520/4611606
未完,待续。
转载的朋友,请不要删除以下行,对此,表示感谢!!!
原文来自VAllen cnblogs链接:http://www.cnblogs.com/VAllen/archive/2012/10/01/SQLConnect.html


