用Spring MVC3 + Ant + Jenkins + SVN + Tomcat 做一个简单的持续集成例子
posted @ 2012-02-25 18:08 无知者云 阅读(490) | 评论 (0) 编辑
要学Spring,要学svn,要学Jenkins,还要学持续集成,所以自己做了一个简单的例子与大家分享。

(一) 环境搭建
(1) 安装JDK
下载JDK并安装后,设置JAVA_HOME环境变量为:C:\Program Files\Java\jdk1.7.0_02,然后需要将JAVA_HOME\bin加到PATH环境变量中。
(2) 安装Ant
下载Ant并将其解压到C盘下,设置ANT_HOME环境变量为:C:\apache-ant-1.8.2,然后将ANT_HOME\bin加到PATH环境变量中。
(3) 安装SVN
下载VisualSVN Server并安装后,将C:\Program Files (x86)\VisualSVN Server\bin加入PATH环境变量中。
请注意:以上(1)-(3)中所有软件的环境变量的设置应根据你自己的安装路径做相应的修改。
(4) 安装Tomcat服务器
下载Tomcat并将其解压到任意目录下,笔者的为G:\download\apache-tomcat-7.0.23,执行bin目录下的startup.bat文件,Tomcat便启动了,此时你可以在浏览器窗口中输入:http://localhost:8080,如果能看到Apache Tomcat页面,则表示Tomcat运行成功。
(5) 安装Jenkins
下载Jenkins并将该war文件直接放到Tomcat安装路径的webapps下,然后在在浏览器中输入http://localhost:8080/jenkins,如果能看到Jenkins主页,则表示Jenkins安装成功。
(6) 下载Spring MVC 3
(二)创建工程
新建spring-mvc-3-walk-through目录,我们称此目录为根目录,在根目录下创建original-project子目录,该目录用于将原始的工程import到SVN中(见下文),之后便可忽略了。
在original-project下创建war文件夹,在war文件夹下创建index.jsp文件,内容如下:
<html>
  <head><title>spring mvc 3 walk through</title></head>
  <body>
    <h1>Spring MVC 3</h1>
    <p>This is my spring mvc 3 tutorial.</p>
  </body>
</html>
在war文件夹下创建WEB-INF文件夹,在WEB-INF文件夹下创建lib和classes文件夹,并将下载的spring库文件(在spring的dist文件夹下)拷到lib文件夹下,事实上对于本例,你不用将spring的库文件全部拷过来的,但是我为了省事,将它们全拷了。另外将commons-logging.jar, jstl.jar和 junit-3.8.2.jar也拷到lib文件夹下。
在orginal-project下创建src文件夹,并在src下创建com\thoughtworks\davenkin\spring\HelloController.java:
package com.thoughtworks.davenkin.spring;

import org.springframework.web.servlet.mvc.Controller;
import org.springframework.web.servlet.ModelAndView;
import javax.servlet.ServletException;
import javax.servlet.http.HttpServletRequest;
import javax.servlet.http.HttpServletResponse;
import org.apache.commons.logging.Log;
import org.apache.commons.logging.LogFactory;
import java.io.IOException;

public class HelloController implements Controller {

    protected final Log logger = LogFactory.getLog(getClass());

    public ModelAndView handleRequest(HttpServletRequest request, HttpServletResponse response)
            throws ServletException, IOException {

        logger.info("Returning hello view");

        return new ModelAndView("hello.jsp");
    }

}
该为HelloController添加测试了,在orginal-project下建立test文件夹,在test文件夹下创建com\thoughtworks\davenkin\spring\HelloControllerTests.java:
package com.thoughtworks.davenkin.spring;

import org.springframework.web.servlet.ModelAndView;
import com.thoughtworks.davenkin.spring.HelloController;
import junit.framework.TestCase;

public class HelloControllerTests extends TestCase {

    public void testHandleRequestView() throws Exception{
        HelloController controller = new HelloController();
        ModelAndView modelAndView = controller.handleRequest(null, null);
        assertEquals("hello.jsp", modelAndView.getViewName());
    }
}
之后在war下创建hello.jsp文件:
<html>
  <head><title>spring mvc 3 walk through</title></head>
    <body>
      <h1>spring mvc 3 walk through</h1>
      <p>From HelloController</p>
    </body>
</html>
该文件将被HelloController.java调用。
在WEB-INF下创建web.xml文件,在该文件中将注册spring的DispatcherServlet用于拦截请求:
<?xml version="1.0" encoding="UTF-8"?>

<web-app version="2.4"
         xmlns="http://java.sun.com/xml/ns/j2ee"
         xmlns:xsi="http://www.w3.org/2001/XMLSchema-instance"
         xsi:schemaLocation="http://java.sun.com/xml/ns/j2ee
         http://java.sun.com/xml/ns/j2ee/web-app_2_4.xsd" >
  <servlet>
    <servlet-name>springapp</servlet-name>
    <servlet-class>org.springframework.web.servlet.DispatcherServlet</servlet-class>
    <load-on-startup>1</load-on-startup>
  </servlet>

  <servlet-mapping>
    <servlet-name>springapp</servlet-name>
    <url-pattern>*.htm</url-pattern>
  </servlet-mapping>

  <welcome-file-list>
    <welcome-file>
      index.jsp
    </welcome-file>
  </welcome-file-list>

</web-app>
同时,在WEB-INF下创建springapp-servlet.xml文件,至于为什么要取这个名字,我想你比我更清楚:
<?xml version="1.0" encoding="UTF-8"?>

<beans xmlns="http://www.springframework.org/schema/beans"
       xmlns:xsi="http://www.w3.org/2001/XMLSchema-instance"
       xsi:schemaLocation="http://www.springframework.org/schema/beans
       http://www.springframework.org/schema/beans/spring-beans-2.5.xsd">

  <bean name="/hello.htm" class="com.thoughtworks.davenkin.spring.HelloController"/>

</beans>
在springapp-servlet.xml中,通过传统的方式将hello.htm映射到HelloController。
接下来该写ant脚本了,在orginal-project文件下创建build.properties:
appserver.home=G:/download/apache-tomcat-7.0.23
appserver.lib=${appserver.home}/lib
deploy.path=${appserver.home}/webapps
根据你的Tomcat安装路径,以上文件应该做相应的修改。
再在original-project下创建build.xml:
<?xml version="1.0"?>

<project name="spring-mvc-3-walks-through" basedir="." default="usage">
    <property file="build.properties"/>

    <property name="src.dir" value="src"/>
    <property name="web.dir" value="war"/>
    <property name="build.dir" value="${web.dir}/WEB-INF/classes"/>
    <property name="name" value="spring-mvc-3-walks-through"/>

    <path id="master-classpath">
        <fileset dir="${web.dir}/WEB-INF/lib">
            <include name="*.jar"/>
        </fileset>
        <fileset dir="${appserver.lib}">
            <include name="servlet*.jar"/>
        </fileset>
        <pathelement path="${build.dir}"/>
    </path>


    <target name="build" description="Compile main source tree java files">
        <mkdir dir="${build.dir}"/>
        <javac destdir="${build.dir}" source="1.6" target="1.6" debug="true"
               deprecation="false" optimize="false" failonerror="true">
            <src path="${src.dir}"/>
            <classpath refid="master-classpath"/>
        </javac>
    </target>

    <target name="deploy" depends="build" description="Deploy application">
        <copy todir="${deploy.path}/${name}" preservelastmodified="true">
            <fileset dir="${web.dir}">
                <include name="**/*.*"/>
            </fileset>
        </copy>
    </target>

    <target name="deploywar" depends="build" description="Deploy application as a WAR file">
        <war destfile="${name}.war"
             webxml="${web.dir}/WEB-INF/web.xml">
            <fileset dir="${web.dir}">
                <include name="**/*.*"/>
            </fileset>
        </war>
        <copy todir="${deploy.path}" preservelastmodified="true">
            <fileset dir=".">
                <include name="*.war"/>
            </fileset>
        </copy>
    </target>


  <property name="test.dir" value="test"/>

    <target name="buildtests" description="Compile test tree java files">
        <mkdir dir="${build.dir}"/>
        <javac destdir="${build.dir}" source="1.6" target="1.6" debug="true"
            deprecation="false" optimize="false" failonerror="true">
            <src path="${test.dir}"/>
            <classpath refid="master-classpath"/>
        </javac>
    </target>

    <target name="tests" depends="build, buildtests" description="Run tests">
        <junit printsummary="on"
            fork="false"
            haltonfailure="false"
            failureproperty="tests.failed"
            showoutput="true">
            <classpath refid="master-classpath"/>
            <formatter type="brief" usefile="false"/>
            <batchtest>
                <fileset dir="${build.dir}">
                    <include name="**/*Tests.*"/>
                </fileset>
            </batchtest>
        </junit>

        <fail if="tests.failed">
           Test Failed.
        </fail>
    </target>

</project>
到此,工程创建好,可以运行ant tests来跑单元测试了。
(三)将工程导入SVN
(1)首先需要建立svn库(关于svn的使用,请参考笔者的八步学SVN),在项目根目录(spring-mvc-3-walk-through)下创建repo文件夹来存放svn库,切换当前目录到根目录下,运行:
svnadmin create .\repo
(2)修改svn配置文件,为了方便使用,我们修改repo\conf\svnserve.conf配置文件,找到以下两行(默认被注释掉了),取消注释,并将其改为:
         anon-access = write
         auth-access = write
这样你便不用配置svn的用户名和密码了。
(3)运行svn服务器,监听1986端口:
svnserve -d -r .\repo --listen-port=1986
(4)导入original-project工程:
svn import original-project svn://localhost:1986 -m "import project"
(5)现在你便可以check out一份工作拷贝了:
svn checkout svn://localhost:1986 working
我们将工作拷贝check out到了working目录下,以后便可以在working进行修改提交了。
(四)在Jenkins中新建Job
在浏览器中打开http://localhost:8080/jenkins进入jenkins主页(当然前提是你已启动Tomcat并已将jenkins的war文件拷到了Tomcat的webapps文件夹下),点击“新job”,在新页面中的“任务名称”中输入自己job的名字(笔者为spring-mvc3-walk-through),选择“构建一个自由风格的软件项目”,点击“OK”进入job的配置页面。
在“源代码管理”中选择Subversion,并在Repository URL中输入:http://localhost:1986,这样jenkins便知道到从什么地方获取源代码了,然后在“构建触发器”中选择“Poll SCM",并在“日程表”中输入“* * * * *”,这表示jenkins将每分钟从svn更新一次代码,如果有新的提交,便自动触发构建。
点击“增加构建步骤”,选择“Invoke Ant”,在Target中输入“svn build”,表明我们第一步希望完成build目标,在用相同的方法依次创建“svn tests”和“svn deploy”两个构建目标,然后点击保存。
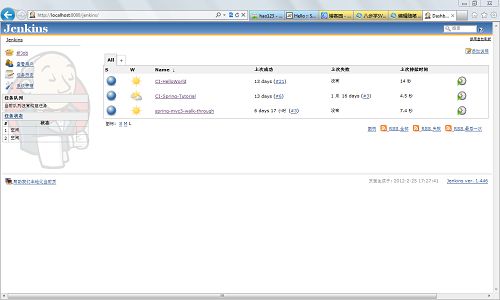
返回jenkins主页,你便可以看到新建了一个spring-mvc3-walk-through的job,这时你便可以在working目录下做自己的修改,然后提交,提交后不到1分钟便能看到该job前的灯在一闪一闪的,表明jenkins正在构建你的项目。(想想为什么是“不到”,而不是之前设置的“恰恰”一分钟)
如果构建成功,那么灯将变成蓝色,否则红色。
posted @ 2012-02-25 18:08 无知者云 阅读(490) | 评论 (0) 编辑
posted @ 2011-10-16 22:09 无知者云 阅读(189) | 评论 (0) 编辑