Python 网页编程- Pyramid Wiki2
---恢复内容开始---
一般情况下需要sqlite3
所以需要
sudo apt-get install libsqlite3-dev
而后,创建一个alchemy的project
还需要
Exposing Test Coverage Information
就是
$ ../bin/easy_install nose coverage
然后,让它自动下载安装即可。
On UNIX:
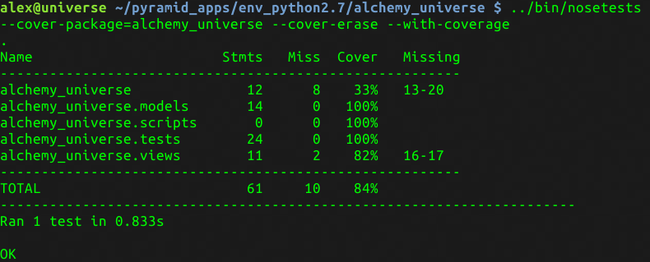
$ ../bin/nosetests --cover-package=tutorial --cover-erase --with-coverage
这样是用来检测应用的成分的,
nose , coverage
看看包里面的主要成分是什么。(那个包括静态文件的文件夹static,以及views.py, __init__.py, modules.py , 文件夹templates的文件夹,跟应用的名字相同)
这是我得到的结果
Looks like our package doesn’t quite have 100% test coverage.
Initializing the Database 初始化数据库
../bin/initialize_tutorial_db development.ini
数据库的相关东西可以到development.ini查看
使用的sqlalchemy,
sqlalchemy.url = sqlite:///%(here)s/alchemy_universe.sqlite
意思是在应用的同目录下创建一个叫alchemy_universe.sqlite的数据库
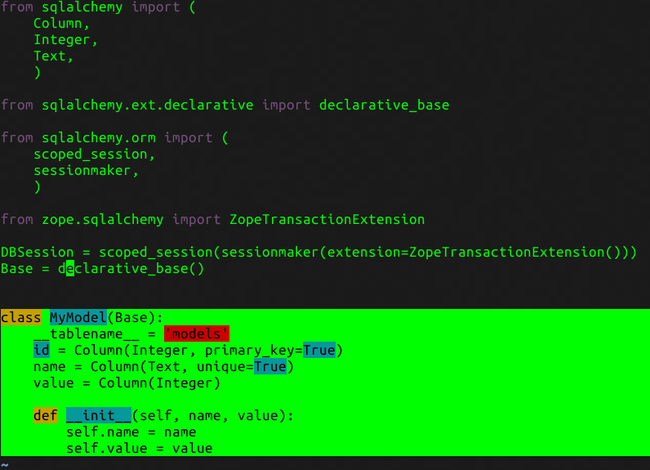
数据库的内容,从这里查看 models.py
使用sqlalchemy 创建数据库,上面的是先引用一些数据类型与方法。比如Column, Integer, Text 还可以加上string, 以及其他的数据类型,具体看doc。
下面的类名称MyModel(Base), 继承类Base的所有属性和方法。(面向对象就是好用)
---翻译一下,就是创建一个表名叫 'models'
-----创建栏目id 整型, 主键
-----创建栏目 name 字符形, 独特
-----创建栏目, 整型
下面的
def __init__(self, name, value):
self.name = name
self.value = value
是构造函数。确定这个类的构造方法。可以会议一下很多有意思的各种内置函数(__str__, __add__, __eq__, __sub__, __repr__, __dict__, 等等吧,看doc)
那它是怎么将数据导入到数据库的呢?
是这样的?
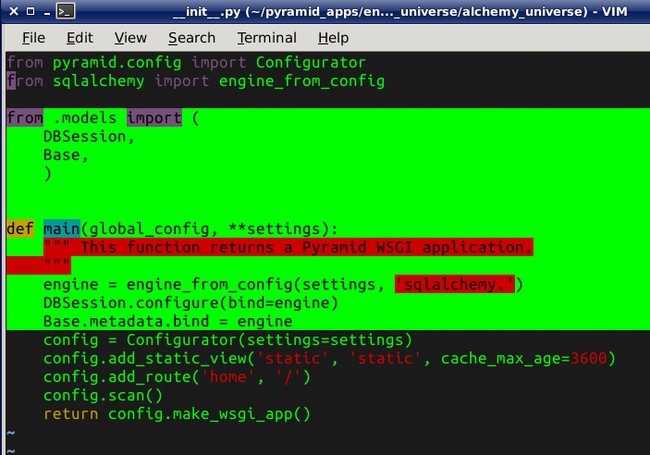
查看__init__.py
下面的这句话很有道理,来源的是官方wiki可以,说的很详细:
Application Configuration with __init__.py 初始全局设置的实现
而后是
View Declarations via views.py 可参见变量
主要的几句话:
When the pattern associated with the home view is matched during a request, my_view() will be executed. my_view() returns a dictionary; the renderer will use the templates/mytemplate.pt template to create a response based on the values in the dictionary.
Content Models with models.py¶ 模块,模型,数据库等
讲的非常详细,通俗易懂,不必翻译了。
而后是
Defining the Domain Model 定义主要模型
---恢复内容结束---


