译者注:这篇文章涉及图像处理,非常有趣,同时可以用来构建云加端的移动拍照App。
教程细节
- 程序 :PHP/ImageMagick
- 难度:中级
- 预计完成时间:45分钟
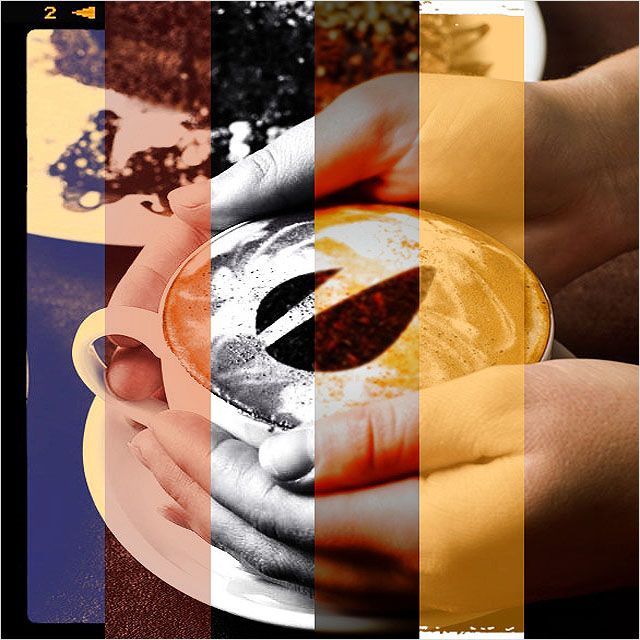
你将创建的最终作品
在本教程中,我将演示如何用PHP和ImageMagick创建像Instagram一样效果的老照片。是的,你可以用PHP和ImageMagick来完成这件事,而且这只是最简单的事情!
我们创建数码老照片,然后让它变得很酷
曾几何时 - 22年以前(在PHP出现5年前)ImageMagick诞生了。从那时起,它已经发展成为一个独立的软件平台来创建、编辑、生成或者转换光栅图像(支持超过100种格式!)。 你可以用它来调整图像大小,制作图像镜像,翻转、旋转、扭曲、剪切和转换图像,调整图像颜色,应用各种特殊效果,或者绘制文本、线条、多边形、椭圆和贝塞尔曲线。 它完全拥有你在Web开发中处理图像、处理视频、生成全景图所需要的一切。但是请注意,它不是一个GUI的图像编辑器。
ImageMagick就是Web上的Photoshop命令行。
PHP图像处理
PHP捆绑了GD (GIF绘制/图形绘制),这是一个动态创建图像库。 它可以用于简单的图像操作,如缩放、裁剪、添加水印、 创建缩略图 (杰弗里写的),应用基本的照片滤镜-你可能已经用过它。不幸的是,如果你要创建像Instagram滤镜一样更复杂的效果,GD无法实现。不过,幸运的是,我们有ImageMagick!
GD vs. ImageMagick
它们不能在高层次上来进行对比,因此我们将使用一个简单的例子,例如调整尺寸。想象一下,我们已经上传了一个新的1024×768像素的photo.jpg图像,我们要动态的把它的大小调整为640×480像素。
GD
在下面的例子中,我们必须调用6个函数,如果我们有可变宽高比时还可能要执行一些计算。
- $im= imagecreatefromjpeg('photo.jpg');
- $ox= imagesx($im);
- $oy= imagesy($im);
- $nx= 640;
- $ny= 480;
- $nm= imagecreatetruecolor($nx, $ny);
- imagecopyresized($nm,$im,0,0,0,0,$nx,$ny,$ox,$oy);
- imagejpeg($nm, 'photo.jpg');
ImageMagick
IM(ImageMagick的简称)有一个漂亮的包装,称为Imagick - 原生的PHP扩展,使用ImageMagick的API来创建和修改图像。唯一的缺点是:你将有可能用PECL来安装,它的共享主机有时会有一些连接问题。
- $image= newImagick('photo.jpg');
- $image->resizeImage(640, 480,imagick::FILTER_LANCZOS, 0.9);
更简单的方法是使用PHP的命令行(也是我们将要用到的)。
- exec('mogrify -resize 640x480 photo.jpg');
就是它了!相当完美。
安装ImageMagick
虽然基本上每一个不错的服务器托管商都提供了ImageMagick安装,但是你可能在本地服务器上并没有安装,因为它并没有被PHP所捆绑。
不过安装ImageMagick是一件很容易的事情。访问ImageMagick下载页面,选择你服务器的操作系统(Unix/Mac/Win),并且选择所推荐的包。只要遵循简单的说明,你就不会犯错。
一旦完成安装,转到终端命令提示符下,输入“convert”并且回车,如果你得到一系列选择项而不是“Command not found”,证明你已经安装成功。请注意你并不需要在PHP里进行任何配置。
Instagram是如何工作的?
说实话,我也不知道Instagram团队使用什么技术来进行图像处理。ImageMagick在iOS下也同样可用,也许这就是Instagram的魔力源泉?引用Instagram CEO和联合创始人Kevin Systrom的话如下。
“它确实是许多不同方法的组合。在某些情况下,我们在图像上绘画;另外一些情况下我们进行像素运算。这真的取决于我们想要的效果。”
例如,Lomo-fi在有高对比度的图像上不太有效,而Toaster是最复杂(同时很慢,也很受欢迎)的滤镜之一。
我不再描述更多的信息,但它会是我们的秘密武器:)也许有一天…
“也许有一天…”对我们来说并不足够,Systrom先生。我们接受挑战。
Show Me The Code!
我们将要模仿实现gotham、toaster、nashville、lomo和kelvin滤镜效果。
Instagraph – PHP类
我曾经创建了一个小的PHP包装类来使图像处理的过程尽量的简单。如你所知,在这些滤镜里,我们有许多的:
- Colortone:将会给一副图片用高亮或者阴影着色。例如, 我们希望将黑色变为紫色。
- Vignette:图像的边缘淡出或逐步去色。我们甚至可以进行翻转或者为晕影着色。
- Border:为图片添加边框。例如, 我们希望有一个黑色或白色,或者任意一个一定宽度的彩色边框。注意边框的宽度将会增加图片的尺寸。
- Frame:将读取指定的相框并拉伸来适合图片。Nashville和kelvin滤镜需要用到。
- Tempfile:创建临时文件(原始图片的副本)。
- Output:简单重命名工作副本。
- Execute:我们将通过这个方法发送所有命令,来防止使用shell脚本时发生错误。
我提到这些以便于我们能跳到有趣的部分。创建一个名为 instagraph.php的新文件,但后复制和粘贴下面的代码。
- /**
- * Instagram filters with PHP and ImageMagick
- *
- * @package Instagraph
- * @author Webarto <dejan.marjanovic@gmail.com>
- * @copyright NetTuts+
- * @license http://creativecommons.org/licenses/by-nc/3.0/ CC BY-NC
- */
- class Instagraph
- {
- public $_image = NULL;
- public $_output = NULL;
- public $_prefix = 'IMG';
- private $_width = NULL;
- private $_height = NULL;
- private $_tmp = NULL;
- public static function factory($image, $output)
- {
- return new Instagraph($image, $output);
- }
- public function __construct($image, $output)
- {
- if(file_exists($image))
- {
- $this->_image = $image;
- list($this->_width, $this->_height) = getimagesize($image);
- $this->_output = $output;
- }
- else
- {
- throw new Exception('File not found. Aborting.');
- }
- }
- public function tempfile()
- {
- # copy original file and assign temporary name
- $this->_tmp = $this->_prefix.rand();
- copy($this->_image, $this->_tmp);
- }
- public function output()
- {
- # rename working temporary file to output filename
- rename($this->_tmp, $this->_output);
- }
- public function execute($command)
- {
- # remove newlines and convert single quotes to double to prevent errors
- $command = str_replace(array("\n", "'"), array('', '"'), $command);
- $command = escapeshellcmd($command);
- # execute convert program
- exec($command);
- }
- /** ACTIONS */
- public function colortone($input, $color, $level, $type = 0)
- {
- $args[0] = $level;
- $args[1] = 100 - $level;
- $negate = $type == 0? '-negate': '';
- $this->execute("convert
- {$input}
- ( -clone 0 -fill '$color' -colorize 100% )
- ( -clone 0 -colorspace gray $negate )
- -compose blend -define compose:args=$args[0],$args[1] -composite
- {$input}");
- }
- public function border($input, $color = 'black', $width = 20)
- {
- $this->execute("convert $input -bordercolor $color -border {$width}x{$width} $input");
- }
- public function frame($input, $frame)
- {
- $this->execute("convert $input ( '$frame' -resize {$this->_width}x{$this->_height}! -unsharp 1.5×1.0+1.5+0.02 ) -flatten $input");
- }
- public function vignette($input, $color_1 = 'none', $color_2 = 'black', $crop_factor = 1.5)
- {
- $crop_x = floor($this->_width * $crop_factor);
- $crop_y = floor($this->_height * $crop_factor);
- $this->execute("convert
- ( {$input} )
- ( -size {$crop_x}x{$crop_y}
- radial-gradient:$color_1-$color_2
- -gravity center -crop {$this->_width}x{$this->_height}+0+0 +repage )
- -compose multiply -flatten
- {$input}");
- }
- /** RESERVED FOR FILTER METHODS */
- }
Instagram滤镜
我们将会一个接一个创建滤镜效果。我将会解释必要的PHP函数和ImageMagick命令,包括示例。确保你更新了PHP类来支持下面的新方法。下载的包里提供了图像的相框,它们都是PNG的透明图片。下面让我们开始。
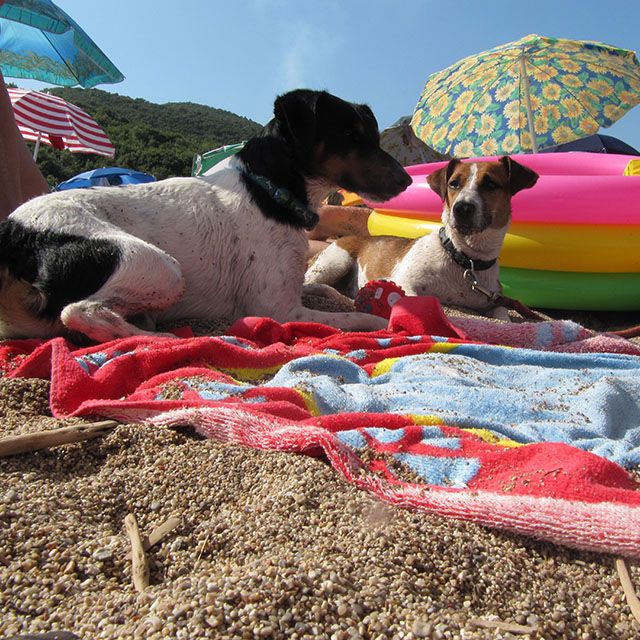
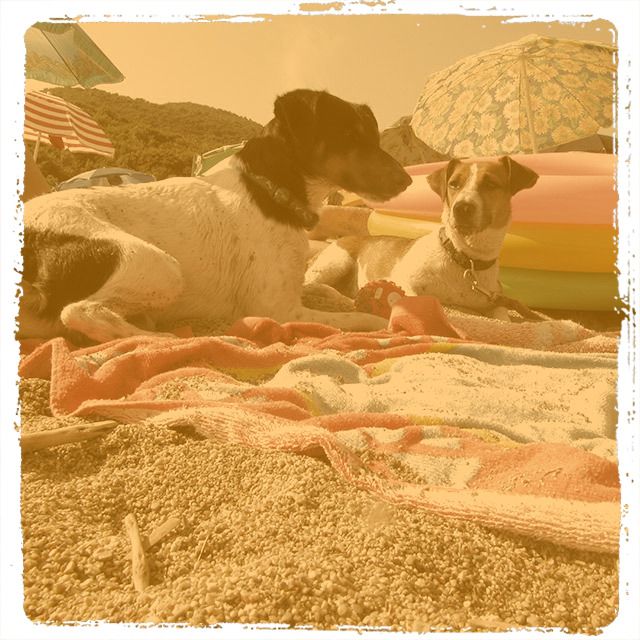
原始图片
这是我的狗在沙滩上享受生活的照片。它是我相机的作品。
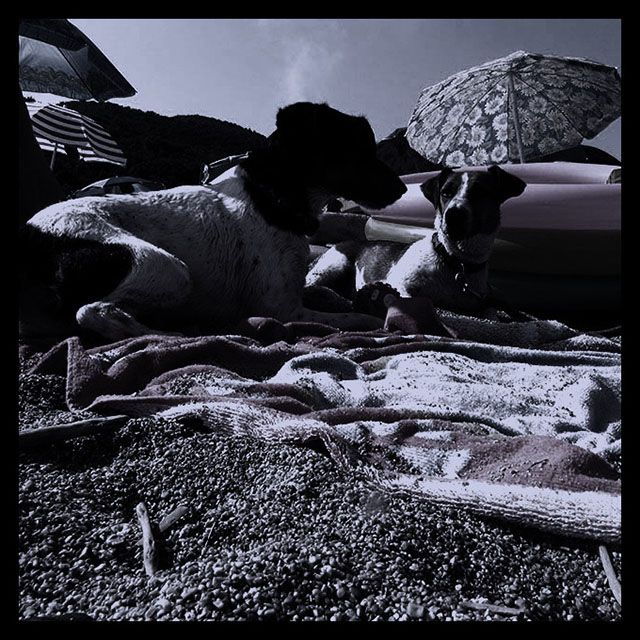
Gotham
滤镜生成一张黑白、有浅蓝底色的高对比度的图像。在现实生活中,这会用Holga相机和Ilford X2胶片来实现。
- public function gotham()
- {
- $this->tempfile();
- $this->execute("convert $this->_tmp -modulate 120,10,100 -fill '#222b6d' -colorize 20 -gamma 0.5 -contrast -contrast $this->_tmp");
- $this->border($this->_tmp);
- $this->output();
- }
文字解释:创建一个工作文件,将图像加载到内存,提高一点亮度和饱和度,改变剩下的颜色为深紫色,伽马校正,增加更多对比度,把所有改变保存到一个文件中。添加一个20像素的黑色边框。是不是很简单?
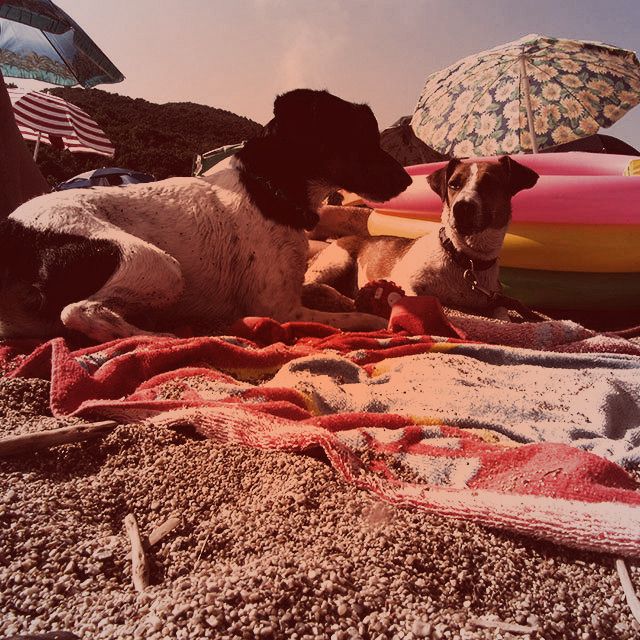
Toaster
Toaster滤镜类似于老宝丽来相机的效果,它有以粉红色或橙色为发光中心的鲜艳颜色。按Instagram CEO的话来说,它是最难实现的效果之一。
- public function toaster()
- {
- $this->tempfile();
- $this->colortone($this->_tmp, '#330000', 100, 0);
- $this->execute("convert $this->_tmp -modulate 150,80,100 -gamma 1.2 -contrast -contrast $this->_tmp");
- $this->vignette($this->_tmp, 'none', 'LavenderBlush3');
- $this->vignette($this->_tmp, '#ff9966', 'none');
- $this->output();
- }
提示:你甚至可以添加为完整的效果添加一个白色边框,只需要在$this->output();前添加代码$this->border($this->_tmp,'white');.
文字解释:创建一个工作文件,将图像加载到内存,将黑色变为暗红色,提高亮度,将饱和度设为1/5,执行伽玛校正(使图像更亮),添加更多对比度并保存。最后,添加一个灰色的晕影(边缘去掉一点饱和度)以及一个实现色彩燃烧效果的橙色翻转晕影。
Nashville
Nashville有很棒的80年代时尚掉色照片似的感觉。它通过洋红和桃红色调产生图片。此外,它还添加一个相框来获得幻灯片的外观。这是最容易实现并且最流行的Instagram滤镜之一。
- public function nashville()
- {
- $this->tempfile();
- $this->colortone($this->_tmp, '#222b6d', 100, 0);
- $this->colortone($this->_tmp, '#f7daae', 100, 1);
- $this->execute("convert $this->_tmp -contrast -modulate 100,150,100 -auto-gamma $this->_tmp");
- $this->frame($this->_tmp, __FUNCTION__);
- $this->output();
- }
文字解释:创建一个工作文件,将图像加载到内存,将黑色变成靛蓝色,将白色变成桃红色,增强对比度,将饱和度提高一半,进行伽马自动校正。从PNG文件添加相框。
Lomo
Lomography就是通过相框和柔焦来创建高对比度的照片。在现实生活中,这种效果大多通过Holga,LOMO LC-A或者所谓的玩具相机(有塑料镜片的照相机)来实现。这种效果相当容易重现,我们将红色和绿色通道的对比度简单的提高1/3,并且添加一个相框。你可以随意进行实验。
- public function lomo()
- {
- $this->tempfile();
- $command = "convert {$this->_tmp} -channel R -level 33% -channel G -level 33% $this->_tmp";
- $this->execute($command);
- $this->vignette($this->_tmp);
- $this->output();
- }
提示:如果你喜欢没有晕影的Lomo效果,只需要注释掉或者移除对应代码。文字解释:创建一个工作文件,将图像加载到内存,将红色通道的对比度提高1/3,再次将红色通道对比度提高1/3,应用一个晕影。
Kelvin
这种效果以达尔文命名,它使用了一个强力的桃色和橙色覆盖层,并且添加了一个掉色的相框。
- public function kelvin()
- {
- $this->tempfile();
- $this->execute("convert
- ( $this->_tmp -auto-gamma -modulate 120,50,100 )
- ( -size {$this->_width}x{$this->_height} -fill 'rgba(255,153,0,0.5)' -draw 'rectangle 0,0 {$this->_width},{$this->_height}' )
- -compose multiply
- $this->_tmp");
- $this->frame($this->_tmp, __FUNCTION__);
- $this->output();
- }
文字解释:创建一个工作文件,将图像加载到内存,规范化,提高1/5的亮度,提高饱和度的一半,创建一个桃色和橙色的覆盖层,并且应用多重混合模式。最后,使用PNG文件添加一个相框。
如何使用
你可以很容易地使用这些效果!我假定你会在instagraph.php文件内保存所有代码。现在,创建一个文件,名为filter.ph并复制下面你需要的代码。
如果你只想在图像上应用一种滤镜,你可以这样做:
- require 'instagraph.php';
- try
- {
- $instagraph = Instagraph::factory('input.jpg', 'output.jpg');
- }
- catch (Exception $e)
- {
- echo $e->getMessage();
- die;
- }
- $instagraph->toaster(); // name of the filter
就是它了。现在,如果你想为一副图像使用所有的滤镜,使用如下代码。
- require 'instagraph.php';
- try
- {
- $instagraph = Instagraph::factory('input.jpg', 'output.jpg');
- }
- catch (Exception $e)
- {
- echo $e->getMessage();
- die;
- }
- // loop through all filters
- foreach(array('gotham', 'toaster', 'nashville', 'lomo', 'kelvin') as $method)
- {
- $instagraph->_output = $method.'.jpg'; // we have to change output file to prevent overwrite
- $instagraph->$method(); // apply current filter (from array)
- }
现在只需要在浏览器里打开这个页面,你就可以得到想要的结果。
性能
性能肯定是每个应用的重要组成部分。因为为一副图像应用滤镜的平均时间大约是1秒,我们可以肯定地说相当快!
ImageMagick资源
要了解更多关于ImageMagick的信息,下面有我们在滤镜方法里所有曾用到的命令和选项的链接列表:
- convert:
- modulate: 调整亮度,饱和度和色相
- contrast: 提高或降低图像的对比度
- size: 调整图像高度或宽度
- fill: 当填充原始图形时着色
- draw: 使用原始图形来标注图像
- compose: 设置图像合成操作
- channel: 应用选项来选择图像通道
- level: 调整图像对比度水平
- auto-gamma: 自动调整图像伽马水平
- gamma: 伽马校正的水平
此外,这儿还有一些ImageMagick的脚本、教程和示例。
总结
在本教程中,我们学到了ImageMagick,通过创建类似Instagram的滤镜表现出了它的力量。我们实现了Instagraph!
如果你需要任何帮助,或需要援助来创造其他的滤镜,例如Tilt Shift或Earlybird,在评论里告诉我,我会尽我所能来协助你。
译自:http://net.tutsplus.com/tutorials/php/create-instagram-filters-with-php/
