搭建gxt-2.2.0环境,让我们第一个简单程序跑起来
最近对gxt有兴趣,它是一个Rich Application Client,界面很漂亮,所以今天试着搭建环境,让自己的一个程序起来。
我的是gxt是gxt-2.2.0,gwt是gwt-2.0.4版本。
介绍我的开发工具是Myeclipse8.5,其实Eclipse就可以了,可能自己习惯用myeclipse了。
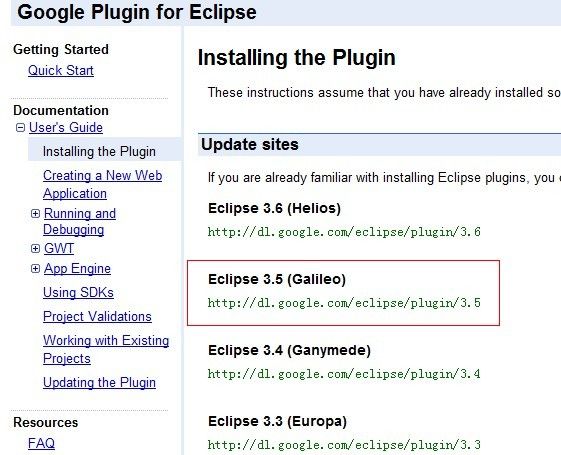
1.gxt就是ext-gwt的简称,它是依赖GWT的,所以需要安装gwt,我们到这个网站下载gwt的eclipse 插件,
http://code.google.com/intl/zh-CN/webtoolkit/download.html,
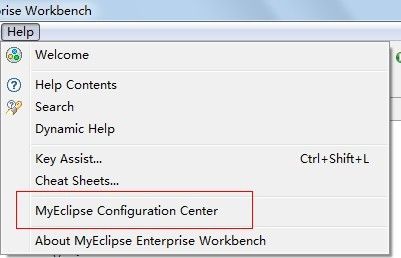
复制途中红色的地址,http://dl.google.com/eclipse/plugin/3.5,然后在Myeclipse8.5的配置管理中心,如下图所示:
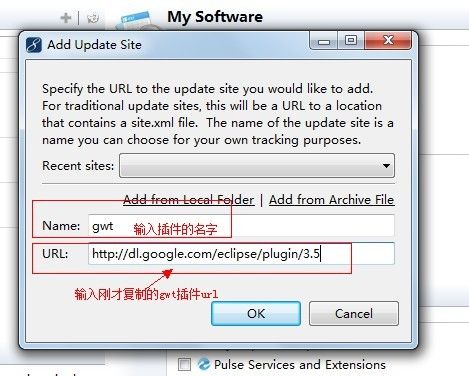
点击site,输入插件名次和gwt for eclipse的插件url,如下图:
然后就下载安装插件,这过程需要一些时间。安装后,重启IDE,你会看到如下图标,表示安装成功了。
eclipse或myeclipse的工具栏显示:
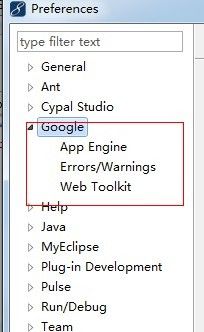
或在myeclipse的首选项菜单,看到google插件也表示刚才安装好了gwt,这里我安装的是gwt2.0.4;
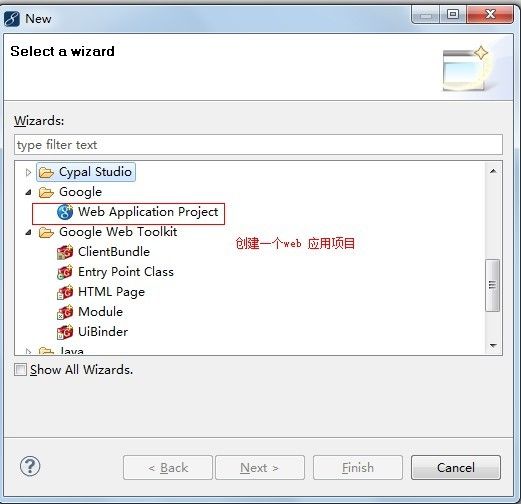
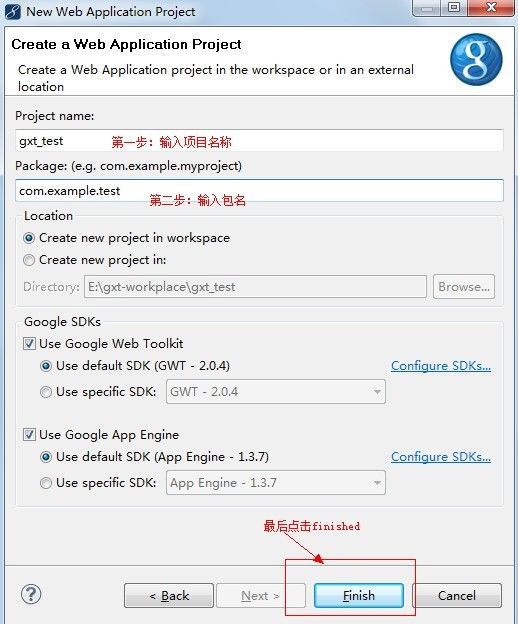
2.创建一个web Application Project,直接点击工具栏上的“g”图标,或在菜单那里选择“New”
到目前位置一个gwt项目已经创建完了 ,右键项目就可以运行了,其实可以参考这里的,
写得很详细,http://code.google.com/intl/zh-CN/eclipse/docs/running_and_debugging_2_0.html
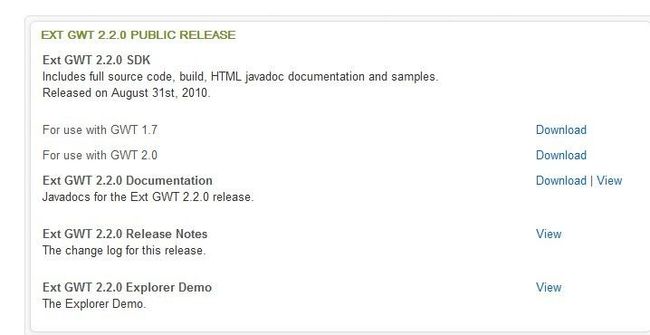
3.把GXT 整合到项目里面去,首先我们到这里下载,http://www.sencha.com/products/gwt/download.php
下载后解压,里面有一个setup.txt文件,跟着里面的说明就可以整合gxt了。
setup.txt里面的内容大概如下:
Quick Setup for Ext GWT 2.X =========================== Note : Ext GWT 2.X requires GWT 1.7+ or GWT 2.0+ (any build ending in "-gwt2.zip"). STEP 1 -> Create a Google Web Application Project project within Eclipse. Copy the contents of the /resources folder in the download to a {foldername} location within your war folder. Substitute {foldername} with the name of the folder you've created for resources within your war folder. STEP 3 -> Add the following stylesheet to your host page. <link rel="stylesheet" type="text/css" href="{foldername}/css/gxt-all.css" /> STEP 3b -> If you are using Charts, add the following script to your host page. <script language='javascript' src='{foldername}/flash/swfobject.js'></script> STEP 4 -> Add the following entry to you projects module xml file. <inherits name='com.extjs.gxt.ui.GXT'/> STEP 5 -> Eclipse Setup (should be similar for other development environments) These instructions assume you have a existing project and launch configuration. 1. Add gxt.jar to the project. a. Right click on project name in 'Package Explorer'. b. Select 'Properties' from content menu. c. Select 'Java Build Path'. d. Select 'Libraries' tab. e. Add the gxt.jar either with 'Add JARs...' or 'Add External JARs...'. 2. Add GXT jar to launch configuration. a. Choose Run / Open Run Dialog. b. Select your appropriate launch configuration under 'Java Application'. c. Select the 'Classpath' tab. d. Add the gxt.jar to the classpath.
快速安装gxt2.x版本 ================= 第一步:创建一个 web 应用项目(我们已经创建好了) 第二步:复制gxt解压目录下的/resources文件加到创建好项目的war目录下; 第三步:增加css的链接到<link rel="stylesheet" type="text/css" href="resources/css/gxt-all.css" />主页面, 这里我们加到gxt01.html里面;如果我们要使用图标的话,还需要复制<script language='javascript' src='resources/flash/swfobject.js'></script> 到host page; 第四步:在项目的Gxt01.gwt.xml文件里面增加<inherits name='com.extjs.gxt.ui.GXT'/>; 第五步:把gxt解压目录中的gxt.jar通过buidl-classpath引人到项目里面去, 至此已经成功整合了gxt了。
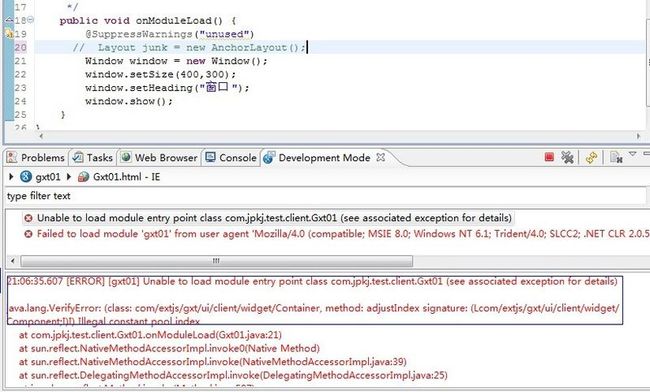
Layout junk = new AnchorLayout();//提前初始化Layout对象
就可以了。
