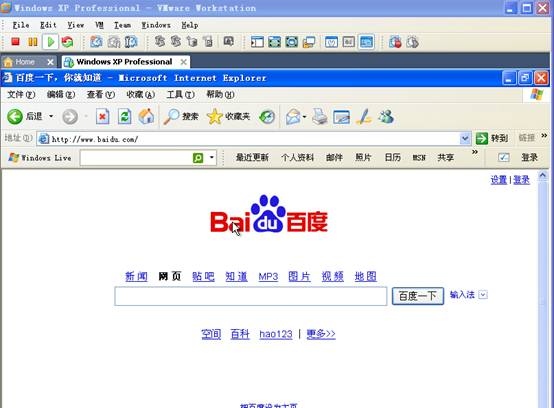
Vmware 虚拟机通过GNS的模拟路由器连接Internet
Vmware 虚拟机通过GNS的模拟路由器连接Internet
1、环境: XP 系统,Vmware 7.0.1,GNS3.0.7.2 集成SecureCRT(也可以没有SecureCRT)
准备:在XP系统下添加Loopback adapter 虚拟网卡 ,一个ADSL拨号连接,用Vmware 安装一台XP虚拟机
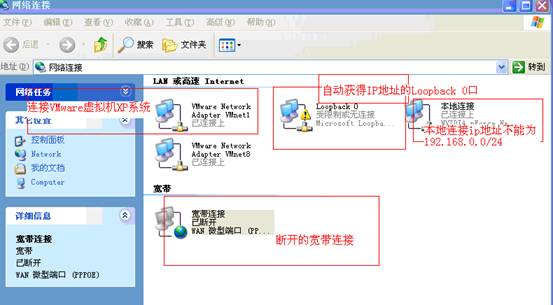
2、本地网络连接配置:
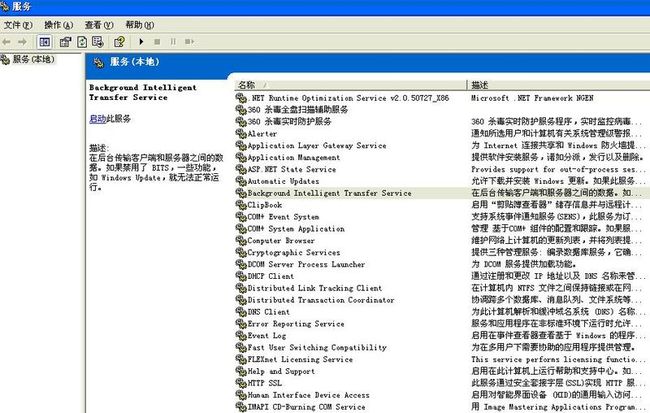
3、接着打开运行,输入services.msc出现如下界面:
然后找到下面服务,并确定这些服务已启动,否则设置他们为已启动。
DHCP Client 设为已启动
DNS Client 设为已启动
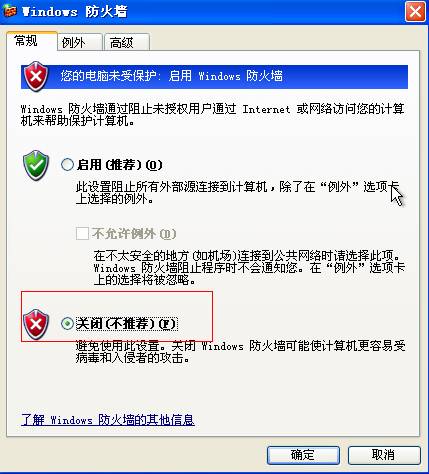
Windows Firewall / Internet Connection Sharing(ICS) 设为已启动.
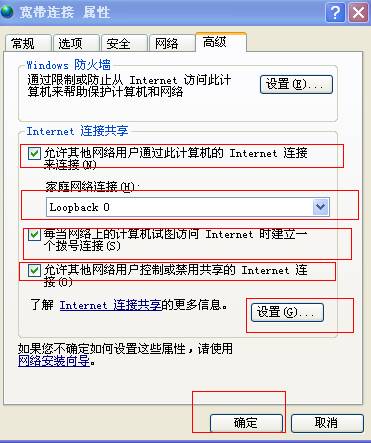
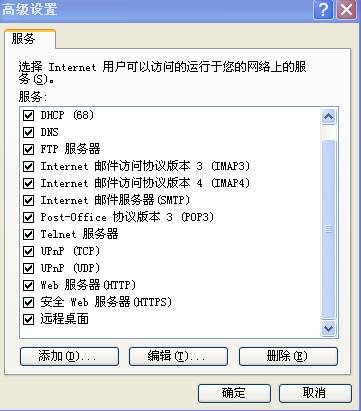
4、打开网络连接,双击“宽带连接勾上”任何使用此计算机的人“接着填上密码,然后,选择“属性”然后选择“高级“ 进行设置:
完成设置后查看网络连接变化:
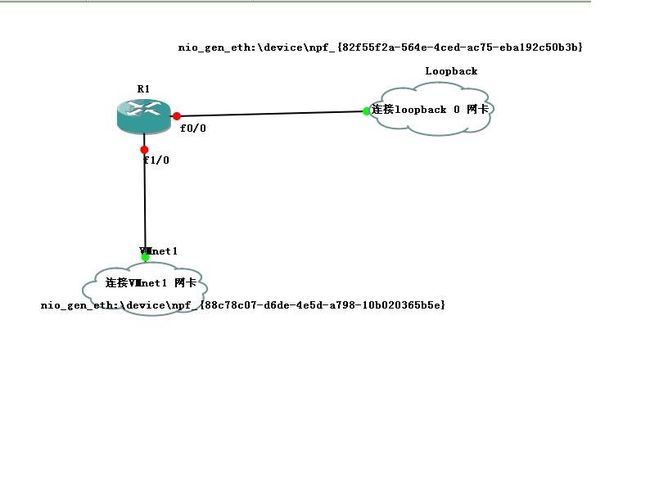
5、完成以上步骤后打开GNS3.0构建拓扑如下:
配置Cloud “Loopback”,右键单击“Loopback”选择“配置“,按顺序进行以下操作即可:
配置Cloud “VMnet 1”,右键单击“VMnet 1”选择“配置“,按顺序进行以下操作即可:
6、设备进行连接,单击GNS的工具栏的“添加连接”按钮,接着用鼠标把设备连接,接着再按“show interface names”按钮,如下图:
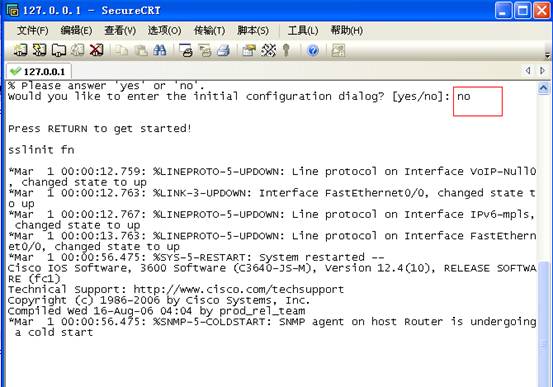
7、选中R1然后按右键,单击“开始“,接着在选中R1按右键,单击“Console”出现与GNS集成的SecureCRT配置控制台(如果没有集成SecureCRT的话会出现一个dos一样的控制台):
8、在SecureCRT里对R1进行配置.命令如下:
Router>en
Router#conf t
Enter configuration commands, one per line. End with CNTL/Z.
Router(config)#host R1
R1(config)#enable pass cisco
R1(config)#line con 0
R1(config-line)#pass cisco
R1(config-line)#login
R1(config-line)#logg synchronous
R1(config-line)#no exec-timeout
R1(config-line)#line vty 0 15
R1(config-line)#pass cisco
R1(config-line)#login
R1(config-line)#logg syn
R1(config-line)#no exec-timeout
R1(config-line)#exit
R1(config)#int fa0/0
R1(config-if)#ip add 192.168.0.2 255.255.255.0
R1(config-if)#no shutdown
R1(config-if)#
*Mar 1 00:05:53.659: %LINK-3-UPDOWN: Interface FastEthernet0/0, changed state to up
*Mar 1 00:05:54.659: %LINEPROTO-5-UPDOWN: Line protocol on Interface FastEthernet0/0, changed state to up
R1(config-if)#exit
R1(config)#int fa1/0
R1(config-if)#ip add 192.168.19.1 255.255.255.0
R1(config-if)#no shutdown
R1(config-if)#
*Mar 1 00:01:17.767: %LINK-3-UPDOWN: Interface FastEthernet1/0, changed state to up
*Mar 1 00:01:18.767: %LINEPROTO-5-UPDOWN: Line protocol on Interface FastEthernet1/0, changed state to up
R1(config-if)#exit
R1(config)#ip route 0.0.0.0 0.0.0.0 192.168.0.1
R1(config)#exit
R1#
*Mar 1 00:07:06.071: %SYS-5-CONFIG_I: Configured from console by console
9.路由器R1网络连通性测试(成功)
R1#ping 192.168.0.2
Type escape sequence to abort.
Sending 5, 100-byte ICMP Echos to 192.168.0.2, timeout is 2 seconds:
!!!!!
Success rate is 100 percent (5/5), round-trip min/avg/max = 1/3/4 ms
R1#ping 192.168.19.1
Type escape sequence to abort.
Sending 5, 100-byte ICMP Echos to 192.168.19.1, timeout is 2 seconds:
!!!!!
Success rate is 100 percent (5/5), round-trip min/avg/max = 1/1/4 ms
R1#ping 192.168.0.1
Type escape sequence to abort.
Sending 5, 100-byte ICMP Echos to 192.168.0.1, timeout is 2 seconds:
.!!!!
Success rate is 80 percent (4/5), round-trip min/avg/max = 24/41/48 ms
R1#ping www.baidu.com
Translating "www.baidu.com"...domain server (255.255.255.255) [OK]
Type escape sequence to abort.
Sending 5, 100-byte ICMP Echos to 220.181.6.18, timeout is 2 seconds:
!!!!!
Success rate is 100 percent (5/5), round-trip min/avg/max = 72/96/120 ms
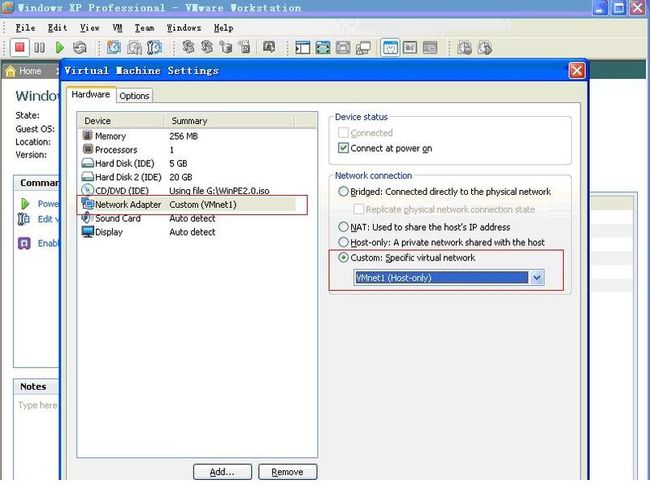
10、开始对VMware XP 虚拟机进行设置:
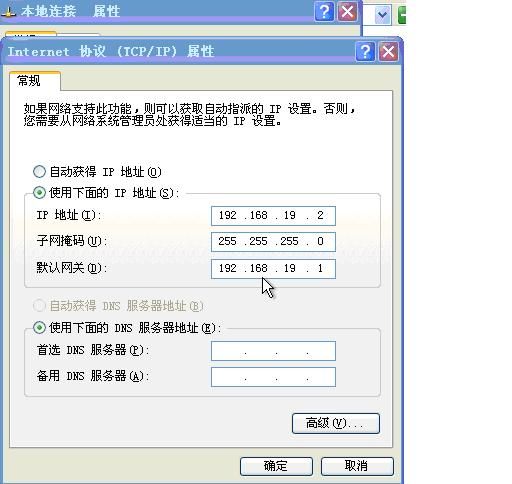
11、进入虚拟机XP进行网卡配置:
12、测试连通性:
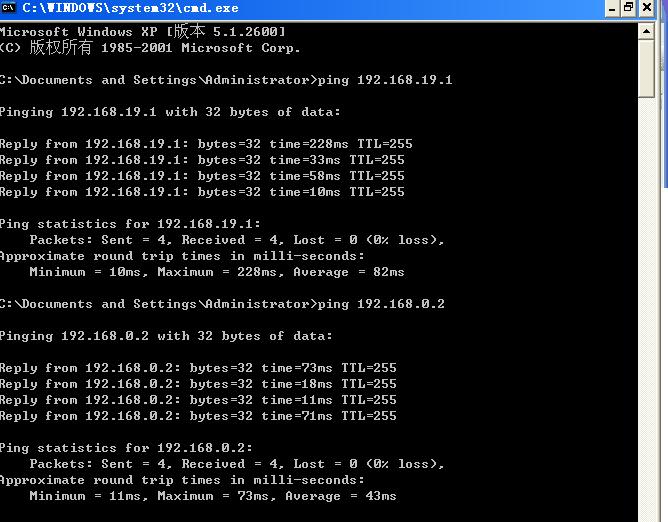
1)测试虚拟机与路由器R1的联通性成功:
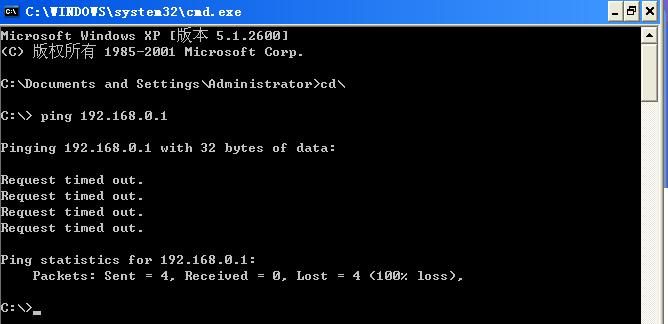
2)测试虚拟机与物理机Loopback 0网卡的连通性失败:
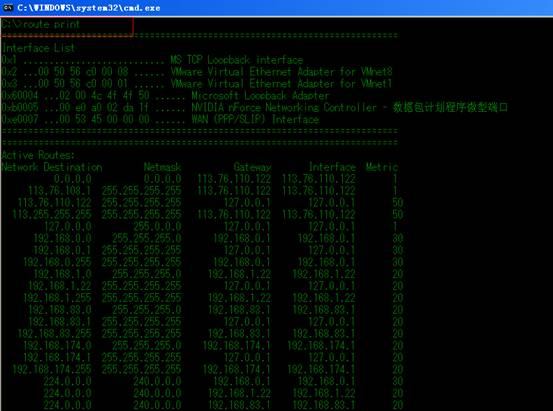
13、 解决虚拟机与物理机Loopback 0网卡无法联通:切换到物理机的桌面并打开“运行”输入cmd,进行route 命令操作:
A、查看物理机的路由表发现并无路由指向192.168.19.0网段:
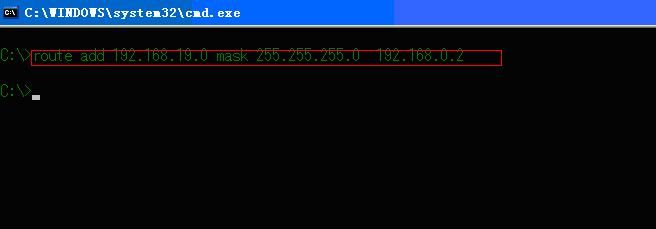
B、向物理机添加路由条目192.168.19.0:
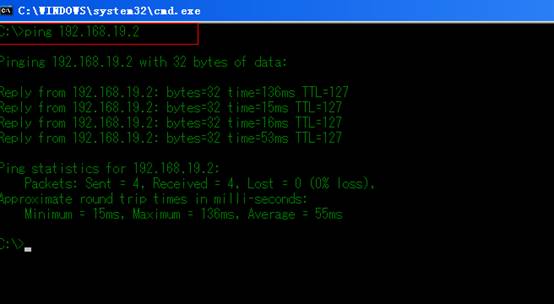
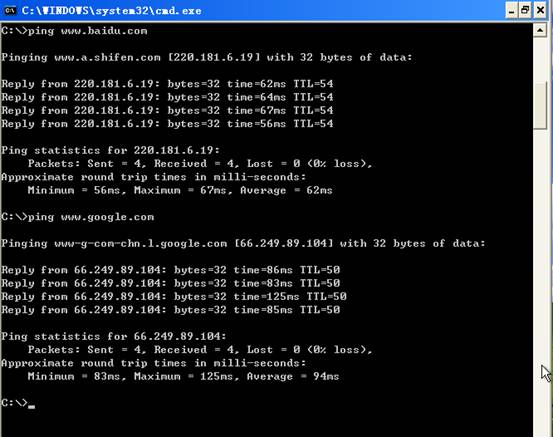
C、再测试虚拟机与Loopback 0网卡的连通性成功并且与外网沟通:
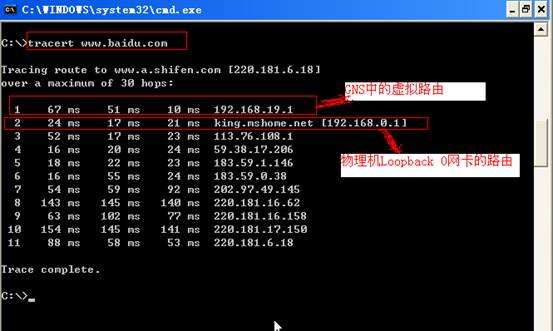
14、测试虚拟机与Internet连接并且追踪路由,上网冲浪:
