打造一个基于OSGi的Web Application .
动机和目标
OSGi技术发展至今也有好几年了,然而除了在富客户端应用(以Eclipse为代表)和服务器应用(如大多数的应用服务器)方面大放光芒之外,在 Web Application方面的应用和资料却少之又少。一方面,在OSGi规范中,对于Web应用方面的规划尚不成熟,即使在最新的4.2版中,也仅仅只有一个HttpService,这个简陋的service甚至不能覆盖任何一个现有的Servlet规范;另一方面,各个OSGi实现厂商对 HttpService的实现也是不完全的,在开发实现一个常规的Web Application时,这些实现也是完全不够用的。本文章的目的,也就是为了探索OSGi在Web Application上的开发之路该如何走,从我的视角提出一些看法,做一些尝试,希望对大家有所帮助。
现在OSGi与Web Application的结合,大致有两个方向:
- OSGi包含Web Container:目前能完美嵌入OSGi的Web Container似乎只有jetty一个,tomcat的catalina似乎有希望能成为第二个。我们完全不能指望Websphere和 Weblogic能在短期内具有能嵌入OSGi的能力,所以这个方向理所当然的被我放弃了。
- Web Container包含OSGi:这个方面目前只有equinox的Servlet Bridge这么一个著名的实现,equinox通过Servlet Bridge的方式来实现一个OSGi的HttpService服务,这个服务目前能做的事情还非常有限,还不足以覆盖Servlet规范。
我的目标是构建一个OSGi与Web Application结合的方式,它要能满足一下几点需求:
- 基于OSGi的bundle和service。
- 适合绝大对数支持Servlet 2.4和Jsp 2.0规范的Web服务器。
- 适合现有的实现OSGi 4.2规范的OSGi Framework实现:equinox、felix和knopflerfish。
- 支持大部分Servlet 2.4和Jsp 2.0规范中声明的功能。
- 提供一个基于HttpService的服务实现,以此来兼容其他使用HttpService的service。
毫无疑问,我将采用Web Container中包含OSGi的方式来实现,具体的内容将在以后陆续提供。
搭建开发环境
工欲善其事必先利其器,在正式开发之前,花一点时间来构建开发环境还是有必要的。本章介绍一下我的开发环境。
我使用的开发环境如下:
- Eclipse:当然了,最新版3.52,其中包含了最新版的WTP(Eclipse Web Tools Platform),个人感觉,不比MyEclipse差,而且最重要的是,它是free的。
- equinox-SDK:版本为3.6M5,实现了OSGi R4 core framework specification 4.2。
- Tomcat:作为第一个实现的Web Container,我采用了Tomcat,从中抽取几个特定版本作为测试对象:5.5.28和6.0.26这两个版本,因为他们支持Java5和 Servlet2.4/Jsp2.0。
- JDK:当然Java5以上的,谁叫Equinox只支持Java5以上的呢,我采用的是jdk1.5.0.22。基于Websphere和 Weblogic的缓慢的JDK升级历程,我还是决定不采用Java6或者是7了。
以下是我的目录结构: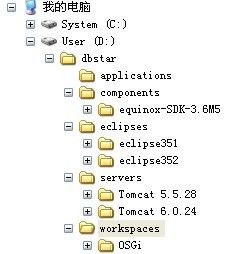
环境整合:
1.运行Eclipse,指定Workspace路径为:D:/dbstar/workspaces/OSGi
2.设置Plug-in Development的Target Platform,增加equinox-SDK-3.6M5并设为默认,这样我们就可以使用equinox-SDK-3.6M5来作为我们开发 bundle的基准库,而不是使用Eclipse自带的plugin开发环境。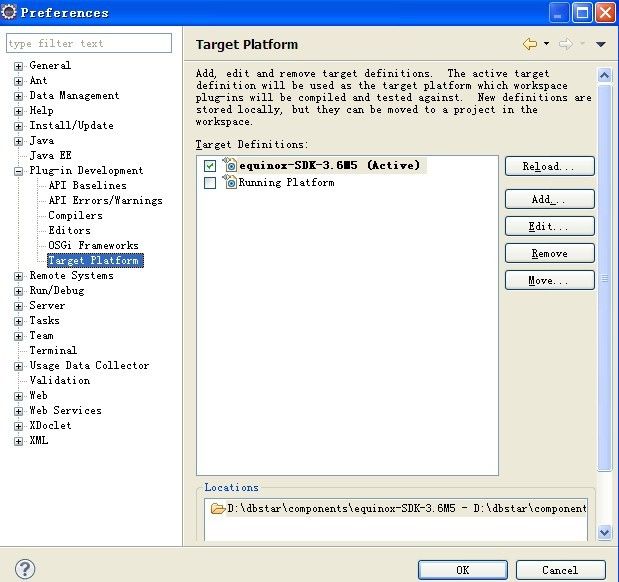
3.在Server配置中增加Tomcat两个版本的服务器。
自此,我的开发环境就已经设置好了,当然了,还有一些其他的个人习惯设置,比如说字体,默认编码设为UTF-8,Code Template和Formatter等等,就不一一赘述了。
在下面一篇中,将介绍如何在Web Application中启动OSGi。
在WebApplication中启动 OSGi
本章将创建一个Web Application项目,并描述如何在此应用中启动OSGi。
首先,在Eclipse中创建一个Dynamic Web Project,名字为OSGi-Web,Context root为osgi。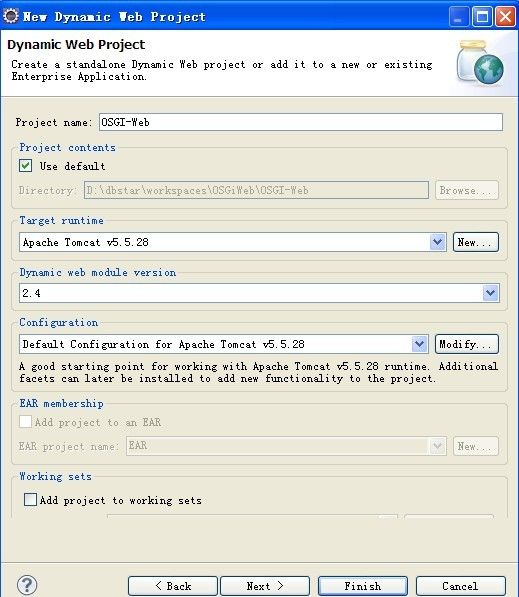
这个项目只作为部署Web Application使用,相关java代码放在另外一个Java Project中,因此我们再创建一个新的Java Project,名字为OSGi-Web-Launcher。然后在OSGi-Web项目的Java EE Module Dependencies中设置OSGi-Web-Launcher为关联,这样在部署的时候,OSGi-Web-Launcher项目中的java代码将为打包为jar存放到Web的WEB-INF/lib目录之中。
为了启动OSGi,我们在web中增加一个ServletContextListener监听器实现,并且通过这个监听器来控制OSGi容器的启动和终止。
在OSGi-Web-Launcher项目中增加一个java类,类名为FrameworkConfigListener,实现接口 ServletContextListener,package为org.dbstar.osgi.web.launcher。在 contextInitialized方法中,增加启动OSGi的代码,在contextDestroyed方法中,增加停止OSGi的代码,这样我们就可以使OSGi容器的生命周期与ServletContext的生命周期保持一致了。
启动OSGi容器:
感谢OSGi规范4.2给了我们一个简单统一的启动OSGi容器的方式,所有实现OSGi4.2规范的容器实力都应该实现这种启动方式,那就是通过 org.osgi.framework.launch.FrameworkFactory,同时,还必须在其实现jar中放置一个文件:META- INF/services/org.osgi.framework.launch.FrameworkFactory,这个文件中设置了实际的 FrameworkFactory实现类的类名。在equinox-SDK-3.6M5的 org.eclipse.osgi_3.6.0.v20100128-1430.jar中,这个文件的内容是:org.eclipse.osgi.launch.EquinoxFactory。
我们先写一个工具类来载入这个配置文件中的内容:
2
3 import java.io.BufferedReader;
4 import java.io.IOException;
5 import java.io.InputStream;
6 import java.io.InputStreamReader;
7
8 public abstract class ServiceLoader {
9 public final static < E > Class < E > load(Class < E > clazz) throws IOException, ClassNotFoundException {
10 return load(clazz, Thread.currentThread().getContextClassLoader());
11 }
12
13 @SuppressWarnings( " unchecked " )
14 public final static < E > Class < E > load(Class < E > clazz, ClassLoader classLoader) throws IOException,
15 ClassNotFoundException {
16 String resource = " META-INF/services/ " + clazz.getName();
17 InputStream in = classLoader.getResourceAsStream(resource);
18 if (in == null ) return null ;
19
20 try {
21 BufferedReader reader = new BufferedReader( new InputStreamReader(in));
22 String serviceClassName = reader.readLine();
23 return (Class < E > ) classLoader.loadClass(serviceClassName);
24 } finally {
25 in.close();
26 }
27 }
28 }
然后获取到FrameworkFactory的实例类:
2 frameworkFactoryClass = ServiceLoader.load(FrameworkFactory. class );
3 } catch (Exception e) {
4 throw new IllegalArgumentException( " FrameworkFactory service load error. " , e);
5 }
6 if (frameworkFactoryClass == null ) {
7 throw new IllegalArgumentException( " FrameworkFactory service not found. " );
8 }
实例化FrameworkFactory:
2 try {
3 frameworkFactory = frameworkFactoryClass.newInstance();
4 } catch (Exception e) {
5 throw new IllegalArgumentException( " FrameworkFactory instantiation error. " , e);
6 }
获取Framework的启动配置:
2 try {
3 // 载入Framework启动配置
4 configuration = loadFrameworkConfig(event.getServletContext());
5 if (logger.isInfoEnabled()) {
6 logger.info( " Load Framework configuration: [ " );
7 for (Object key : configuration.keySet()) {
8 logger.info( " /t " + key + " = " + configuration.get(key));
9 }
10 logger.info( " ] " );
11 }
12 } catch (Exception e) {
13 throw new IllegalArgumentException( " Load Framework configuration error. " , e);
14 }
启动配置读取外部配置文件,可以在此配置文件中增加OSGi容器实现类相关的配置项,例如Equinox的osgi.console:
2 private static Map < Object, Object > loadFrameworkConfig(ServletContext context) throws MalformedURLException {
3 String configLocation = context.getInitParameter(CONTEXT_PARAM_OSGI_CONFIG_LOCATION);
4 if (configLocation == null ) configLocation = DEFAULT_OSGI_CONFIG_LOCATION;
5 else if ( ! configLocation.startsWith( " / " )) configLocation = " / " .concat(configLocation);
6
7 Properties config = new Properties();
8 try {
9 // 载入配置项
10 config.load(context.getResourceAsStream(configLocation));
11 if (logger.isInfoEnabled()) logger.info( " Load Framework configuration from: " + configLocation);
12 } catch (IOException e) {
13 if (logger.isWarnEnabled()) logger.warn( " Load Framework configuration error from: " + configLocation, e);
14 }
15
16 String storageDirectory = config.getProperty(PROPERTY_FRAMEWORK_STORAGE, DEFAULT_OSGI_STORAGE_DIRECTORY);
17 // 检查storageDirectory合法性
18 if (storageDirectory.startsWith(WEB_ROOT)) {
19 // 如果以WEB_ROOT常量字符串开头,那么相对于WEB_ROOT来定位
20 storageDirectory = storageDirectory.substring(WEB_ROOT.length());
21 storageDirectory = context.getRealPath(storageDirectory);
22 } else {
23 // 如果是相对路径,那么相对于WEB_ROOT来定位
24 if ( ! new File(storageDirectory).isAbsolute()) {
25 storageDirectory = context.getRealPath(storageDirectory);
26 }
27 }
28 storageDirectory = new File(storageDirectory).toURL().toExternalForm();
29 config.setProperty(PROPERTY_FRAMEWORK_STORAGE, storageDirectory);
30 if (logger.isInfoEnabled()) logger.info( " Use Framework Storage: " + storageDirectory);
31
32 return config;
33 }
然后,就可以获取framework实例了,通过framework来初始化,启动和停止OSGi容器:
2 framework = frameworkFactory.newFramework(configuration);
3 framework.init();
4
5 // 初始化Framework环境
6 initFramework(framework, event);
7
8 // 启动Framework
9 framework.start();
10
11 succeed = true ;
12 } catch (BundleException e) {
13 throw new OSGiStartException( " Start OSGi Framework error! " , e);
14 } catch (IOException e) {
15 throw new OSGiStartException( " Init OSGi Framework error " , e);
16 }
在initFramework方法中,主要做两件事情,一是将当前的ServletContext作为一个service注册到OSGi容器中去:
2 Properties properties = new Properties();
3 properties.setProperty( " ServerInfo " , servletContext.getServerInfo());
4 properties.setProperty( " ServletContextName " , servletContext.getServletContextName());
5 properties.setProperty( " MajorVersion " , String.valueOf(servletContext.getMajorVersion()));
6 properties.setProperty( " MinorVersion " , String.valueOf(servletContext.getMinorVersion()));
7 bundleContext.registerService(ServletContext. class .getName(), servletContext, properties);
8 }
第二件事就是:在第一次初始化容器时,加载并启动指定目录中的bundle:
2 private static void initFramework(Framework framework, ServletContextEvent event) throws IOException {
3 BundleContext bundleContext = framework.getBundleContext();
4 ServletContext servletContext = event.getServletContext();
5
6 // 将ServletContext注册为服务
7 registerContext(bundleContext, servletContext);
8
9 File file = bundleContext.getDataFile( " .init " );
10 if ( ! file.isFile()) { // 第一次初始化
11 if (logger.isInfoEnabled()) logger.info( " Init Framework
12
13 String pluginLocation = servletContext.getInitParameter(CONTEXT_PARAM_OSGI_PLUGINS_LOCATION);
14 if (pluginLocation == null ) pluginLocation = DEFAULT_OSGI_PLUGINS_LOCATION;
15 else if ( ! pluginLocation.startsWith( " / " )) pluginLocation = " / " .concat(pluginLocation);
16
17 // 安装bundle
18 File bundleRoot = new File(servletContext.getRealPath(pluginLocation));
19 if (bundleRoot.isDirectory()) {
20 if (logger.isInfoEnabled()) logger.info( " Load Framework bundles from: " + pluginLocation);
21
22 File bundleFiles[] = bundleRoot.listFiles( new FilenameFilter() {
23 public boolean accept(File dir, String name) {
24 return name.endsWith( " .jar " );
25 }
26 });
27
28 if (bundleFiles != null && bundleFiles.length > 0 ) {
29 for (File bundleFile : bundleFiles) {
30 try {
31 bundleContext.installBundle(bundleFile.toURL().toExternalForm());
32 if (logger.isInfoEnabled()) logger.info( " Install bundle success: " + bundleFile.getName());
33 } catch (Throwable e) {
34 if (logger.isWarnEnabled()) logger.warn( " Install bundle error: " + bundleFile, e);
35 }
36 }
37 }
38
39 for (Bundle bundle : bundleContext.getBundles()) {
40 if (bundle.getState() == Bundle.INSTALLED || bundle.getState() == Bundle.RESOLVED) {
41 if (bundle.getHeaders().get(Constants.BUNDLE_ACTIVATOR) != null ) {
42 try {
43 bundle.start(Bundle.START_ACTIVATION_POLICY);
44 if (logger.isInfoEnabled()) logger.info( " Start bundle: " + bundle);
45 } catch (Throwable e) {
46 if (logger.isWarnEnabled()) logger.warn( " Start bundle error: " + bundle, e);
47 }
48 }
49 }
50 }
51 }
52
53 new FileWriter(file).close();
54 if (logger.isInfoEnabled()) logger.info( " Framework inited. " );
55 }
56 }
以上就是启动OSGi容器的过程,相比较而言,停止容器就简单多了:
2 if (framework != null ) {
3 if (logger.isInfoEnabled()) logger.info( " Stopping OSGi Framework
4
5 boolean succeed = false ;
6 try {
7 if (framework.getState() == Framework.ACTIVE) framework.stop();
8 framework.waitForStop( 0 );
9 framework = null ;
10
11 succeed = true ;
12 } catch (BundleException e) {
13 throw new OSGiStopException( " Stop OSGi Framework error! " , e);
14 } catch (InterruptedException e) {
15 throw new OSGiStopException( " Stop OSGi Framework error! " , e);
16 } finally {
17 if (logger.isInfoEnabled()) {
18 if (succeed) logger.info( " OSGi Framework Stopped! " );
19 else logger.info( " OSGi Framework not stop! " );
20 }
21 }
22 }
23 }
最后,还有一件事情,就是将FrameworkConfigListener配置到web.xml中:
2 < listener >
3 < listener-class > org.dbstar.osgi.web.launcher.FrameworkConfigListener </ listener-class >
4 </ listener >
让我们来测试一下吧,在Eclipse中新建一个Server: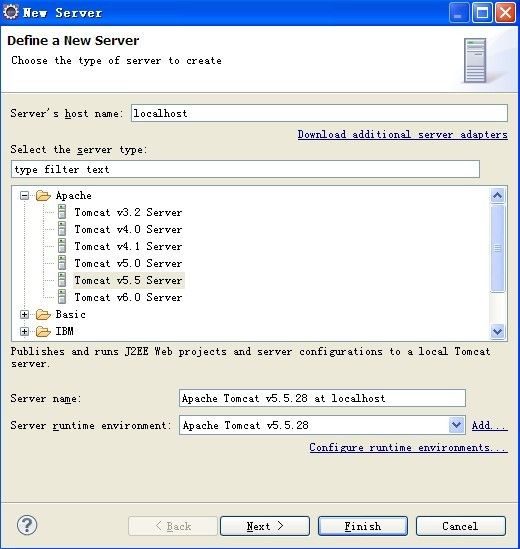
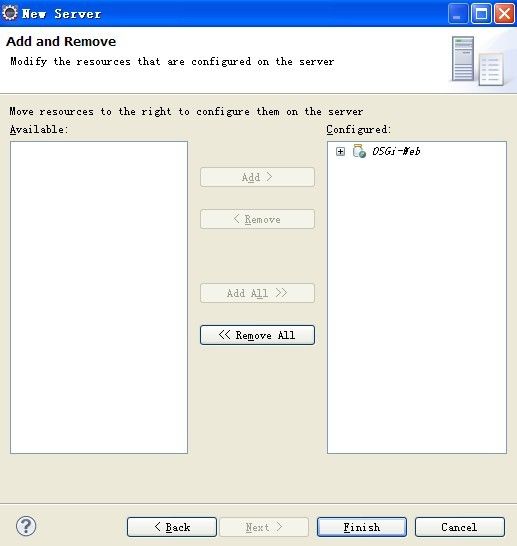
另外,在OSGi-Web-Launcher项目的classpath中增加 org.eclipse.osgi_3.6.0.v20100128-1430.jar,并且在Java EE Module Dependencies中勾选这个jar,这样可以保证这个jar最终部署到Web Application的WEB-INF/lib目录下去。同样,还需要增加commons-logging.jar。
然后就可以启动这个Server查看效果了。
附上本文中提到的源代码 。
为OSGi容器提供Web Application环境
本章叙述如何在OSGi容器中提供必要的Web Application环境,其中包括Servlet 2.4、Jsp 2.0和Commons-Logging相关的package,使得其他在OSGi容器中的bundle可以import。
为了在OSGi容器中提供export的package,一般有三种方式:
- 一个常规的bundle,自身包含必要的class,同时在Export-Package中声明。
- 一个Host为System Bundle的Fragment Bundle,同样也可以在Export-Package中声明导出的package,只要这个package中的class在System Bundle的ClassLoader中能load到。
- 通过启动Framework的配置项:org.osgi.framework.system.packages和 org.osgi.framework.system.packages.extra。OSGi 4.2规范中描述了这两个标准的配置项。在这两个配置项中描述的package都等同于在System Bundle中声明了export。
对于在Web Application中运行的OSGi容器,一些必要的环境是通过Web Container提供的,我们最好不要,也不应该用自己的类来替换,这包括了j2ee相关的jar,如servlet和jsp相关的jar等等。在一些 WebServer的实现中,会自动屏蔽Web Application的classpath中的j2ee相关的jar。
除了j2ee相关的jar之外,还有一些使用非常普遍的jar,比如说Apache commons一类,其中最常用的大概就是commons-lang.jar、commons-io.jar和commons-logging.jar 了,这些jar最好也有Web Container来提供,或者有必要的话,在Web Application中提供,而不是在OSGi容器中提供,这涉及到一些JVM层次的单例类,或者希望能由Web Application级别来统一实现和配置的环境,最常见的应用就是日志配置了。通过由Web Application提供的commons-logging来给OSGi容器中的环境使用,而commons-logging通过何种方式来实现,不需要让OSGi内部知道。
至于导出package到OSGi的方式中,是采用第二种还是第三种,主要区别在于:第三种方式是加载framework时指定的,在其后的生命周期中不可更改,而第二种方式则更符合OSGi动态加载的特性。
我采用第二种方式来给OSGi容器增加环境支持,具体操作很简单,以Servlet为例,首先编写一个文本文件,名字为:MANIFEST.MF,内容如下:
2 Bundle-ManifestVersion: 2
3 Bundle-Name: Servlet Extension Fragment
4 Bundle-SymbolicName: javax.servlet_extension ; singleton:=true
5 Bundle-Version: 2.4.0
6 Fragment-Host: system.bundle ; extension:=framework
7 Bundle-RequiredExecutionEnvironment: J2SE- 1.5
8 Export-Package: javax.servlet ; version="2.4.0",
9 javax.servlet.http ; version="2.4.0",
10 javax.servlet.resources ; version="2.4.0"
11 Bundle-Vendor: dbstar
注意其中关键的header属性,Fragment-Host: system.bundle; extension:=framework
这样写才能保证这个Fragment Bundle在各种OSGi Framework实现中都能兼容。
保存以后,将这个文件放置到一个名字为META-INF的目录中,然后用jar命令打包成一个jar即可(或者用winrar打包,记得选择压缩方式为 zip,在打包后将zip后缀名改成jar,我通常都是这么干的)。
Jsp的MANIFEST.MF:
2 Bundle-ManifestVersion: 2
3 Bundle-Name: Jsp Extension Fragment
4 Bundle-SymbolicName: javax.servlet.jsp_extension ; singleton:=true
5 Bundle-Version: 2.0.0
6 Bundle-Vendor: dbstar
7 Fragment-Host: system.bundle ; extension:=framework
8 Bundle-RequiredExecutionEnvironment: J2SE- 1.5
9 Export-Package: javax.servlet.jsp ; version="2.0.0",
10 javax.servlet.jsp.el ; version="2.0.0",
11 javax.servlet.jsp.resources ; version="2.0.0",
12 javax.servlet.jsp.tagext ; version="2.0.0"
commons-logging的MANIFEST.MF
2 Bundle-ManifestVersion: 2
3 Bundle-Name: Commons Logging Extension Fragment
4 Bundle-SymbolicName: org.apache.commons.logging_extension ; singleton:=true
5 Bundle-Version: 1.1.1
6 Bundle-Vendor: dbstar
7 Fragment-Host: system.bundle ; extension:=framework
8 Bundle-RequiredExecutionEnvironment: J2SE- 1.5
9 Export-Package: org.apache.commons.logging ; version="1.1.1",
10 org.apache.commons.logging.impl ; version="1.1.1"
因为我用的是commons-logging-1.1.1.jar,所以version写的是1.1.1,大家可以修改成自己所使用的jar的版本。
将上面生成的三个jar放到OSGi-Web项目的WEB-INF/osgi/plugins目录下面。还记得我在上一章创建的那个Tomcat Server么,clean一次,新的jar会部署到Tomcat中去,然后就可以运行Server了。
至于为什么是clean而不是publish,区别在于clean会清除所有OSGi容器创建出来的文件,这样下次启动OSGi时就会做一个 install bundle的事情,而publish不会自动install新加进去的bundle。
如果你使用的是equinox,那么你可以在控制台中看到Syetem Bundle现在多了几个Fragments,查看一下Servlet Bundle,会显示下列信息,表示servlet 2.4的package在OSGi容器中已经可用了:
javax.servlet_extension_2 .4.0 [ 2 ]
Id = 2 , Status = RESOLVED Data Root = D:/dbstar/workspaces/OSGi/.metadata/.plugins/org.eclipse.wst.server.core/tmp0/wtpwebapps/OSGi-Web/WEB-INF/osgi/configuration/org.eclipse.osgi/bundles/ 2 /data
No registered services.
No services in use.
Exported packages
javax.servlet ; version="2.4.0"[exported]
javax.servlet.http ; version="2.4.0"[exported]
javax.servlet.resources ; version="2.4.0"[exported]
No imported packages
Host bundles
org.eclipse.osgi_3 .6.0 .v20100128- 1430 [ 0 ]
No named class spaces
No required bundles
最后提供几个本章提到的bundle给大家下载,大家就不用自己再起生成一个了。
javax.servlet_extension_2.4.0.jar
javax.servlet.jsp_extension_2.0.0.jar
org.apache.commons.logging_extension_1.1.1.jar
系统不让传扩展名为.jar的文件,大家下载后把扩展名改改吧,阿门。
在OSGi容器中管理Web元素的实现思路
要在OSGi容器中动态的管理Web相关的元素,目前有两种方式。
一种是通过类似于bridge的方式,现在外层的Web Application中配置一个对应的元素,然后通过对这个元素将外部的访问桥接到OSGi容器内部。在OSGi容器内部,会有一个总控的 service,通过这个service来提供Web元素的动态管理,以及对外界请求的响应和分发。Equinox的Servlet Bridge就是采用的这种方式。
另一种方式就是通过使用Web Container提供的原生的API来实现Web元素的动态管理,将Web Container的部分功能作为Service注册到OSGi中,然后在OSGi中通过这个Service来动态的管理Web元素。
两种方式各有利弊:
对于bridge方式来说,优点是与Web Container实现无关,在多种Web Container中均能正常使用;缺点也很明显,无法使用Web Container提供的各种特性,并且相当于自己要实现一部分Web Server的功能,不仅是重复造轮子,而且还是个不怎么好的轮子,能否满足企业级应用的需求,还只是个未知数。
对于使用原生API的方式来说,优点就是完全使用Web Server自身的机制,可以保证性能和功能需求;缺点同样也很明显,现在流行的Web Server开源的并不多,而且就算是开源的,也不一定提供了可以动态管理Web元素的API,就算是有相应的API,也不一定适合OSGi环境,而且同一个Web Server的不同版本,API也很有可能会变化,这直接导致了原生方式实现的多样性和不兼容性。
幸运的是,在Tomcat 5.5.x和6.0.x中都提供了这样的API,在以后的章节中,我会着重针对Tomcat 5.5.x、6.0.x版本以及对bridge方式这三个场景,来实现对Web元素的动态管理。
Servlet 2.4中描述了如下可以在web.xml中配置的元素,这也是我要实现动态管理的目标:
- Context Parameter
- Error Page
- Filter
- Filter Mapping
- Listener
- Security role
- Servlet
- Servlet Mapping
- Welcome Page
增加日志输出功能
到目前为止,我们的基于OSGi内核的Web Application还没有任何的日志输出功能,本章将介绍如何在这个Web应用中配置和输出日志。
在前面的配置中,我们的应用中只含有commons-logging.jar,而OSGi容器之外的代码中,均是通过配置commons logging的Log对象来输出日志的,在默认的配置下,系统将采用Jdk14Logger来作为输出日志的实现,这对我们来说是远远不够的。我们下一步将配置更加常用的Log4j在作为我们的日志输出实现,通过以下几个步骤:
一、为Web Application配置Log4j:
1.在OSGi-Web项目的Java EE Module Dependencies中,增加对log4j.jar的依赖关系。
2.在WEB-INF/config目录中,增加一个log4j.properties文件,内容如下:
2 log4j.appender.stdout = org.apache.log4j.ConsoleAppender
3 log4j.appender.stdout.Target = System.out
4 log4j.appender.stdout.layout = org.apache.log4j.PatternLayout
5 log4j.appender.stdout.layout.ConversionPattern =% d{ABSOLUTE} % 5p % c{ 1 }: % L - % m % n
6
7 #Default Log File Configuration For OSGi
8 log4j.appender.OSGiLog = org.apache.log4j.DailyRollingFileAppender
9 log4j.appender.OSGiLog.DatePattern = ' . ' yyyy - MM - dd
10 log4j.appender.OSGiLog.File = ${osgi.root} / logs / OSGi.log
11 log4j.appender.OSGiLog.layout = org.apache.log4j.PatternLayout
12 log4j.appender.OSGiLog.layout.ConversionPattern =% d [ % t] %- 5p % c - % m % n
13
14 log4j.rootLogger = info, stdout
15
16 log4j.logger.org.dbstar = debug, OSGiLog
17 log4j.logger.org.eclipse = debug, OSGiLog
3.采用Spring Web的Log4j配置方式,在web.xml中增加如下配置:
2 < context-param >
3 < param-name > webAppRootKey </ param-name >
4 < param-value > osgi.root </ param-value >
5 </ context-param >
6 < context-param >
7 < param-name > log4jConfigLocation </ param-name >
8 < param-value > /WEB-INF/config/log4j.properties </ param-value >
9 </ context-param >
10
11 <!-- Init log4j -->
12 < listener >
13 < listener-class > org.springframework.web.util.Log4jConfigListener </ listener-class >
14 </ listener >
4.在OSGi-Web项目的Java EE Module Dependencies中,增加spring相关jar的依赖。
经过以上4个步骤,我们在Web Application中使用commons logging输出的日志,都可以通过Log4j来显示了。但是作为OSGi容器内部来说,这还不够。OSGi规范中推荐使用 org.osgi.service.log包中的LogService和LogReaderService来管理和显示OSGi日志。为了能正常显示 OSGi容器内部的日志,我们还需要将LogService、LogReaderService和OSGi容器外部的Log4j结合起来才行,为了达到这个目的,我们还需要做以下几个步骤:
1.为OSGi容器增加一个org.osgi.service.log的实现包。在equinox-SDK-3.6M5开发包中,这个实现jar 是:org.eclipse.equinox.log_1.2.100.v20100118.jar,当然,还需要 org.eclipse.osgi.services_3.2.100.v20100108.jar,都放置到OSGi-Web工程的WEB- INT/osgi/plugins目录下面。
2.为OSGi容器增加Declarative Services支持。在equinox-SDK-3.6M5开发包中,包含了一个DS的实现:org.eclipse.equinox.ds_1.2.0.v20100125.jar,将这个jar和一个依赖的 jar:org.eclipse.equinox.util_1.0.100.v20090520-1800.jar部署到OSGi容器中,就可以使用 DS服务了。同样也放到plugins目录下面去。
3.新增一个plugin工程,名字为:org.dbstar.osgi.log,我们使用DS方式来获取服务,相关源代码如下:
OSGI-INF/log.xml
2 < scr:component xmlns:scr ="http://www.osgi.org/xmlns/scr/v1.1.0" enabled ="true" name ="logListener" xsi:schemaLocation ="http://www.osgi.org/xmlns/scr/v1.1.0 http://www.osgi.org/xmlns/scr/v1.1.0/scr.xsd" >
3 < implementation class ="org.dbstar.osgi.log.LogListenerImpl" />
4 < reference cardinality ="1..1" interface ="org.osgi.service.log.LogReaderService" name ="LogReaderService" policy ="static" />
5 </ scr:component >
LogListenerImpl.java
2
3 import org.apache.commons.logging.Log;
4 import org.apache.commons.logging.LogFactory;
5 import org.osgi.service.component.ComponentContext;
6 import org.osgi.service.log.LogEntry;
7 import org.osgi.service.log.LogListener;
8 import org.osgi.service.log.LogReaderService;
9 import org.osgi.service.log.LogService;
10
11 public class LogListenerImpl implements LogListener {
12 private static final Log logger = LogFactory.getLog(LogListenerImpl. class );
13
14 protected void activate(ComponentContext context) {
15 LogReaderService service = (LogReaderService) context.locateService( " LogReaderService " );
16 service.addLogListener( this );
17 }
18
19 protected void deactivate(ComponentContext context) {
20 LogReaderService service = (LogReaderService) context.locateService( " LogReaderService " );
21 service.removeLogListener( this );
22 }
23
24 public void logged(LogEntry entry) {
25 String msg = getMessage(entry);
26
27 switch (entry.getLevel()) {
28 case LogService.LOG_DEBUG:
29 if (logger.isDebugEnabled()) {
30 if (entry.getException() == null ) {
31 logger.debug(msg);
32 } else {
33 logger.debug(msg, entry.getException());
34 }
35 }
36 break ;
37 case LogService.LOG_INFO:
38 if (logger.isInfoEnabled()) {
39 if (entry.getException() == null ) {
40 logger.info(msg);
41 } else {
42 logger.info(msg, entry.getException());
43 }
44 }
45 break ;
46 case LogService.LOG_WARNING:
47 if (logger.isWarnEnabled()) {
48 if (entry.getException() == null ) {
49 logger.warn(msg);
50 } else {
51 logger.warn(msg, entry.getException());
52 }
53 }
54 break ;
55 case LogService.LOG_ERROR:
56 if (logger.isErrorEnabled()) {
57 if (entry.getException() == null ) {
58 logger.error(msg);
59 } else {
60 logger.error(msg, entry.getException());
61 }
62 }
63 break ;
64 }
65 }
66
67 private String getMessage(LogEntry entry) {
68 StringBuilder msg = new StringBuilder();
69 if (entry.getBundle() != null ) msg.append( " [bundle: " ).append(entry.getBundle()).append( " ] " );
70 if (entry.getServiceReference() != null ) msg.append( " [service: " ).append(entry.getServiceReference())
71 .append( " ] " );
72 msg.append(entry.getMessage());
73 return msg.toString();
74 }
75 }
META-INF/MANIFEST.MF
2 Bundle-ManifestVersion: 2
3 Bundle-Name: Log Bundle
4 Bundle-SymbolicName: org.dbstar.osgi.log
5 Bundle-Version: 1.0.0
6 Bundle-Vendor: dbstar
7 Bundle-RequiredExecutionEnvironment: J2SE- 1.5
8 Service-Component: OSGI-INF/log.xml
9 Import-Package: org.apache.commons.logging ; version="1.0.4",
10 org.osgi.framework ; version="1.3.0",
11 org.osgi.service.component ; version="1.1.0",
12 org.osgi.service.log ; version="1.3.0"
好了,打包成bundle jar然后也扔到plugins目录下面,然后clean一下server,启动,现在能看到多了许多日志输出,现在OSGi内部通过 LogService输出的日志也能由Log4j接管了。
最后总结一下,LogService和LogReaderService是OSGi规范中提倡的日志标准,在equinox内部实现中大量使用了这种日志,而commons logging是我们开发常规程序时所常用的日志方式。在你的bundle代码中,具体要采用哪一种日志方式,并没有强制的要求,大家可以根据各人喜好来选用。
顺便提一句,LogService有些美中不足的是,不能像commons logging那样,显示出日志具体是从哪个java类的第几行输出的,不知道各位大虾是否有人知道该如何解决呢,希望不吝赐教:)
设置初始化bundle的 StartLevel
后来发现其中在初始化时加载bundle的方式,还有一些美中不足。这种方式加载的bundle都具有相同的启动顺序,即bundle的初始化默认 start level,在之前均没有做过特别的设置,所以默认值都是1,这样会导致所有的bundle的启动顺序无法控制,在某些希望特殊bundle优先加载的场合(如日志功能,需要最先加载),我们希望能够在bundle初始化的时候就能指定特别的start level,这样所有的bundle就能按照我们预设的启动顺序来加载了。下面就是我优化过的初始化代码,能够解决启动顺序问题。
工作原理是这样的,首先,在原来存放初始化bundle的目录,也就是OSGi-Web工程的/WEB-INF/osgi/plugins目录下面再增加一个名为start的目录,在start目录下,再按照期望设置的start level来建立子目录,例如,期望设置start level为1的bundle,放到plugins/start/1目录下面;期望设置start level为2的bundle,放到plugins/start/2目录下面,以此类推。
代码方面,设置bundle的start level,需要使用StartLevel Service,可以通过下面代码获得:
2 ServiceReference slRef = bundleContext.getServiceReference(StartLevel. class .getName());
3 StartLevel sl = slRef == null ? null : (StartLevel) bundleContext.getService(slRef);
然后设置initial bundle start level:
2 String bsl = bundleContext.getProperty( " org.osgi.framework.startlevel.beginning " );
3 if (bsl != null && isInteger(bsl)) sl.setInitialBundleStartLevel(Integer.parseInt(bsl));
这样所有新安装的bundle的初始化start level都将被设置为和系统配置项:org.osgi.framework.startlevel.beginning相同的值,以确保所有默认安装的 bundle都能启动。
修改osgi.properties中关于org.osgi.framework.startlevel.beginning的配置项,我改成了5:
2 #Level Service Specification on page 235 for more information.
3 #
4 org.osgi.framework.startlevel.beginning = 5
增加一个方法,用于安装一个目录下所有的直属bundle,并且设置start level:
2 File bundleFiles[] = bundleRoot.listFiles( new FilenameFilter() {
3 public boolean accept(File dir, String name) {
4 return name.endsWith( " .jar " );
5 }
6 });
7
8 if (bundleFiles != null && bundleFiles.length > 0 ) {
9 for (File bundleFile : bundleFiles) {
10 try {
11 Bundle bundle = bundleContext.installBundle(bundleFile.toURL().toExternalForm());
12 if (sl != null && bsl > 0 ) sl.setBundleStartLevel(bundle, bsl);
13 if (logger.isInfoEnabled()) logger.info( " Install bundle success: " + bundleFile.getName());
14 } catch (Throwable e) {
15 if (logger.isWarnEnabled()) logger.warn( " Install bundle error: " + bundleFile, e);
16 }
17 }
18 }
19 }
最后,遍历start目录下的子目录来安装所有的bundle:
2 File slRoot = new File(bundleRoot, " start " );
3 if (slRoot.isDirectory()) {
4 File slDirs[] = slRoot.listFiles( new FileFilter() {
5 public boolean accept(File file) {
6 return file.isDirectory() && isInteger(file.getName());
7 }
8 });
9
10 for (File slDir : slDirs) {
11 installBundles(bundleContext, slDir, sl, Integer.parseInt(slDir.getName()));
12 }
13 }
14
15 // 安装直属目录下面的bundle
16 installBundles(bundleContext, bundleRoot, sl, 0 );
2 try {
3 Integer.parseInt(value);
4 return true ;
5 } catch (NumberFormatException e) {
6 return false ;
7 }
8 }
最后,由于Declarative Services的存在,稍微调整了一下启动策略,所有包含Service-Component的header定义的bundle,也调用start方法来启动:
2 if (bundle.getState() == Bundle.INSTALLED || bundle.getState() == Bundle.RESOLVED) {
3 if (bundle.getHeaders().get(Constants.BUNDLE_ACTIVATOR) != null || bundle.getHeaders().get( " Service-Component " ) != null ) {
4 try {
5 bundle.start(Bundle.START_ACTIVATION_POLICY);
6 if (logger.isInfoEnabled()) logger.info( " Start bundle: " + bundle);
7 } catch (Throwable e) {
8 if (logger.isWarnEnabled()) logger.warn( " Start bundle error: " + bundle, e);
9 }
10 }
11 }
12 }
clean Server然后启动Server,我们可以看到初始化后的bundle已经被赋予了指定Start Level。
附上initFramework方法的完整代码,更多的代码请参加以前的帖子:
2 private static void initFramework(Framework framework, ServletContextEvent event) throws IOException {
3 BundleContext bundleContext = framework.getBundleContext();
4 ServletContext servletContext = event.getServletContext();
5
6 // 将ServletContext注册为服务
7 registerContext(bundleContext, servletContext);
8
9 File file = bundleContext.getDataFile( " .init " );
10 if ( ! file.isFile()) { // 第一次初始化
11 if (logger.isInfoEnabled()) logger.info( " Init Framework
12
13 String pluginLocation = servletContext.getInitParameter(CONTEXT_PARAM_OSGI_PLUGINS_LOCATION);
14 if (pluginLocation == null ) pluginLocation = DEFAULT_OSGI_PLUGINS_LOCATION;
15 else if ( ! pluginLocation.startsWith( " / " )) pluginLocation = " / " .concat(pluginLocation);
16
17 // 安装bundle
18 File bundleRoot = new File(servletContext.getRealPath(pluginLocation));
19 if (bundleRoot.isDirectory()) {
20 if (logger.isInfoEnabled()) logger.info( " Load Framework bundles from: " + pluginLocation);
21
22 // StartLevel Service,用于设置bundle的 startlevel
23 ServiceReference slRef = bundleContext.getServiceReference(StartLevel. class .getName());
24 StartLevel sl = slRef == null ? null : (StartLevel) bundleContext.getService(slRef);
25 // 设置新bundle的初始startlevel为系统配置项:org.osgi.framework.startlevel.beginning的值
26 String bsl = bundleContext.getProperty( " org.osgi.framework.startlevel.beginning " );
27 if (bsl != null && isInteger(bsl)) sl.setInitialBundleStartLevel(Integer.parseInt(bsl));
28
29 // 安装bundle并设置相应的start level
30 File slRoot = new File(bundleRoot, " start " );
31 if (slRoot.isDirectory()) {
32 File slDirs[] = slRoot.listFiles( new FileFilter() {
33 public boolean accept(File file) {
34 return file.isDirectory() && isInteger(file.getName());
35 }
36 });
37
38 for (File slDir : slDirs) {
39 installBundles(bundleContext, slDir, sl, Integer.parseInt(slDir.getName()));
40 }
41 }
42
43 // 安装直属目录下面的bundle
44 installBundles(bundleContext, bundleRoot, sl, 0 );
45
46 for (Bundle bundle : bundleContext.getBundles()) {
47 if (bundle.getState() == Bundle.INSTALLED || bundle.getState() == Bundle.RESOLVED) {
48 if (bundle.getHeaders().get(Constants.BUNDLE_ACTIVATOR) != null || bundle.getHeaders().get( " Service-Component " ) != null ) {
49 try {
50 bundle.start(Bundle.START_ACTIVATION_POLICY);
51 if (logger.isInfoEnabled()) logger.info( " Start bundle: " + bundle);
52 } catch (Throwable e) {
53 if (logger.isWarnEnabled()) logger.warn( " Start bundle error: " + bundle, e);
54 }
55 }
56 }
57 }
58
59 if (slRef != null ) bundleContext.ungetService(slRef);
60 }
61
62 new FileWriter(file).close();
63 if (logger.isInfoEnabled()) logger.info( " Framework inited. " );
64 }
65 }
使用Tomcat原生API来动态管理 Web元素:原理
Tomcat的org.apache.catalina.Context接口提供了动态管理注入到Catalina Web Container中的Web元素的API。在基于OSGi的Web Application中,可以利用这个接口来实现在OSGi容器中动态管理Web元素的目的。为了达到这个目的,我们还需要做一些额外的配置。请注意,以下方法仅适用于Tomcat,并非通用的实现,而且只针对5.5.28版和6.0.24版的Tomcat做过简单的测试。
首先我们要做的事情,就是将Tomcat的org.apache.catalina.Context实现类作为Service注入到OSGi容器中去。在 OSGi-Web工程的WebContent/META-INF目录中,增加一个context.xml文件,内容如下:
2 < Context privileged ="true" />
这样我们就可以使用org.apache.catalina.ContainerServlet这个接口类了,通过它可以访问Catalina的内部功能,它有Catalina被类加载器加载,而不是我们的WebApplication类加载器。它的 Setter方法在这个Servlet的新的实例被放进Service时被执行。
接下来我们写一个Servlet,这个Servlet将实现ContainerServlet接口,请注意它是怎么工作的:
2
3 import java.util.Properties;
4
5 import javax.servlet.ServletException;
6 import javax.servlet.UnavailableException;
7 import javax.servlet.http.HttpServlet;
8
9 import org.apache.catalina.ContainerServlet;
10 import org.apache.catalina.Context;
11 import org.apache.catalina.Wrapper;
12 import org.dbstar.osgi.web.launcher.FrameworkConfigListener;
13 import org.osgi.framework.BundleContext;
14 import org.osgi.framework.ServiceRegistration;
15 import org.osgi.framework.launch.Framework;
16
17 public final class TomcatContextServlet extends HttpServlet implements ContainerServlet {
18 private static final long serialVersionUID = - 3977062987005392657L ;
19
20 private Wrapper wrapper;
21 private Context context;
22
23 private ServiceRegistration registration;
24
25 public Wrapper getWrapper() {
26 return wrapper;
27 }
28
29 public void setWrapper(Wrapper wrapper) {
30 this .wrapper = wrapper;
31 if (wrapper == null ) context = null ;
32 else context = (Context) wrapper.getParent();
33 }
34
35 @Override
36 public void init() throws ServletException {
37 // Ensure that our ContainerServlet properties have been set
38 if ((wrapper == null ) || (context == null )) throw new UnavailableException( " Wrapper not set. " );
39
40 // Ensure that Framework have been set
41 Framework framework = FrameworkConfigListener.getFramework();
42 if (framework == null ) throw new UnavailableException( " Framework not set. " );
43
44 // 将context注册为服务
45 registration = registerContext(framework.getBundleContext(), context);
46 }
47
48 private static ServiceRegistration registerContext(BundleContext bundleContext, Context context) {
49 Properties properties = new Properties();
50 properties.setProperty( " DisplayName " , context.getDisplayName());
51 properties.setProperty( " ContextPath " , context.getPath());
52 return bundleContext.registerService(Context. class .getName(), context, properties);
53 }
54
55 @Override
56 public void destroy() {
57 if (registration == null ) return ;
58
59 Framework framework = FrameworkConfigListener.getFramework();
60 if (framework == null ) return ;
61
62 if (framework.getState() == Framework.ACTIVE) registration.unregister();
63 registration = null ;
64 }
65 }
通过ContainerServlet接口提供的setWrapper方法,我们获得了一个Wrapper实例,这个实例对应于 TomcatContextServlet部署到Tomcat中的封装类,通过其getParent方法我们就可以获得Servlet所在的 Context了。
接下来在init方法中,我们将获得的Context实例,通过Framework注册到OSGi容器中去。在destroy方法中,注销Context 的注册,这样形成了一个完整的生命周期。
然后,将这个TomcatContextServlet部署到web.xml中去:
2 < servlet >
3 < servlet-name > TomcatContextServlet </ servlet-name >
4 < servlet-class > org.dbstar.osgi.web.launcher.tomcat.TomcatContextServlet </ servlet-class >
5 < load-on-startup > 1 </ load-on-startup >
6 </ servlet >
设置<load-on-startup>使这个Servlet在WebContainer初始化时加载,否则它将没有加载的机会,因为我们在应用中不会直接使用到这个Servlet。
最后还有一件事情不要忘记了,我们需要将org.apache.catalina及其相关的package export到OSGi容器中去,这样才能在OSGi容器中供给bundle来import。参照《打造一个基于OSGi的Web Application——为OSGi容器提供Web Application环境 》一文中提到的方式,我们将catalina.jar作为extension Fragment的方式,引入到OSGi容器中去。
Catalina的MANIFEST.MF:
2 Bundle-ManifestVersion: 2
3 Bundle-Name: Catalina Extension Fragment
4 Bundle-SymbolicName: org.apache.catalina_extension ; singleton:=true
5 Bundle-Version: 5.5.28
6 Bundle-Vendor: dbstar
7 Fragment-Host: system.bundle ; extension:=framework
8 Bundle-RequiredExecutionEnvironment: J2SE- 1.5
9 Export-Package: org.apache.catalina , org.apache.catalina.authenticator ,
10 org.apache.catalina.connector , org.apache.catalina.core , org.apache.cat
11 alina.deploy , org.apache.catalina.loader , org.apache.catalina.mbeans , or
12 g.apache.catalina.realm , org.apache.catalina.security , org.apache.catal
13 ina.session , org.apache.catalina.startup , org.apache.catalina.users , org
14 .apache.catalina.util , org.apache.catalina.valves
在接下来的章节中,我会逐一描述如何在基于Tomcat的OSGi容器中,如何实现各种Web元素的动态管理,尽请期待哦:)
最后提供几个本章提到的bundle给大家下载,大家就不用自己再起生成一个了。
org.apache.catalina_extension_5.5.28.jar