android中的UI控制(一)
android中的UI控制(一)
转载自 http://www.android777.com/index.php/tutorial/androids-ui-control-a.html
Java在UI方面的表现一直很不如意,由于界面不好看、使用不方便造成大量开发人员不愿去使用它。幸好在Android中我们将不再使用这些控 件。Android内建了一个内部的UI框架,并做了一些特殊的设计以让其在手机上能有良好的用户体验。在Android SDK中,跟JDK一样有Button、TextField、List、Grid等,但是这些控件都做了优化,提供了适合在手机上做的控制。
在Android SDK UI的核心控制中有android.view.View和android.view.ViewGroup是两个主要类。View表示是一个视图就是一般视 觉上的一个区域,ViewGroup也是一个View,它扩展View使其内部能存放其他的View所以可以理解为一个Container容器。 ViewGroup内部采用跟Swing一样的处理机制,内部采用一个layout manager来管理它的布局,让用户能采用内置的布局进行视图控制。
声明布局和视图的方式:
在Android中有三种方式可以用来创建UI界面。
1. 在xml布局文件中创建出UI视图的层次架构,android提供了很多属性用来使用xml对视图和布局进行管理,你可以通过这些属性定义视图大小,方向等。
2. 在代码中创建视图或布局。 动态的创建View或ViewGroup并设置它们的属性。
3.混合方式。 在xml中声明视图或布局。然后在代码中找出这些视图,然后修改里面的属性。
使用xml布局的优点是:它使用的MVC模式,将视图层和逻辑控制层分开。视图和布局控制文件没有混合在程序代码中,使整个项目结构清晰,可维护性高。
使用代码创建视图或布局的优点是:可以根据程序运行状态,动态的显示内容。
下面演示对应两种方式实现同一个视图:
(一)代码方式
package com.zhouzijing.android;

import android.app.Activity;
import android.os.Bundle;
import android.view.ViewGroup.LayoutParams;
import android.widget.LinearLayout;
import android.widget.TextView;

public class MainActivity extends Activity {
    /** Called when the activity is first created. */
    @Override
    public void onCreate(Bundle savedInstanceState) {
        super.onCreate(savedInstanceState);

        //创建一个主视图容器
        LinearLayout parent = new LinearLayout(this);
        parent.setOrientation(LinearLayout.VERTICAL);
        parent.setLayoutParams(new LayoutParams(
        		LayoutParams.FILL_PARENT,LayoutParams.FILL_PARENT));

        //创建放名字的容器
        LinearLayout nameLinearLayout = new LinearLayout(this);
        nameLinearLayout.setOrientation(LinearLayout.HORIZONTAL);
        nameLinearLayout.setLayoutParams(new LayoutParams(
        		LayoutParams.FILL_PARENT, LayoutParams.WRAP_CONTENT));
        TextView nameLabel = new TextView(this);
        nameLabel.setText("名字:");
        TextView name = new TextView(this);
        name.setText("张三丰");
        nameLinearLayout.addView(nameLabel);
        nameLinearLayout.addView(name);

        //创建放地址的容器
        LinearLayout addressLinearLayout = new LinearLayout(this);
        addressLinearLayout.setOrientation(LinearLayout.HORIZONTAL);
        addressLinearLayout.setLayoutParams(new LayoutParams(
        		LayoutParams.FILL_PARENT, LayoutParams.WRAP_CONTENT));
        TextView addressLabel = new TextView(this);
        addressLabel.setText("地址:");
        TextView address = new TextView(this);
        address.setText("武当山");
        addressLinearLayout.addView(addressLabel);
        addressLinearLayout.addView(address);

        //创建放国家的容器
        LinearLayout countryLinearLayout = new LinearLayout(this);
        countryLinearLayout.setOrientation(LinearLayout.HORIZONTAL);
        countryLinearLayout.setLayoutParams(new LayoutParams(
        		LayoutParams.FILL_PARENT, LayoutParams.WRAP_CONTENT));
        TextView countryLabel = new TextView(this);
        countryLabel.setText("国家:");
        TextView country = new TextView(this);
        country.setText("中国");
        countryLinearLayout.addView(countryLabel);
        countryLinearLayout.addView(country);

        //将名字、地址、国家放到主容器中
        parent.addView(nameLinearLayout);
        parent.addView(addressLinearLayout);
        parent.addView(countryLinearLayout);

        //显示主容器
        setContentView(parent);
    }
}
(二)布局xml方式
下面我们创建一个布局xml也可以完成同样的效果:
main.xml 存放到res/layout目录下
<?xml version="1.0" encoding="utf-8"?>
<LinearLayout xmlns:android="http://schemas.android.com/apk/res/android"
    android:orientation="vertical"
    android:layout_width="fill_parent"
    android:layout_height="fill_parent"
    >
    <LinearLayout
    	android:orientation="horizontal"
    	android:layout_width="fill_parent"
    	android:layout_height="wrap_content"
    	>
		<TextView
			android:layout_width="wrap_content"
    		android:layout_height="wrap_content"
		    android:text="名字:"
		    />
		<TextView
		    android:layout_width="wrap_content"
    		android:layout_height="wrap_content"
		    android:text="张三丰"
		    />
    </LinearLayout>

    <LinearLayout
    	android:orientation="horizontal"
    	android:layout_width="fill_parent"
    	android:layout_height="wrap_content"
    	>
		<TextView
			android:layout_width="wrap_content"
    		android:layout_height="wrap_content"
		    android:text="地址:"
		    />
		<TextView
		    android:layout_width="wrap_content"
    		android:layout_height="wrap_content"
		    android:text="武当山"
		    />
    </LinearLayout>

    <LinearLayout
    	android:orientation="horizontal"
    	android:layout_width="fill_parent"
    	android:layout_height="wrap_content"
    	>
		<TextView
			android:layout_width="wrap_content"
    		android:layout_height="wrap_content"
		    android:text="国家:"
		    />
		<TextView
		    android:layout_width="wrap_content"
    		android:layout_height="wrap_content"
		    android:text="中国"
		    />
    </LinearLayout>
</LinearLayout>
对应Activity代码:
    @Override
    public void onCreate(Bundle savedInstanceState) {
        super.onCreate(savedInstanceState);
        setContentView(R.layout.main);
    }
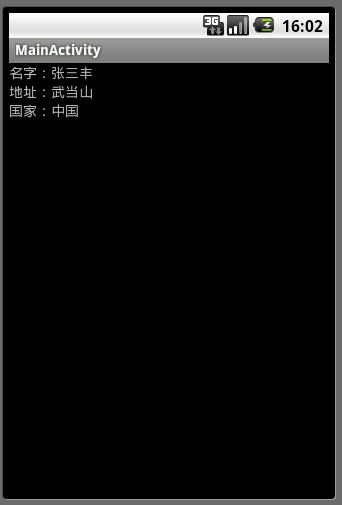
上面完成的效果同用代码创建视图的一样。主容器、名字容器、地址容器和国家容器都是LinearLayout,它有一个属性可以设置方向,在主容器中方向是纵向,而 其他三个则是横向,所以名字标签和名字值在同一行,地址标签和地址值在同一行, 国家标签和国家值也在同一行 。因为主容器是纵向,所以主容器里面的三个子节点名字容器、地址容器、 国家容器 将从上 到下排列所以分层三行。
备注:
xml文件中:
		    android:layout_width="..."
    		android:layout_height="..."
每个View的android:layout_width、android:layout_height必须在xml中进行设置,否则程序将发生异常而终止。
android:layout_width、android:layout_height取值有2种数据:(1)fill_parent(2)wrap_content
(三) 混和使用动态创建和xml布局创建视图
新建布局文件 second.xml
<?xml version="1.0" encoding="utf-8"?>
<LinearLayout xmlns:android="http://schemas.android.com/apk/res/android"
    android:layout_width="fill_parent"
    android:layout_height="fill_parent"
    >
	<TextView
		android:id="@+id/view1"
		android:layout_width="wrap_content"
   		android:layout_height="wrap_content"
	    android:text="原始文本"
	    />
</LinearLayout>
这边我们定义了一个TextView,然后设置的它的大小和里面的内容。注意,这里我们给这个TextView赋了一个ID 值:android:id=”@+id/view1″。这边的”@+id”是值创建一个新的ID值,这时候android平台开发的aapt工具(Android Asset Packaging Tool)就会帮我 们生成一个字段值,让我们可以通过R.id.view1来查找出这个对象。如果是”@id”则表示这个是对ID值的引用,aapt工具不会帮我们生成一个 字段值来获取这个id。
Activity代码:
(代码1)
@Override
    public void onCreate(Bundle savedInstanceState) {
        super.onCreate(savedInstanceState);
        setContentView(R.layout.second);
    }
(代码2)
    @Override
    public void onCreate(Bundle savedInstanceState) {
        super.onCreate(savedInstanceState);
        setContentView(R.layout.second);
        TextView tv = (TextView)findViewById(R.id.view1);
        tv.setText("新的TextView值");
    }
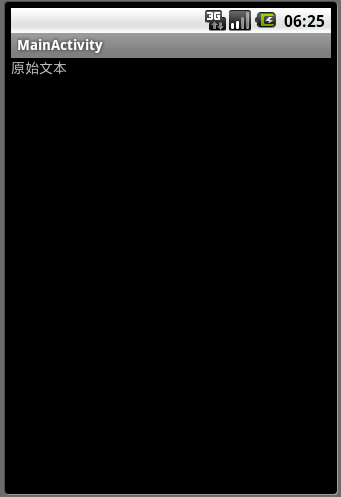
代码2做的工作:先将布局文件second.xml设置到当前的布局中。然后根据id进行查找,查找出在xml布局中声明的TextView对象,然后修改里面的值。最终效果如下图(代码2效果)
执行效果如下:
 |
 |
| 代码1效果 | 代码2效果 |
运行效果是,原来的在xml布局中声明的内容被动态修改掉了。通过以上的代码对比可以发现其实使用xml布局文件的效果更好,因为避免写了一大堆界面代码 嵌套在应用程序逻辑中。当布局复杂时还有很多布局额外的属性要配置如:layout_padding , layout_margin等,如果把这些东西全部写在代码中,那代码将会变得很臃肿,很难维护,所以建议除非要创建的只有简单的几个视图对象否则最好用 xml布局或混合方式。
