jsp+strut2.1使用
jsp+strut2.1使用
前几天写的都是c/c++类的给朋友们
现在给个b/s框架类的给朋友们分享一下,全是为了服务大家
源码+说明文件后面有下载......
我这里用的是myeclipse8.5
File->New->Web Project
1.
输入teststruct
这是一个基本的web项目,目前没有加入任何jar,如果你使用eclipse也是同样
建立一个空的web项目
2.
Myeclipse->Project Capabilities->Add Struts Capabilities
这样strut2所使用的jar,你就引入了
如果你用eclipse,引入你所需要的jar,把下面所有的jar,找到引入的到你的项目中
3.
修改struct.xml
<?xml version="1.0" encoding="UTF-8" ?>
<!DOCTYPE struts PUBLIC "-//Apache Software Foundation//DTD Struts Configuration 2.1//EN" "http://struts.apache.org/dtds/struts-2.1.dtd">
<struts>
<constant name="struts.devMode" value="true" />
<constant name="struts.ui.theme" value="simple" />
<!-- 解决表单换行 -->
<constant name="struts.action.extension" value="action,qvb" />
<!-- 使xxx.action 或是 xxxx.qvb 都是表单 -->
<package name="simple_qvb01" extends="struts-default">
<action name="process" class="com.qvb.first.processjava">
<result>process_jsp.jsp</result>
</action>
</package>
</struts>
保存
我们这里表单的名加入了一个qvb自定义
主表单类,com.qvb.first.processjava我们一会再进行编写
结果映射的process_jsp.jsp我们一会再进行编写
这个struct.xml在生成后应该在classes中
也就是要和你生成的class在一个位置
4.
修改WebRoot中的index.jsp
如果你的标签库引入不正常,这里taglib就会有问题
<%@ page language="java" import="java.util.*" pageEncoding="UTF-8"%>
<%@ taglib uri="/struts-tags" prefix="s" %>
<html>
<head>
<title>Login</title>
</head>
<body>
<s:form action="process.qvb">
<table border='0' width='260' height='100' align='center'>
<tr>
<td>
<s:textfield name="name">用户名: </s:textfield>
</td>
</tr>
<tr>
<td>
<s:password name="pwd">密 码: </s:password>
</td>
</tr>
<tr>
<td>
<s:submit value="登录" />
</td>
</tr>
</table>
</s:form>
</body>
</html>
保存
这里的name pwd 是表单元素的名称,在后面的com.qvb.first.processjava类中要一致
5.
WEB-INF/web.xml
<?xml version="1.0" encoding="UTF-8"?>
<web-app version="2.5"
xmlns="http://java.sun.com/xml/ns/javaee"
xmlns:xsi="http://www.w3.org/2001/XMLSchema-instance"
xsi:schemaLocation="http://java.sun.com/xml/ns/javaee
http://java.sun.com/xml/ns/javaee/web-app_2_5.xsd">
<welcome-file-list>
<welcome-file>index.jsp</welcome-file>
</welcome-file-list>
<filter>
<filter-name>struts2</filter-name>
<filter-class>
org.apache.struts2.dispatcher.ng.filter.StrutsPrepareAndExecuteFilter
</filter-class>
</filter>
<filter-mapping>
<filter-name>struts2</filter-name>
<url-pattern>/*</url-pattern>
</filter-mapping></web-app>
保存
这里使用了struts2的新的过滤
指定了index.jsp的首页
6.
File->New->Package
com.qvb.first
在com.qvb.first包中新建一个类processjava
processjava.java
package com.qvb.first;
import com.opensymphony.xwork2.*;
public class processjava extends ActionSupport{
/**
*
*/
private static final long serialVersionUID = 1L;
private String name;
private String pwd;
public String getName()
{
return this.name;
}
public String getPwd()
{
return this.pwd;
}
public void setName(String name)
{
this.name=name;
}
public void setPwd(String pwd)
{
this.pwd=pwd;
}
public String execute()
{
return SUCCESS;
}
}
保存
这里的name pwd 还有大小写 都要和前面index.jsp对应
7.
表单的结果文件
<%@ page language="java" import="java.util.*" pageEncoding="UTF-8"%>
<%@ taglib uri="/struts-tags" prefix="s" %>
<html>
<head>
<title>Show process_jsp</title>
</head>
<body>
<table border='0' width='200' height='80' align='center'>
<tr>
<td align='center'>
用户名:
</td>
<td align='center'>
<s:property value="name" />
</td>
</tr>
<tr>
<td align='center'>
密 码:
</td>
<td align='center'>
<s:property value="pwd" />
</td>
</tr>
</table>
</body>
</html>
保存
这里process_jsp.jsp是已经返回你processjava这个类处理完成的内容了
注意 property 中的 value
要统一
8.
在项目上点右键
Run As ->Myeclipse Server Application
如果是eclipse自行配置tomcat
这样你输入的用户名与密码最后都要经过processjava的这个类进行处理了
我们这里只是原样输出
9.
打包jar
我们这里打包jar,比较麻烦一点,我们要生成一个jar到lib
这里以Myeclipse Server Tomcat 运行结果打包
如果是eclipse请在tomcat中找
进入命令行中,windows中是运行cmd
Mac OSX 是终端
Linux 也是终端
这里以unix标准来说
cd ~
进入自己的目录,这里主要是找到Workspaces这个目录,
看你在启动myeclipse设定到哪里就进入到哪里
我的是 ~/Workspaces/MyEclipse 8.5/
cd ~/Workspaces/MyEclipse 8.5/
cd .metadata/.me_tcat/webapps
ls (windows)是 dir
这时你就看到你的项目最终在tomcat的部署目录了
cd teststruct/
cd WEB-INF/
cd classes
mkdir tmp (windows)是md
mv com tmp (windows)是move
jar cvf mytest.jar -C tmp .
rm -rf tmp (windows)是del tmp 然后再 rd tmp
mv mytest.jar ../lib/ (windows)是move 注意目录的表示方式..\lib
上面我们这样做的目的是
为了形成一个封闭的jar,注意的是,struts.xml不要删除
完成后,关闭终端
10.
打包war
利用ant打包war
在WebRoot建立一个make.xml
<?xml version="1.0" encoding="UTF-8"?>
<project name="simple1" default="mybuild" basedir=".">
<property name="app.name" value="teststruct"></property>
<property name="app.home" value="."></property>
<property name="usr.home" value="/Users/qvb3d"></property>
<property name="myeclipse.ver" value="MyEclipse 8.5"></property>
<property name="webapps.home" value="${usr.home}/Workspaces/${myeclipse.ver}/.metadata/.me_tcat/webapps"></property>
<target name="mybuild">
<jar jarfile="${app.home}/${app.name}.war" basedir="${webapps.home}/${app.name}">
</jar>
</target>
<target name="clean_all">
<delete file="${app.home}/${app.name}.war"></delete>
</target>
</project>
保存
选中make.xml右键
Run As->Ant Build...
选mybuild
按Run按钮
F5刷新你的项目
这样你就会看到一个teststruct.war
这个文件你以后可以直接部署到tomcat上
11.
手工打包war
cd ~
进入自己的目录,这里主要是找到Workspaces这个目录,
看你在启动myeclipse设定到哪里就进入到哪里
我的是 ~/Workspaces/MyEclipse 8.5/
cd ~/Workspaces/MyEclipse 8.5/
cd .metadata/.me_tcat/webapps
jar cvf teststruct.war -C teststruct .
这样一步就升成teststruct.war
这样你打包后会少一个make.xml,不过没有关系的
都是一样的,make.xml就是为了打包而写的
12.
如何配置tomcat,请参看我别的文章
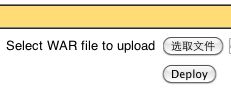
这里我们用tomcat安装一下war测试一下
![]()
Deploy


