LNMP服务架设
|
名称
|
角色
|
|
server
(RHEL5.5)
|
服务器
|
1
、编译安装Nginx
[root@localhost ~]# rpm -ivh/media/RHEL_5.4\ x86_64\ DVD/Server/pcre-devel-6.6-2.el5_1.7. i386.rpm --nodeps--force
(1)安装依赖包pcre-devel、zlib-devel
[root@localhost ~]# mount /dev/cdrom /media/ //挂载光盘
mount: block device /dev/sr0 is write-protected, mounting read-only
[root@localhost ~]# vi /etc/yum.repos.d/rhel-source.repo //编辑YUM文件
[rhel-source]
name=Red Hat Enterprise Linux $releasever - $basearch - Source
baseurl=file:///media/Server
enabled=1
gpgcheck=0
gpgkey=file:///etc/pki/rpm-gpg/RPM-GPG-KEY-redhat-release
[root@localhost ~]# yum -y install pcre-devel zlib-devel //YUM安装依赖包
(2)创建运行用户,组
[root@localhost ~]# useradd -M -u 27 -s /sbin/nologin nginx
(3)编译安装Nginx
[root@localhost ~]# tar zxf nginx-1.0.8.tar.gz
[root@localhost ~]# cd nginx-1.0.8
[root@localhost nginx-1.0.8]# ./configure --prefix=/usr/local/nginx --user=nginx --group=nginx --with-http_stub_status_module ;make ;make install
(4)创建软连接
[root@localhost nginx-1.0.8]# ln -s /usr/local/nginx/sbin/nginx /usr/local/sbin/
[root@localhost nginx-1.0.8]# ll /usr/local/sbin/nginx
lrwxrwxrwx 1 root root 27 4月 18 13:20 /usr/local/sbin/nginx -> /usr/local/nginx/sbin/nginx
2
、Nginx
的运行控制
(1)检查配置文件
/usr/local/nginx/sbin/nginx -t -c /usr/local/nginx/conf/nginx.conf
-t 检测�Cc 指定配置文件
[root@localhost ~]# nginx -t
nginx: the configuration file /usr/local/nginx/conf/nginx.conf syntax is ok
nginx: configuration file /usr/local/nginx/conf/nginx.conf test is successful
(2)启动Nginx
/usr/local/nginx/sbin/nginx -v 显示nginx版本信息
/usr/local/nginx/sbin/nginx 开启nginx
Killall -9 nginx 关闭nginx
[root@localhost ~]# nginx
查看运行状态
[root@localhost ~]# netstat -anpt |grep nginx
tcp 0 0 0.0.0.0:80 0.0.0.0:* LISTEN 9224/nginx: master
使用elink查看是否成功
[root@localhost ~]# elinks
http://localhost
重载、退出nginx
[root@localhost ~]# kill -s HUP nginx
[root@localhost ~]# kill -s QUIT nginx
(3)编写Nginx服务脚本
[root@localhost ~]# vi /etc/init.d/nginx
#!/bin/bash
# chkconfig: - 99 20
# description: xxxxx
PROG="/usr/local/nginx/sbin/nginx"
PIDF="/usr/local/nginx/logs/nginx.pid"
case "$1" in
start)
$PROG
;;
stop)
kill -s QUIT $(cat $PIDF)
;;
restart)
$0 stop
$0 start
;;
reload)
kill -s HUP $(cat $PIDF)
;;
*)
echo "Usage: $0 {start|stop|restart|reload}"
exit 1
esac
exit 0
[root@localhost ~]# chmod +x /etc/init.d/nginx //给予执行权限
[root@localhost ~]# chkconfig --add nginx //添加为系统服务
映射主机名
[root@localhost ~]# vi /etc/hosts
# Do not remove the following line, or various programs
# that require network functionality will fail.
127.0.0.1 localhost.localdomain localhost
::1 localhost6.localdomain6 localhost6
192.168.1.1 www.benet.com www.accp.com
[root@localhost ~]# elinks
http://www.benet.com查看
//
3
、编辑Nginx.conf
配置文件
[root@localhost ~]# vi /usr/local/nginx/conf/nginx.conf
user nobody;
worker_processes 1;
error_log logs/error.log;
pid logs/nginx.pid;
events {
use epoll;
worker_connections 1024;
}
http {
include mime.types;
default_type application/octet-stream;
log_format main '$remote_addr - $remote_user [$time_local] "$req uest" '
'$status $body_bytes_sent "$http_referer" '
'"$http_user_agent" "$http_x_forwarded_for"';
access_log logs/access.log main;
sendfile on;
tcp_nopush on;
#keepalive_timeout 0;
keepalive_timeout 65;
#gzip on;
server {
listen 80;
server_name localhost;
#charset koi8-r;
charset utf-8;
access_log logs/host.access.log main;
location / {
root html;
index index.html index.php;
}
}
}
[root@localhost~]# service nginx reload
基于域名的虚拟web
主机
(1)准备网站目录及测试文件
[root@localhost ~]# mkdir -p /var/www/benet
[root@localhost ~]# echo "<h1>www.benet.com</h1>" > /var/www/benet/index.html
[root@localhost ~]# mkdir -p /var/www/accp
[root@localhost ~]# echo "<h1>www.accp.comf</h1>" > /var/www/accp/index.html
(2)调整nginx.conf 配置文件
http {
include mime.types;
default_type application/octet-stream;
log_format main '$remote_addr - $remote_user [$time_local] "$request" '
'$status $body_bytes_sent "$http_referer" '
'"$http_user_agent" "$http_x_forwarded_for"';
access_log logs/access.log main;
sendfile on;
#tcp_nopush on;
#keepalive_timeout 0;
keepalive_timeout 65;
#gzip on;
server {
listen
80;
server_name
www.benet.com;
#charset koi8-r;
charset utf-8;
access_log logs/host.access.log main;
location / {
root
/var/www/benet;
index index.html index.php;
}
server {
listen
80;
server_name
www.accp.com;
charset utf-8;
access_log logs/accp.access.log main;
location / {
root
/var/www/accp;
index index.html index.php;
Nginx状态访问统计
在server中添加如下行
location ~ /NginxStatus {
stub_status on;
access_log off;
}
}
}
[root@localhost ~]# service nginx restart
[root@localhost ~]# elinks
http://www.benet.com
www.benet.com //看到内容后按e建,在按c,选择yes退出
[root@localhost ~]# elinks
http://www.accp.com
www.accp.com

[root@localhostconf]# elinks http://www.benet.com/NginxStatus通过访问此链接查看nginx的访问量

在xp上访问,要修改C:\WINDOWS\system32\drivers\etc下的host文件,右键此文件属性,将只读勾去,记事本方式打开host文件,添加如下行
192.168.1.1 www.benet.com www.accp.com添加完此行后,在网页中访问
http://www.benet.com即可,否则不能访问 //
1
、安装Mysql
(1)安装Mysql
[root@localhost ~]# tar zxf mysql-5.1.55.tar.gz
[root@localhost ~]# cd mysql-5.1.55
[root@localhost mysql-5.1.55]# ./configure --prefix=/usr/local/mysql/ --with-charset=utf8 --with-collation=utf8_general_ci --with-extra-charsets=gbk,gb2312 ;make ;make install
(2)优化调整
[root@localhost mysql-5.1.55]# cp support-files/my-medium.cnf /etc/my.cnf
[root@localhost mysql-5.1.55]# cp support-files/mysql.server /etc/init.d/mysqld
[root@localhost mysql-5.1.55]# chmod +x /etc/init.d/mysqld
[root@localhost mysql-5.1.55]# chkconfig --add mysqld
[root@localhost mysql-5.1.55]# ln -s /usr/local/mysql/bin/* /usr/local/bin
[root@localhost mysql-5.1.55]# ln -s /usr/local/mysql/lib/mysql/* /usr/lib
[root@localhost mysql-5.1.55]# ln -s /usr/local/mysql/include/mysql/* /usr/include
(3)初始化数据库
[root@localhost mysql-5.1.55]# useradd -M -u 27 -s /sbin/nologin mysql
[root@localhost mysql-5.1.55]# cd /usr/local/mysql/bin/
[root@localhost mysql-5.1.55]# chown -R root.mysql /usr/local/mysql/
[root@localhost mysql-5.1.55]# chown -R mysql /usr/local/mysql/var/
(4)启动Mysql
[root@localhost mysql-5.1.55]# service mysqld start
2
、安装PHP
(1)编译安装PHP
[root@localhost ~]# tar zxf php-5.3.6.tar.gz
[root@localhost ~]# cd php-5.3.6
[root@localhost php-5.3.6]# ./configure --prefix=/usr/local/php5 --with-gd --with-zlib --with-mysql=/usr/local/mysql --with-config-file-path=/usr/local/php5 --enable-mbstring --enable-fpm ;make ;make install
(2)安装后的调整
[root@localhost php-5.3.6]# cp php.ini-development /usr/local/php5/php.ini
[root@localhost php-5.3.6]# ln -s /usr/local/php5/bin/* /usr/local/bin/
[root@localhost php-5.3.6]# ln -s /usr/local/php5/sbin/* /usr/local/sbin/
(3)安装ZendGuardLoader
[root@localhost ~]# tar zxf ZendGuardLoader-php-5.3-linux-glibc23-i386.tar.gz
[root@localhost ~]# cd ZendGuardLoader-php-5.3-linux-glibc23-i386
[root@localhost ZendGuardLoader-php-5.3-linux-glibc23-i386]# ls
php-5.3.x README.txt
[root@localhost ZendGuardLoader-php-5.3-linux-glibc23-i386]# cd php-5.3.x/
[root@localhost php-5.3.x]# cp ZendGuardLoader.so /usr/local/php5/lib/php/
[root@localhost php-5.3.x]# vi /usr/local/php5/php.ini
zend_extension=/usr/local/php5/lib/php/ZendGuardLoader.so
zend_loader.enable=1
3
、配置Nginx
支持php
环境
(1)启动php-fpm进程
[root@localhost ~]# cd /usr/local/php5/etc/
[root@localhost etc]# cp php-fpm.conf.default php-fpm.conf
[root@localhost etc]# vi php-fpm.conf
pid = run/php-fpm.pid
user = nginx
group = nginx
pm.start_servers = 20
pm.min_spare_servers = 5
pm.max_spare_servers = 35
(2)编辑/etc/init.d/nginx,以便在启动/停止Nginx服务时将php-fpm进程也自动启动/停止
[root@localhost etc]# vi /etc/init.d/nginx
#!/bin/bash
# chkconfig: - 99 20
# description: xxxxx
PROG="/usr/local/nginx/sbin/nginx"
PIDF="/usr/local/nginx/logs/nginx.pid"
PROG_FPM="/usr/local/sbin/php-fpm"
PIDF_FPM="/usr/local/php5/var/run/php-fpm.pid"
case "$1" in
start)
$PROG
$PROG_FPM
;;
stop)
kill -s QUIT $(cat $PIDF)
kill -s QUIT $(cat $PIDF_FPM)
;;
restart)
$0 stop
$0 start
;;
reload)
kill -s HUP $(cat $PIDF)
;;
*)
echo "Usage: $0 {start|stop|restart|reload}"
exit 1
esac
exit 0
(2)配置Nginx支持PHP解析,使用第二种方法
[root@localhost etc]# vi /usr/local/nginx/conf/nginx.conf
server {
listen 80;
server_name www.benet.com;
charset utf-8;
access_log logs/host.access.log main;
location / {
root /var/www/benet;
index index.html index.php;
}
location ~ \.php$ {
root /var/www/benet;
fastcgi_pass 127.0.0.1:9000;
fastcgi_index index.php;
include fastcgi.conf;
}
}
server {
listen 80;
server_name www.accp.com;
charset utf-8;
access_log logs/host.access.log main;
location / {
root /var/www/accp;
index index.html index.php;
}
location ~ \.php$ {
root /var/www/accp;
fastcgi_pass 127.0.0.1:9000;
fastcgi_index index.php;
include fastcgi.conf;
}
location ~ /status {
stub_status on;
access_log off;
}
error_page 500 502 503 504 /50x.html;
location = /50x.html {
root html;
}
}
}
(3)php页面测试
[root@localhostbenet]# vim 1.php
<?php
phpinfo();
?>

[root@localhost etc]# vi /var/www/benet/test.php
<?php
$link=mysql_connect('localhost','root','');
if($link) echo "<h1>succell!!</h1>";
mysql_close();
?>

在LEMP平台中部署WEB应用
(1)下载并部署程序代码
[root@localhost ~]# tar zxf SKYUC_3.2.2_Free_For_PHP5.3.tar.bz2
[root@localhost ~]# mv SKYUC_3.2.2_Free_For_PHP5.3/wwwroot /var/www/benet/skyuc/
[root@localhost ~]# cd /var/www/benet/skyuc/
[root@localhost skyuc]# chown -R nginx.nginx admincp/ data/ templates/ upload/
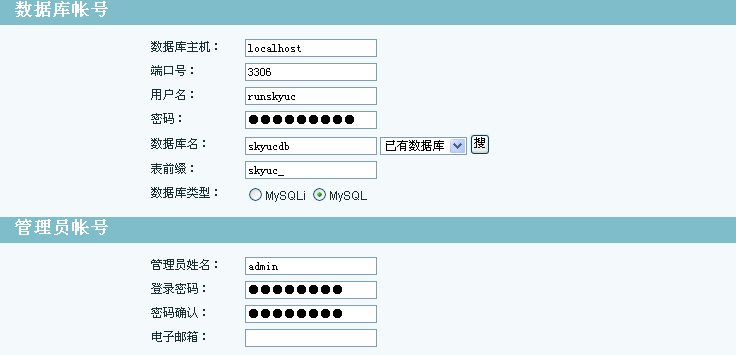
(2)创建数据库
[root@localhost ~]# mysql
Welcome to the MySQL monitor. Commands end with ; or \g.
Your MySQL connection id is 29
Server version: 5.1.55-log Source distribution
Copyright (c) 2000, 2010, Oracle and/or its affiliates. All rights reserved.
This software comes with ABSOLUTELY NO WARRANTY. This is free software,
and you are welcome to modify and redistribute it under the GPL v2 license
Type 'help;' or '\h' for help. Type '\c' to clear the current input statement.
mysql> create database skyucdb;
mysql> grant all on skyucdb.* to runskyuc@localhost identified by '123';
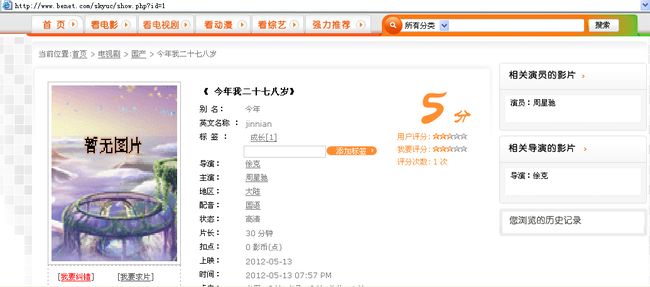
3、安装web应用
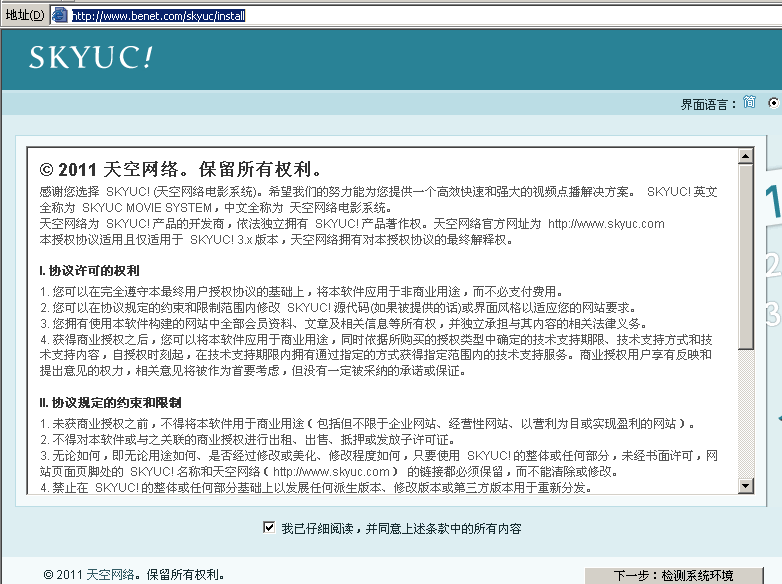
前往后天管理


登陆后天出现警告,需移除install文件
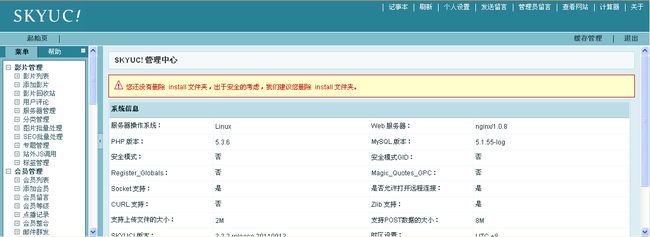
[root@localhost skyuc]# mv install/ install.bak
[root@localhost skyuc]# chmod 600 install.bak/
在/var/www/benet/skyuc下创建目录dianying,将要看的电影拷贝到此目录下(.rmvb后缀的电影)
[root@localhost skyuc]# mkdir dianying
[root@localhost skyuc]# mv /root/今年我二十七八岁.rmvb dianying/
[root@localhost skyuc]# cd dianying/
[root@localhost dianying]# ls
今年我二十七八岁.rmvb
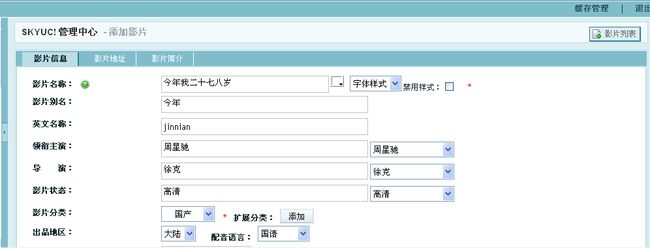
![]() 添加内容,最后点击确定即可
添加内容,最后点击确定即可
![]() 点击编辑
点击编辑

点击影片地址,添加之后确认
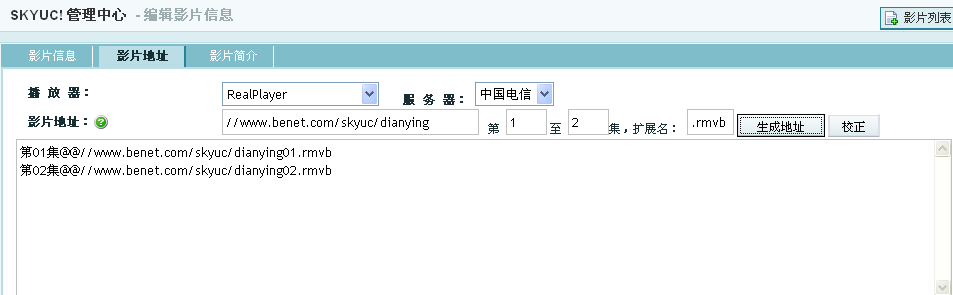
为了让电影地下的路径和校正的路径一样,做如下操作
[root@localhost dianying]# mv 今年我二十七八岁.rmvb 01.rmvb
[root@localhost dianying]# ls
01.rmvb
退出,返回首页,去前台