生产环境实用之LEMP架构的编译安装+SSL加密实现
LNMP是Linux下Nginx、MySQL、PHP网站服务器架构,在之前的博文中也有对LAMP架构的实现,我们主要介绍一下Nginx
为什么使用Nginx
Nginx是一个小巧而高效的Linux下的Web服务器软件,是由 Igor Sysoev 为俄罗斯访问量第二的 Rambler.ru 站点开发的,已经在一些俄罗斯的大型网站上运行多年,相当的稳定
Nginx是解决C10K问题的服务器之一。不同于传统的服务器,Nginx的不依赖于线程处理请求。相反,它使用一个更可扩展的事件驱动(event-driven)(异步)架构
Nginx的服务器特性
基本的服务器特性
处理静态文件,索引文件以及自动索引;打开文件描述符缓存;
使用缓存加速反向代理;简单负载均衡以及容错;
远程FastCGI,uwsgi,SCGI,和memcached服务的缓存加速支持;简单的负载均衡以及容错;
模块化的架构。过滤器包括gzip压缩、ranges支持、chunked响应、XSLT,SSI以及图像缩放。在SSI 过滤器中,一个包含多个SSI的页面,如果经由FastCGI或反向代理处理,可被并行处理;
支持SSL,TLS SNI。
基于名字和IP的虚拟主机;
Keep-alive和pipelined连接支持;
灵活的配置;
重新加载配置以及在线升级时,不需要中断正在处理的请求;
自定义访问日志格式,带缓存的日志写操作以及快速日志轮转;
3xx-5xx错误代码重定向;
重写(rewrite)模块:使用正则表达式改变URI;
根据客户端地址执行不同的功能;
基于客户端IP地址和HTTP基本认证机制的访问控制;
支持验证HTTP referer;
支持PUT、DELETE、MKCOL、COPY以及MOVE方法;
支持FLV流和MP4流;
速度限制;
来自同一地址的同时连接数或请求数限制;
嵌入Perl语言。
邮件代理服务器特性
使用外部HTTP认证服务器重定向用户到IMAP/POP3后端;
使用外部HTTP认证服务器认证用户后重定向连接到内部SMTP后端;
支持的认证方式:
POP3: USER/PASS, APOP, AUTH LOGIN/PLAIN/CRAM-MD5;
IMAP: LOGIN, AUTH LOGIN/PLAIN/CRAM-MD5;
SMTP: AUTH LOGIN/PLAIN/CRAM-MD5;
SSL支持;
STARTTLS和STLS支持。
LNMP架构优势
作为 Web 服务器:相比 Apache,Nginx 使用更少的资源,支持更多的并发连接,体现更高的效率
作为负载均衡服务器:Nginx 既可以在内部直接支持 Rails 和 PHP,也可以支持作为 HTTP代理服务器 对外进行服务。Nginx 用 C 编写, 不论是系统资源开销还是 CPU 使用效率都比 Perlbal 要好的多。
作为邮件代理服务器: Nginx 同时也是一个非常优秀的邮件代理服务器(最早开发这个产品的目的之一也是作为邮件代理服务器),Last.fm 描述了成功并且美妙的使用经验
LEMP编译安装实现
编译安装Nginx
创建nginx用户与组
# groupadd �Cr �Cg 108 naginx
#useradd �Cr �Cg 108 nginx
编译过程
# tar xf nginx-1.4.1.tar.gz
# cd nginx-1.4.1
# ./configure \
 --prefix=/usr \
 --sbin-path=/usr/sbin/nginx \
 --conf-path=/etc/nginx/nginx.conf \
 --error-log-path=/var/log/nginx/error.log \
 --http-log-path=/var/log/nginx/access.log \
 --pid-path=/var/run/nginx/nginx.pid \
 --lock-path=/var/lock/nginx.lock \
 --user=nginx \
 --group=nginx \
 --with-http_ssl_module \
 --with-http_flv_module \
 --with-http_stub_status_module \
 --with-http_gzip_static_module \
 --http-client-body-temp-path=/var/tmp/nginx/client/ \
 --http-proxy-temp-path=/var/tmp/nginx/proxy/ \
 --http-fastcgi-temp-path=/var/tmp/nginx/fcgi/ \
 --http-uwsgi-temp-path=/var/tmp/nginx/uwsgi \
 --http-scgi-temp-path=/var/tmp/nginx/scgi \
 --with-pcre
准备服务脚本
# vim /etc/init.d/nginx
#!/bin/sh
#
# nginx - this script starts and stops thenginx daemon
#
# chkconfig:   - 85 15
# description:  Nginx is an HTTP(S) server, HTTP(S) reverse \
#               proxy and IMAP/POP3 proxy server
# processname: nginx
# config:      /etc/nginx/nginx.conf
# config:      /etc/sysconfig/nginx
# pidfile:     /var/run/nginx.pid
# Source function library.
. /etc/rc.d/init.d/functions
# Source networking configuration.
. /etc/sysconfig/network
# Check that networking is up.
[ "$NETWORKING" = "no" ] && exit 0
nginx="/usr/sbin/nginx"
prog=$(basename $nginx)
NGINX_CONF_FILE="/etc/nginx/nginx.conf"
[ -f /etc/sysconfig/nginx ] && ./etc/sysconfig/nginx
lockfile=/var/lock/subsys/nginx
make_dirs() {
   #make required directories
  user=`nginx -V 2>&1 | grep "configure arguments:" | sed 's/[^*]*--user=\([^ ]*\).*/\1/g' -`
  options=`$nginx -V 2>&1 | grep 'configure arguments:'`
  for opt in $options; do
      if [ `echo $opt | grep '.*-temp-path'` ]; then
          value=`echo $opt | cut -d "=" -f 2`
          if [ ! -d "$value" ]; then
               # echo "creating"$value
               mkdir -p $value && chown-R $user $value
          fi
      fi
  done
}
start() {
    [ -x $nginx ] || exit 5
    [ -f $NGINX_CONF_FILE ] || exit 6
   make_dirs
   echo -n $"Starting $prog: "
   daemon $nginx -c $NGINX_CONF_FILE
   retval=$?
   echo
    [ $retval -eq 0 ] && touch $lockfile
   return $retval
}
stop() {
   echo -n $"Stopping $prog: "
   killproc $prog -QUIT
   retval=$?
   echo
    [ $retval -eq 0 ] && rm -f $lockfile
   return $retval
}
restart() {
   configtest || return $?
   stop
   sleep 1
   start
}
reload() {
   configtest || return $?
   echo -n $"Reloading $prog: "
   killproc $nginx -HUP
   RETVAL=$?
   echo
}
force_reload() {
   restart
}
configtest() {
 $nginx -t -c $NGINX_CONF_FILE
}
rh_status() {
   status $prog
}
rh_status_q() {
   rh_status >/dev/null 2>&1
}
case "$1" in
   start)
       rh_status_q && exit 0
       $1
       ;;
   stop)
       rh_status_q || exit 0
       $1
       ;;
   restart|configtest)
       $1
       ;;
   reload)
       rh_status_q || exit 7
       $1
       ;;
   force-reload)
        force_reload
       ;;
   status)
       rh_status
       ;;
   condrestart|try-restart)
       rh_status_q || exit 0
           ;;
   *)
       echo $"Usage: $0{start|stop|status|restart|condrestart|try-restart|reload|force-reload|configtest}"
       exit 2
esac
添加到服务控制列表
# chmod +x /etc/init.d/nginx
# chkconfig --add nginx
# chkconfig nginx on
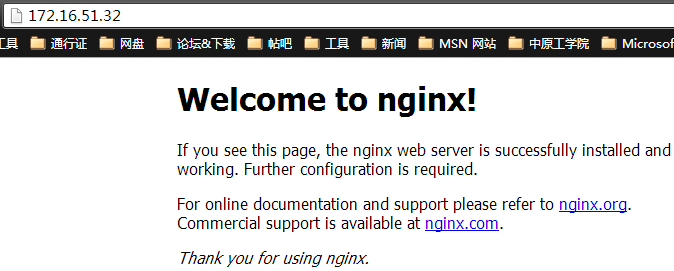
启动nginx,进行测试

Mysql的准备
创建mysql用户
# groupadd -g 3306 mysql
# useradd -g 3306 -u 3306 mysql
创建数据目录
# mkdir /mydata/data -pv
# cd /mydata/
# chown mysql.mysql data �CR
解压二进制包
# tar xf mysql-5.6.10-linux-glibc2.5-i686.tar.gz -C /usr/local
# cd /usr/local/
# ln -sv mysql-5.6.10-linux-glibc2.5-x86_64mysql
# chown .mysql * -R
初始化mysql
# scripts/mysql_install_db --user=mysql--datadir=/mydata/data
准备服务脚本
# cp support-files/mysql.server/etc/init.d/mysqld
# chkconfig --add mysqld
初始化后会自动在当前目录下创建一个my.cnf配置文件,直接修改就可以
修改配置文件my.cnf添加必要内容
log-bin=master-bin.log
port=3306
datadir=/mydata/data
socket=/tmp/mysql.sock
启动mysql5.6

为了使用mysql的安装符合系统使用规范,并将其开发组件导出给系统使用
输出mysql的man手册至man命令的查找路径
编辑/etc/man.config,添加如下行即可:
MANPATH  /usr/local/mysql/man
输出mysql的头文件至系统头文件路径/usr/include
以创建链接实现
# ln -sv/usr/local/mysql/include /usr/include/mysql
输出mysql的库文件给系统库查找路径
# echo'/usr/local/mysql/lib' > /etc/ld.so.conf.d/mysql.conf
让系统重新载入系统库
# ldconfig
修改PATH环境变量,让系统可以直接使用mysql的相关命令。具体实现过程这里不再给出。
# vim /etc/profile.d/mysql.d     ---添加内容如下
export PATH=$PATH:/usr/local/mysql/bin
# . /etc/profile.d/mysql.d
编译安装PHP
与在LAMP编译安装时相同安装libmcrypt与mhash(这里下载这些包到/root/soft下了)
#yum --nogpgcheck localinstall -y libmcrypt-2.5.7-5.el5.i386.rpm libmcrypt-devel-2.5.7-5.el5.i386.rpm mhash-0.9.2-6.el5.i386.rpm mhash-devel-0.9.2-6.el5.i386.rpm
安装一下编译所依赖的组件包
libcurl-devel.i686
bzip2-devel.i686
openssl-devel.i686
libxml2-devel.i686
开始编译安装
# tar xf php-5.4.13.tar.bz2^C
# cd php-5.4.13
./configure
--prefix=/usr/local/php
--with-mysql=/usr/local/mysql
--with-openssl --enable-fpm
--enable-sockets --enable-sysvshm
--with-mysqli=/usr/local/mysql/bin/mysql_config
--enable-mbstring --with-freetype-dir --with-jpeg-dir
--with-png-dir --with-zlib-dir --with-libxml-dir=/usr
--enable-xml  --with-mhash --with-mcrypt  --with-config-file-path=/etc
--with-config-file-scan-dir=/etc/php.d --with-bz2 --with-curl
# make
# make install
准备PHP的配置文件
# cd php-5.4.8
# cp php.ini-production /etc/php.ini
为php-fpm提供Sysv init脚本,并将其添加至服务列表
# cd php-5.4.8
# cp sapi/fpm/init.d.php-fpm  /etc/rc.d/init.d/php-fpm
# cp sapi/fpm/init.d.php-fpm/etc/init.d/php-fpm
# chmod +x /etc/init.d/php-fpm
# chkconfig --add php-fpm
# chkconfig php-fpm on
准备php_fpm的配置文件
# cp php.ini-production /etc/php.ini
# cd /usr/local/php/etc/
# cp php-fpm.conf.default php-fpm.conf
# vim php-fpm.conf
修改php-fpm.conf配置文件内容
pm.max_children =50
pm.start_servers = 5
pm.min_spare_servers = 2
pm.max_spare_servers = 8
pid = /usr/local/php/var/run/php-fpm.pid
启动php-fpm

编辑nginx配置文件,整合nginx与php
说明:nginx默认页面路径已经更改为了/web/bbs;
location ~ \.php$ {
           root           /web/bbs;
           fastcgi_pass   127.0.0.1:9000;
           fastcgi_index  index.php;
           fastcgi_param SCRIPT_FILENAME /scripts$fastcgi_script_name;
           include        fastcgi_params;
}
添加默认默认页面
index index.php index.htmlindex.htm;
编辑fastcgi_params文件
# vim /etc/nginx/fastcgi_params    --把原有内容更改如下
fastcgi_param  GATEWAY_INTERFACE  CGI/1.1;
fastcgi_param  SERVER_SOFTWARE    nginx;
fastcgi_param  QUERY_STRING       $query_string;
fastcgi_param  REQUEST_METHOD     $request_method;
fastcgi_param  CONTENT_TYPE       $content_type;
fastcgi_param  CONTENT_LENGTH     $content_length;
fastcgi_param  SCRIPT_FILENAME    $document_root$fastcgi_script_name;
fastcgi_param  SCRIPT_NAME        $fastcgi_script_name;
fastcgi_param  REQUEST_URI        $request_uri;
fastcgi_param  DOCUMENT_URI       $document_uri;
fastcgi_param  DOCUMENT_ROOT      $document_root;
fastcgi_param  SERVER_PROTOCOL    $server_protocol;
fastcgi_param  REMOTE_ADDR        $remote_addr;
fastcgi_param  REMOTE_PORT        $remote_port;
fastcgi_param  SERVER_ADDR        $server_addr;
fastcgi_param  SERVER_PORT        $server_port;
fastcgi_param  SERVER_NAME        $server_name;
更改index.php页面内容
# vim /web/bbs/beifen/index.php
内容为(显示php信息):
<?php
phpinfo();
?>
重新启动nginx

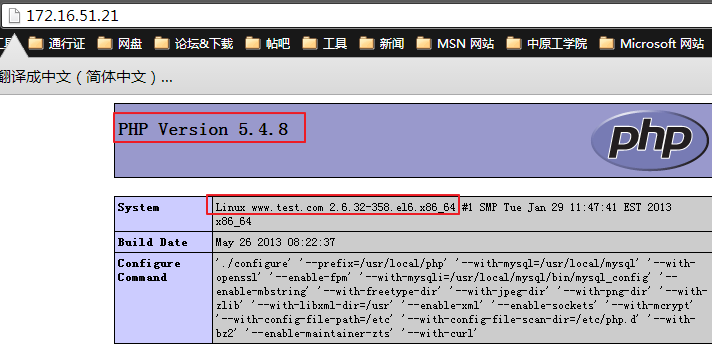
验证Nginx是否与PHP整合

添加加速器xcache
# tar xf xcache-3.0.1.tar.bz2
# cd xcache-3.0.1
# /usr/local/php/bin/phpize

编译安装
# ./configure
 --enable-xcache
--with-php-config=/usr/local/php/bin/php-config
# make && make install
安装完成时,会显示图中所示路径

编辑php.ini,整合php和xcache
# mkdir /etc/php.d
# cp xcache.ini /etc/php.d/
# vim /etc/php.d/xcache.ini
更改内容为
extension = /usr/local/php/lib/php/extensions/no-debug-zts-20100525/xcache.so
配置SSL实现加密连接
CA端生成密钥,完成自签署
# (umask 077; openssl genrsa 2048 > private/cakey.pem)
# openssl req -new -x509 -keyprivate/cakey.pem -out cacert.pem
# echo 01 > serial
#touch index.txt
服务器端生成密钥,生成证书请求
# mkdir /etc/nginx/ssl -pv
# cd /etc/nginx/ssl/
# (umask 077; openssl genrsa2048 > nginx.key)
# openssl req -new -keynginx.key -out nginx.csr
ca签署证书
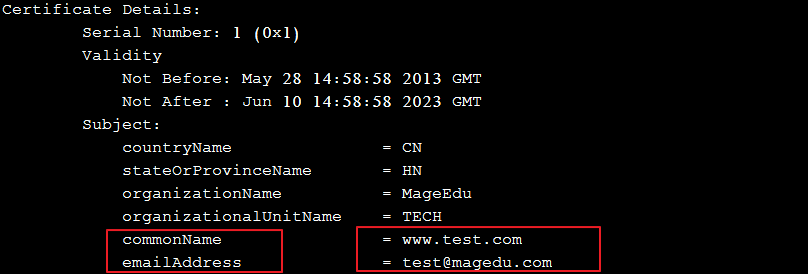
# openssl ca -in nginx.csr-out nginx.crt -days 3665

修改nginx配置文件
   #HTTPS server
   #
   server {
       listen       443;
       server_name  www.test.com;
       ssl                  on;
       ssl_certificate    /etc/nginx/ssl/nginx.crt;
       ssl_certificate_key /etc/nginx/ssl/nginx.key;
       ssl_session_timeout  5m;
       ssl_protocols  SSLv2 SSLv3 TLSv1;
       ssl_ciphers  HIGH:!aNULL:!MD5;
       ssl_prefer_server_ciphers   on;
       location ~ \.php$ {
           root           /web/bbs;
           fastcgi_pass   127.0.0.1:9000;
           fastcgi_index  index.php;
           fastcgi_param SCRIPT_FILENAME /scripts$fastcgi_script_name;
           include        fastcgi_params;
       }
       location / {
           root   /web/bbs;
           index  index.php index.htmlindex.htm;
    }
}
重新启动php-fpm
# service php-fpm restart

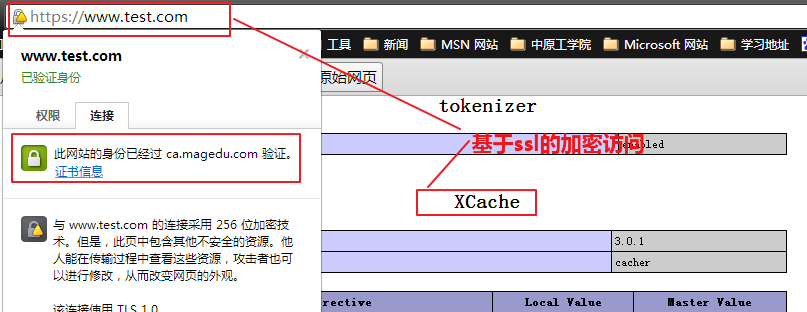
验证xcache是否成功添加以及是否可以完成ss加密连

好了,现在LNMP的编译安装就完成了并且实现了基于ssl的连接,大家不妨也试一下