需求:
1、将原有的74G容量hdisk0(rootvg盘)用300G的盘替代;
2、调整文件系统大小;
此方法适用于更换AIX的本地系统硬盘,但不想重装系统的情况。
实施步骤:
1、插入新硬盘,系统进行扫描
#cfgmgr -v
2、激活硬盘
#chdev -l hdisk37 -a pv=yes
-a参数表示更改设备属性
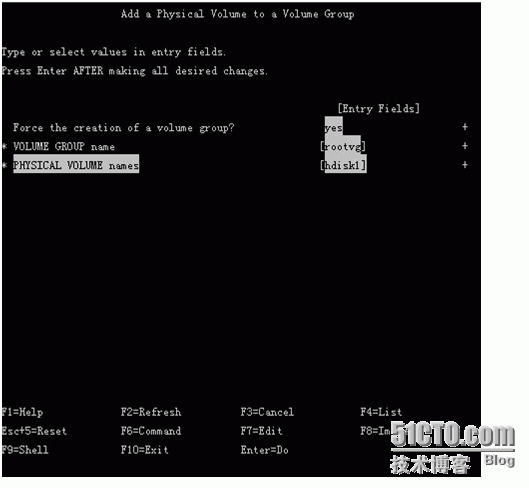
3、加入rootvg
#smit extendvg

期间有支持pp数不足的报错,lsvg查看

原MAX PPS PER PV支持数为1016,使用
#chvg -t 3 rootvg
基数为1016,参数3为基数的三倍。
再次添加,成功。
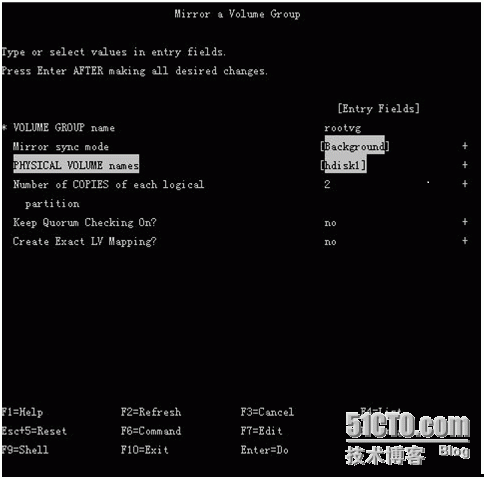
4、做成mirror
#smit mirrorvg

注意:使用smit mirror操作可以使用lsvg -l rootvg来查看逻辑卷的同步情况,而是用syncvg命令来操作,则会锁定vg,无法查看。
5、添加启动信息
#bosboot -ad /dev/hdisk37
6、加入启动项,并查看启动列表
#bootlist �Cm normal hdisk0 hdisk37
#bootlist �Cm normal �Co
下面是去mirror并删除hdisk0的操作;
1、除去mirror
# unmirrorvg rootvg hdisk0
0516-1246 rmlvcopy: If hd5 is the boot logical volume, please run 'chpv -c <diskname>'
as root user to clear the boot record and avoid a potential boot
off an old boot image that may reside on the disk from which this
logical volume is moved/removed.
0516-1804 chvg: The quorum change takes effect immediately.
0516-1144 unmirrorvg: rootvg successfully unmirrored, user should perform
bosboot of system to reinitialize boot records. Then, user must modify
bootlist to just include: hdisk37.
2、清除hdisk0上的数据
# chpv -c hdisk0
3、更改启动项,将hdisk0踢出启动项
查看启动项
# bootlist -m normal -o
hdisk37 blv=hd5 pathid=0
hdisk0 pathid=0
设置启动项
# bootlist -m normal hdisk37
# bootlist -m normal -o
hdisk37 blv=hd5 pathid=0
4、踢出rootvg
# reducevg rootvg hdisk0
报错显示踢出失败:
0516-016 ldeletepv: Cannot delete physical volume with allocated
partitions. Use either migratepv to move the partitions or
reducevg with the -d option to delete the partitions.
0516-884 reducevg: Unable to remove physical volume hdisk0.
# lsvg -p rootvg
rootvg:
PV_NAME PV STATE TOTAL PPs FREE PPs FREE DISTRIBUTION
hdisk0 active 546 538 110..101..109..109..109
hdisk37 active 2235 1703 446..262..101..447..447
查看有lg_dumplv无法删除:
# lspv -l hdisk0
hdisk0:
LV NAME LPs PPs DISTRIBUTION MOUNT POINT
lg_dumplv 8 8 00..08..00..00..00 N/A
采取迁移lv的方式:
# migratepv -l lg_dumplv hdisk0 hdisk37
# lspv -l hdisk0
迁移成功,再次踢出
# reducevg rootvg hdisk0
小贴士:有时候我们会想要更改系统识别到的hdisk号,可以使用
rendev命令
把hdisk37改成hdisk0
#rendev -l hdisk37 -n hdisk0
更改文件系统:
#smit fs


