PHP加速
PHP加速
实验环境:
CentOS6.4 32位系统
VMware workstation 10
php-5.4.24.tar.bz2
zendopcache-7.0.2.tgz
php和per以及ptyon,rubby,等都属于脚本类的语言,执行时都要进行翻译,叫做opcode(操作码
,字节码),但是,可想而知,对网站页面来说这是一项非常大的工作量,所以我们可以将那些翻译
过的opcode存入缓存当中,以提高网站的运行速度
opcode是计算机指令中的一部分,用于指定要执行的操作, 指令的格式和规范由处理器的指令规范
指定。 除了指令本身以外通常还有指令所需要的操作数,可能有的指令不需要显式的操作数。 这些
操作数可能是寄存器中的值,堆栈中的值,某块内存的值或者IO端口中的值等等。
通常opcode还有另一种称谓:字节码(byte codes)。 例如Java虚拟机(JVM),.NET的通用中间语言
(CIL: Common Intermeditate Language)等等。
PHP中的opcode则属于前面介绍中的后着,PHP是构建在Zend虚拟机(Zend VM)之上的。PHP的opcode
就是Zend虚拟机中的指令
运行一段PHP代码主要有两个阶段:编译和执行。 当然编译过程中还包括词法分析语法分析不同阶段
和细节,这里我们将其作为一个整体。在这两个阶段之间,PHP代码会被编译成op code,可以将其认
为是引擎的一个中间语言,编辑阶段把PHP源码生成op code,然后在执行阶段执行这些op code。
下面我们就来以实例说一下zend_opcache如何与php5.4版本的结合,因为在5.5以后的时代php自带的有一套自己opcache,可以在源代码的配置编译中自带--enable-opcache来实现加速,所以,我们这样做的目的也是为了帮助低版本php的性能提升。
<一>(php5.4+zendopcache)
主要的操作步骤如下:
安装php5.4,(源代码)并编译配置,
[root@localhost src]# tar -jxvf php-5.4.24.tar.bz2 -C /usr/local/src

[root@localhost php-5.4.24]# ./configure --prefix=/usr/local/php --with-
apxs2=/usr/local/apache/bin/apxs --with-mysql=/usr/local/mysql --with-
mysqli=/usr/local/mysql/bin/mysql_config --enable-mbstring=all

[root@localhost ~]#make && make install

之后我们可以去目录下确认一下编译安装及目录情况

[root@localhost ~]# cd /usr/local/apache/htdocs/
然后我们编写一个小的调用php数据的页面
[root@localhost htdocs]# vim index.php
内容如下:

然后修改Apache配置文件让他能解析.php文件,修改后如下:

解压zendopcache-7.0.2.tgz 文件,如果你想了解详细的安装步骤及解释可以参考README文件

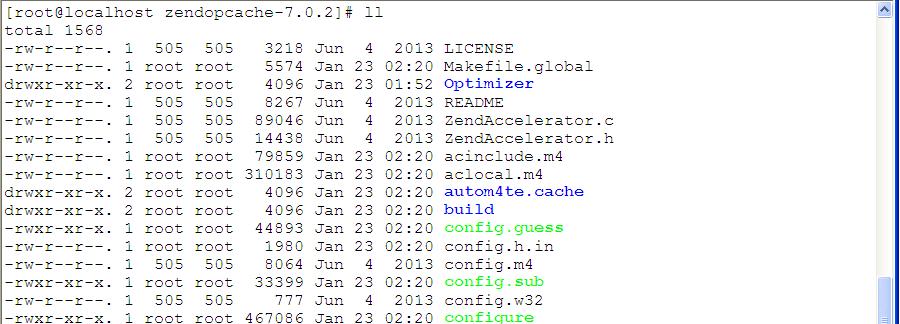
在进入该页面后,你会发现它并没有一般所有源码软件都应该具有的./configure命令(绿色可执行文件),这是因为zendopcache是作为一款支持软件出现的,它要做的是利用php的phpize扩展命令来实现的
[root@localhost zendopcache-7.0.2]# /usr/local/php/bin/phpize
Configuring for:
PHP Api Version: 20100412
Zend Module Api No: 20100525
Zend Extension Api No: 220100525
执行后结果,就有了我们需要的./confugure,如图
然后,执行正常的编译步骤:

并且安装:
[root@localhost zendopcache-7.0.2]# make && make install
结果会提示我们新安装了这么一个共享文件:

在make install这步中,将复制opcache.so进PHP extension 目录中,而我们就要在这个目录中用
他,上面的信息告诉我们在那样一个目录下有,查看到这个文件后,接着我们就要对他进行编辑,
然后利用php5.4的支持文件(软件支持的扩展)编写一个支持zendopcache-7.0.2的配置文件

在这个文件中我们可以看到在dba的选项中并没有有关opcache字段,所以,我们要手动加进去,如图

主要是一些配置参数及路径地址和一些控制语句

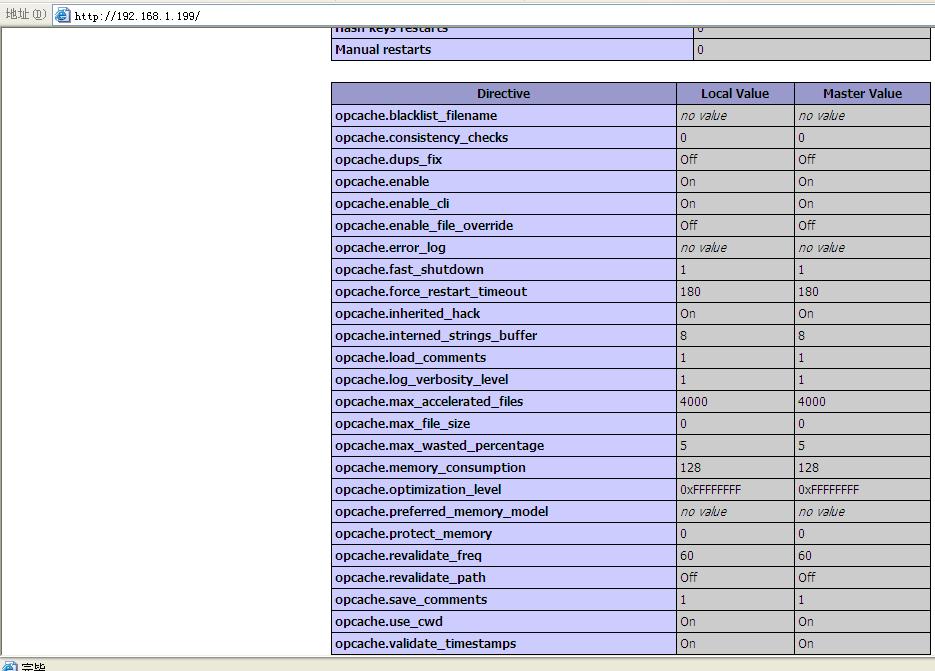
重启我们的服务,可以先用浏览器测试我们的文件是否配置正确,正确的话会在页面信息中反馈出来。如图:
然后我们简单建立一个站点,并用它进行测试


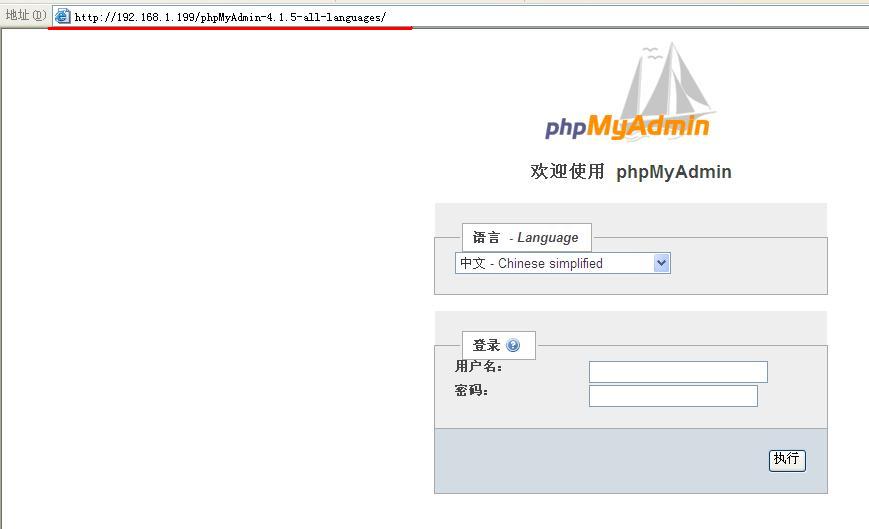
访问测试,并登录这个网站
接着我们利用专业的测试工具进行测试,如ab,httpd_loader,其中ab为Apache自带的压力测试工具,我们就以他为例,你也可以用其它的进行测试
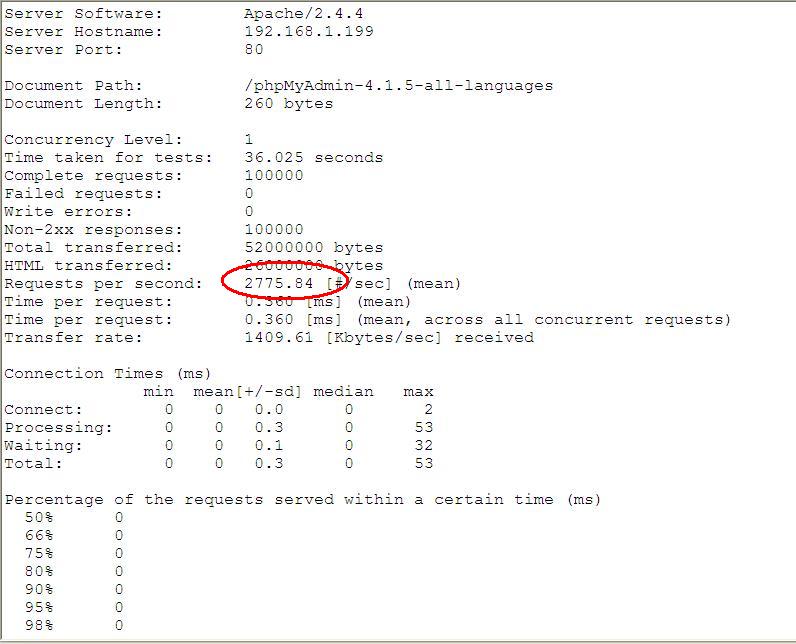
然后我们关闭掉opcache功能,并比较两者之间的差异(因为我们的网站比较小,所以效果不会和正常测试那么悬殊,但效果依然很明显)

[root@localhost htdocs]# cd /usr/local/apache/bin/
[root@localhost bin]# ./ab -n 100000 http://192.168.1.199/phpMyAdmin-4.1.5-all-
languages
其中 -n表示一共的执行次数,-c表示每次的执行次数
[root@localhost bin]# ./ab -n 100000 http://192.168.1.199/phpMyAdmin-4.1.5-all-
languages
This is ApacheBench, Version 2.3 <$Revision: 1430300 $>
Copyright 1996 Adam Twiss, Zeus Technology Ltd, http://www.zeustech.net/
Licensed to The Apache Software Foundation, http://www.apache.org/
Benchmarking 192.168.1.199 (be patient)
Completed 10000 requests
Completed 20000 requests
Completed 30000 requests
Completed 40000 requests
Completed 50000 requests
Completed 60000 requests
Completed 70000 requests
Completed 80000 requests
Completed 90000 requests
Completed 100000 requests
Finished 100000 requests
Server Software: Apache/2.4.4
Server Hostname: 192.168.1.199
Server Port: 80
Document Path: /phpMyAdmin-4.1.5-all-languages
Document Length: 260 bytes
Concurrency Level: 1
Time taken for tests: 34.785 seconds
Complete requests: 100000
Failed requests: 0
Write errors: 0
Non-2xx responses: 100000
Total transferred: 52000000 bytes
HTML transferred: 26000000 bytes
Requests per second: 2874.76 [#/sec] (mean)
Time per request: 0.348 [ms] (mean)
Time per request: 0.348 [ms] (mean, across all concurrent requests)
Transfer rate: 1459.84 [Kbytes/sec] received
Connection Times (ms)
min mean[+/-sd] median max
Connect: 0 0 0.0 0 1
Processing: 0 0 1.0 0 307
Waiting: 0 0 0.0 0 0
Total: 0 0 1.0 0 307
Percentage of the requests served within a certain time (ms)
50% 0
66% 0
75% 0
80% 0
90% 0
95% 0
98% 0
99% 0
100% 307 (longest request)
<二> xcache加速器的安装与使用

和zend_opcache类似,它也要用到php的ize功能,(使用phpize(模块扩展)),增加./configure文件)如图
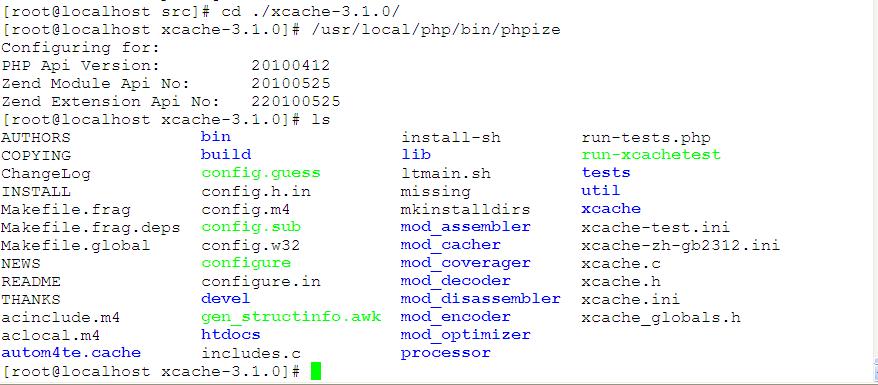
[root@localhost xcache-3.1.0]# ./configure --enable-xcache --with-php-
config=/usr/local/php/bin/php-config
[root@localhost xcache-3.1.0]# make && make install
会看到算上上一步我们的执行结果,在文件路径下,因该会看到如下结果

因为这个时候已经有了php.ini这样的配置文件,所以我们只需要将新的配置文件追加进去就可以了
并用exstension= 加入具体地址,如图:

[root@localhost no-debug-zts-20100525]# cat /usr/local/src/xcache-3.1.0/xcache.ini
>> /usr/local/php/lib/php.ini
[root@localhost no-debug-zts-20100525]# vim /usr/local/php/lib/php.ini
[root@localhost no-debug-zts-20100525]# service httpd restart
the httpd is stoping....
ok
the httpd is starting...
ok

利用页面进行测试,并寻找xcache选项
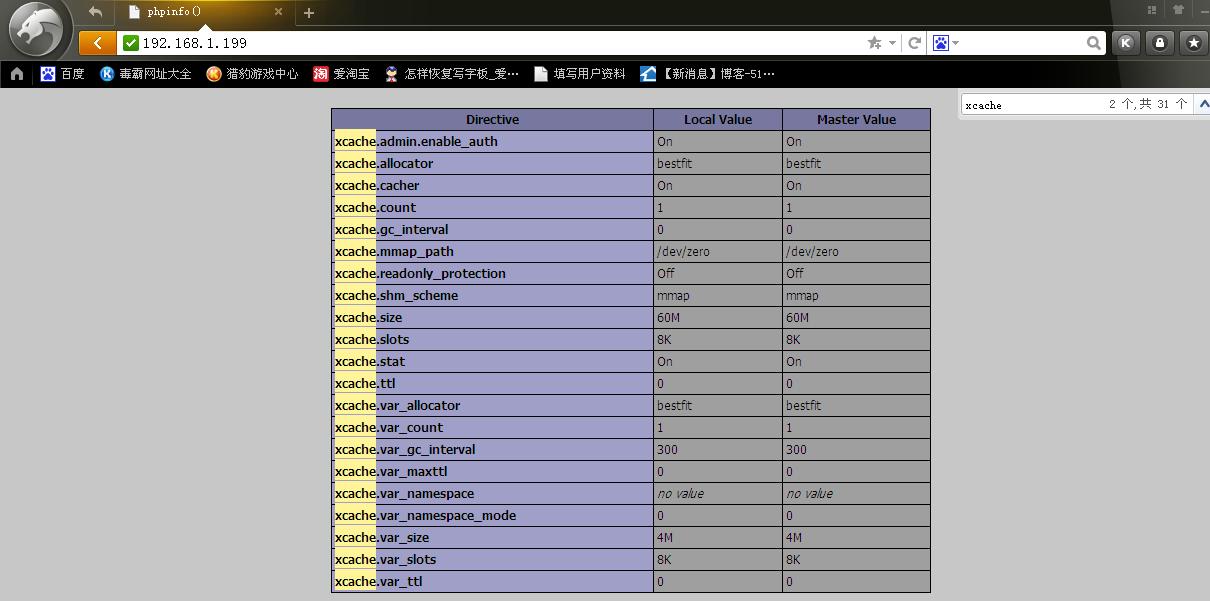
然后测试xcache,为了保证,xcache的测试效果,我们要将先前安转的opcache禁用掉,如图

重启我们的Apache服务器,
root@localhost no-debug-zts-20100525]# vim /usr/local/php/lib/php.ini
[root@localhost no-debug-zts-20100525]# service httpd restart
the httpd is stoping....
ok
the httpd is starting...
ok
[root@localhost no-debug-zts-20100525]# cd /usr/local/apache/bin/
[root@localhost bin]# ./ab -n 100000 http://192.168.1.199/phpMyAdmin-4.1.5-all-
languages
This is ApacheBench, Version 2.3 <$Revision: 1430300 $>
Copyright 1996 Adam Twiss, Zeus Technology Ltd, http://www.zeustech.net/
Licensed to The Apache Software Foundation, http://www.apache.org/
Benchmarking 192.168.1.199 (be patient)
Completed 10000 requests
Completed 20000 requests
Completed 30000 requests
Completed 40000 requests
Completed 50000 requests
Completed 60000 requests
Completed 70000 requests
Completed 80000 requests
Completed 90000 requests
Completed 100000 requests
Finished 100000 requests
Server Software: Apache/2.4.4
Server Hostname: 192.168.1.199
Server Port: 80
Document Path: /phpMyAdmin-4.1.5-all-languages
Document Length: 260 bytes
Concurrency Level: 1
Time taken for tests: 34.452 seconds
Complete requests: 100000
Failed requests: 0
Write errors: 0
Non-2xx responses: 100000
Total transferred: 52000000 bytes
HTML transferred: 26000000 bytes
Requests per second: 2902.60 [#/sec] (mean)
Time per request: 0.345 [ms] (mean)
Time per request: 0.345 [ms] (mean, across all concurrent requests)
Transfer rate: 1473.98 [Kbytes/sec] received
Connection Times (ms)
min mean[+/-sd] median max
Connect: 0 0 0.0 0 1
Processing: 0 0 0.7 0 205
Waiting: 0 0 0.1 0 21
Total: 0 0 0.7 0 205
Percentage of the requests served within a certain time (ms)
50% 0
66% 0
75% 0
80% 0
90% 0
95% 0
98% 0
99% 0
100% 205 (longest request)
[root@localhost bin]#
结果,比我们的zend_opcache 还要好一些,但这些测试结果,与机器平台有很大的关系,可能不同的人测试有不同的结果
最后为了便于对来xcache的管理,我们可以在他的配置文件中的如图所示的字段进行如下修改,来方便对它进行性能上的控制,以admin用户为例:
在它要求我们输入MD5加密的密码时我们可以这么做
[root@localhost ~]# echo -n "123456"|md5sum
e10adc3949ba59abbe56e057f20f883e -
[root@localhost ~]#
产生那堆数字就是加密后的结果,把它加进去

重启Apache
[root@localhost]# service httpd restart
the httpd is stoping....
ok
the httpd is starting...
ok
如图
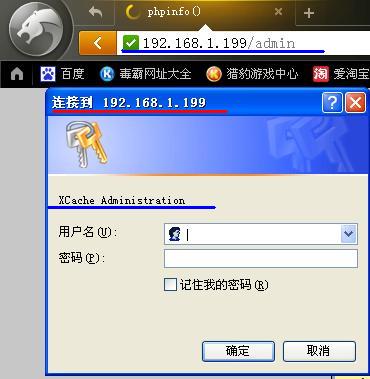
输入密码登录进去之后,我们可以看到很直观的控制参数展示,如图
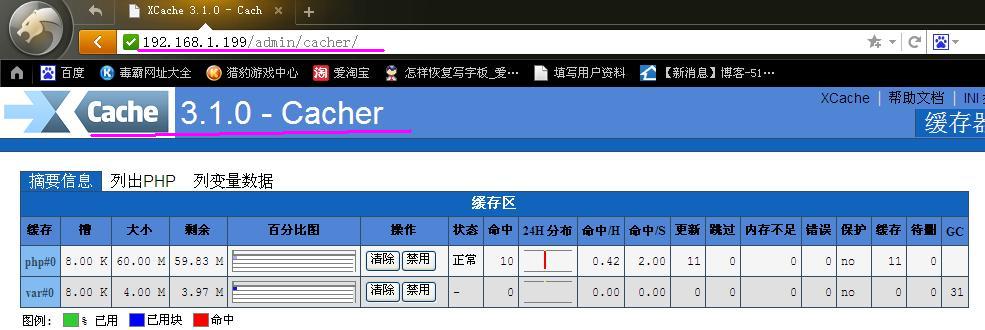
比如缓存的大小,已经使用的和没有使用的等等;
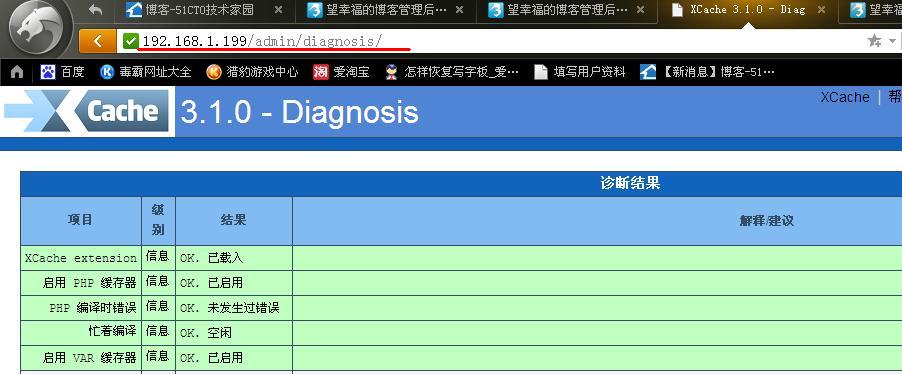
还可以实现对xcache的日常检测及维护,如图,可以显示对xcache的各种诊断结果:
关于php的加速,在互联网上有很多,自由的以及收费的各种软件,十分的齐全,在这我们就一这样两个典型的例子为例,希望能给大家带来帮助。