服务器群集常用Nginx模块
服务器群集常用Nginx模块
本文操作环境CentOS6.4 64位,本文使用的所有软件包地址:http://pan.baidu.com/s/15XPSi
一.Rewrite重定向模块;
我们在网站建设中,时常会遇到需要网页重定向的情况:
1.网站调整(如改变网页目录结构);
2.网页被移到一个新地址;
3.网页扩展名改变(如应用需要把.php改成.Html或.shtml)。
这种情况下,如果不做重定向,则用户收藏夹或搜索引擎数据库中旧地址只能让访问客户得到一个404页面错误信息,访问流量白白丧失;再者某些注册了多个域名的网站,也需要通过重定向让访问这些域名的用户自动跳转到主站点等,下面我会在nginx下用rewrite重定向模块做一些演示。
二.Proxy反向代理模块;
通常的代理服务器,只用于代理内部网络对Internet的连接请求,客户机必须指定代理服务器,并将本来要直接发送到Web服务器上的http请求发送到代理服务器中。
当一个代理服务器能够代理外部网络上的主机,访问内部网络时,这种代理服务的方式称为反向代理服务。此时代理服务器对外就表现为一个Web服务器,外部网络就可以简单把它当作一个标准的Web服务器而不需要特定的配置。不同之处在于,这个服务器没有保存任何网页的真实数据,所有的静态网页或者CGI程序,都保存在内部的Web服务器上。因此对反向代理服务器的攻击并不会使得网页信息遭到破坏,这样就增强了Web服务器的安全性。
对于Nginx的反向代理主要在四个方面:
1、URL重写 URL rewirte
2、反向代理 reverse proxy 并启用缓存功能
3、实现负载均衡
4、安装第三方模块,实现健康状态检测。
关于一些Nginx的应用,可以在Nginx的官方网站上看到,内容介绍的也相当的详细。这里只浅谈一些我对于Nginx服务器学习到和一些认识。网站地址: http://wiki.nginx.org/Modules
三.upstream负载均衡模块
为了减轻单个服务器的访问流量处理和避免单个服务器如果出现故障导致的信息无法访问,我们往往使用多个服务器实现群集来实现冗余和分担流量,结合反向代理实现负载均衡。
负载均衡常见的方式:
1.轮流式的平均负载分担,分发流量到服务器群集内的服务器,见到来说就是轮流着接受服务器请求。
2.使用加权重的负载分担,简单来说就是有个服务器处理能力强,给它的权重大些,让它每次处理的流量比别的服务器多。
四.Health-check 健康检查模块;
大家都知道,前段的nginx做反向代理,如果后端有服务器失效的话,nginx是不能把这台真实的服务器剔出upstream的,所以还会有请求转发到后端的这真实的服务器上面去,这就有可能把错误信息页面发送给请求用户。虽然nginx可以在localtion中启用proxy_next_upstream来解决返回给用户的错误页面,但这个还是会把请求转发给这台服务器的,然后再转发给别的服务器,这样就浪费了一次转发,借助nginx的模快nginx_upstream_check_module来检测后方真实服务器的健康状态,如果后端服务器不可用,则请求就不转发到这台服务器。
我先来介绍一下CentOS6.4下编译安装配置nginx;
1.挂在光盘
mount /dev/cdrom /media/cdrom/
2.增加nginx的系统组合用户
groupadd -r nginx
useradd -r -g nginx -s /sbin/nologin -M nginx
3安装必备的包
yum --disablerepo=* --enablerepo=c6-media install pcre-devel
yum --disablerepo=* --enablerepo=c6-media install openssl-devel
4.拆包
tar -zxvf nginx-1.0.11.tar.gz -C /usr/local/src/
cd /usr/local/src/nginx-1.0.11/
5.编译安装
[root@centos nginx-1.0.11]# ./configure --conf-path=/etc/nginx/nginx.conf --error-log-path=/var/log/nginx/error.log --http-log-path=/var/log/nginx/access.log --pid-path=/var/run/nginx/nginx.pid --lock-path=/var/lock/nginx.lock --user=nginx --group=nginx --with-http_ssl_module --with-http_flv_module --with-http_stub_status_module --with-http_gzip_static_module --http-client-body-temp-path=/var/tmp/nginx/client/ --http-proxy-temp-path=/var/tmp/nginx/proxy/ --http-fastcgi-temp-path=/var/tmp/nginx/fcgi/ --with-pcre
6.安装
root@centos nginx-1.0.11]# make && make install
7.编辑控制脚本
[root@centos ~]# cd /etc/init.d/
[root@centos init.d]# vim nginx
#!/bin/bash
# chkconfig: 2345 79 39
# descripstion: the nginx server.
prog=/usr/local/nginx/sbin/nginx
lockfile=/var/lock/nginx.lock
. /etc/init.d/functions
start() {
if [ -e $lockfile ]; then
echo "the nginx is running "
else
echo -n "the nginx is starting ......"
sleep 1
$prog && echo "ok" && touch $lockfile ||echo "fail"
fi
}
stop() {
if [ ! -e $lockfile ];then
echo "the nginx is stoped"
else
echo -n "the nginx is stoping......"
killproc nginx && echo "ok" && rm -rf $lockfile || echo "fail "
fi
}
configtest() {
$prog -t
}
case "$1" in
start)
start
;;
stop)
stop
;;
restart)
stop
start
;;
configtest)
configtest
;;
esac
[root@centos init.d]# chmod a+x nginx 增加可执行权限
8.开启服务
[root@centos init.d]# mkdir -pv /var/tmp/nginx/client 创建必要目录
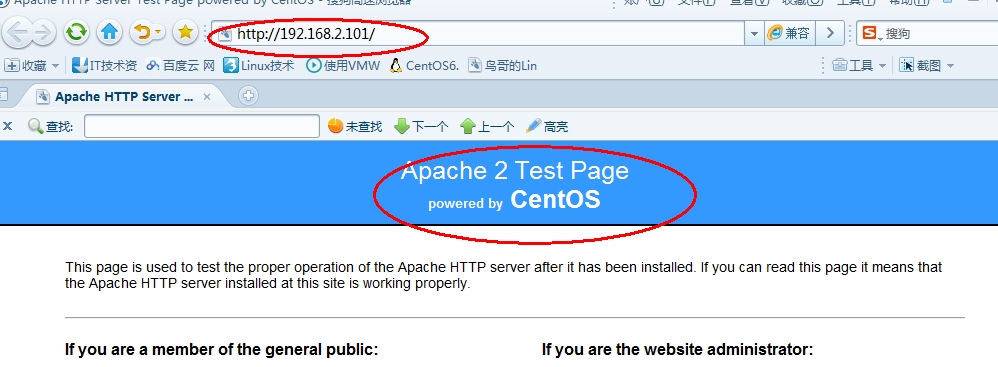
[root@centos init.d]# service nginx start 开启nginx服务
一.实现重定向
1.简单的访问重定向(实现重定向到本服务器的其他地方)
具体实现:访问2.101下的任何bmp格式的内容都重定向到index.html网页;
[root@centos ~]# vim /etc/nginx/nginx.conf
location / {
44 root html;
45 index index.html index.htm;
46 rewrite "^/.*\.bmp$" /index.html;
47 }
脚本内容大意,访问本服务器的站点主目录下的bmp格式的文件时都转到访问index.html文件,保存后重启nginx时测试:

2.复杂一点的重定向:(实现访问服务器的特定目录下的内容时被重定向到指定的服务器的指定内容)
具体实现:访问服务器2.101下的某个目录下的文件时被重定向到服务器2.10上访问别的内容。
另开一台服务器,地址2.10,安装httpd,在站点主目录/var/www/html/下建两个目录aa ,bb;分别放入图片文件1.html , 2.html;
[root@centos ~]# vim /etc/nginx/nginx.conf
location / {
44 root html;
45 index index.html index.htm;
46 rewrite "^/(.*)(.*)\.bmp$" http://192.168.2.10/$1/$2.html;
47 }
此时再次访问,http://192.168.2.101/aa/1.bmp,结果被重定向到了2.10下;

二.Proxy反向代理模块;
1,简单反向代理
当访问2.101(nginx)服务器也就是反向代理服务器时实现反向代理到2.10(apache)服务器上;
在2.101下,编辑
[root@centos ~]# vim /etc/nginx/nginx.conf
location / {
root html;
index index.html index.htm;
proxy_pass http://192.168.2.10;
}
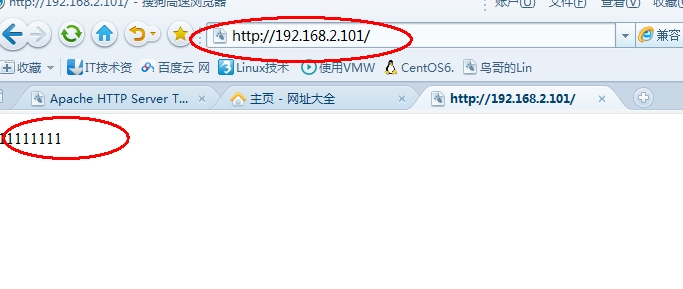
访问查看代理情况,发现被代理到了apache的服务区上。

2.为反向代理增加缓存
编辑/etc/nginx/nginx.conf;增加第20行缓存cache目录及大小;
17 http {
18 include mime.types;
19 default_type application/octet-stream;
20 proxy_cache_path /data/nginx/cache levels=1:2 keys_zone=STATIC:10m inact ive=24h max_size=1g;
.....
增加缓存策略;
location / {
45 root html;
46 proxy_set_header HOST $host;
47 proxy_cache STATIC;
48 proxy_cache_valid 200 1d;
49 proxy_cache_use_stale error timeout invalid_header updating http_500 http_502 http_503 http_504;
50 proxy_pass http://192.168.2.10/1.html;
51 }
[root@centos ~]# mkdir -pv /data/nginx/cache
[root@centos ~]# service nginx restart
访问2.101的nginx服务器,被反向代理到了2.10下的1.html了。

查看缓存/data/nginx/cache/目录,
[root@centos ~]# ll /data/nginx/cache/
total 4
drwx------. 3 nginx nginx 4096 Jan 26 00:39 d
[root@centos ~]# ll /data/nginx/cache/d
total 4
drwx------. 2 nginx nginx 4096 Jan 26 00:39 ce
[root@centos ~]# ll /data/nginx/cache/d/ce
total 4
-rw-------. 1 nginx nginx 348 Jan 26 00:39 182284be3b81335767894ef39047eced
确实生成了两层缓存目录,并有了一个缓存文件ce;
测试缓存效果;
安装测试工具:此时有了2.101的缓存,访问测试。
[root@centos ~]# yum --disablerepo=* --enablerepo=c6-media install httpd-tools
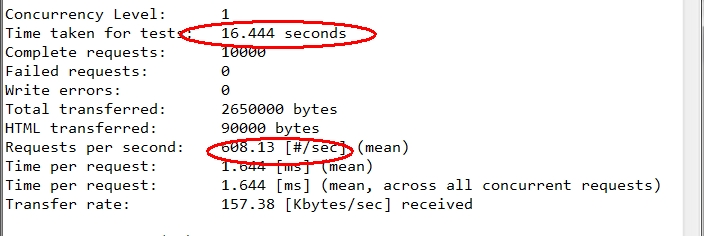
root@centos ~]# ab -n 10000 http://192.168.2.101/

访问2.101下的aa目录,这个文件还没有缓存;
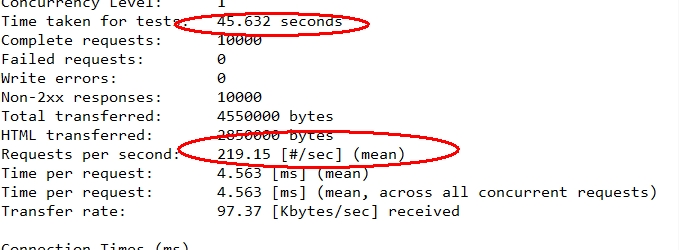
root@centos ~]# ab -n 10000 http://192.168.2.101/aa

很明显有缓存提高了不少速度。
3,增加upstream负载均衡模块,实现反向代理服务器的负载均衡
upstream模块是nginx的一个插件,如果要在nginx用的话先要在nginx打补丁才能用。我们安装时没有补丁,所以把nginx卸掉重新带补丁安装,看到这很蛋疼吧,我也没办法只好重装了。
1.删除没有补丁的nginx
[root@centos ~]# rm -rf /usr/local/src/nginx-1.0.11/
2.解压模块
[root@centos ~]# unzip healthcheck_nginx_upstreams-master.zip
[root@centos ~]# mv healthcheck_nginx_upstreams-master /tmp
3.解压nginx
[root@centos ~]# tar -zxvf nginx-1.0.11.tar.gz -C /usr/local/src/
打补丁:
[root@centos nginx-1.0.11]# patch -p1< /tmp/healthcheck_nginx_upstreams-master/nginx.patch
4.重新配置编译安装;
[root@centos nginx-1.0.11]# ./configure --conf-path=/etc/nginx/nginx.conf --error-log-path=/var/log/nginx/error.log --http-log-path=/var/log/nginx/access.log --pid-path=/var/run/nginx/nginx.pid --lock-path=/var/lock/nginx.lock --user=nginx --group=nginx --with-http_ssl_module --with-http_flv_module --with-http_stub_status_module --with-http_gzip_static_module --http-client-body-temp-path=/var/tmp/nginx/client/ --http-proxy-temp-path=/var/tmp/nginx/proxy/ --http-fastcgi-temp-path=/var/tmp/nginx/fcgi/ --with-pcre --add-module=/tmp/healthcheck_nginx_upstreams-master/
最后执行make和make install 完成安装。
****1.简单的平均负载分担
编辑/etc/nginx/nginx.conf;Server下建立服务器组;
upstream backend {
server 192.168.2.10;
server 192.168.2.11;}
在location下加入反向代理;
proxy_pass http://backend;(说明负载分担方式为轮流方式)
另外在家一台httpd服务器,地址2.11;主站点下建一个静态index.html,显示服务器2;在服务器2.10下的主站点目录也建index.html,显示服务器1.
测试 ;

刷新;

发现一刷新结果一遍,就是在服务器1和服务器2间来回访问,实现了负载均衡
***2.实现带权重的负载分担;
修改反向代理服务器2.101的配置文件;
把2.10服务器权值改为3;
upstream backend {
server 192.168.2.10 weight=3;(增加权重为3,默认为1)
server 192.168.2.11;
}
先分析一下结果:
我们把2.10服务器权重改为3,而2.11服务器为1,流量处理数应该为3:1。访问测试:
发现当出现服务器1标志时,要刷新三下才会显示服务器2;也就是说访问次数比例服务器1比服务器2为3:1;结果实现了权值不同的负载分担。
***3.加入ip_bash实现分网段的负载分担;
编辑配置文件,如图;
upstream backend {
server 192.168.2.10
server 192.168.2.11;
ip_bash;
}
4.增加Health-check 健康检查模块,实现反向代理服务器对后方服务器的检查。
编辑/etc/nginx/nginx.conf,加入健康检查的参数(红色部分)
upstream backend {
server 192.168.2.10 weight=3;
server 192.168.2.11;
healthcheck_enabled;
healthcheck_delay 1000;
healthcheck_timeout 1000;
healthcheck_failcount 1;
healthcheck_send "GET /health HTTP/1.0";
}
并加入探测状态调用;(红色部分)
location /stat {
healthcheck_status;
}
测试健康检查:
在服务器1和2的站点主目录下,都编辑health探测页面,vim health;内容随便写即可。
关闭服务器2的httpd服务,访问查看结果;

服务器2出现错误 ,这是访问后方服务器时,那些负载分担对服务器2就不发送请求了,这就实现了健康检查的目的。
谢谢大家的阅读!