phonegap照相插件的使用
phonegap的API提供照相功能,使用很方便.
此篇文章以cordova 3.3版本编写
据我总结核心步骤: 创建工程 ; 下载插件 ;编译工程; 调用插件;
按照如下步骤就能生产出代码:
打开cmd 控制台
1 使用命令行 建立phonegap工程
2 进入到phonegap工程下的plugins 文件夹当中 ,使用命令行下载官方插件 ;(输入命令: cordova plugin add org.apache.cordova.camera)
4 添加生成 android或者IOS 工程 ;android命令如下cordova platform add android (注:oc的把android换成ios)
5 在命令行输入cordova build
6 最后 将生成的工程导入编辑器(我用的eclipse)
在assets/www目录下在index.html中添加 javascript 调用语句
接下来给大家演示:
目测大家都是已经安装好环境的,如果没有搭好环境 可以查看我的phonegap配置文章 点击打开链接
调用系统的API 官方文档地址 点击打开链接
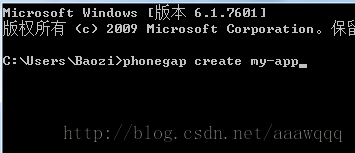
<1> 在控制台 创建一个phonegap工程 命令如下
 phonegap create my-app
 cd my-app
 phonegap run android
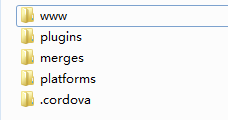
<2> 我们从命令行进入 到工程目录下的 plugins文件夹
cd my-app

cd plugins
<3> 现在开始下载插件 本篇讲述camera :
输入:
cordova plugin add org.apache.cordova.camera
插件下载完毕
<4> 添加android 平台工程 (ios把 "android" 替换)
cordova platform add android
<5> 编译android工程
cordova build
至此 camera 已经生成...
现在大家只需要将工程导入到eclipse当中 使用官方APi语句在javascript中调用
将下方语句考到 assets目录下 www/index.html 当中 完全复制过去;
example:
<!DOCTYPE html>
<html>
<head>
 <title>Capture Photo</title>
 <script type="text/javascript" charset="utf-8" src="cordova.js"></script>
 <script type="text/javascript" charset="utf-8">
    var pictureSource;   // picture source
    var destinationType; // sets the format of returned value
    // Wait for device API libraries to load    //
    document.addEventListener("deviceready",onDeviceReady,false);
        // device APIs are available    //
        function onDeviceReady() {        pictureSource=navigator.camera.PictureSourceType;        destinationType=navigator.camera.DestinationType;    }
        // Called when a photo is successfully retrieved    //
        function onPhotoDataSuccess(imageData) {
        // Uncomment to view the base64-encoded image data      //
        console.log(imageData);
        // Get image handle      //
        var smallImage = document.getElementById('smallImage');
        // Unhide image elements      //
        smallImage.style.display = 'block';
        // Show the captured photo      // The in-line CSS rules are used to resize the image      //
        smallImage.src = "data:image/jpeg;base64," + imageData;    }
        // Called when a photo is successfully retrieved    //
        function onPhotoURISuccess(imageURI) {
        // Uncomment to view the image file URI      //
        console.log(imageURI);
        // Get image handle      //
        var largeImage = document.getElementById('largeImage');
        // Unhide image elements      //
        largeImage.style.display = 'block';
        // Show the captured photo      // The in-line CSS rules are used to resize the image      //
        largeImage.src = imageURI;    }
        // A button will call this function    //
        function capturePhoto() {
        // Take picture using device camera and retrieve image as base64-encoded string
        navigator.camera.getPicture(onPhotoDataSuccess, onFail, { quality: 50,        destinationType: destinationType.DATA_URL });    }
        // A button will call this function    //
        function capturePhotoEdit() {
        // Take picture using device camera, allow edit, and retrieve image as base64-encoded string
        navigator.camera.getPicture(onPhotoDataSuccess, onFail, { quality: 20, allowEdit: true,        destinationType: destinationType.DATA_URL });    }
        // A button will call this function    //
        function getPhoto(source) {
        // Retrieve image file location from specified source
        navigator.camera.getPicture(onPhotoURISuccess, onFail, { quality: 50,        destinationType: destinationType.FILE_URI,        sourceType: source });    }
        // Called if something bad happens.    //
        function onFail(message) {      alert('Failed because: ' + message);    }
    </script>
</head>
<body>
    <button onclick="capturePhoto();">Capture Photo</button> <br>
    <button onclick="capturePhotoEdit();">Capture Editable Photo</button> <br>
    <button onclick="getPhoto(pictureSource.PHOTOLIBRARY);">From Photo Library</button><br>
    <button onclick="getPhoto(pictureSource.SAVEDPHOTOALBUM);">From Photo Album</button><br>
    <img style="display:none;width:60px;height:60px;" id="smallImage" src="" />
    <img style="display:none;" id="largeImage" src="" />

</body>
</html>
相机参数详解:
调用系统的API 官方文档地址 点击打开链接
百度的中文文档点击打开链接
phonegap的工程:
工程下载 将phonegap的platforms导入到eclipse中
如果报错clear一下 查看导的lib包 有没有报错
Demo下载:
http://download.csdn.net/detail/aaawqqq/6974247


