OpenCv,对像素读取,修改,保存等操作
imread
(1)功能:
读取一幅图像
读取一幅图像
(2)函数的声明格式:
Mat imread( const string& filename,int flags=1 );
(3)参数说明:
filename : 被读取的图像的名字
flags : 说明读取图像的数据类型
如果flags>0 , 那么是把图像加载成3通道的彩色图像(注意:默认被加载成了一副彩色图像)
如果flags=0,那么把图像加载成灰度图(单通道的图像)
如果flags<0,那么如果图像本身是彩色图,就加载成彩色图,如果图像本身是灰度图就加载成灰度图。
如果图像加载失败,那么imread会返回一个空矩阵(Mat::data == NULL)。
1,多种方式访问图像的像素
代码如下:
/*
*开发环境:Win7,VS2012
*OpenCv版本:2.4.9
*程序功能:多种方式操纵图像的每一个像素
*日期:2014/12/3
*原创:是
*作者:EbowTang
*Email:[email protected]
*/
// ConsoleAppOpenCvIterator.cpp : 定义控制台应用程序的入口点。
//

#include "stdafx.h"
#include "iostream"
#include "opencv2/opencv.hpp"

using namespace std;
using namespace cv;
/*
//最普通的操作方式at()遍历所有像素,并且对其进行操作
int _tmain(int argc, _TCHAR* argv[])
{
	Mat grayimg(256,480,CV_8UC1);
	Mat colorimg(256,480,CV_8UC3);

	for (int i=0;i<grayimg.rows;i++)
	{
		for (int j=0;j<grayimg.cols;j++)
		{
			grayimg.at<uchar>(i,j)=0;//对灰度图像素操作赋

值
		}
	}

	for (int i=0;i<colorimg.rows;i++)
	{
		for (int j=0;j<colorimg.cols;j++)
		{
			Vec3b pixel;
			pixel[0]=255;
			pixel[1]=155;
			pixel[2]=50;
			colorimg.at<Vec3b>(i,j)=pixel;
		}
	}

	cout<<grayimg.channels();
	imshow("grayimg",grayimg);
	imshow("colorimg",colorimg);
	waitKey(0);
	return 0;
}

*/

/*
//使用迭代器遍历所有像素,并且对其进行操作
int _tmain(int argc, _TCHAR* argv[])
{
	Mat grayimg(256,480,CV_8UC1);
	Mat colorimg(256,480,CV_8UC3);

	MatIterator_<uchar> grayst,grayend;
	grayst=grayimg.begin<uchar>();
	grayend=grayimg.end<uchar>();

	for (;grayst!=grayend;grayst++)
	{
		*grayst=rand()%255;
	}

	MatIterator_<Vec3b> Colorst,Colorend;
	Colorst=colorimg.begin<Vec3b>();
	Colorend=colorimg.end<Vec3b>();
	for (;Colorst!=Colorend;Colorst++)
	{
		(*Colorst)[0]=rand()%255;
		(*Colorst)[1]=rand()%255;
		(*Colorst)[2]=rand()%255;
	}

	imshow("grayimg",grayimg);
	imshow("colorimg",colorimg);
	waitKey(0);
}
*/
/*
//用指针遍历所有像素
int _tmain(int argc, _TCHAR* argv[])
{
	Mat grayimg(256,480,CV_8UC1);
	Mat colorimg(256,480,CV_8UC3);

	for (int i=0;i<grayimg.rows;i++)
	{
		uchar *p=grayimg.ptr<uchar>(i);//获取第i行的第一个像素
		for (int j=0;j<grayimg.cols;j++)
		{
			p[j]=(i+j)%255;
		}
	}
	//注意ptr是一个函数,其尖括号是在指明他的类型
	for (int i=0;i<colorimg.rows;i++)
	{
		Vec3b *p=colorimg.ptr<Vec3b>(i);
		for (int j=0;j<colorimg.cols;j++)
		{
			p[0]=255;
			p[1]=155;
			p[2]=50;
		}
	}

	cout<<grayimg.channels();
	imshow("grayimg",grayimg);
	imshow("colorimg",colorimg);
	waitKey(0);
	return 0;
}
*/


//读取一幅图像,并利用指针方式对像素进行更改
int _tmain(int argc, _TCHAR* argv[])
{
	Mat flower=imread("flower.jpg");
	Mat grayflower;
	cv::cvtColor(flower,grayflower,CV_BGR2GRAY);

	for (int i=grayflower.rows/2;i<grayflower.rows;i++)
	{
		uchar *p=grayflower.ptr<uchar>(i);//获取第i行的第一个

像素
		for (int j=0;j<grayflower.cols/2;j++)
		{
			p[j]=i*j%255;//对灰度图像素操作赋值
		}
	}


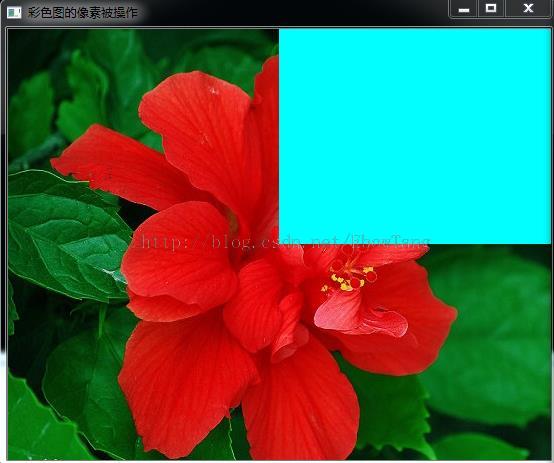
	for (int i=0;i<flower.rows/2;i++)
	{
		Vec3b *pixel=flower.ptr<Vec3b>(i);
		for (int j=flower.cols/2;j<flower.cols;j++)
		{
			pixel[j][0]=255;
			pixel[j][1]=255;
			pixel[j][2]=0;
		}
	}

	cout<<flower.channels()<<"   "<<grayflower.channels();
	imshow("灰度图的像素被操作",grayflower);
	imshow("彩色图的像素被操作",flower);
	waitKey(0);
}
2,保存图像操作
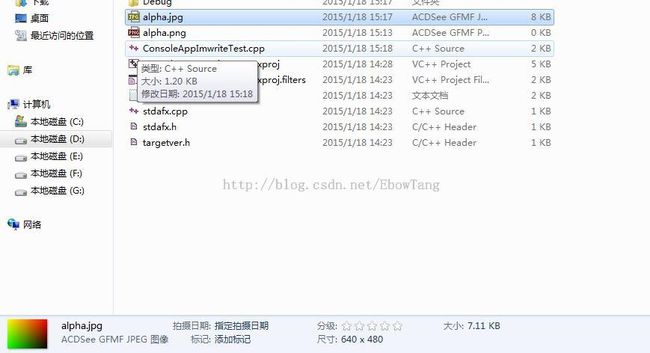
代码如下:
// ConsoleAppImwriteTest.cpp : Defines the entry point for the console application.
//

#include "stdafx.h"
#include "opencv2/highgui/highgui.hpp"
#include <iostream>
#include <vector>
using namespace cv;
using namespace std;

void createAlphaMat(Mat &img)
{
	for (int i = 0; i < img.rows; ++i) {
		for (int j = 0; j < img.cols; ++j) {
			Vec3b& rgba = img.at<Vec3b>(i, j);
			//#define UCHAR_MAX     0xff      /* maximum unsigned char value */
			rgba[0] =0;//对通道1操作
			rgba[1] = saturate_cast<uchar>((float (img.cols - j)) / ((float)img.cols) * UCHAR_MAX);
			rgba[2] = saturate_cast<uchar>((float (img.rows - i)) / ((float)img.rows) * UCHAR_MAX);
			//rgba[3] = saturate_cast<uchar>((rgba[1] + rgba[2]));
		}
	}
}
int _tmain(int argc, _TCHAR* argv[])
{
	// Create mat with alpha channel
	Mat scr(480, 640, CV_8UC3);//8位深度,字符型,4通道,640x480尺寸
		createAlphaMat(scr);//创建图像
	vector<int> compression_params;
	compression_params.push_back(CV_IMWRITE_JPEG_QUALITY );//指定格式
	compression_params.push_back(50);//压缩等级,将影响图像质量
		imwrite("alpha.jpg", scr, compression_params);//写入图像
	cout<<"Saved jpg file with alpha data completely."<<endl;
	system("pause");
	return 0;
}


