Alpha颜色混合的魔法 上篇 “法术篇”
[email protected] 2007.08.14
摘要:本系列文章介绍了一种在图像处理、2D游戏、3D游戏中经常使用的图片混合模型:Alpha颜色混合;
它就像神奇的魔法一样,在电脑屏幕上给我们展现出一个个绚丽多彩的世界!
全文 分为: 上篇 “法术篇” 各种Alpha颜色混合方式
中篇 “战力篇” 混合的速度优化
下篇 “修炼篇” 一些扩展话题和补充
tag:Alpha,Blend,透明,颜色混合,颜色混合公式
正文:
为了便于讨论,这里只处理32bit的ARGB颜色;
代码使用C++,编译器:VC2005
A: 一些颜色和图片的数据定义:
typedef unsigned char TUInt8; // [0..255]
struct TARGB32 // 32 bit color
{
TUInt8 b,g,r,a; // a is alpha
};
struct TPicRegion // 一块颜色数据区的描述,便于参数传递
{
TARGB32 * pdata; // 颜色数据首地址
long byte_width; // 一行数据的物理宽度(字节宽度);
// abs(byte_width)有可能大于等于width*sizeof(TARGB32);
long width; // 像素宽度
long height; // 像素高度
};
// 那么访问一个点的函数可以写为:
inline TARGB32 & Pixels( const TPicRegion & pic, const long x, const long y)
{
return ( (TARGB32 * )((TUInt8 * )pic.pdata + pic.byte_width * y) )[x];
}
B: 混合两幅图片
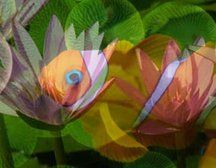
这里简单的按照50%的比例混合两幅图片;算法也很简单,就是将颜色分量直接
相加,然后取平均值;函数如下:
{
long width = min(picDst.width ,picSrc.width );
long height = min(picDst.height,picSrc.height);
for ( long y = 0 ;y < height; ++ y)
{
for ( long x = 0 ;x < width; ++ x)
{
TARGB32 & DstColor = Pixels(picDst,x,y);
TARGB32 SrcColor = Pixels(picSrc,x,y);
DstColor.b = (DstColor.b + SrcColor.b) / 2 ;
DstColor.g = (DstColor.g + SrcColor.g) / 2 ;
DstColor.r = (DstColor.r + SrcColor.r) / 2 ;
DstColor.a = (DstColor.a + SrcColor.a) / 2 ;
}
}
}
函数效果:
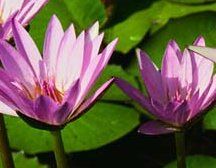
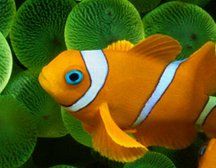
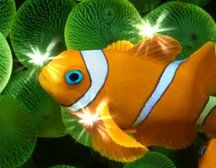
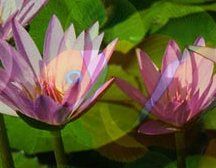
混合前源图片0 混合前源图片1
PicBlend_half混合后的结果图片
C.按比例混合两幅图片
我们来增强PicBlend_half的混合能力,允许指定两幅图片的混合比例(参数Alpha);
Alpha属于[0..255],当Alpha=127的时候与PicBlend_half等价(小的误差不算:)
Alpha颜色混合公式:Dst=( Src0*(255-Alpha) + Src1*Alpha ) / 255;
{
long width = min(picDst.width ,picSrc.width );
long height = min(picDst.height,picSrc.height);
for ( long y = 0 ;y < height; ++ y)
{
for ( long x = 0 ;x < width; ++ x)
{
TARGB32 & DstColor = Pixels(picDst,x,y);
TARGB32 SrcColor = Pixels(picSrc,x,y);
DstColor.b = (DstColor.b * ( 255 - Alpha) + SrcColor.b * Alpha) / 255 ;
DstColor.g = (DstColor.g * ( 255 - Alpha) + SrcColor.g * Alpha) / 255 ;
DstColor.r = (DstColor.r * ( 255 - Alpha) + SrcColor.r * Alpha) / 255 ;
DstColor.a = (DstColor.a * ( 255 - Alpha) + SrcColor.a * Alpha) / 255 ;
}
}
}
提示: 利用两幅图片然后不断的调整Alpha混合参数就可以得到漂亮的
动画效果(过渡/切换屏幕等);
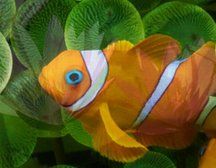
Alpha=64时混合后的结果图片 Alpha=192时混合后的结果图片
D.带关键色的图片合成
图片中用一种特殊的颜色来代表图片透明的部分,这个关键色一般会选择图片中实际没
有用到的颜色;程序在显示图片的时候跳过这些特殊像素,从而形成透明效果;
GIF的透明、很多游戏中的透明贴图都应用了这种原理;
比如一幅带有透明关键色的图片:
![]()
该图片中的关键色颜色为纯红色,R=255;G=0;B=0;
函数实现:
{
long width = min(picDst.width ,picSrc.width );
long height = min(picDst.height,picSrc.height);
unsigned long KeyColorValue = ( * (unsigned long * ) & KeyColor) & 0x00FFFFFF ;
for ( long y = 0 ;y < height; ++ y)
{
for ( long x = 0 ;x < width; ++ x)
{
TARGB32 SrcColor = Pixels(picSrc,x,y);
if ( ( ( * (unsigned long * ) & SrcColor) & 0x00FFFFFF ) != KeyColorValue )
Pixels(picDst,x,y) = SrcColor;
}
}
}
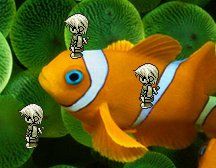
函数效果:
提示:有时为了方便也可以将一个颜色范围内的颜色都作为透明关键色;
按 底、身体、头、发型 的顺序混合后的效果图
E.带Alpha通道的图片的混合
PicBlend_KeyColor的实现方式有一些缺点,比如美工做图片的时候需要"抠边"
(将透明区域和不透明区域分离),增加了工作量;合成的图片在“精灵”的边界区域
有锯齿感(如果有缩放的话,锯齿感会更强);我们需要一种更加自由的定义方式,
每个颜色增加一个专门的通道Alpha通道来描述该像素的透明信息;
Alpha属于[0..255],
带Alpha通道的颜色混合公式:Dst=( Dst*(255-Src.Alpha) + Src*Src.Alpha ) / 255;
(提示: 当Alpha==0时, 公式化简为: Dst=Dst; //Src完全透明
当Alpha==255时,公式化简为: Dst=Src; //Src完全不透明 )
{
long width = min(picDst.width ,picSrc.width );
long height = min(picDst.height,picSrc.height);
for ( long y = 0 ;y < height; ++ y)
{
for ( long x = 0 ;x < width; ++ x)
{
TARGB32 & DstColor = Pixels(picDst,x,y);
TARGB32 SrcColor = Pixels(picSrc,x,y);
unsigned long Alpha = SrcColor.a;
DstColor.b = (DstColor.b * ( 255 - Alpha) + SrcColor.b * Alpha) / 255 ;
DstColor.g = (DstColor.g * ( 255 - Alpha) + SrcColor.g * Alpha) / 255 ;
DstColor.r = (DstColor.r * ( 255 - Alpha) + SrcColor.r * Alpha) / 255 ;
DstColor.a = (DstColor.a * ( 255 - Alpha) + SrcColor.a * Alpha) / 255 ;
}
}
}
函数效果:
混合前源图片0 混合前源图片1(32bit ARGB颜色) 其中透明通道展示
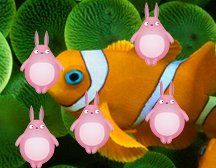
PicBlend混合后的结果图片(注意精灵的轮廓线,与背景完美的融合在了一起)
F.颜色混合方案:加
有时候,直接把两幅图片颜色值相加也能得到很不错的效果;
比如在实现一些光照特效、太阳引起的镜头光晕等效果的时候就很不错;
(颜色相加时可能会超出255的值域,需要把结果饱和到255)
{
if (color >= 255 )
return 255 ;
else
return color;
}
void PicBlend_Add( const TPicRegion & picDst, const TPicRegion & picSrc)
{
long width = min(picDst.width ,picSrc.width );
long height = min(picDst.height,picSrc.height);
for ( long y = 0 ;y < height; ++ y)
{
for ( long x = 0 ;x < width; ++ x)
{
TARGB32 & DstColor = Pixels(picDst,x,y);
TARGB32 SrcColor = Pixels(picSrc,x,y);
DstColor.b = border_color_up(DstColor.b + SrcColor.b);
DstColor.g = border_color_up(DstColor.g + SrcColor.g);
DstColor.r = border_color_up(DstColor.r + SrcColor.r);
DstColor.a = border_color_up(DstColor.a + SrcColor.a);
}
}
}
函数效果:
