Android中的Animation应用
最近在应用中用到了Animation。在网上浏览了下,感觉有些东西讲得很精辟。因此,我想总结下。
Drawable最强大的功能是:显示Animation。AndroidSDK介绍了2种Animation:
-
TweenAnimation(渐变动画):通过对场景里的对象不断做图像变换(平移、缩放、旋转)产生动画效果
-
FrameAnimation(帧动画) :顺序播放事先做好的图像,类似放电影
在使用Animation前,我们先学习如何定义Animation,这对我们使用Animation会有很大的帮助。Animation是以XML格式定义的,定义好的XML文件存放在res\anim中。由于TweenAnimation与FrameAnimation的定义、使用都有很大的差异,我们将分开介绍,本篇幅中介绍TweenAnimation的定义与使用,后续篇幅再详细介绍FrameAnimation。按照XML文档的结构【父节点,子节点,属性】来介绍TweenAnimation,其由4种类型:
-
Alpha:渐变透明度动画效果
-
Scale:渐变尺寸伸缩动画效果
-
Translate:画面转换位置移动动画效果
-
Rotate:画面转换位置移动动画效果
在介绍以上4种类型前,先介绍TweenAnimation共同的节点属性。
| 表一 |
|||
| 属性[类型] |
功能 |
|
|
| Duration[long] |
属性为动画持续时间 |
时间以毫秒为单位 |
|
| fillAfter[boolean] |
当设置为true,该动画转化在动画结束后被应用 |
||
| fillBefore[boolean] |
当设置为true,该动画转化在动画开始前被应用 |
||
| interpolator |
指定一个动画的插入器 |
有一些常见的插入器 |
|
| repeatCount[int] |
动画的重复次数 |
|
|
| repeatMode[String] |
定义重复的行为 |
1:"restart" 2:"reverse" eg:android:repeatMode="reverse" |
|
| startOffset[long] |
动画之间的时间间隔,从上次动画停多少时间开始执行下个动画 |
||
| zAdjustment[int] |
定义动画的ZOrder的改变 |
0:保持ZOrder不变 |
|
看了以上节点,大家是不是都想开始定义动画了。下面我们就开始结合具体的例子,介绍4种类型各自特有的节点元素。
| 表二 |
|||
| XML节点 |
功能说明 |
||
| alpha |
渐变透明度动画效果 |
||
| <alpha |
|||
| fromAlpha |
属性为动画起始时透明度 |
0.0表示完全透明 |
|
| toAlpha |
属性为动画结束时透明度 |
||
| 表三 |
|||||
| scale |
渐变尺寸伸缩动画效果 |
||||
| <scale |
|||||
| fromXScale[float]fromYScale[float] |
为动画起始时,X、Y坐标上的伸缩尺寸 |
0.0表示收缩到没有 |
|||
| toXScale[float] |
为动画结束时,X、Y坐标上的伸缩尺寸 |
||||
| pivotX[float] |
为动画相对于物件的X、Y坐标的开始位置 |
属性值说明:从0%-100%中取值,50%为物件的X或Y方向坐标上的中点位置 |
|||
|
|
|
|
|
||
| 表四 |
|||||
| translate |
画面转换位置移动动画效果 |
||||
| <translate |
|||||
| fromXDelta |
为动画、结束起始时X坐标上的位置 |
|
|||
| fromYDelta |
为动画、结束起始时Y坐标上的位置 |
|
|||
|
|
|
|
|
||
| 表五 |
|||||
| rotate |
画面转移旋转动画效果 |
||||
| <rotate |
|||||
| fromDegrees |
为动画起始时物件的角度 |
说明 |
|||
| toDegrees |
属性为动画结束时物件旋转的角度可以大于360度 |
||||
| pivotX |
为动画相对于物件的X、Y坐标的开始位 |
说明:以上两个属性值从0%-100%中取值 |
|||
|
|
|
|
|
||
按照上面的讲述学习完了TweenAnimation的定义,对TweenAnimation有了详细的了解,再去了解下AndroidSDK的animationpackage(android.view.animation),其提供了操作TweenAnimation所有的类。
AndroidSDK提供了基类:Animation,包含大量的set/getXXXX()函数来设置、读取Animation的属性,也就是前面表一中显示的各种属性。TweenAnimation由4种类型:alpha、scale、translate、roate,在AndroidSDK中提供了相应的类,Animation类派生出了AlphaAnimation、ScaleAnimation、TranslateAnimation、RotateAnimation分别实现了平移、旋转、改变Alpha值等动画,每个子类都在父类的基础上增加了各自独有的属性。再去看下这几个类的构造函数,是不是与我们在表二、表三、表四、表五种定义的属性完全一样。
在了解了TweenAnimation的定义,对android.view.animation有了一些基本的认识后,开始介绍TweenAnimation如何使用。AndroidSDK提供了2种方法:1、直接从XML资源中读取Animation;2、使用Animation子类的构造函数来初始化Animation对象。第二种方法在看了AndroidSDK中各个类的说明就知道如何使用了,下面简要说明从XML资源中读取Animation,按照应用程序开发的过程,介绍整个使用的过程,如下:
-
创建Android工程;
-
导入一张图片资源;
-
在res\layout\main.xml中添加一个 ImageViewWidget;
-
在res下创建新的文件夹且命名为:anim,并在此文件夹下面定义AnimationXML 文件;
-
修改OnCreate()中的代码,显示动画资源;
关键代码,解析如下:
//main.xml中的ImageView
ImageViewspaceshipImage = (ImageView)findViewById(R.id.spaceshipImage);
//加载动画
AnimationhyperspaceJumpAnimation =
AnimationUtils.loadAnimation(this,R.anim.hyperspace_jump);
//使用ImageView显示动画
spaceshipImage.startAnimation(hyperspaceJumpAnimation);
这里简要解析如下:
-
AnimationUtils提供了加载动画的函数,除了函数loadAnimation(),其他的到AndroidSDK中去详细了解吧;
-
所谓的动画,也就是对view的内容做一次图形变换;
Android中的Animation应用(二)
对TweenAnimation的本质做个总结:TweenAnimation通过对View的内容完成一系列的图形变换(包括平移、缩放、旋转、改变透明度)来实现动画效果。具体来讲,预先定义一组指令,这些指令指定了图形变换的类型、触发时间、持续时间。这些指令可以是以XML文件方式定义,也可以是以源代码方式定义。程序沿着时间线执行这些指令就可以实现动画效果。
在这里,我们需要对2个问题进行深入的解析:
-
动画的运行时如何控制的?
-
动画的运行模式。
如何控制动画的运行?
这个问题,我们也就也就是上一篇幅中提到的TweenAnimation,估计大家对什么是Interpolator、到底有什么作用,还是一头雾水,在这里做个详细的说明。按照AndroidSDK中对interpolator的说明:interpolator定义一个动画的变化率(therate of change)。这使得基本的动画效果(alpha,scale, translate, rotate)得以加速,减速,重复等。
用通俗的一点的话理解就是:动画的进度使用Interpolator控制。Interpolator定义了动画的变化速度,可以实现匀速、正加速、负加速、无规则变加速等。Interpolator是基类,封装了所有Interpolator的共同方法,它只有一个方法,即getInterpolation(float input),该方法mapsa point on the timeline to a multiplier to be applied to thetransformations of an animation。Android提供了几个Interpolator子类,实现了不同的速度曲线,如下:
| AccelerateDecelerateInterpolator |
在动画开始与介绍的地方速率改变比较慢,在中间的时候加速 |
| AccelerateInterpolator |
在动画开始的地方速率改变比较慢,然后开始加速 |
| CycleInterpolator |
动画循环播放特定的次数,速率改变沿着正弦曲线 |
| DecelerateInterpolator |
在动画开始的地方速率改变比较慢,然后开始减速 |
| LinearInterpolator |
在动画的以均匀的速率改变 |
对于LinearInterpolator,变化率是个常数,即f(x) = x.
public float getInterpolation(float input) {
returninput;
}
Interpolator其他的几个子类,也都是按照特定的算法,实现了对变化率。还可以定义自己的Interpolator子类,实现抛物线、自由落体等物理效果。
动画的运行模式
动画的运行模式有两种:
-
独占模式,即程序主线程进入一个循环,根据动画指令不断刷新屏幕,直到动画结束;
-
中断模式,即有单独一个线程对时间计数,每隔一定的时间向主线程发通知,主线程接到通知后更新屏幕;
额外补充说明:Transformation类
Transformation记录了仿射矩阵Matrix,动画每触发一次,会对原来的矩阵做一次运算,View的Bitmap与这个矩阵相乘就可实现相应的操作(旋转、平移、缩放等)。Transformation类封装了矩阵和alpha值,它有两个重要的成员,一是mMatrix,二是mAlpha。Transformation类图如下所示:
总结说明
图形变换通过仿射矩阵实现。图形变换是图形学中的基本知识,简单来讲,每种变换都是一次矩阵运算。在Android中,Canvas类中包含当前矩阵,当调用Canvas.drawBitmap(bmp, x, y, Paint) 绘制时,Android会先把bmp做一次矩阵运算,然后将运算的结果显示在Canvas上。这样,编程人员只需不断修改Canvas的矩阵并刷新屏幕,View里的对象就会不停的做图形变换,因此就形成了动画。
Android中的Animation应用(三)
前面我们详细介绍了Tween Aniamation,这节我将介绍另外一种动画FrameAnimation。在前面已经说过,FrameAnimation是顺序播放事先做好的图像,与电影类似。不同于animationpackage,AndroidSDK提供了另外一个类AnimationDrawable来定义、使用FrameAnimation。
FrameAnimation可以在XMLResource定义(还是存放到res\anim文件夹下),也可以使用AnimationDrawable中的API定义。由于TweenAnimation与FrameAnimation有着很大的不同,因此XML定义的格式也完全不一样,其格式是:首先是animation-list根节点,animation-list根节点中包含多个item子节点,每个item节点定义一帧动画:当前帧的drawable资源和当前帧持续的时间。下面对节点的元素加以说明:
| XML属性 |
说明 |
| drawable |
当前帧引用的drawable资源 |
| duration |
当前帧显示的时间(毫秒为单位) |
| oneshot |
如果为true,表示动画只播放一次停止在最后一帧上,如果设置为false表示动画循环播放。 |
| variablePadding |
Iftrue, allows the drawable’s padding to change based on thecurrent state that is selected. |
| visible |
规定drawable的初始可见性,默认为flase; |
下面就给个具体的XML例子,来定义一帧一帧的动画:
<animation-listxmlns:android=”http://schemas.android.com/apk/res/android”
android:oneshot=”true”>
<item android:drawable=”@drawable/rocket_thrust1″android:duration=”200″ />
<itemandroid:drawable=”@drawable/rocket_thrust2″android:duration=”200″ />
<itemandroid:drawable=”@drawable/rocket_thrust3″android:duration=”200″ />
</animation-list>
上面的XML就定义了一个FrameAnimation,其包含3帧动画,3帧动画中分别应用了drawable中的3张图片:rocket_thrust1,rocket_thrust2,rocket_thrust3,每帧动画持续200毫秒。
然后我们将以上XML保存在res/anim/文件夹下,命名为rocket_thrust.xml,显示动画的代码,如下:在OnCreate()中增加如下代码:
ImageViewrocketImage = (ImageView)findViewById(R.id.rocket_image);
rocketImage.setBackgroundResource(R.anim.rocket_thrust);
rocketAnimation= (AnimationDrawable)rocketImage.getBackground();
最后还需要增加启动动画的代码:
publicboolean onTouchEvent(MotionEvent event) {
if (event.getAction() ==MotionEvent.ACTION_DOWN) {
rocketAnimation.start();
returntrue;
}
return super.onTouchEvent(event);
}
代码运行的结果想必大家应该就知道了(3张图片按照顺序的播放一次),不过有一点需要强调的是:启动FrameAnimation动画的代码rocketAnimation.start();不能在OnCreate()中,因为在OnCreate()中AnimationDrawable还没有完全的与ImageView绑定,在OnCreate()中启动动画,就只能看到第一张图片。
下面,阅读AndroidSDK中对AnimationDrawable的介绍,有个简单的了解:
| AnimationDrawable |
|
| 获取、设置动画的属性 |
|
| intgetDuration() |
获取动画的时长 |
| intgetNumberOfFrames() |
获取动画的帧数 |
| booleanisOneShot() VoidsetOneShot(boolean oneshot) |
获取oneshot属性 |
| voidinflate(Resurce r,XmlPullParser p, |
|
| 增加、获取帧动画 |
|
| DrawablegetFrame(int index) |
获取某帧的Drawable资源 |
| voidaddFrame(Drawable frame,int duration) |
为当前动画增加帧(资源,持续时长) |
| 动画控制 |
|
| voidstart() |
开始动画 |
| voidrun() |
外界不能直接掉调用,使用start()替代 |
| boolean isRunning() |
当前动画是否在运行 |
| voidstop() |
停止当前动画 |
总结说明
FrameAnimation的定义、使用比较简单,在这里已经详细介绍完了,更加深入的学习还是到AndroidSDK去仔细了解吧,在AndroidSDK中也包含很多这方面的例子程序。注:FrameAnimation 的XML文件中不定义interpolator属性,因为定义它没有任何意义。
撒旦法大赛
一、AnimationSet的具体使用方法
1.AnimationSet是Animation的子类;
2.一个AnimationSet包含了一系列的Animation;
3.针对AnimationSet设置一些Animation的常见属性(如startOffset,duration等),可以被包含在AnimationSet当中的Animation集成;
例:一个AnimationSet中有两个Animation,效果叠加
AnimationSet animationSet = new AnimationSet(true);
AlphaAnimation alphaAnimation = new AlphaAnimation(1, 0);
RotateAnimation rotateAnimation = new RotateAnimation(0, 360,
        Animation.RELATIVE_TO_SELF,0.5f,
        Animation.RELATIVE_TO_SELF,0.5f);
rotateAnimation.setDuration(1000);
animationSet.addAnimation(rotateAnimation);
animationSet.addAnimation(alphaAnimation);
image.startAnimation(animationSet);
二、Interpolator的具体使用方法
Interpolator定义了动画变化的速率,在Animations框架当中定义了一下几种Interpolator
AccelerateDecelerateInterpolator:在动画开始与结束的地方速率改变比较慢,在中间的时候速率快。
AccelerateInterpolator:在动画开始的地方速率改变比较慢,然后开始加速
CycleInterpolator:动画循环播放特定的次数,速率改变沿着正弦曲线
DecelerateInterpolator:在动画开始的地方速率改变比较慢,然后开始减速
LinearInterpolator:动画以均匀的速率改变
例 在set标签上:
xml代码:
android:interpolator="@android:anim/accelerate_interpolator"
如果一个set中包含了两种动画效果,要想这两种动画效果共享一个interpolator,可以在set标签上添加:
xml代码:
android:shareInterpolator="true"
另以上方法是在xml上处理interpolator,如果是在代码上设置 共享一个interpolator,则可以在AnimationSet设置interpolator,如果不设置共享一个interpolator则可以 在alpha等的对象上面设置interpolator:
java代码:
animationSet.setInterpolator(new AccelerateInterpolator());
或
java代码:
alphaAnimation.setInterpolator(new AccelerateInterpolator());
三、Frame-By-Frame Animations的使用方法
Frame-By-Frame Animations是一帧一帧的格式显示动画效果。类似于电影胶片拍摄的手法。
例子程序:
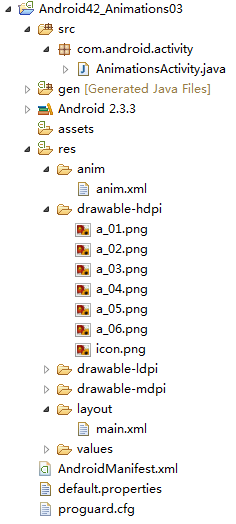
多张图片展示一个人行走的动画。
Main.xml
<?xml version="1.0" encoding="utf-8"?>
<LinearLayout xmlns:android="http://schemas.android.com/apk/res/android"
    android:orientation="vertical"
    android:layout_width="fill_parent"
    android:layout_height="fill_parent">
    <LinearLayout
        android:orientation="horizontal"
        android:layout_height="wrap_content"
        android:layout_width="wrap_content">
        <Button
            android:id="@+id/button"
                android:layout_width="wrap_content"
                android:layout_height="wrap_content"
                android:text="运动"/>
    </LinearLayout>
    <LinearLayout
        android:orientation="vertical"
        android:layout_width="fill_parent"
        android:layout_height="fill_parent">
        <ImageView
            android:id="@+id/image"
            android:layout_width="wrap_content"
            android:layout_height="wrap_content"
            android:layout_centerInParent="true"/>
    </LinearLayout>
</LinearLayout>
Anim.xml
<?xml version="1.0" encoding="utf-8"?>
<animation-list xmlns:android="http://schemas.android.com/apk/res/android"
    android:oneshot="false">
    <item android:drawable="@drawable/a_01" android:duration="50"/>
    <item android:drawable="@drawable/a_02" android:duration="50"/>
    <item android:drawable="@drawable/a_03" android:duration="50"/>
    <item android:drawable="@drawable/a_04" android:duration="50"/>
    <item android:drawable="@drawable/a_05" android:duration="50"/>
    <item android:drawable="@drawable/a_06" android:duration="50"/>
</animation-list>
AnimationsActivity.java
package com.android.activity;
import android.app.Activity;
import android.graphics.drawable.AnimationDrawable;
import android.os.Bundle;
import android.view.View;
import android.view.View.OnClickListener;
import android.widget.Button;
import android.widget.ImageView;
public class AnimationsActivity extends Activity {
    private Button button = null;
    private ImageView imageView = null;
    @Override
    public void onCreate(Bundle savedInstanceState) {
        super.onCreate(savedInstanceState);
        setContentView(R.layout.main);
        button = (Button)findViewById(R.id.button);
        imageView = (ImageView)findViewById(R.id.image);
        button.setOnClickListener(new ButtonListener());
    }
    class ButtonListener implements OnClickListener{
        public void onClick(View v) {
            imageView.setBackgroundResource(R.anim.anim);
            AnimationDrawable animationDrawable = (AnimationDrawable)
                imageView.getBackground();
            animationDrawable.start();
        }
    }
}
看似十分完美,跟官方文档上写的一样,然而当我们运行这个程序时会发现,它只停留在第一帧,并没有出现我们期望的动画,也许你会失望的说一 句:“Why?”,然后你把相应的代码放在一个按钮的点击事件中,动画就顺利执行了,再移回到onCreate中,还是没效果,这个时候估计你会气急败坏 的吼一句:“What the fuck!”。但是,什么原因呢?如何解决呢?
出现这种现象是因为当我们在onCreate中调用AnimationDrawable的start方法时,窗口Window对象还没有完全初始 化,AnimationDrawable不能完全追加到窗口Window对象中,那么该怎么办呢?我们需要把这段代码放在 onWindowFocusChanged方法中,当Activity展示给用户时,onWindowFocusChanged方法就会被调用,我们正是 在这个时候实现我们的动画效果。当然,onWindowFocusChanged是在onCreate之后被调用的,如图:

一、LayoutAnimationsContrlller的使用方法
LayoutAnimationsContrlller可以用于实现使多个控件按顺序一个一个的显示。
1)LayoutAnimationsContrlller用于为一个layout里面的控件,或者是一个ViewGroup里面的控件设置动画效果。
2)每一个控件都有相同的动画效果。
3)控件的动画效果可以在不同的时间显示出来。
4)LayoutAnimationsContrlller可以在xml文件当中设置,以可以在代码当中进行设置。
二、ListView与Animaions结合使用
1.在xml当中使用LayoutAnimationsController
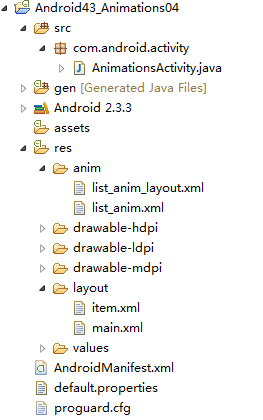
1)在res/anim文件夹下创建一个名为list_anim_layout.xml文件:
android:dylay - 动画间隔时间;
android:animationOrder - 动画执行的循序(normal:顺序,random:随机,reverse:反向显示)
android:animation – 引用动画效果文件
xml代码:
<layoutAnimation
    xmlns:android="http://schemas.android.com/apk/res/android"
    android:delay="0.5"
    android:animationOrder="normal"
    android:animation="@anim/list_anim"/>
2)在布局文件当中为ListVIew添加如下配置:
xml代码:
android:layoutAnimation="@anim/list_anim_layout"
完整代码:
xml代码:
<?xml version="1.0" encoding="utf-8"?>
<layoutAnimation
    xmlns:android="http://schemas.android.com/apk/res/android"
    android:delay="0.5"
    android:animationOrder="normal"
    android:animation="@anim/list_anim"/>
List_anim.xml
xml代码:
<?xml version="1.0" encoding="utf-8"?>
<LinearLayout xmlns:android="http://schemas.android.com/apk/res/android"
    android:orientation="vertical"
    android:layout_width="fill_parent"
    android:layout_height="fill_parent"
    >
    <ListView
        android:id="@id/android:list"
        android:layout_width="fill_parent"
        android:layout_height="wrap_content"
        android:scrollbars="vertical"
        android:layoutAnimation="@anim/list_anim_layout"/>
    <Button
        android:id="@+id/button"
        android:layout_width="fill_parent"
        android:layout_height="wrap_content"
        android:text="测试"/>
</LinearLayout>
Item.xml
xml代码:
<?xml version="1.0" encoding="utf-8"?>
<LinearLayout xmlns:android="http://schemas.android.com/apk/res/android"
    android:layout_width="fill_parent"
    android:layout_height="fill_parent"
    android:orientation="horizontal"
    android:paddingLeft="10dip"
    android:paddingRight="10dip"
    android:paddingTop="1dip"
    android:paddingBottom="1dip">
    <TextView android:id="@+id/name"
        android:layout_width="180dip"
        android:layout_height="30dip"
        android:textSize="5pt"
        android:singleLine="true" />
    <TextView android:id="@+id/sex"
        android:layout_width="fill_parent"
        android:layout_height="fill_parent"
        android:textSize="5pt"
        android:singleLine="true"/>
</LinearLayout>
AnimationsActivity.java
Java代码:
package com.android.activity;
import java.util.ArrayList;
import java.util.HashMap;
import java.util.List;
import android.app.ListActivity;
import android.os.Bundle;
import android.view.View;
import android.view.View.OnClickListener;
import android.widget.Button;
import android.widget.ListAdapter;
import android.widget.ListView;
import android.widget.SimpleAdapter;
public class AnimationsActivity extends ListActivity {
    private Button button = null;
    private ListView listView = null;
    @Override
    public void onCreate(Bundle savedInstanceState) {
        super.onCreate(savedInstanceState);
        setContentView(R.layout.main);
        listView = getListView();
        button = (Button)findViewById(R.id.button);
        button.setOnClickListener(new ButtonListener());
    }
    private ListAdapter createListAdapter() {
        List<HashMap<String,String>> list =
            new ArrayList<HashMap<String,String>>();
        HashMap<String,String> m1 = new HashMap<String,String>();
        m1.put("name", "bauble");
        m1.put("sex", "male");
        HashMap<String,String> m2 = new HashMap<String,String>();
        m2.put("name", "Allorry");
        m2.put("sex", "male");
        HashMap<String,String> m3 = new HashMap<String,String>();
        m3.put("name", "Allotory");
        m3.put("sex", "male");
        HashMap<String,String> m4 = new HashMap<String,String>();
        m4.put("name", "boolbe");
        m4.put("sex", "male");
        list.add(m1);
        list.add(m2);
        list.add(m3);
        list.add(m4);
        SimpleAdapter simpleAdapter = new SimpleAdapter(
                this,list,R.layout.item,new String[]{"name","sex"},
                new int[]{R.id.name,R.id.sex});
        return simpleAdapter;
    }
    private class ButtonListener implements OnClickListener{
        public void onClick(View v) {
            listView.setAdapter(createListAdapter());
        }
    }
}
运行结果:每一个item都是淡入淡出的按顺序显示。
2.在代码当中使用LayoutAnimationsController
对于在代码中使用LayoutAnimationsController,只不过去掉了list_anim_layout.xml这个文件,以及listview当中的
xml代码:
android:layoutAnimation="@anim/list_anim_layout"
这句。将animation的布局设置更改到了ButtonListener代码当中进行。
1) 创建一个Animation对象:可以通过装载xml文件,或者是直接使用Animation的构造方法创建Animation对象;
java代码:
Animation animation = (Animation)AnimationUtils.loadAnimation(
    AnimationsActivity.this, R.anim.list_anim);
2) 创建LayoutAnimationController对象:
java代码:
LayoutAnimationController controller = new LayoutAnimationController(animation);
3) 设置控件的显示顺序以及延迟时间:
java代码:
controller.setOrder(LayoutAnimationController.ORDER_NORMAL);
controller.setDelay(0.5f);
4) 为ListView设置LayoutAnimationController属性:
java代码:
listView.setLayoutAnimation(controller);
三、AnimationListener的使用方法
1.AnimationListener是一个监听器,该监听器在动画执行的各个阶段会得到通知,从而调用相应的方法;
2.AnimationListener主要包括如下三个方法:
·onAnimationEnd(Animation animation) - 当动画结束时调用
·onAnimationRepeat(Animation animation) - 当动画重复时调用
·onAniamtionStart(Animation animation) - 当动画启动时调用
实例:
Main.xml
xml代码:
<?xml version="1.0" encoding="utf-8"?>
<RelativeLayout xmlns:android="http://schemas.android.com/apk/res/android"
    android:id="@+id/layout"
    android:orientation="vertical"
    android:layout_width="fill_parent"
    android:layout_height="fill_parent">
    <Button android:id="@+id/addButton"
        android:layout_width="fill_parent"
        android:layout_height="wrap_content"
        android:layout_alignParentBottom="true"
        android:text="添加图片" />
    <Button android:id="@+id/deleteButton"
        android:layout_width="fill_parent"
        android:layout_height="wrap_content"
        android:layout_above="@id/addButton"
        android:text="删除图片" />
    <ImageView android:id="@+id/image"
        android:layout_width="wrap_content"
        android:layout_height="wrap_content"
        android:layout_centerInParent="true"
        android:layout_marginTop="100dip"
        android:src="@drawable/image" />
</RelativeLayout>
AnimationListenerActivity.java
java代码:
package com.android.activity;
import android.app.Activity;
import android.os.Bundle;
import android.view.View;
import android.view.View.OnClickListener;
import android.view.ViewGroup;
import android.view.ViewGroup.LayoutParams;
import android.view.animation.AlphaAnimation;
import android.view.animation.Animation;
import android.view.animation.Animation.AnimationListener;
import android.widget.Button;
import android.widget.ImageView;
public class AnimationListenerActivity extends Activity {
    private Button addButton = null;
    private Button deleteButton = null;
    private ImageView imageView = null;
    private ViewGroup viewGroup = null;
    @Override
    public void onCreate(Bundle savedInstanceState) {
        super.onCreate(savedInstanceState);
        setContentView(R.layout.main);
        addButton = (Button)findViewById(R.id.addButton);
        deleteButton = (Button)findViewById(R.id.deleteButton);
        imageView = (ImageView)findViewById(R.id.image);
        //LinearLayout下的一组控件
        viewGroup = (ViewGroup)findViewById(R.id.layout);
        addButton.setOnClickListener(new AddButtonListener());
        deleteButton.setOnClickListener(new DeleteButtonListener());
    }
    private class AddButtonListener implements OnClickListener{
        public void onClick(View v) {
            //淡入
            AlphaAnimation animation = new AlphaAnimation(0.0f, 1.0f);
            animation.setDuration(1000);
            animation.setStartOffset(500);
            //创建一个新的ImageView
            ImageView newImageView = new ImageView(
                AnimationListenerActivity.this);
            newImageView.setImageResource(R.drawable.image);
            viewGroup.addView(newImageView,
                new LayoutParams(
                    LayoutParams.FILL_PARENT,
                    LayoutParams.WRAP_CONTENT));
            newImageView.startAnimation(animation);
        }
    }
    private class DeleteButtonListener implements OnClickListener{
        public void onClick(View v) {
            //淡出
            AlphaAnimation animation = new AlphaAnimation(1.0f, 0.0f);
            animation.setDuration(1000);
            animation.setStartOffset(500);
            //为Aniamtion对象设置监听器
            animation.setAnimationListener(
                new RemoveAnimationListener());
            imageView.startAnimation(animation);
        }
    }
    private class RemoveAnimationListener implements AnimationListener{
        //动画效果执行完时remove
        public void onAnimationEnd(Animation animation) {
            System.out.println("onAnimationEnd");
            viewGroup.removeView(imageView);
        }
        public void onAnimationRepeat(Animation animation) {
            System.out.println("onAnimationRepeat");
        }
        public void onAnimationStart(Animation animation) {
            System.out.println("onAnimationStart");
        }
    }
}
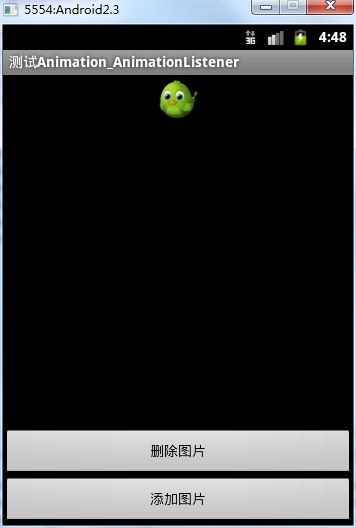
运行结果:
删除时慢慢淡出,添加时慢慢淡入


