车牌识别系统开发记录(三) 字符识别
这篇博文来谈谈车牌的字符识别。
目前,车牌字符识别算法主要是基于模板匹配、特征匹配或神经网络的方法。
在本文中我们主要来说说基于神经网络的字符识别方法,采用的是OpenCV中的CvANN_MLP。关于神经网络的具体细节,可以参考我以前的博文:
BP神经网络解析及Matlab实现
更加细节的东西可以查看如下参考文献:
Neural Networks【OpenCV Documentation】
BackPropWikipedia【Wikipedia】
现在我们确定了字符识别的总体框架,那么先来说说字符的特征提取问题。这里我们主要考虑的是:
垂直方向、水平方向的数据统计特征提取法:
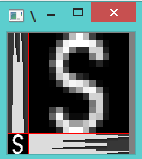
这种特征提取法就是自左向右对图像进行逐列的扫描,统计每列黑色像素的个数,然后,自上往下逐行扫描,统计每行的黑色像素的个数,将统计结果作为字符的特征向量,如果字符的宽度为w,高度为h,则特征向量维数是w+h。
同时,为了能够提取更多的特征用于识别,还将输入字符每个点的值引入特征向量。
Code:
Mat OCR::features(Mat in, int sizeData){
    // 直方图特征,
    Mat vhist=ProjectedHistogram(in,VERTICAL);
    Mat hhist=ProjectedHistogram(in,HORIZONTAL);

    // 将输入字符resize为15*15大小
    Mat lowData;
    resize(in, lowData, Size(sizeData, sizeData) );

    // 特征向量维数
    int numCols=vhist.cols+hhist.cols+lowData.cols*lowData.cols;

    Mat out=Mat::zeros(1,numCols,CV_32F);

    int j=0;
    for(int i=0; i<vhist.cols; i++)
    {
        out.at<float>(j)=vhist.at<float>(i);
        j++;
    }
    for(int i=0; i<hhist.cols; i++)
    {
        out.at<float>(j)=hhist.at<float>(i);
        j++;
    }
    for(int x=0; x<lowData.cols; x++)
    {
        for(int y=0; y<lowData.rows; y++){
            out.at<float>(j)=(float)lowData.at<unsigned char>(x,y);
            j++;
        }
    }
    if(DEBUG)
        cout << out << "\n===========================================\n";
    return out;
}
Mat OCR::ProjectedHistogram(Mat img, int t)
{
    int sz=(t)?img.rows:img.cols;
    Mat mhist=Mat::zeros(1,sz,CV_32F);

    for(int j=0; j<sz; j++){
        Mat data=(t)?img.row(j):img.col(j);
        mhist.at<float>(j)=countNonZero(data);
    }

    //Normalize histogram
    double min, max;
    minMaxLoc(mhist, &min, &max);

    if(max>0)
        mhist.convertTo(mhist,-1 , 1.0f/max, 0);

    return mhist;
}
不过,在上面的特征提取之前,我们其实还需要做几步预处理:
首先,就是字符分割。在字符分割里面,我们首先将输入车牌二值化,然后利用findContours寻找出每个字符的轮廓,再利用boundingRect定位出每个轮廓的矩形区域,然后割取出每个字符的区域。
Code:
vector<CharSegment> OCR::segment(Plate plate){

	Mat input=plate.plateImg;
    vector<CharSegment> output;

    Mat img_threshold;
    threshold(input, img_threshold, 60, 255, CV_THRESH_BINARY_INV);

	if(DEBUG)
        imshow("Threshold plate", img_threshold);

	Mat img_contours;
    img_threshold.copyTo(img_contours);

    // 在车牌区域中寻找可能字符的的轮廓
    vector< vector< Point> > contours;
    findContours(img_contours,
            contours,
            CV_RETR_EXTERNAL,
            CV_CHAIN_APPROX_NONE);


    cv::Mat result;
    img_threshold.copyTo(result);
    cvtColor(result, result, CV_GRAY2RGB);
    cv::drawContours(result,contours,
            -1,
            cv::Scalar(255,0,0),
            1);

    vector<vector<Point> >::iterator itc= contours.begin();

    while (itc!=contours.end()) {

        Rect mr= boundingRect(Mat(*itc));
        rectangle(result, mr, Scalar(0,255,0));

        Mat auxRoi(img_threshold, mr);
        if(verifySizes(auxRoi)){
            auxRoi=preprocessChar(auxRoi);
            output.push_back(CharSegment(auxRoi, mr));
            rectangle(result, mr, Scalar(0,125,255));
        }
        ++itc;
    }
    if(DEBUG)
        cout << "Num chars: " << output.size() << "\n";

    if(DEBUG)
        imshow("SEgmented Chars", result);

    return output;
}
效果:
然后,就是对字符进行预处理(统一大小)。
Code:
// 这个函数主要是对输入图片归一化到统一的大小20×20
Mat OCR::preprocessChar(Mat in){
    int h=in.rows;
    int w=in.cols;

    Mat transformMat=Mat::eye(2,3,CV_32F);
    int m=max(w,h);
    transformMat.at<float>(0,2)=m/2 - w/2;
    transformMat.at<float>(1,2)=m/2 - h/2;

    Mat warpImage(m,m, in.type());
    warpAffine(in, warpImage, transformMat, warpImage.size(), INTER_LINEAR, BORDER_CONSTANT, Scalar(0) );

    Mat out;
    resize(warpImage, out, Size(charSize, charSize) );

    return out;
}
现在我们来介绍一下OpenCV中的神经网络方法。在OpenCV的documentation中有如下叙述:
the whole trained network works as follows:
- Take the feature vector as input. The vector size is equal to the size of the input layer.
- Pass values as input to the first hidden layer.
- Compute outputs of the hidden layer using the weights and the activation functions.
- Pass outputs further downstream until you compute the output layer.
void OCR::train(Mat TrainData, Mat classes, int nlayers){
    Mat layers(1,3,CV_32SC1);
    layers.at<int>(0)= TrainData.cols;
    layers.at<int>(1)= nlayers;
    layers.at<int>(2)= numCharacters;
    ann.create(layers, CvANN_MLP::SIGMOID_SYM, 1, 1);

    //Prepare trainClases
    //Create a mat with n trained data by m classes
    Mat trainClasses;
    trainClasses.create( TrainData.rows, numCharacters, CV_32FC1 );
    for( int i = 0; i <  trainClasses.rows; i++ )
    {
        for( int k = 0; k < trainClasses.cols; k++ )
        {
            //If class of data i is same than a k class
            if( k == classes.at<int>(i) )
                trainClasses.at<float>(i,k) = 1;
            else
                trainClasses.at<float>(i,k) = 0;
        }
    }
    Mat weights( 1, TrainData.rows, CV_32FC1, Scalar::all(1) );

    //Learn classifier
    ann.train( TrainData, trainClasses, weights );
    trained=true;
}

int OCR::classify(Mat f){
    int result=-1;
    Mat output(1, numCharacters, CV_32FC1);

    ann.predict(f, output);
    Point maxLoc;
    double maxVal;
    minMaxLoc(output, 0, &maxVal, 0, &maxLoc);
    //We need know where in output is the max val, the x (cols) is the class.

    return maxLoc.x;
}
本文地址:http://blog.csdn.net/linj_m/article/details/23736381
更多图像处理、机器视觉资源请关注 博客: LinJM-机器视觉 微博:林建民-机器视觉

