ArcGIS Viewer for Silverlight 系列:扩展Viewer之自定义布局
前面一篇博客讲了Application Builder快速构建应用,一些简单的应用、只需要常用功能的GIS应用,使用Builder内置的布局、工具基本能够满足需求。但是,在这个讲究XXX特色的地方,甲方往往不喜欢千篇一律的界面、一模一样的弹窗、更不能容忍没有用户登录的系统。那么我们先来讲讲如何自定义Viewer的布局。
ArcGIS Viewer for SL系列的这篇博客及以后的博客都需要安装ArcGIS Extensibility SDK for Silverlight. 下载地址:http://www.esri.com/apps/products/download/index.cfm?fuseaction=download.all#ArcGIS_for_SharePoint
SDK安装好后在VS的新建窗口中的Silverlight下就会有一个ESRI Viewer节点,其中有一个 ArcGIS Viewer for Silverlight Project的项目模板,点击新建一个名为CustomLayout的项目。
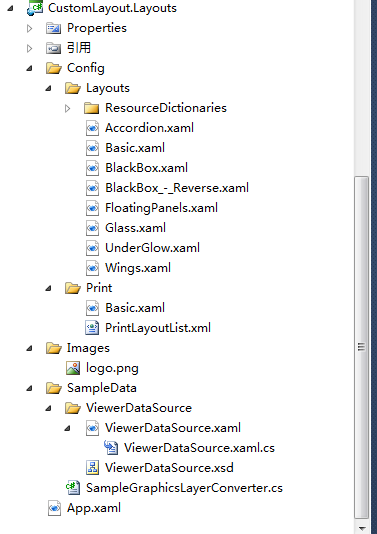
创建出来的项目结构如下图,其中CustomLayout是测试运行的web项目,Addins是自定义的工具(Command、Tool、Behavior等),Layouts是自定义的布局项目。
Layouts项目中的Config目录中的Layouts目录包含了Viewer常用的布局模板和各种弹出窗口模板,Print包含的是打印模板。所以我们自定义布局的工作主要从这里开始。
我们可以自己新建一个XAML文件来设计应用的布局,也可以通过Layouts里的XAML文件来修改布局,如果是完全重新设计布局模板,XAML中的各种命名需要和标准模板的命名规则一致,这样Viewer中的功能才可以正常运行。
将Layout项目通过Blend打开,这样更直观一些。
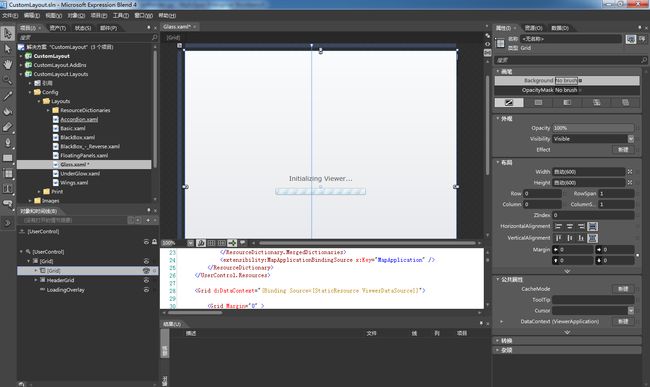
我们来新建一个HelloWorldLayout.xaml的布局模板,

这里演示新建了一个简单的布局模板,只有标题、工具栏和地图三个内容,XAML代码如下:
<UserControl
	xmlns="http://schemas.microsoft.com/winfx/2006/xaml/presentation"
    xmlns:toolkit="http://schemas.microsoft.com/winfx/2006/xaml/presentation/toolkit"
    xmlns:x="http://schemas.microsoft.com/winfx/2006/xaml"
    xmlns:esri="http://schemas.esri.com/arcgis/client/2009"
    xmlns:sdk="http://schemas.microsoft.com/winfx/2006/xaml/presentation/sdk"
	xmlns:d="http://schemas.microsoft.com/expression/blend/2008"
    xmlns:mc="http://schemas.openxmlformats.org/markup-compatibility/2006"
    xmlns:ctlPrimitives="clr-namespace:System.Windows.Controls.Primitives;assembly=System.Windows.Controls"
    xmlns:controls="clr-namespace:System.Windows.Controls;assembly=System.Windows.Controls"
	xmlns:extensibility="http://schemas.esri.com/arcgis/client/extensibility/2010"
    xmlns:converters="clr-namespace:ESRI.ArcGIS.Client.Application.Layout.Converters;assembly=ESRI.ArcGIS.Client.Application.Layout"
    xmlns:i="http://schemas.microsoft.com/expression/2010/interactivity"
    xmlns:ei="http://schemas.microsoft.com/expression/2010/interactions"
    mc:Ignorable="d"
	d:DesignHeight="600" d:DesignWidth="600">
	<UserControl.Resources>
        <ResourceDictionary>
            <ResourceDictionary.MergedDictionaries>
                <ResourceDictionary Source="ResourceDictionaries/Common/Shared_Resources.xaml" />
                <ResourceDictionary Source="ResourceDictionaries/Common/VerticalNavigationStyle.xaml" />
            </ResourceDictionary.MergedDictionaries>
            <extensibility:MapApplicationBindingSource x:Key="MapApplication" />
        </ResourceDictionary>
    </UserControl.Resources>
	<Grid d:DataContext="{Binding Source={StaticResource ViewerDataSource}}">
		<Grid.RowDefinitions>
			<RowDefinition Height="50"/>
			<RowDefinition Height="75"/>
			<RowDefinition/>
		</Grid.RowDefinitions>
		<StackPanel>
		<TextBlock x:Name="ViewerTitle"  Text="{Binding TitleText}" Grid.Column="1" FontWeight="ExtraBold" FontSize="18" Foreground="{StaticResource AccentTextColorBrush}" />
		<TextBlock Text="Hello World Layout" FontWeight="ExtraBold" Foreground="{StaticResource AccentTextColorBrush}"/>
		</StackPanel>
		<ContentControl x:Name="MainToolbarContainer" Grid.Row="1" />
		<esri:Map x:Name="Map" HorizontalAlignment="Stretch" IsLogoVisible="False"  VerticalAlignment="Stretch"
						Grid.Row="2"
                      d:DataContext="{Binding RelativeSource={RelativeSource Self}, Converter={StaticResource SampleGraphicsLayerConverter}}"
                      WrapAround="True"/>
	</Grid>
</UserControl>
模板编辑好后,将HelloWorldLayout.xaml文件拷到CustomLayout项目的Config/Layouts目录下,并修改Application.xml中的ViewerApplication节点的LayoutFilePath属性为Config/Layouts/HelloWorldLayout.xaml即可应用到这个项目。
如果要将模板应用于Builder中,那么你需要准备一个名为HelloWorldLayout.Png的图片,
将HelloWorldLayout.XAML和HelloWorldLayout.PNG文件都拷到IIS目录下的\Builder\Templates\Default\Config\Layouts目录
我们再到Builder中就能看到自定义的模板了
这里应用新模板后的效果,由于XAML代码中没有设置Grid的背景色,看得有点模糊。
以上只是示意一下,项目中大多数作法是通过现有的模板来修改,当然有专门做UI设计的项目可以考虑自己做布局模板。同理可证,加什么登录窗口、进度条、修改其它窗口样式都是一样一样的!